


Welcome back, my aspiring hackers!
In previous tutorials, I have shown you how to scan the globe for vulnerable servers and write simple scripts in BASH and Perl to perform other reconnaissance tasks. In a very recent guide, I taught how to scan vulnerable servers for Heartbleed.
In all of these cases, you might want to perform these usually time consuming tasks at a regular time; maybe the middle of the night, or while you are at work or school. That way, when you wake up in the morning, you are greeted by a long list of vulnerable machines that can be targets of your efforts later that day.
Luckily for us, Linux has a built-in functionality that allows us to schedule such jobs as these on a regular schedule. In Linux, this is called cron, or crond, for the daemon that runs these services (a daemon, or demon, is simply a process that runs in the background).
How Cron Works in Linux
Typically used to schedule such mundane, but necessary, tasks such as doing scheduled regular backups at a regular time each week, we can use it to schedule our scans or other nefarious "jobs".
The cron daemon starts when the system boots and continues to run as long as the system is up and running. It reads a configuration file or files that consist of the jobs to be run and the schedule they are to be run on. Almost anything we can do from the command line can be scheduled to be done on a regular schedule using cron.
Let's take a look how it works and how we can use it as a hacker.
Locating Crontab
Cron is one of those functions that is almost identical across Linux distributions, so what you learn here can be used in Ubuntu, Red Hat, Suse, Mint, Slackware, CentOS, etc. It has been part of the Linux/UNIX family since the 1970s, so it is tried and true and has proven its value.
Like so many things in Linux, the cron functionality is controlled by a configuration file that is a plain text file. In a multi-user environment, each user can have their own cron configuration file, but here we will concentrate on the root user in Kali.
For cron, the configuration file is the crontab, or "cron table", file. To find the crontab file, type:
locate crontab
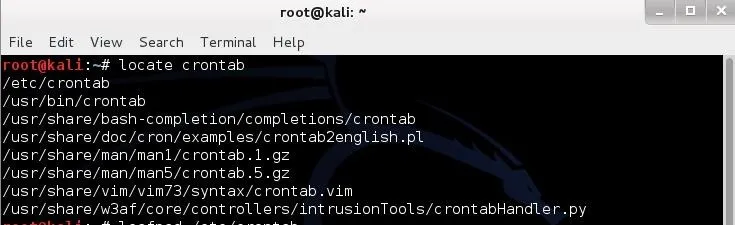
As you can see, it is located in the /etc directory like nearly every other configuration file in Linux (there are exceptions, of course).
Opening Crontab
Let's open it and look around. We can open it with any text editor, but here let's use the graphical text editor built into Kali, Leafpad. Type:
leafpad /etc/crontab
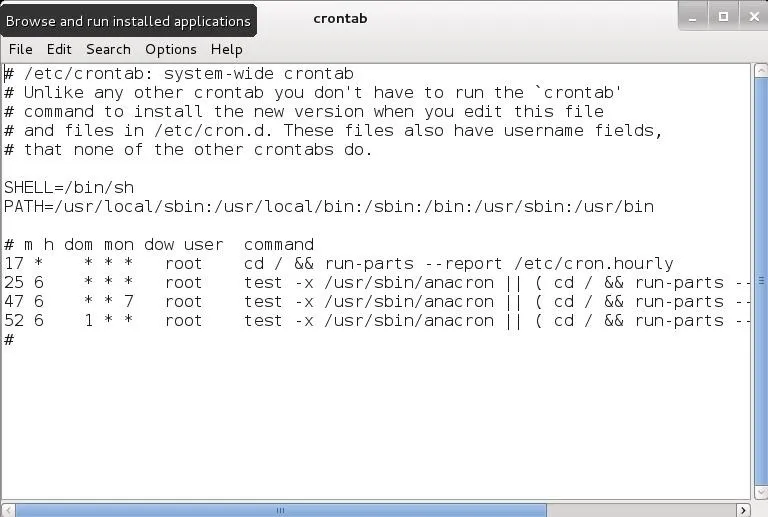
The Debian version that Kali is built on has a newer version of crontab that is slightly easier to work with than earlier versions. Unlike earlier versions, they have labeled the fields and added a new field to denote the user that will run the job.
The Anatomy of a Crontab
Let's break down the parts. As you can see in the screenshot above, the crontab starts with 5 lines that are commented (#) out. These lines are simply an explanation and notes, they are not seen or executed by the system.
After the commented lines, you see a couple of lines together.

The first of these sets the shell to run the jobs from. In our case, we have designating the BASH shell with the following command. If want to use a different shell, we could designate it here.
SHELL=/bin/sh
The second line sets the PATH variable. The PATH variable is an environment variable (there is one in Windows, too), that tells the system where to look for commands that are being used in the cron job. Typically, these are bin and sbin directories (binary) that contain the system commands that we use in Linux (ls, echo, ps, cd, etc.).
Here the default settings are:
PATH=/usr/local/sbin:/usr/local/bin:/sbin:/bin:/usr/sbin:/usr/bin
This simply means that the cron daemon will look in those directories for the commands that you use in your scheduled jobs. If you are using a command or file not in those directories, simply edit that line and add that directory to the end of the line after putting in a colon (:), such as:
PATH=/usr/local/sbin:/usr/local/bin:/sbin:/bin:/usr/sbin:/usr/bin:/newdir
Scheduling Jobs
Now comes the meat of the crontab file. In this third section, we schedule the jobs that we want to run.

As you can see, each line represents a scheduled job that will run automatically at whatever day, date, or time you have it scheduled for.
The fields of the crontab file are as follows:
- Minute -- the exact minute when the command or will be run (0-59)
- Hour -- the exact hour when the command or job will be run (0-23)
- Day of the Month -- the exact day of the month when the command or job will be run (1-31)
- Month -- the exact month when the command or job will be run (1-12)
- Day of the week -- the exact day when you want the command to run (0-6, Sunday=0)
- User -- the user permissions that the job will run as
- Command -- the command or job you want to run
The asterisk (*), or star, represents any, so it may be any day, any hour, or any minute.
Using Cron to Find Vulnerable Servers
Now, let's imagine that we want to scan the globe for IP addresses that are vulnerable to the Heartbleed vulnerability.
Reportedly, there are over 300,000 servers that are still unpatched. Although that's a very large number, with over 2 billion IP addresses on the planet; that represents 1 out of every 10,000 IP addresses that are vulnerable. This means we will need to set up a scanner to repeatedly search thousands of IP's to find just one vulnerable server.
This is a perfect task for a cron job!
Scheduling Our Heartbleed Scanner
We can schedule the scanner to run every night while we are asleep and hopefully, awake each morning with a new potential victim(s)!
Let's open that cron tab file again in any text editor.
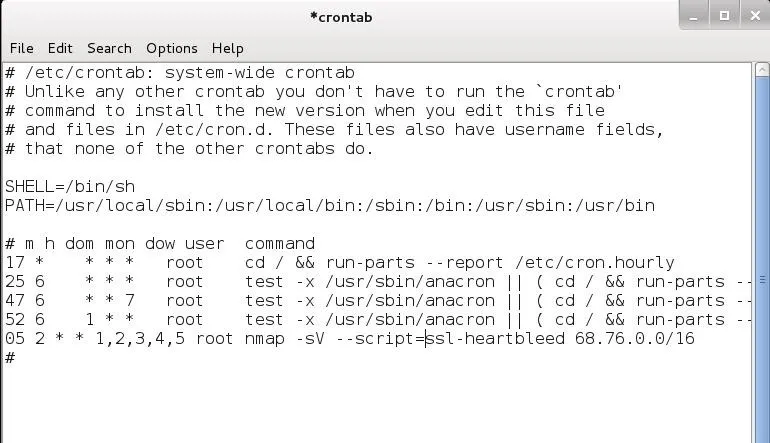
Now we are going to add a line to run our nmap scanner each weeknight at 2:05 am. Simply add this line to our crontab file:
05 2 * * 1,2,3,4,5 root nmap -sV --script=ssl-heartbleed 68.76.0.0/16
Now, save and close this file.
This would schedule our nmap Heartbleed scanner to run Monday, Tuesday, Wednesday, Thursday, and Friday at precisely 2:05 am for the Heartbleed vulnerability across 65,536 IP addresses.
That's good start.
Just 2 billion more to go.
Original cover image via Shutterstock


Comments
Be the first, drop a comment!