


If you want to control electronic devices, such as a relay or motor, you can do so using MicroPython with an ESP8266 and web browser. Usually, you'd program an ESP8266 using Arduino, but C++, which Arduino uses, is not always the easiest programming language for beginners to learn.
MicroPython is much simpler to program in. Plus, it's a great way to utilize Python code on a microcontroller, such as an ESP8266 or ESP32, to control basically any electronic component you want from your computer running Jupyter Notebook in a browser. If you're new to MicroPython, check out our previous guides on using it with a microcontroller; one covers creating rogue access points, while the other talks about programming an MCU over Wi-Fi.
Our Example Scenario
To help show you how MicroPython, an MCU, and Jupyter Notebook could be used together to control electronic components, we'll be using a setup that's normally very difficult to do in Arduino but very easy in MicroPython.
On a breadboard, we have our ESP8266 paired with a D1 Mini, which is plugged into a relay switch. A relay is an electronic switch similar to the single-pole wall switches that are in many of your rooms. When we send it a power signal, it switches on or off. There's a 9-volt battery attached, which will turn on the motor when we want it to.
What You'll Need
You could come with a different project and use different materials, but to replicate what we're doing here, these are the project parts:
- D1 Mini board (or other ESP8266 or ESP32)
- Breadboard
- Relay
- Motor with propeller
- Jumpers
- Micro-USB cable
- 9-volt battery
- Battery connector
That's the basics of it, but when you have your D1 Mini plugged into your breadboard, with your relay attached, connect the relay vis the GPIO pins and hook up a 9V battery to the motor.
On your computer, you'll need:
- ESPtool (visit that link to see how to install it)
- Jupyter Notebook (we'll cover the install later)
Identify the Correct Serial Port
Plug your ESP8266 into your computer, then run one of the commands below to see what its serial address is. If you unplug the MCU into a different USB port later, it may have another serial address.
On a Linux computer:
~$ dmesg | grep tty

/dev/cu.Bluetooth-Incoming-Port
/dev/cu.SOC
/dev/cu.wchusbserial14630
/dev/cu.MALS
/dev/cu.usbserial-14630
On a Mac:
~% ls /dev/cu.*

/dev/cu.Bluetooth-Incoming-Port
/dev/cu.SOC
/dev/cu.wchusbserial14630
/dev/cu.MALS
/dev/cu.usbserial-14630
From my results from Linux and macOS, it would be /dev/cu.wchusbserial14630. If you see two serial ports, always use the one with "wch" in it. To know for sure if it's your ESP8266, you can unplug it, rerun the command, then plug it back into the same USB port and rerun it again.
On Windows, to find the serial address, you'll need to open Device Manager and find the COM port under the "Ports (COM & LPT)." We're not going to be showing any of the Windows steps below, so if you're using Windows and can't figure out the process, hit up the comments and we'll try and steer you in the right direction.
Download the Latest MicroPython Binary
If you already have MicroPython installed on your microcontroller, like if you followed one of our previous guides, then you can skip down to Step 4. Otherwise, you'll need MicroPython on the MCU.
Download the latest firmware based on the board you're using. Visit MicroPython's download page, find your board, and download the file. You can find quick links below to the downloads for ESP8266 and ESP32 boards. When you select your board, choose the .bin file for the latest stable release.
Erase the Board
Erase the board so that there are no issues when you flash MicroPython to it. Use the following command, replacing my serial port with the serial port of your ESP.
~$ esptool.py --port /dev/cu.wchusbserial14630 erase_flash

esptool.py v2.8
Serial port /dev/cu.wchusbserial14140
Connecting....
Detecting chip type... ESP8266
Chip is ESP8266EX
Features: WiFi
Crystal is 26MHz
MAC: 2c:f4:32:4b:07:83
Uploading stub...
Running stub...
Stub running...
Erasing flash (this may take a while)...
Flash MicroPython
Now, if you're using an ESP8266 microcontroller, run the following to flash MicroPython over to it. Replace the .bin file at the end with the MicroPython binary you downloaded.
~$ esptool.py --port /dev/cu.wchusbserial14630 --baud 460800 write_flash --flash_size=detect 0 /Users/kali/Downloads/esp8266-20191220-v1.12.bin

esptool.py v2.8
Serial port /dev/cu.wchusbserial14630
Connecting....
Detecting chip type... ESP8266
Chip is ESP8266EX
Features: WiFi
Crystal is 26MHz
MAC: 2c:f4:32:4b:07:83
Uploading stub...
Running stub...
Stub running...
Changing baud rate to 460800
Changed.
Configuring flash size...
Auto-detected Flash size: 4MB
Flash params set to 0x0040
Compressed 617880 bytes to 402086...
Wrote 617880 bytes (402086 compressed) at 0x00000000 in 9.6 seconds (effective 514.5 kbit/s)...
Hash of data verified.

Leaving...
Hard resetting via RTS pin...
If you're using an ESP32, run the following instead. Again, replace the .bin file at the end with the MicroPython binary you downloaded.
~$ esptool.py --chip esp32 --port /dev/cu.wchusbserial14630 write_flash -z 0x1000 /Users/kali/Downloads/esp32-idf3-20191220-v1.12.binOnce it's done flashing, confirm that it worked by using the following command. If the output is similar, you're good. If you don't see anything, hit Enter a few more times to force it into action.
~$ screen /dev/cu.wchusbserial14630 115200

MicroPython v1.12 on 2019-12-20; ESP module with ESP8266
Type "help()" for more information.
>>>
Install Jupyter Notebook
Now, we need to get Jupyter Notebook on our computer, the web program we'll be using to have direct control over motors, relays, sensors, and other components. If you already have it installed, skip to Step 6 to get the kernel. Otherwise, upgrade your pip installation:
~$ python3 -m pip install --upgrade pip

Collecting pip
  Downloading pip-20.1.1-py2.py3-none-any.whl (1.5 MB)
     |████████████████████████████████| 1.5 MB 935 kB/s
Installing collected packages: pip
Successfully installed pip-20.1.1
Then install Jupyter Notebook with:
~$ python3 -m pip install jupyter

Collecting jupyter
  Using cached jupyter-1.0.0-py2.py3-none-any.whl (2.7 kB)
Collecting notebook
  Using cached notebook-6.0.3-py3-none-any.whl (9.7 MB)
Collecting qtconsole
  Downloading qtconsole-4.7.5-py2.py3-none-any.whl (118 kB)
     |████████████████████████████████| 118 kB 907 kB/s
Collecting ipykernel
  Downloading ipykernel-5.3.3-py3-none-any.whl (120 kB)
     |████████████████████████████████| 120 kB 11.7 MB/s
Collecting ipywidgets
  Using cached ipywidgets-7.5.1-py2.py3-none-any.whl (121 kB)
Collecting nbconvert
  Using cached nbconvert-5.6.1-py2.py3-none-any.whl (455 kB)
Collecting jupyter-console
  Using cached jupyter_console-6.1.0-py2.py3-none-any.whl (21 kB)
Requirement already satisfied: nbformat in /usr/lib/python3/dist-packages (from notebook->jupyter) (5.0.7)
Requirement already satisfied: tornado>=5.0 in /usr/lib/python3/dist-packages (from notebook->jupyter) (5.1.1)
Collecting Send2Trash
  Using cached Send2Trash-1.5.0-py3-none-any.whl (12 kB)
Requirement already satisfied: jupyter-core>=4.6.1 in /usr/lib/python3/dist-packages (from notebook->jupyter) (4.6.3)
Collecting jupyter-client>=5.3.4
  Downloading jupyter_client-6.1.6-py3-none-any.whl (108 kB)
     |████████████████████████████████| 108 kB 2.2 MB/s
Requirement already satisfied: traitlets>=4.2.1 in /usr/lib/python3/dist-packages (from notebook->jupyter) (4.3.3)
Collecting prometheus-client
  Downloading prometheus_client-0.8.0-py2.py3-none-any.whl (53 kB)
     |████████████████████████████████| 53 kB 1.9 MB/s
Requirement already satisfied: ipython-genutils in /usr/lib/python3/dist-packages (from notebook->jupyter) (0.2.0)
Collecting pyzmq>=17
  Downloading pyzmq-19.0.1-cp38-cp38-manylinux1_x86_64.whl (1.1 MB)
     |████████████████████████████████| 1.1 MB 9.9 MB/s
Requirement already satisfied: jinja2 in /usr/lib/python3/dist-packages (from notebook->jupyter) (2.10.1)
Collecting terminado>=0.8.1
  Using cached terminado-0.8.3-py2.py3-none-any.whl (33 kB)
Requirement already satisfied: pygments in /usr/lib/python3/dist-packages (from qtconsole->jupyter) (2.3.1)
Collecting qtpy
  Using cached QtPy-1.9.0-py2.py3-none-any.whl (54 kB)
Requirement already satisfied: ipython>=5.0.0 in /usr/lib/python3/dist-packages (from ipykernel->jupyter) (7.13.0)
Collecting widgetsnbextension~=3.5.0
  Using cached widgetsnbextension-3.5.1-py2.py3-none-any.whl (2.2 MB)
Collecting testpath
  Using cached testpath-0.4.4-py2.py3-none-any.whl (163 kB)
Requirement already satisfied: mistune<2,>=0.8.1 in /usr/lib/python3/dist-packages (from nbconvert->jupyter) (0.8.4)
Collecting pandocfilters>=1.4.1
  Using cached pandocfilters-1.4.2.tar.gz (14 kB)
Collecting bleach
  Downloading bleach-3.1.5-py2.py3-none-any.whl (151 kB)
     |████████████████████████████████| 151 kB 1.3 MB/s
Collecting entrypoints>=0.2.2
  Using cached entrypoints-0.3-py2.py3-none-any.whl (11 kB)
Collecting defusedxml
  Using cached defusedxml-0.6.0-py2.py3-none-any.whl (23 kB)
Requirement already satisfied: prompt-toolkit!=3.0.0,!=3.0.1,<3.1.0,>=2.0.0 in /usr/lib/python3/dist-packages (from jupyter-console->jupyter) (3.0.5)
Requirement already satisfied: python-dateutil>=2.1 in /usr/lib/python3/dist-packages (from jupyter-client>=5.3.4->notebook->jupyter) (2.8.1)
Collecting ptyprocess; os_name != "nt"
  Using cached ptyprocess-0.6.0-py2.py3-none-any.whl (39 kB)
Requirement already satisfied: pexpect in /usr/lib/python3/dist-packages (from ipython>=5.0.0->ipykernel->jupyter) (4.6.0)
Requirement already satisfied: webencodings in /usr/lib/python3/dist-packages (from bleach->nbconvert->jupyter) (0.5.1)
Requirement already satisfied: packaging in /usr/lib/python3/dist-packages (from bleach->nbconvert->jupyter) (20.3)
Requirement already satisfied: six>=1.9.0 in /usr/lib/python3/dist-packages (from bleach->nbconvert->jupyter) (1.14.0)
Building wheels for collected packages: pandocfilters
  Building wheel for pandocfilters (setup.py) ... done
  Created wheel for pandocfilters: filename=pandocfilters-1.4.2-py3-none-any.whl size=7856 sha256=d120576d72839490baf2013615ee01ad685c9e81b3a8f3068b4597432d8a6b36
  Stored in directory: /home/kali/.cache/pip/wheels/f6/08/65/e4636b703d0e870cd62692dafd6b47db27287fe80cea433722
Successfully built pandocfilters
Installing collected packages: pyzmq, jupyter-client, ipykernel, Send2Trash, testpath, pandocfilters, bleach, entrypoints, defusedxml, nbconvert, prometheus-client, ptyprocess, terminado, notebook, qtpy, qtconsole, widgetsnbextension, ipywidgets, jupyter-console, jupyter
Successfully installed Send2Trash-1.5.0 bleach-3.1.5 defusedxml-0.6.0 entrypoints-0.3 ipykernel-5.3.3 ipywidgets-7.5.1 jupyter-1.0.0 jupyter-client-6.1.6 jupyter-console-6.1.0 nbconvert-5.6.1 notebook-6.0.3 pandocfilters-1.4.2 prometheus-client-0.8.0 ptyprocess-0.6.0 pyzmq-19.0.1 qtconsole-4.7.5 qtpy-1.9.0 terminado-0.8.3 testpath-0.4.4 widgetsnbextension-3.5.1
And upgrade the Juypter client:
~$ pip3 install --upgrade jupyter_client

Requirement already up-to-date: jupyter_client in ./.local/lib/python3.8/site-packages (6.1.6)
Requirement already satisfied, skipping upgrade: jupyter-core>=4.6.0 in /usr/lib/python3/dist-packages (from jupyter_client) (4.6.3)
Requirement already satisfied, skipping upgrade: traitlets in /usr/lib/python3/dist-packages (from jupyter_client) (4.3.3)
Requirement already satisfied, skipping upgrade: python-dateutil>=2.1 in /usr/lib/python3/dist-packages (from jupyter_client) (2.8.1)
Requirement already satisfied, skipping upgrade: tornado>=4.1 in /usr/lib/python3/dist-packages (from jupyter_client) (5.1.1)
Requirement already satisfied, skipping upgrade: pyzmq>=13 in ./.local/lib/python3.8/site-packages (from jupyter_client) (19.0.1)
Install the Jupyter Notebook MicroPython Kernel
We need to install the MicroPython kernel for Jupyter Notebook now. We can get it from the Jupyter MicroPython Kernel GitHub repo using:
~$ git clone https://github.com/goatchurchprime/jupyter_micropython_kernel.git

Cloning into 'jupyter_micropython_kernel'...
remote: Enumerating objects: 340, done.
remote: Total 340 (delta 0), reused 0 (delta 0), pack-reused 340
Receiving objects: 100% (340/340), 108.88 KiB | 1.25 MiB/s, done.
Resolving deltas: 100% (240/240), done.
Next, install it to Python3 with (use sudo if something goes wrong):
~$ pip3 install -e jupyter_micropython_kernel

Obtaining file:///home/kali/jupyter_micropython_kernel
Requirement already satisfied: pyserial>=3.4 in /usr/lib/python3/dist-packages (from jupyter-micropython-kernel==0.1.3) (3.4)
Requirement already satisfied: websocket-client>=0.44 in /usr/lib/python3/dist-packages (from jupyter-micropython-kernel==0.1.3) (0.53.0)
Installing collected packages: jupyter-micropython-kernel
  Running setup.py develop for jupyter-micropython-kernel
Successfully installed jupyter-micropython-kernel
Now, install the kernel into Jupyter:
~$ python3 -m jupyter_micropython_kernel.install

Installing IPython kernel spec of micropython
/home/kali/jupyter_micropython_kernel/jupyter_micropython_kernel/install.py:29: DeprecationWarning: replace is ignored. Installing a kernelspec always replaces an existing installation
  k.install_kernel_spec(td, 'Micropython', user=user, replace=True, prefix=prefix)
...into /home/kali/.local/share/jupyter/kernels/micropython
Jupyter should now be ready to work with MicroPython.
Open Jupyter Notebook
Now, to open the web interface for Jupyter Notebook, use:
~$ jupyter notebookIf you installed Jupyter Notebook into your local, use this instead:
~$ ~/.local/bin/jupyter-notebookOr add export PATH=$PATH:~/.local/bin to your ~/.bashrc file and try jupyter again.
You may need to input your password before it'll open. Afterward, you should see an interface like below open in a web browser.
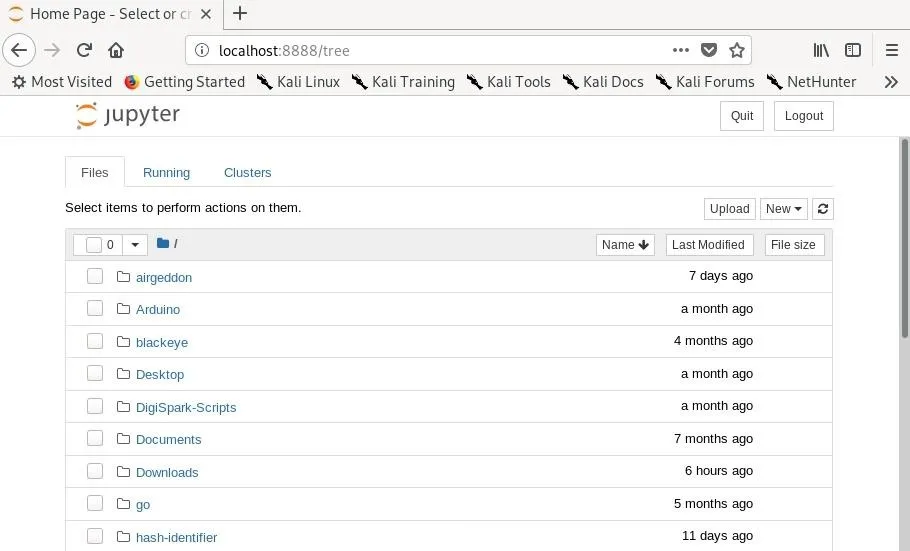
Open a MicroPython Jupyter Notebook
To create a MicroPython file, click on "New" and select "MicroPython - USB" as the type of document to create.

Now, we should find ourselves in a blank Jupyter notebook. We can add cells to run with the plus (+) button, and then run cells with the play button to see how our code runs. Before we can do that, however, we'll need to add a cell to connect.
Control Your Motor from the Web
In your Jupyter Notebook MicroPython file, use the following for the first block, making sure to use your serial port instead of mine. Once it says "Ready" after it starts connecting, you can continue.
%serialconnect to --port=/dev/cu.wchusbserial14630 --baud=115200Now, in our second block, let's create a small task to power on and off the motor. First, make sure you import from machine import pin and from time import sleep. Then, define the value of "motor" as 1 or True to turn it on, and 0 or False to turn it off. For "sleep," I'm using 0.2 seconds for how long it will run when activated. You can press "Run" to watch it in action.
from machine import Pin
from time import sleep
motor = Pin(5, Pin.OUT)
motor.value(1)
sleep(0.2)
motor.value(0)
sleep(0.2)
You can also use .on() or .off() to control the pin:
motor.on()
sleep(0.2)
motor.off()
sleep(0.2)
If you want to loop things, we can start to use different Python data structures that are really fun, short, and easy, and that don't require any of the stuff that Arduino IDE does. So, let's see if we can just turn the motor on and off for 10 times in a row:
from time import sleep
for i in range(10):
    motor.on()
    sleep(0.5)
    motor.off()
    sleep(0.5)
If you want to stop your code, you can always press the stop icon, and if it just keeps running, you can press that to interrupt it and be able to submit new code
If you're a beginner or someone who already knows a little bit of Python, MicroPython is probably the best way to get started interacting with electronics from your laptop — spinning motors, shining lasers, and doing all sorts of other interesting things.
Cover image via Retia/Null Byte


Comments
Be the first, drop a comment!