With the addition of the OpenSSH client and server in the Windows 10 Fall Creators Update, you no longer have to rely on third-party programs to open an SSH server and connect to a Windows machine. While still a beta feature, this represents a long-overdue update fulfilling a promise made back in 2015.
The OpenSSH client allows you to SSH into remote servers directly from the Windows command line. The server lets remote clients connect to your Windows 10 system, where they will be able to receive a command prompt for your system remotely. If you are familiar with OpenSSH from Linux, then you'll be right at home with the Windows 10 version.
OpenSSH for Windows is definitely in beta form and should only be used in a safe, testing environment such as your home network. This shouldn't be used in production or opened to the internet. That being said, as time goes on, this implementation of OpenSSH should grow more secure and useful.
To follow this guide, you'll need a Windows 10 computer that has been fully updated. Before starting, make sure to check for and install any updates Windows may have or these steps may not work properly. To check for updates, you can go to the Start button, and then go to "Settings" –> "Update & security" –> "Windows Update," then click on "Check for updates."
Enable Developer Mode
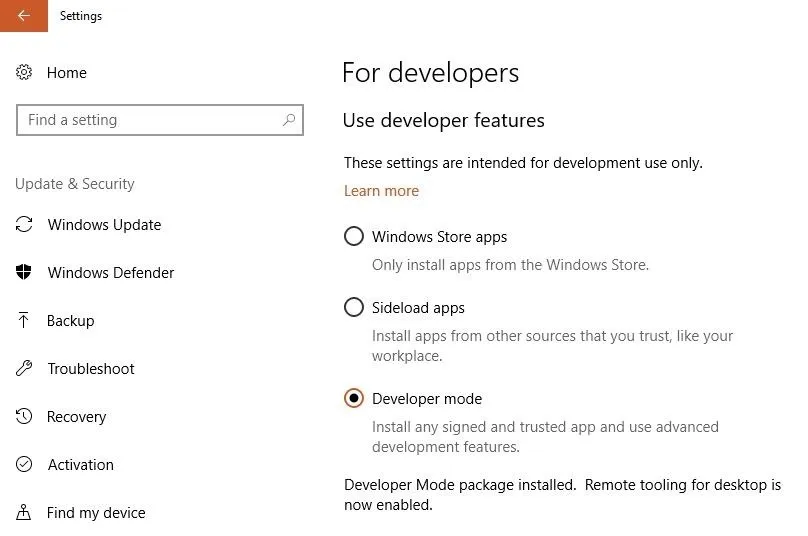
To begin, we need to ensure that the Windows system is set to "Developer mode," otherwise it will be impossible to download these beta features. Navigate to the search bar on the bottom left of your screen. Search for "developers settings" and it should appear under Best match in the results. Select it to open the settings.
Now you should see the Use developer features menu. The "Windows Store apps" setting will be selected by default, so click on "Developer mode" to enable it. It should take a few moments to install the 6 MB file, and just like that, you're a Windows developer!
Install the OpenSSH Server
Once developer mode is enabled, we're ready to install OpenSSH, and there are a few ways to do this, depending on your preferences. We'll cover both PowerShell and DISM.
Using PowerShell
The entire install process can be done in PowerShell, which is more convenient if you are installing OpenSSH on more than one computer. This could easily be turned into a USB Rubber Ducky script to make the process of setting up an SSH server lighting-fast. Some hackers might even start using this as a way to create an SSH backdoor on Windows systems.
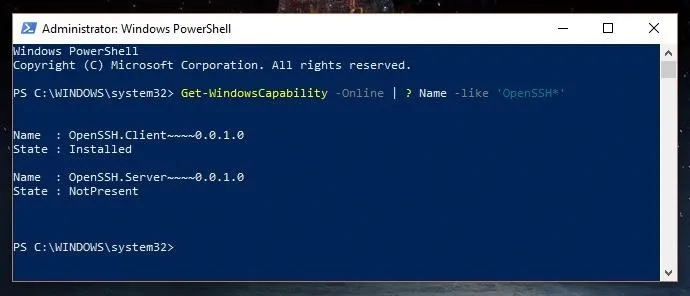
First, run PowerShell as the administrator by pressing Windows + X on your keyboard and clicking on "Windows PowerShell (Admin)." Then, check to ensure that the OpenSSH features are available for installation by running the following command.
Get-WindowsCapability -Online | ? Name -like 'OpenSSH*'
The shell should return "NotPresent" which means that the server isn't yet downloaded. As you can see, I have the OpenSSH Client installed, and the server is available for installation.
Assuming OpenSSH is available, you can install the server with the following command. If it is not available, make sure your system is updated and that developer mode is enabled, as those are the two most common problems which can cause this.
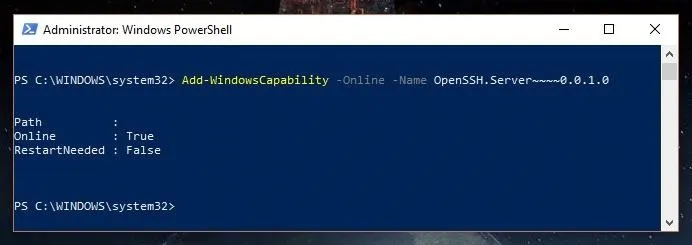
Add-WindowsCapability -Online -Name OpenSSH.Server~~~~0.0.1.0
Note that the prompt may say a restart isn't needed, but it's my experience that a restart is, in fact, required. When the process is complete, you should see something like the screen below.
Using DISM
If you'd prefer to use the command-line over PowerShell, Deployment Image Servicing and Management (DISM) is a command-line tool that we can also use to install the OpenSSH server.
To begin installing OpenSSH with DISM, open a command prompt as an administrator. This can be done by searching for "CMD" in the search bar at the bottom left-hand corner of the screen. Right-click on "Command Prompt" and then select "Run as Administrator."
Check that the OpenSSH features are available with the following command.
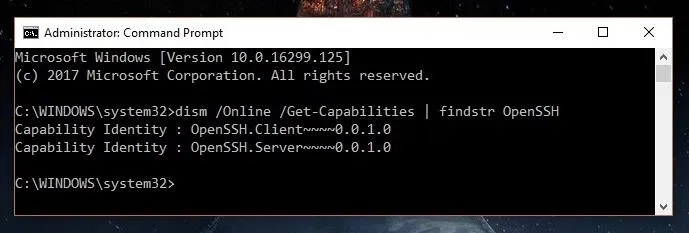
dism /Online /Get-Capabilities | findstr OpenSSH
If you get the following, then you are ready to install the server.
Install the server with this command:
dism /Online /Add-Capability /CapabilityName:OpenSSH.Server~~~~0.0.1.0
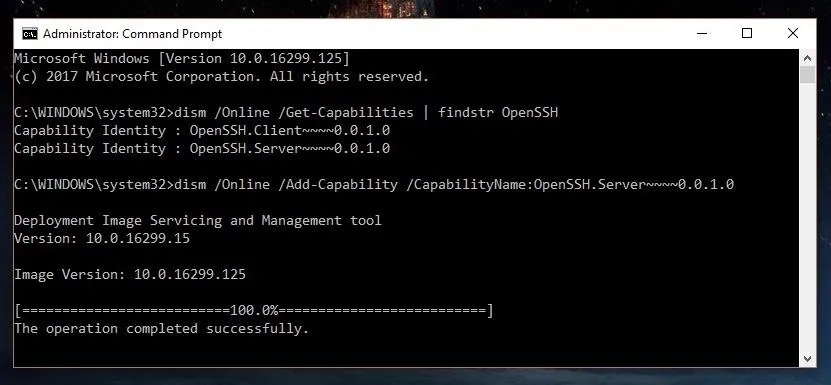
You will need to reboot the computer after installation.
Generate Host Keys
Now that we have the server installed, we need to generate host keys so the SSH server will be able to authenticate clients while it's in use. To do this, we will open PowerShell as the administrator by pressing Windows + X and clicking on "Windows PowerShell (Admin)." Start the ssh-agent with the following command.
Start-Service ssh-agent

Once the ssh-agent is running, we can move to the OpenSSH folder and begin generating a key. Use cd to change folders as seen in the first command below, and then create the key with the second.
cd C:\Windows\System32\OpenSSH
.\ssh-keygen -A

Now, we can add the key to our SSH server with the following command.
.\ssh-add sshhosted25519_key
This is the key that will be used from now on for our SSH connections.
Install the OpenSSHUtils Helper Module
You could attempt to use the SSH server now, but if you do, you'll run into a whole slew of errors. This is because the server is still in beta, and is very finicky.
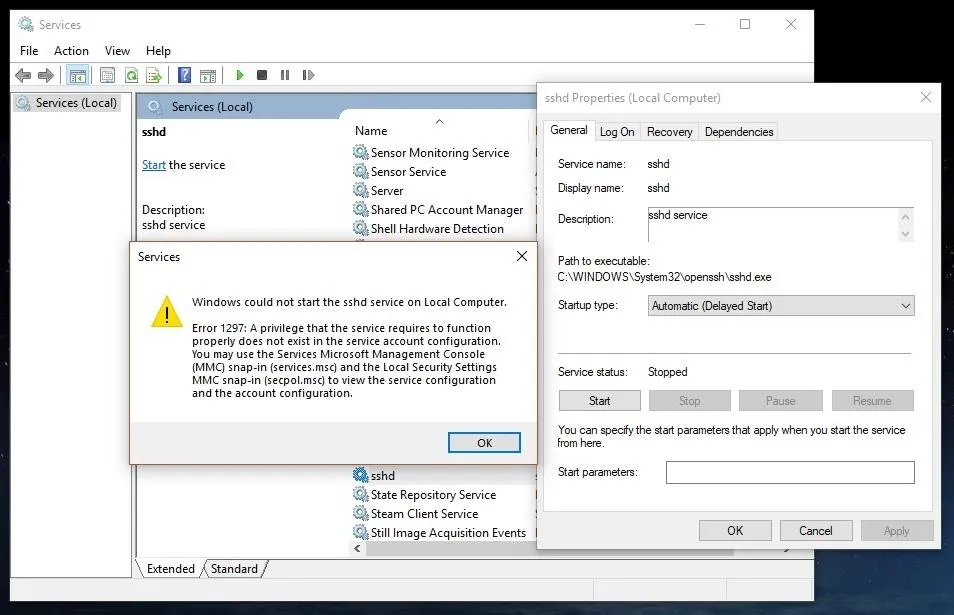
To help resolve these issues, Microsoft has created the OpenSSHUtils helper module, which will appropriately add your host keys and set permissions to the Access Control List (ACL). To install OpenSSHUtils, we will run the command below.
Install-Module -Force OpenSSHUtils
It may also ask to install the package manager NuGet. If you don't already have it, type y to install it.

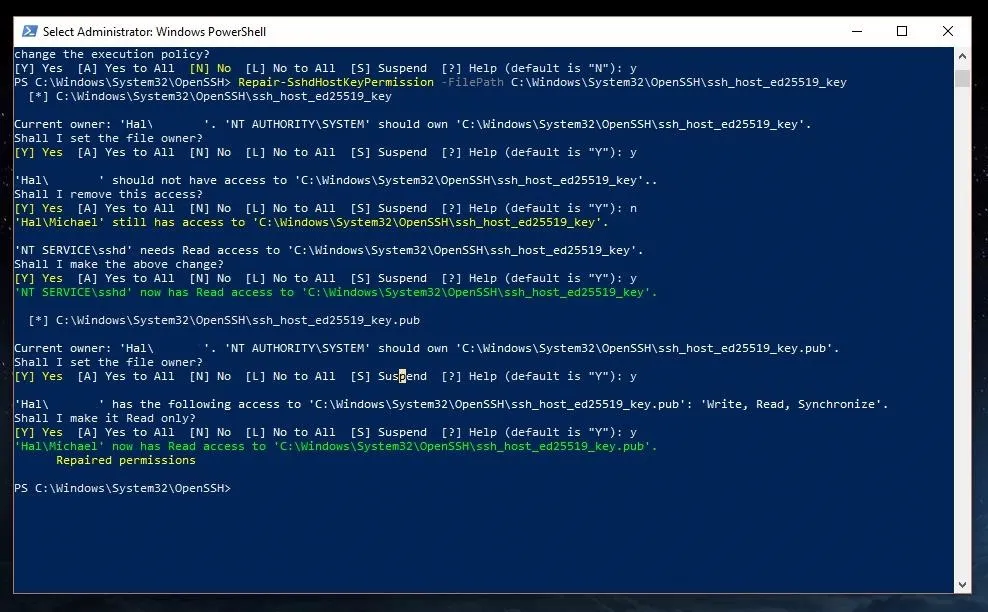
Once that's done, we are ready to run the helper module, which should clean up those errors we saw before. Run the following command to install it.
Repair-SshdHostKeyPermission -FilePath C:\Windows\System32\OpenSSH\sshhosted25519_key
You will revive a number of prompts; use y as your response to all of the prompts to set the file permissions correctly. As you can see below, you have to say yes quite a few times.
Open a Port in the Firewall
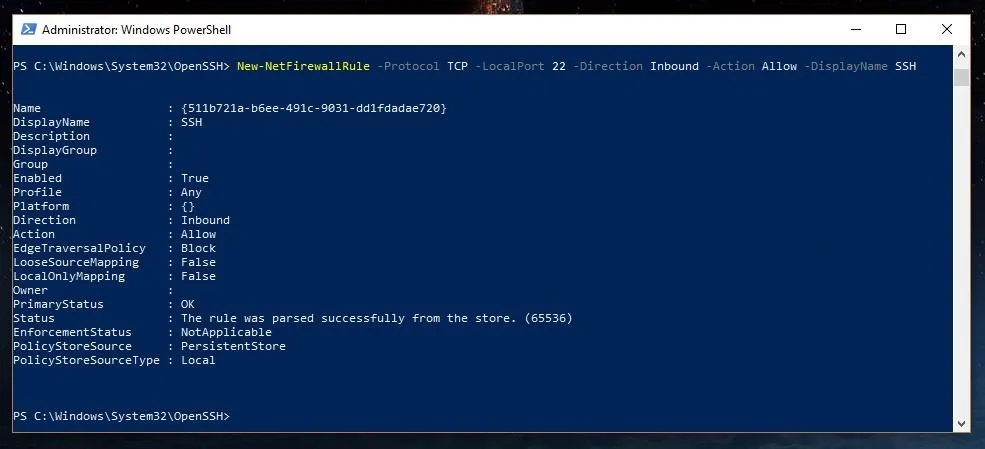
Now, everything should be ready to go on the SSH server side of things. We just need to open a port in the firewall so we can establish an SSH connection with a client outside of the current Windows system. Your requirements may vary based on your environment, but in general, the following firewall rule should work for most Windows users. Input the following command to open a local port 22 named SSH.
New-NetFirewallRule -Protocol TCP -LocalPort 22 -Direction Inbound -Action Allow -DisplayName SSH
Start Your New SSH Server
That's it. You're ready to start using your SSH server! One thing to note, only the built-in ED25519 authentication key type is currently supported. There are plans to add LibreSSL in the future, which will enable additional authentication key types, but as of yet, that has not been done. So for now, use an ED25519 key to connect to the server.
The SSH server doesn't start up automatically, so we have to start it manually each time we wish to use the server by typing Start-Service sshd into our PowerShell window. You can check to see that it's running with Get-Service sshd.
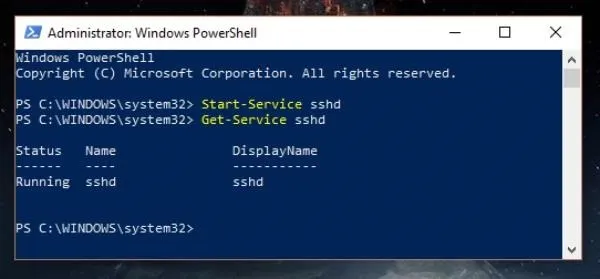
You should always remember to stop the service when not in use with Stop-Service sshd to maintain the security of your system.
To connect to your new SSH server, use your favorite SSH client such as PuTTY or the new OpenSSH client. In general, you can use the following format to connect.
ssh username@host -p port
When you connect to your new server, you'll find that you get a full command prompt, which can run all command line tools, even PowerShell! With the addition of the OpenSSH Client to Windows 10 as well, you now have an extra layer of flexibility where you can directly connect two Windows systems over SSH.
Windows Is Easier Than Ever to Administer Remotely
The new built-in SSH server is a welcome addition to Windows 10. It represents Microsoft taking steps to listen to developers and system administrators to meet their needs. This new feature allows you to manage a Windows machine much more easily, and as Windows continues to improve and implement OpenSSH as a full feature, I believe more and more people will come to use it due to its ease of use and convenience. The days of the third-party SSH servers dominating the Windows field are numbered.
Thanks for reading! If you have any questions, you can ask me here or on Twitter @The_Hoid.
- Follow Null Byte on Twitter, Flipboard, and YouTube
- Follow WonderHowTo on Facebook, Twitter, Pinterest, and Flipboard
Cover image and screenshots by Hoid/Null Byte


Comments
Be the first, drop a comment!