


When we are building programs that communicate over a network, how can we keep our data private? The last thing we want is some other lousy hacker sniffing our packets, so how do we stop them? The easy answer: encryption. However, this is a very wide-ranging answer. Today we're going to look specifically at how to encrypt data in Python with dynamically generated encryption keys using what is known as the Diffie-Hellman key exchange.
The Problem
Encrypting data is a fairly straightforward process. You simply generate a key, run an encryption algorithm against some information using that key, and send it to whoever it is intended for. The only requirement is that both parties must have the encryption key. Typically, the encryption key will be predefined in some way. It might be hard-coded into a program or delivered physically to the intended recipient. The problem is, these methods of encryption key sharing are hardly secure. Digging through a program disassembler or even digging through someone's trash can be used to retrieve these keys, thus making the encryption process worthless.
What if we could dynamically generate a key? What if there was some way that both a client and a server could agree upon an encryption key without ever having to tell each other the actual key? Enter the Diffie-Hellman key exchange.
Diffie-Hellman Explained
According to Dr. Bill Young, a lecturer and researcher in computer science from the University of Texas at Austin, "The Diffie-Hellman key agreement protocol (1976) was the first practical method for establishing a shared secret over an unsecured communication channel." Sounds perfect. It also sounds impossible. Let's dive in and discover exactly how the Diffie-Hellman key exchange works.
The Wikipedia page for the D-H key exchange has a great graphic that explains the process simply:
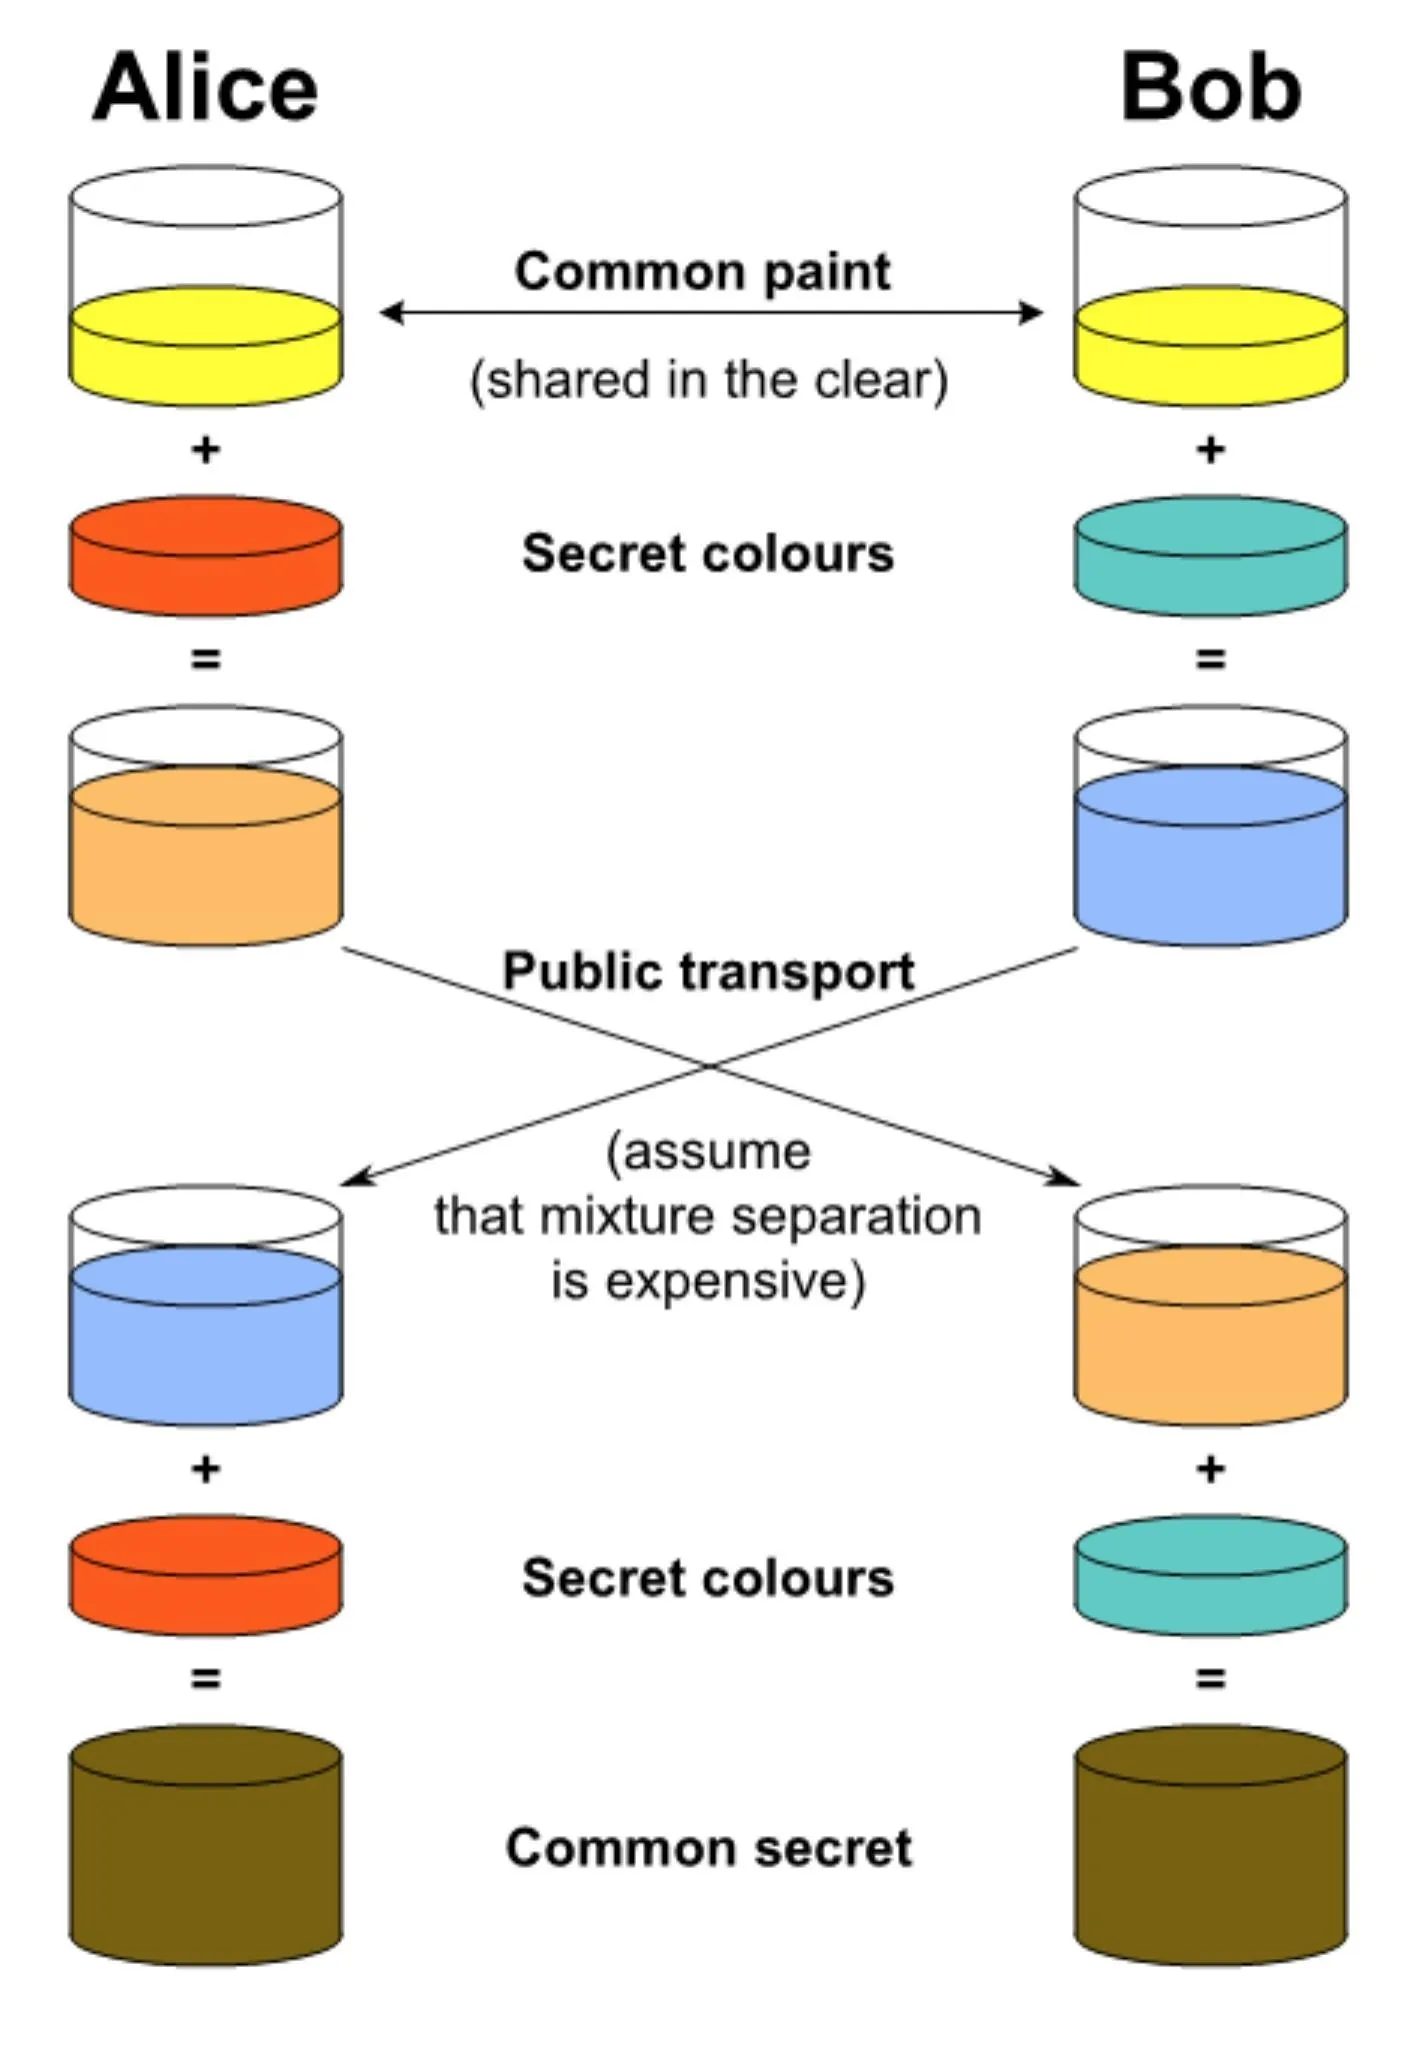
A simple explanation of the Diffie-Hellman key exchange.
As seen in the picture above, Alice and Bob both start with the same common paint. Later on, we'll recognize this as a set of variables in a Python program. For now, it's just paint. Alice and Bob each pick another unique "secret" color of paint that only they know and add it to the common paint, forming a new "public" mixture of color.
Alice and Bob then exchange their paint mixtures, keeping their secret color secret. Each adds their own secret colors to the mixture they just received from the other, ending up with the same "secret" color of paint on both sides.
Bingo! A common secret that only Alice and Bob know. How does this work mathematically though? The above concept is essentially an illustration of this formula:
(g^a)^b = (g^b)^a
When dealing with exponents raised to another exponent, it doesn't matter which order you calculate the final result in. This is part of the magic of the Diffie-Hellman method.
The other part is that handy-dandy little tool we call the modulus. When doing modulus division, the result is the remainder after dividing the first number by the second number. For example, 25 modulus 3 is 1, because after you divide 25 by 3, there is a remainder of 1.
The reason the modulus is important is because while it is easy to calculate the modulus of two numbers, it is hard to use the result to find which two numbers were used to calculate it. For instance, while 25 modulus 3 is 1, so is 27 modulus 2. There's no way to simply "undo" a modulus like there is division, therefore the secrecy of the two numbers used remains in-tact.

A few examples of using the modulus operator ("%") in Python.
Having said all of this, the Diffie-Hellman formula we'll be using is this:
(g^a mod p)^b mod p = (g^b mod p)^a mod p
In this formula, "g" represents a predefined base number. This number should be a primitive root modulo of the prime number "p," which is also predefined. Don't let the term primitive root modulo scare you.
While finding it by hand is a process, there are plenty of resources online where you can punch in a prime number and see all of the primitive roots. I've found the Blue Tulip works very well for this. From there, just do modular division with the prime number divided by the primitive root. The result will be our primitive root modulo that we call "g," (P % Pr = g).
Yes, that's a lot of math, but the rest is simple. While "p" is a prime number and "g" is a base, "a" and "b" are simply random integers that the client and server pick. Now that we've got our formula, let's get into some programming!
Implementing the Diffie-Hellman Key Exchange into Python
Instead of trying to implement the key exchange method in a network setting, let's first write a program that will prove that the above formula works.
Open up a new Python project in your favorite IDE (integrated development environment) I'll be using the Geany IDE. Name the project whatever you want. I'm naming my file "cryptonet.py" because it sounded cool to me.
Now that we've got our environment up and running, let's start writing some code!
Importing the Necessary Modules
First, we need to import the "random" Python module. This module comes with a default installation of Python, so there's no need to install it. The random module will come in handy when it comes to picking our two values that we'll exchange between clients. On the first line of your program, type:

This will import all of the functions from the random module. For this example, we could've also typed:
from random import randint
This would only import the randint function instead of the entire random module. But because the program isn't going to be very resource intensive, we can just import the entire module.
Setting Up Our Variables
Now let's create a function and assign all of the variables we are going to need:

As you can see above, we simply declared a function called "generate" and assigned four variables. As you might have guessed, modulus is going to be our prime modulus that we divide everything by. The "base" is going to be equivalent to the variable "g" in the above example of the formula. We picked 9 because it is the result of modulus division between 23 and one of its primitive roots (in this case, the root is 14).
The next two variables, "a" and "b," are going to be our two secret values that will be randomly selected. We randomly select integer values using the "randint" function provided by the random module we imported earlier. With this function, we specify a range of numbers (in this case 1 and 9999) from which the function will randomly select an integer. I selected the top limit of 9999 simply to prove that this algorithm does, in fact, work for any value of "a" and "b."
Once we have all of our variables, it's time to implement the math. This really isn't that difficult since all we're doing is typing out a formula we already know.
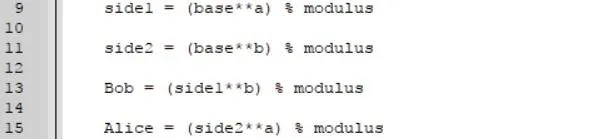
I've broken the equation down into a few parts so we can understand it more clearly. Both "side1" and "side2" represent one side of the equation. On lines 10 and 12, we are taking our base (9) and raising it to the power of "a" and "b," respectively. Notice how we used the "**" operator to do this. Using math.pow() will not work. Math.pow treats the numbers as floating point numbers instead of integers and creates inaccuracies in the equation. So just use "**" instead.
After we assign "side1" and "side2" with the first part of the equation, we would exchange "side1" and "side2" with the other party. Since we are just testing the formula locally, though, we'll create two new variables, "Bob" and "Alice." On lines 14 and 16, we assign these variables with the value of "side1" and "side2" raised to the power of the secret variable that it has not yet been raised to. This is where the properties of exponents we talked about earlier come into play. After we do that, we once again take the modulus of the result and assign it to "Bob" and "Alice," respectively.
At this point, regardless of the values of "a" and "b," our two secret key values (Bob and Alice) should be the same. To check this, we'll put a couple print calls at the end of the function:

Now we add a call to the function we created at the end of the script on line 22, and we can test out the Diffie-Hellman key exchange!
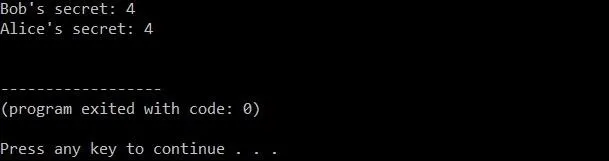
It works! Now, by only exchanging the values of "a" and "b" between two clients, we can generate a secret encryption key.
A Few Notes About the Example
While the example presented is definitely more secure than simply hard-coding an encryption key into a program, it is not completely secure. This is because we used some relatively small numbers (23, 9, and the range of 1 to 9999) in order to generate our key. Because of this, someone could brute-force the encryption key fairly easily. By using much larger prime numbers, a much larger base, and increasing the range of our random variables, we could make the key space for brute forcing the encryption key much more difficult. The larger the numbers, the more difficult the key will be to brute force.
Also, the "secret number" that we've generated here should not be used as an encryption key itself. Instead, it should be used to help generate a much larger encryption key. That, however, would be a whole different article itself.
The last thing you should know is that the random module isn't completely secure. In theory, someone could brute force the randomization seed (the data that the program uses to select a random number) and use it to predict the two integers we picked above. This really isn't too much of a security concern unless the attacker has the source code though. Otherwise, they'll have no idea what operations are being done to the random numbers. We could be multiplying, subtracting, or doing any number of things to the integer before we pass it into the D-H algorithm. If you want a more secure method of randomization, you could instead use the secrets module like this:
import secrets
a = secrets.randbelow(9999)
b = secrets.randbelow(9999)
#Note: randbelow by default starts the range at 0 and goes to the positive number specified.
There are other functions you could use in the module as well, but this one is the one most comparable to the example we used above.
Thanks for reading! If you have any questions, comment below or ask me on Twitter @xAllegiance. For now, give those dirty network snoopers Diffie-Hell, man!
- Follow Null Byte on Twitter and Google+
- Follow WonderHowTo on Facebook, Twitter, Pinterest, and Google+
Cover photo by Markus Spiske/Pexels
Screenshots by allegiance/Null Byte


Comments
Be the first, drop a comment!