Welcome back, my aspiring hackers!
One of the areas that often gives Linux newcomers problems are the environment variables. Although Windows systems have environment variables, most users, and for that matter, most administrators, never manage their environment variables. To get the most from our Linux hacking system, we need to both understand environment variables and be able to manage them for optimal performance.
Environment variables are the variables that are used by our particular user environment. In most cases, this will be our BASH shell. Each user, including root, has a set of environment variables that are set at default values unless they're changed. We can change these values to make our system work more efficiently and tailor our work environment to best meet our individual needs.
View Our Environment Variables
We can view our environment variables by typing:
- set
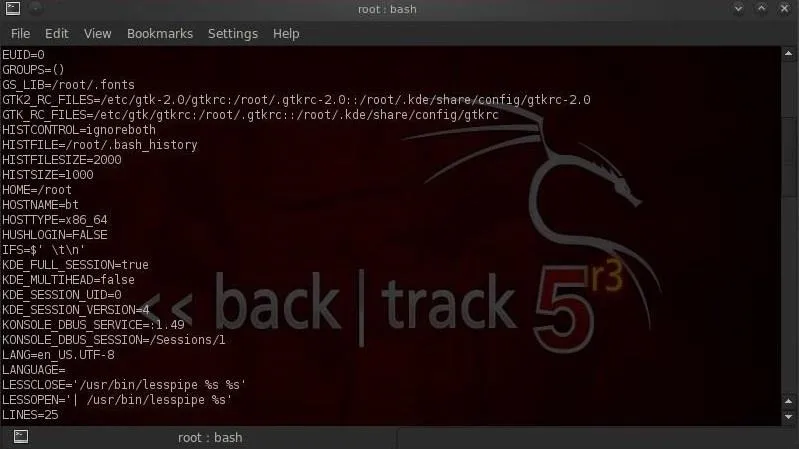
Notice that set lists for us all of the environment variables, user defined functions, and aliases. Also, make note that our environment variables are always UPPER CASE names such as HOME, PATH, HISTSIZE, etc.
If want to see the value inside the variable, we can type:
- echo $HISTSIZE
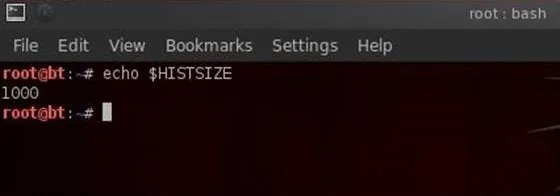
It's important to notice that when we want to use the value inside the variable, such as here, we need to put a $ before the variable name.
The HISTSIZE variable contains the value of the number of commands that are stored in our history file. As you can see in this screenshot, the HISTSIZE variable is set to 1000. In some cases, we may not want our commands stored in the history file, such as when we are covering our tracks, then we can set our HISTSIZE variable to zero.
- HISTSIZE=0
When we change an environment variable, it's only for that environment. This means that once we close that terminal, any changes that we made to these variables is lost or set back to the default value. If we want the value to remain for our next terminal session and other terminal sessions, we need to export the variable. We can do this by simply typing:
- export HISTSIZE
Changing Our Terminal Prompt
Let's have a little fun and change the prompt in our terminal. The environment variable that contains our prompt for the first terminal is PS1. We can change it by typing:
- PS1= "World's Best Hacker: #"
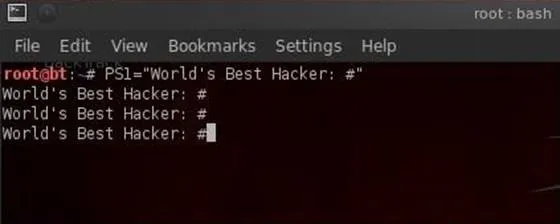
Remember that our prompt will now be "World's Best Hacker" whenever we open the first terminal (PS1), but the second terminal will still be the default BackTrack command prompt. In addition, if we really like this command prompt and want to keep it, we need to export it so that each time we open this terminal, the prompt will be "World's Best Hacker."
- export PS1
Changing Our Path Variable
Probably the most important variable in our environment is our PATH variable. This is what controls where our shell looks for the commands we type, such as cd, ls, echo, etc. If it doesn't find the command in one of the directories in our path, it returns an error "command not found," even if it DOES exist in another directory not in our PATH.
Let's take a look at our path variable:
- echo =$PATH

Notice the directories included in our PATH. These are usually the various /bin and /sbin directories where our system variables are found. When we type ls, the system knows to look in each of these directories for the ls command.
Whenever we want to use aircrack-ng or another hacking application in this PATH variable, we have to first navigate to that directory. In the case of aircrack-ng, that would be /pentest/wireless/aircrack-ng.
Now, if we want to add our wireless hacking application to our PATH variable, we can type:
- PATH=$PATH:/pentest/wireless/aircrack-ng

Now when we want to run aircrack-ng, we don't need to navigate to the pentest/wireless/aircrack-ng directory. We now can execute aircrack-ng applications from anywhere in BackTrack!
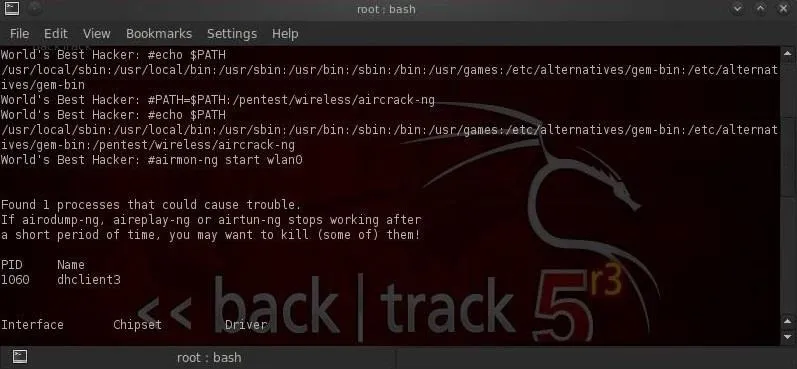
This can be a very useful technique for directories that we use often, but be careful to not add too many directories to your PATH variable as the system will have to search through every directory in the PATH to find commands and could potentially slow down your terminal and your hacking.
That's It for Now...
Stay tuned for more Linux basics for the aspiring hacker. If you haven't checked out the other guides yet, you can find them all right here. If you have any questions, make sure to comment below or start a thread in the Null Byte forum for help.
Calm penguin and screaming penguin photos via Shutterstock


Comments
Be the first, drop a comment!