


In a previous article, we learned how to take advantage of a feature, Dynamic Data Exchange (DDE), to run malicious code when a Microsoft Word document is opened. The biggest challenge of this attack is that it requires getting the user to agree to a pop-up prompt. Fortunately, since I posted that article, many new obfuscation techniques have been discovered to make this easier. Today, we explore and combine some of them to make the ultimate hidden DDE attack.
If you haven't already read the first article, we explored how to abuse Windows DDE. In simple terms, DDE both executes an application and sends it data. We can use it to open any application, including command prompt, and send it data, or in our case, code to execute. When the user opens our Word document, the code runs on after the user accepts two separate pop-up notifications. This article will explore how to make that process easier by hiding the pop-up windows and disguising the content.
If you haven't read my last article on DDE, as well as the first one, I advise you do so before proceeding with this one. When ready, let's dive right in.
Make the Field Invisible
The first and easiest way to obfuscate the DDE field is to turn it invisible. Thanks to WhiskeyS373N for the idea!

With your payload open in Word, go to the "Insert" tab, then find and left-click "Footer" on the right side of the bar. Left-click "Blank" and you should be taken to a new footer at the bottom of the page.
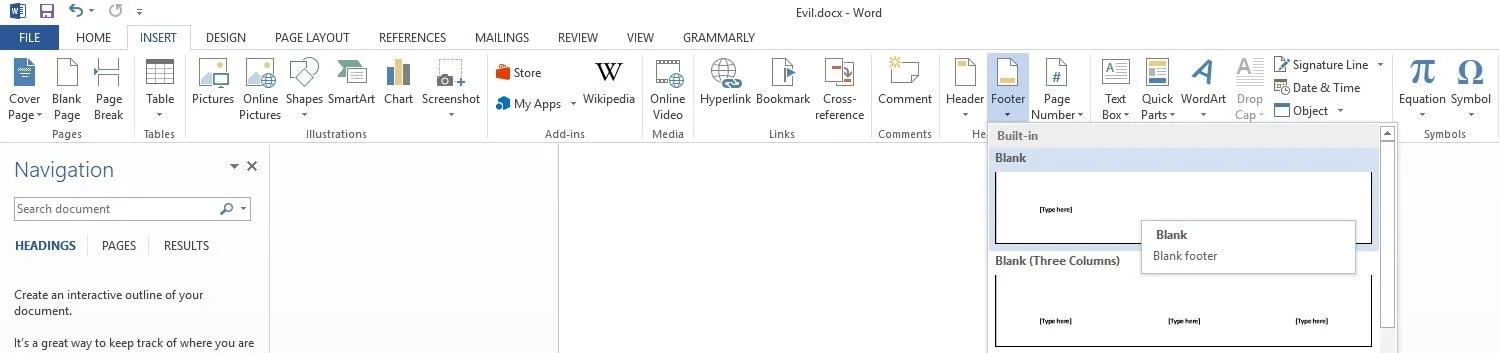
You could now add a field the same way as in the first article, but there's a much easier way. Pressing Ctrl + F9 will open a blank field. Then, you simply add your code. Here, I'll be using the standard calc.exe.
{DDEAUTO c:\\windows\\system32\\cmd.exe "/k calc.exe" }
Once you have your code in place, highlight it and then right-click on it. In the middle bottom of the pop-up window, left-click on the arrow beside "A," then left-click on the white block (the top leftmost one).
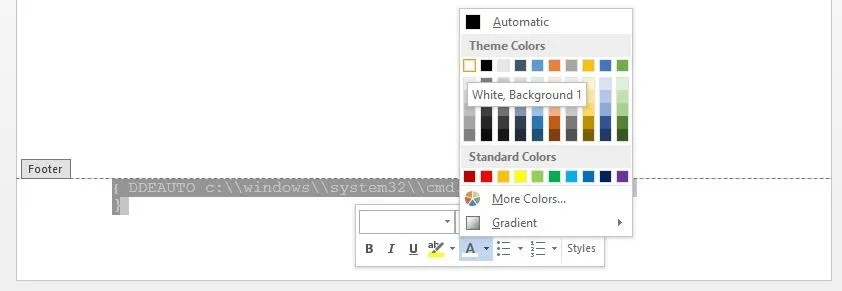
The text should now be white and hidden from sight. As you can see below, it's quite invisible to the human eye.

However, this does not mean it is invisible to the computer. It will still execute when Word is opened. If you don't believe me, try it for yourself. Save the document and reopen it. It will work just the same as if it were in the body of the text.
If you still need to work on the field, then either keep it highlighted to see it or turn it back to black. Just don't forget to set it back to white before sending it to a target.

Modify the User Warning
As we have discussed before, one of the great things about the DDE-based attack is the user never gets an explicit security warning. Unfortunately, they do still get two popups that we need them to say "Yes" to, and there's nothing we can do to change that. Fortunately, since they aren't security warnings, they have less strict policies about changing them, which allows us to modify the second one.
There's nothing we can do about the first one, but it's already pretty mundane, asking the user to update the document. As we discussed in our first article, the best way to tackle this problem is with social engineering.

The second one can cause us some trouble and definitely can draw attention from more security-minded users. It asks them about starting an application, which can tip off the target that something fishy is happening. Interestingly, the text of the pop-up prompt actually incorporates portions of the DDEAUTO command. Specifically, it gets the bit in parentheses just after remote data and at the end where it lists the application.

The original SensePost blog suggests that this can be modified.
The second prompt asks the user whether or not they want to execute the specified application, now this can be considered as a security warning since it asks the user to execute "cmd.exe", however with proper syntax modification it can be hidden. [Emphasis added.]
This naturally peaked the interest of two researchers that came up with two slightly different methods to achieve the same effect. Because the second prompt is reading directly from the DDE command field, we can manipulate it to change the message.
The major difference from the standard method is the directory manipulation and message verbiage added to the second parameter of the DDE command. Ryan Hanson was one of the first to post on Twitter how to do it.

{ DDEAUTO "Microsoft Word" "Document \\..\\..\\..\\..\\Windows\\File.docx\\..\\System32\\cmd.exe" "" }
However, when I attempted to copy and paste it, the code worked, but didn't look quite the same.

Mike Czumak had a slightly a different method of solving this problem.

I had better luck with getting his example working. I used the following without payload for testing.
{DDEAUTO "C:\\Programs\\Microsoft\\Office\\MSWord.exe\\..\\..\\..\\..\\windows\\system32\\WindowsPowerShell\\v1.0\\powershell.exe $e # " "for security reasons"}
Of the two, this one is more likely to make sense to the average end user and thus fool them. You could also try "Due to Security Settings" instead of "for security reasons" or some other variation. Below, you can see my much less suspicious result.

Obfuscate the Payload
Etienne Stalmans, one of the two authors of the SensePost blog that started all the DDE rage, discovered a way to actually obfuscate the payload itself. The method relies on the clever use of the quote field and the fact that these field codes can be nested.
You can feed the quote field characters in ASCII, and the field it is in will read that given ASCII character. For example, {QUOTE 65 66 67} would return ABC. This allows us to represent our payload as integers, and have word convert it to a string before executing our DDE field. There are many tools to convert strings to ASCII.
Another tool we can use is the set and ref functions, which set a variable and then reference it. For example, if we had this in the field:
{SET c "{QUOTE 65 65 65 65}"}
{SET d "{QUOTE 71 71 71 71}"}
{DDE {REF c} {REF d}}
This is what the computer would see before executing the DDE field:
{DDE "AAAA" "GGGG"}
In this way, we can obfuscate the entire payload, as it will appear as nothing more than a string of numbers to any virus scanning software until the user says "Yes" to the second prompt. Opening PowerShell would appear like below.
{SET C "{QUOTE 67 58 92 92 80 114 111 103 114 97 109 115 92 92 77 105 99 114 111 115 111 102 116 92 92 79 102 102 105 99 101 92 92 77 83 87 111 114 100 46 101 120 101 92 92 46 46 92 92 46 46 92 92 46 46 92 92 46 46 92 92 119 105 110 100 111 119 115 92 92 115 121 115 116 101 109 51 50 92 92 119 105 110 100 111 119 115 112 111 119 101 114 115 104 101 108 108 92 92 118 49 46 48 92 92 112 111 119 101 114 115 104 101 108 108 46 101 120 101} "}
{DDE {REF C} "a"}
However, Microsoft doesn't update every field when it's opened, and this will not work if the quote does not execute. Luckily, there's something we can do to make sure it updates — by marking it "dirty" in the XML file.
To do this, save the Word document and the find it in your documents. Rename it from a .docx to a .zip, then open the .zip file. Within the .zip file should be the "Word" folder — open it. Now, copy "document.xml" by dragging it to the desktop, then open it for editing.
Now we need to make our links "dirty" by adding the w:dirty="true" to each begin <w:fldChar>. The easy way to find these is Ctrl + F and search for fldChar.
<w:fldChar w:fldCharType="begin" w:dirty="true"/>
It should look like this when you are done:

Once that is done, save your edits, and place this file back where you found it. Then you can change the file extension back from .zip to .docx.
Now, in addition to our obfuscated payload, we also get a much cleaner looking first prompt.

Circumvent Protected View
Now for the coup de grâce when sending a DDE attack document. One of the troubles when sending a Word document over the internet is that it will normally be opened in Protected View by default. This just puts another layer of popups between the target and code execution.
Thanks to research done by Matt Nelson, we can circumvent Protected View and make it that much easier for the target to mess up.

This is as simple as opening Publisher and going to "File," then "Import Word Document." Once you have it saved as a .pub file, you can send it to the target and it should work just like a normal Word doc, but without triggering Protected View.
Put It All Together & Defend
Now, we can combine all of these obfuscation methods to make make the ultimate super sneaky DDE attack. By turning our payload into ASCII, we avoid most antivirus tools. We then trick the user by editing the prompts they get and even turn the DDE field inviable so they can't easily find it by inspecting the document. Lastly, we take away their last saving grace, Protected View, by using Publisher to slip past.
Combining these methods have made this exploit significantly more dangerous and much more likely to trick the average user. The flexibility of this attack, combined with the modular payload and steep consequences for a user clicking "OK" on the wrong prompt, make this a potent tool for delivering malware.
So, how can you defend against this sort of attack? The key lies in your observation. When opening files, look for any unusual behaviors and be wary of giving permissions to processes you don't understand or aren't familiar. There's not really much you can do other than being paranoid whenever you open a document from an untrusted source. Just remember the golden rule: always say NO to unexpected popups and prompts.
Thanks for reading! If you have any questions, you can ask here or on Twitter @The_Hoid.
- Follow Null Byte on Twitter and Google+
- Follow WonderHowTo on Facebook, Twitter, Pinterest, and Google+
Cover image and screenshots by Hoid/Null Byte


Comments
Be the first, drop a comment!