


Aircraft equipped with ADS-B are constantly shouting their location into the radio void, along with other useful unauthenticated and unencrypted data. In this guide, we will make an ADS-B receiver using a Raspberry Pi with a software-defined radio (SDR) dongle, which we can use to track aircraft anywhere in real time.
In my last article, I covered how to track flights using publically sourced radio receiver data on your phone. However, using public source data has some limitations, like blocking some interesting private jets and government aircraft or lack of coverage at lower altitudes. Now, we can collect our own data!

What's that, FlightAware? I can't track this plane? Right.
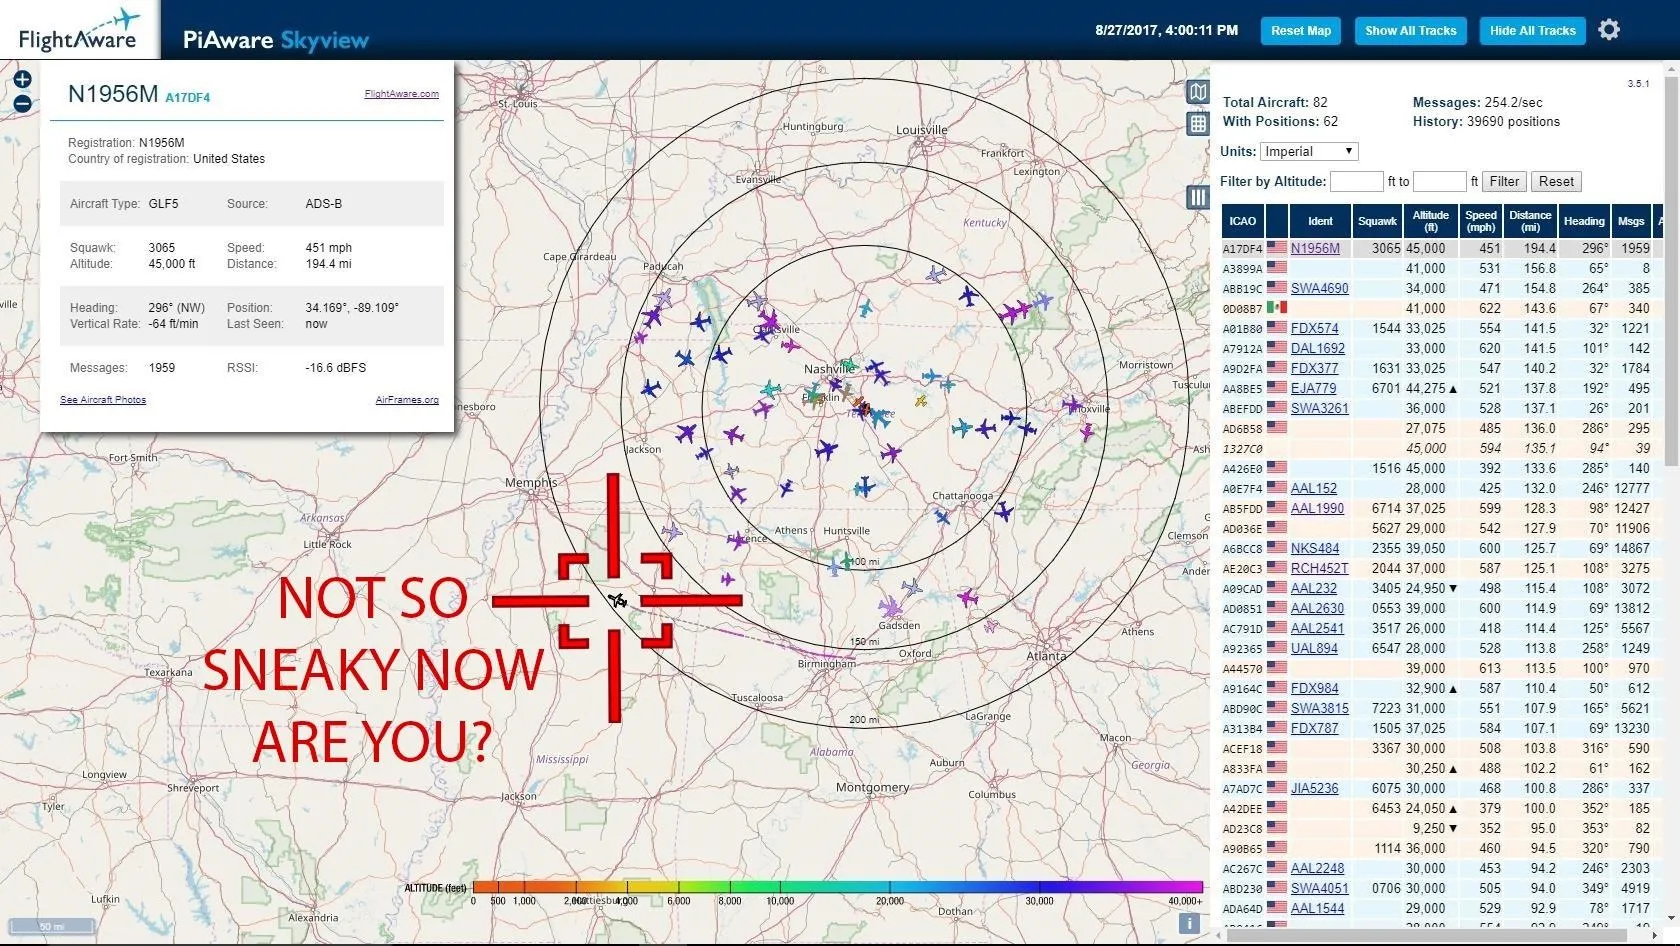
What's that, FlightAware? I can't track this plane? Right.
The Raspberry Pi is a surprisingly versatile credit-card sized Linux computer, and just like the ubiquitous Lego blocks, people are constantly finding new uses for them including wardriving, running Kali Linux, and even setting up a rogue access point and shooting down planes. We're going to put them to yet another use as a host computer for our very own 1090 MHz receiver. If you think you're MacGyver, then you can try to build your own out of scrap parts.
Thankfully there's no code to write. Most of the hard work has already been done for us by programs like dump1090 on GitHub, and branches like this one can even make a heat map of the aircraft locations. FlightAware made its own version called PiAware, which is what we'll be using primarily today, although details for using Flightradar24's Pi image will be included if you prefer their service.
If you're interested in what PiAware is doing under the hood, this helpful block diagram shows what's going on. Our setup will have the Pi, SDR, and antenna directly connected without any analog cables between to minimize wires and maximize the efficiency of our system. Then, we'll only need to find a nice spot outside and plug in the power.
Coverage Reconnaissance
A little reconnaissance can go a long way and save us trouble down the road. We're going to start off by looking at the coverage. Once you click on that link, you'll be taken to a map of FlightAware's coverage, which should be fairly representative of other ADS-B aggregation services.
The default is set to look at "Feeder Sites" such as the Pi-based receiver we are building in this guide. For example, looking at the following image of the Fort Worth and Dallas areas, we can tell that there is already a large number of such systems there.
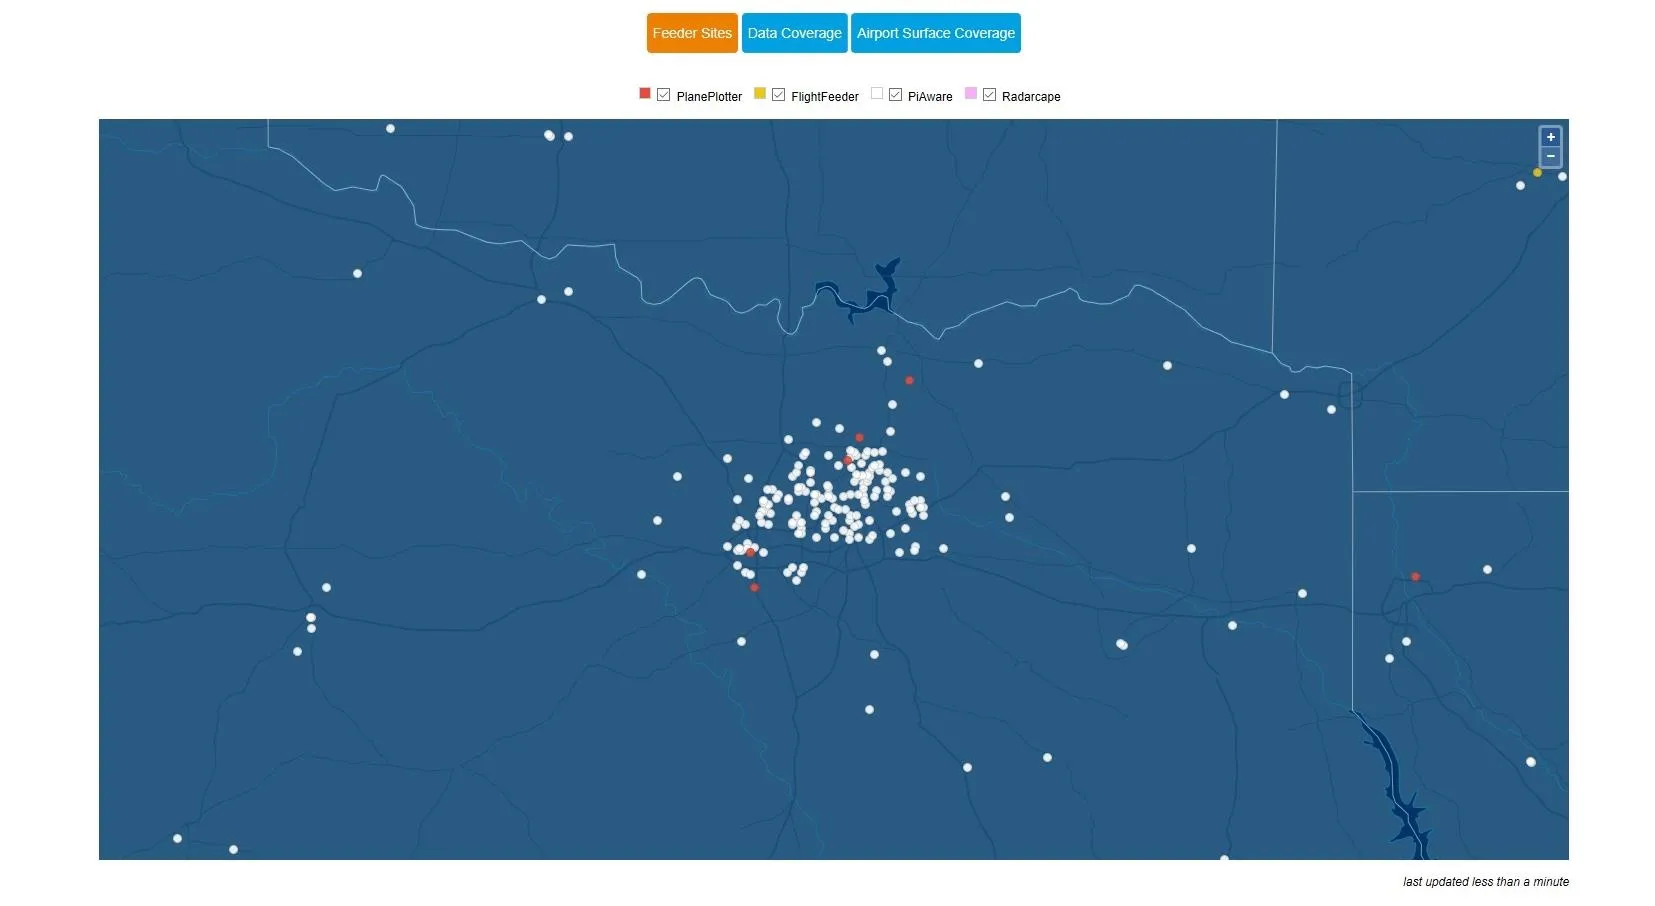
Each white dot represents a receiver just like the one we are about to build.
Additionally, we need to take a quick glance at the "Data Coverage" tab on that map. By now, there are few holes in the coverage of the USA and Europe. If you live there and wanted to add new coverage, you're probably out of luck, but do check the sliding tab at the top left, as coverage below 20,000 feet and particularly below 10,000 feet is still quite sparse.
If you do find yourself in a region with little-to-no coverage, be sure not to skip the free stuff step below, as it could save you a hundred dollars. If you aren't already familiar with the airports in your region, then tab over to "Airport Surface Coverage," too.
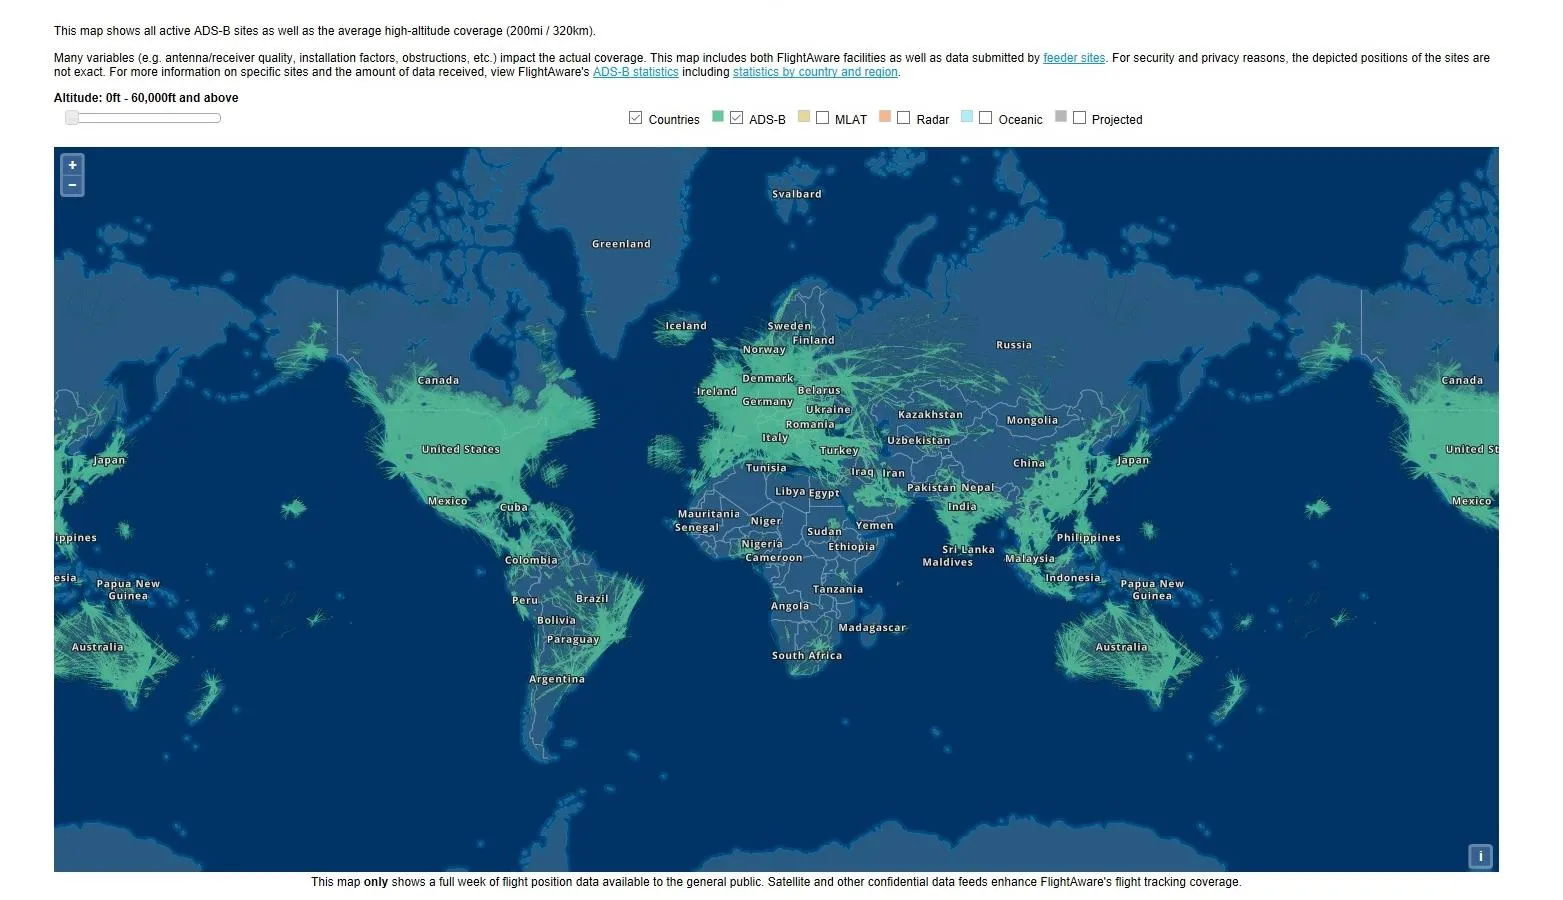
Here you can see a map of the regions with coverage up to 60,000 feet and above.
Radar Horizon Reconnaissance
How far can we expect to be spotting aircraft once we get set up? Typical distances are between 100–300 miles. However, that can vary greatly depending on your setup.
As we mentioned in our last article, ADS-B is line-of-sight propagating, which means that we need to keep radar horizon in mind or it could really limit our range. Since the Earth is a sphere and curves away from us in all directions, it creates regions at lower altitudes which are outside of line-of-sight with our receiver and cause us to have dead zones.
Just like objects cast shadows in sunlight, objects like nearby trees, buildings, and mountains cast "radar shadows," further blocking the areas we will be able to spot aircraft. Think of the aircraft as the sun — you don't want your receiver to be in any cast shadows. Thankfully, there's a tool called HeyWhatsThat to help us visualize this. On the HeyWhatsThat site, click the "New Panorama" tab at the top of the page, and then start filling in the information of your planned install location.
This is also a good time to experiment with different locations you may have available to you, in order to sort out which is best. After you enter a suitable title and submit a request, it will take 2 to 3 minutes to build your map, and you should be taken to the view tab with your title selected.

As you can see, the potential coverage area is quite large.
Definitely play around on the page as there is quite a bit of useful information there. However, what we are interested in right now is that map.
Scroll down to get to it and click on the "Up in the Air" tab in the map window. Just below the map will be two colored boxes which will be 10000 and 30000 by default. Change the first from 10000 to 18000, as 18,000 feet is the altitude at which all air traffic is required to have ADS-B. The second you can keep anywhere in the 30 - 40,000 range, as that represents the cruising altitude of typical airliners.
Be aware you may have to zoom out on the map to actually see the rings appear. Those rings now represent the maximum range at which you can expect to be spotting aircraft at the given altitude.
Apply for Free Stuff
If you enjoy setting fire to money in your spare time, or simply don't perk up at the word free, then you can skip this bit. For the rest of you, keep reading. If you noticed you're in a gap in coverage in the previous recon section, then you will want to follow these links to apply for a free kit — complete ADS-B receiver sets including receiver, antenna, and cables.
Even if your area is already covered, it's worth it to take a few minutes to apply in case they still need MLAT coverage, or even just for the 20% discount code Radarbox24 sends when it rejects your application. Don't forget to check your email for the follow-up emails that arrive within 24 hours, if not instantly.
What You'll Need to Get Started
- Raspberry Pi: Most importantly, you're going to need a Raspberry Pi. Any model will technically work. However, for this guide, you will want one with Wi-Fi built in. This guide uses a Pi 3 model B, but the Pi Zero W is also a good choice with some caveats. As the Pi Zero uses the chipset from the original Pi, it has limited computational power, and there are reports that it struggles when MLAT is running and or when it's viewing a large number of aircraft simultaneously. That being said, the Pi Zero is the cheapest option if you can get away with it. Use your own judgment, and the recon we are performing, to decide. If you don't have a Raspberry Pi yet and would like to follow along with our guides, then this kit will get you up and running.
- MicroSD card: You need a 6 GB card minimum, but it's recommended to use one in the 16 to 32+ GB range.
- MicroSD card reader: Pretty much any one will work for our task today.
- Power supply: This is needed for the Raspberry Pi unit.
- Software-defined radio: We need any software-defined radio with an RTL2832 chip. If you already have an SDR, it should likely work. If you are buying specifically for 1090 MHz, then this SDR is the best choice and is what will be used in this guide. It has a built-in amplifier and 1090 MHz filter specially designed for our purpose.
- 1090 MHz antenna: If you are using an SDR, you already have then you can use the supplied antenna, but you should be aware that it likely isn't optimized for the frequency we are using. While it will work for demonstration purposes, if you are hoping to have a more permanent installation, then you will be gravely disappointed by its performance. In this guide, we are using this antenna. While it is a little on the pricey side (being the most expensive single component in our build), it is also the most important to receiving a strong signal. If you're more interested in the details, here's an in-depth review. If you want to build your own, then look at this guide or this video by Hak5.
- Antenna adapter: If you are using the same antenna as this guide, you will need an N type Male-to-SMA-Male converter. Otherwise, be sure you have the proper cable and adapter for your setup.
- Micro USB cable (optional): You only need this if you're using the Pi Zero W
- Second 1090 MHz Filter (optional): This is rarely needed, as it's already built into the SDR we are using in this guide. However, it is helpful sometimes if you live in very close proximity to a radio transmitter such as a cell phone tower.
Download the Image for the Raspberry Pi
There are two programs that we are going to look at downloading; they both achieve the same ends. It's mostly just a matter of personal preference which you choose. You can use Flightradar24 or FlightAware. If you want the quickest simplest setup, then go with Flightradar24, but if you want more access to your own data or are using a Pi Zero W, then go with FlightAware. Keep in mind, whichever you contribute data to will upgrade your account to their highest level of premium membership for free.
Click on the link below that you want and extract the .zip file. If you just can't pick, then use both with BerryBoot.
Flash the Image to the MicroSD Card
Now, we need to write the image to our microSD card. Best practice is to unplug any external hard drives or other USB devices you have, and then insert your microSD into its adapter and plug it in. This is important because you don't want to accidentally flash the wrong device.
If you already have a program to flash the image to the card, then you can use that. Otherwise, download Etcher. It should detect what operating system you are using, but if not, make sure you download the correct version based on your operating system (OS) and follow the on-screen installation directions. Open Etcher (if it doesn't automatically after installation), and select the image you just downloaded and unzipped.
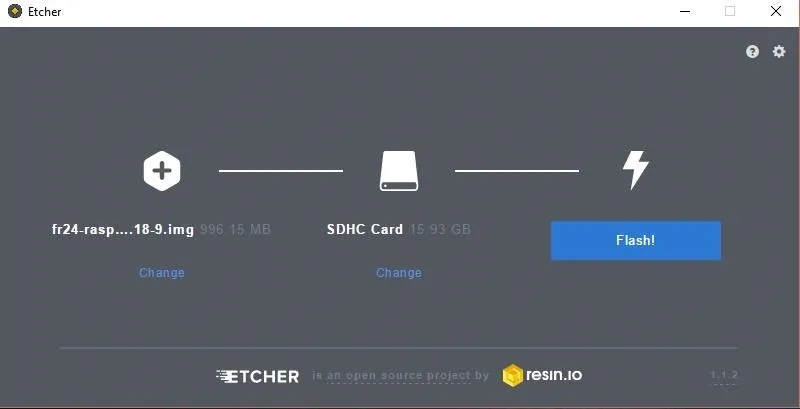
Next, be sure the proper drive is selected and flash the image. Once it's done, it will safely eject the SD card.
Enable Wi-Fi
If using the Flightradar24 image: The Flightradar24 build is intended to be used with Ethernet, however, we can enable Wi-Fi. Just remember, you will still need to run power to the Pi.
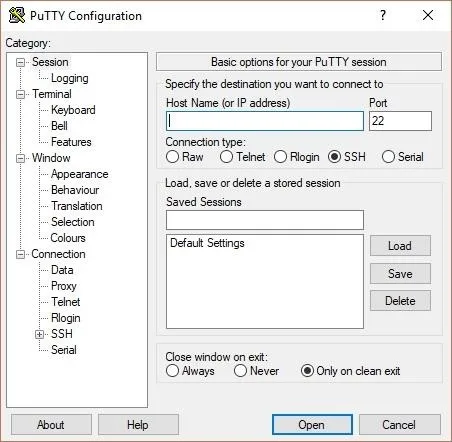
First, insert the SD card into the slot at the bottom of your Raspberry Pi and plug the Pi into both Ethernet and power. Now, we need a program to open a Secure Shell, i.e., SSH into our Pi. This guide uses PuTTY (download), but you can SSH however you like.
In Windows, open PuTTY and select SSH Port 22, and provide the Pi's IP address. The IP address can be found a number of ways, including opening your router's admin page and looking at connected devices or using a program like Nmap or Fing.
On a Mac, you can simply open a terminal window and type the following.
ssh pi@(replace with Pi's IP address)
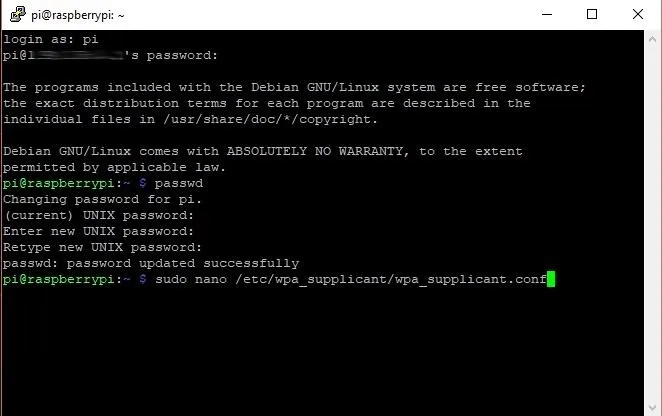
Once you have a successful SSH connection, you will be prompted for a login and password. The default user name is pi and the password is raspberry. Best practice would be to immediately run the passwd command to change the password.
So the Pi knows to automatically connect to the Wi-Fi, we need to edit the "wpa_supplicant.conf" file. Use the following command to open it in nano.
sudo nano /etc/wpasupplicant/wpasupplicant.conf
Arrow key to the bottom of the file, and add the following.
network={
ssid="YourWifi"
psk="Password"
}
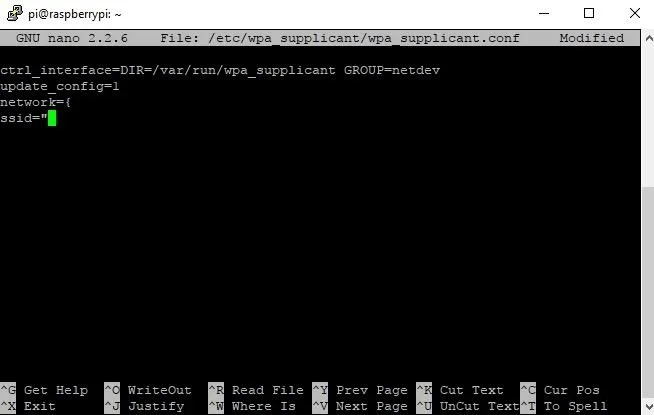
Replace YourWifi and Password with the credentials of your system, but leave the quotes. Exit with Ctrl + X and then save changes with the Y key. That's it, you should have Wi-Fi connected now, although sometimes it may take 2 to 3 minutes and require a reboot. If so, you can use sudo reboot. Use ifconfig wlan0 to check, and if it's working, you will see you have an "inet addr" there.
When you have Wi-Fi up and running, safely shut off the Pi with:
sudo shutdown -h now
If using the FlightAware image: Etcher will have ejected your SD card, so you will need to physically remove it and reinsert it. The SD card should now be called PiAware. Navigate to it, and open the file labeled "piaware-config.txt." Scroll down until you see:
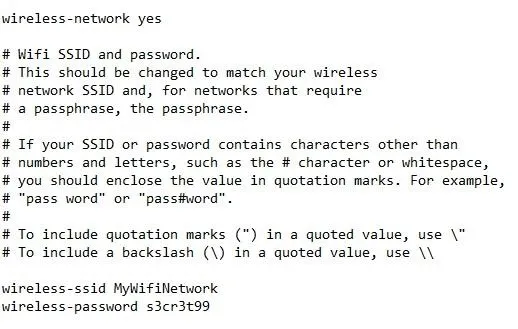
Change MyWifiNetwork to your network's SSID, and s3cr3t to your network's password. Save the changes and close the file. If you want to be able to SSH into your Pi, create an empty file named "ssh" with no file extension, as PiAware disables SSH by default for safety. Safely eject the SD card.
Set Up Your Antenna
The rule of thumb to keep in mind is that the cable between the antenna and SDR should be as short as possible. This is super easy for us to do since we aren't using a cable.
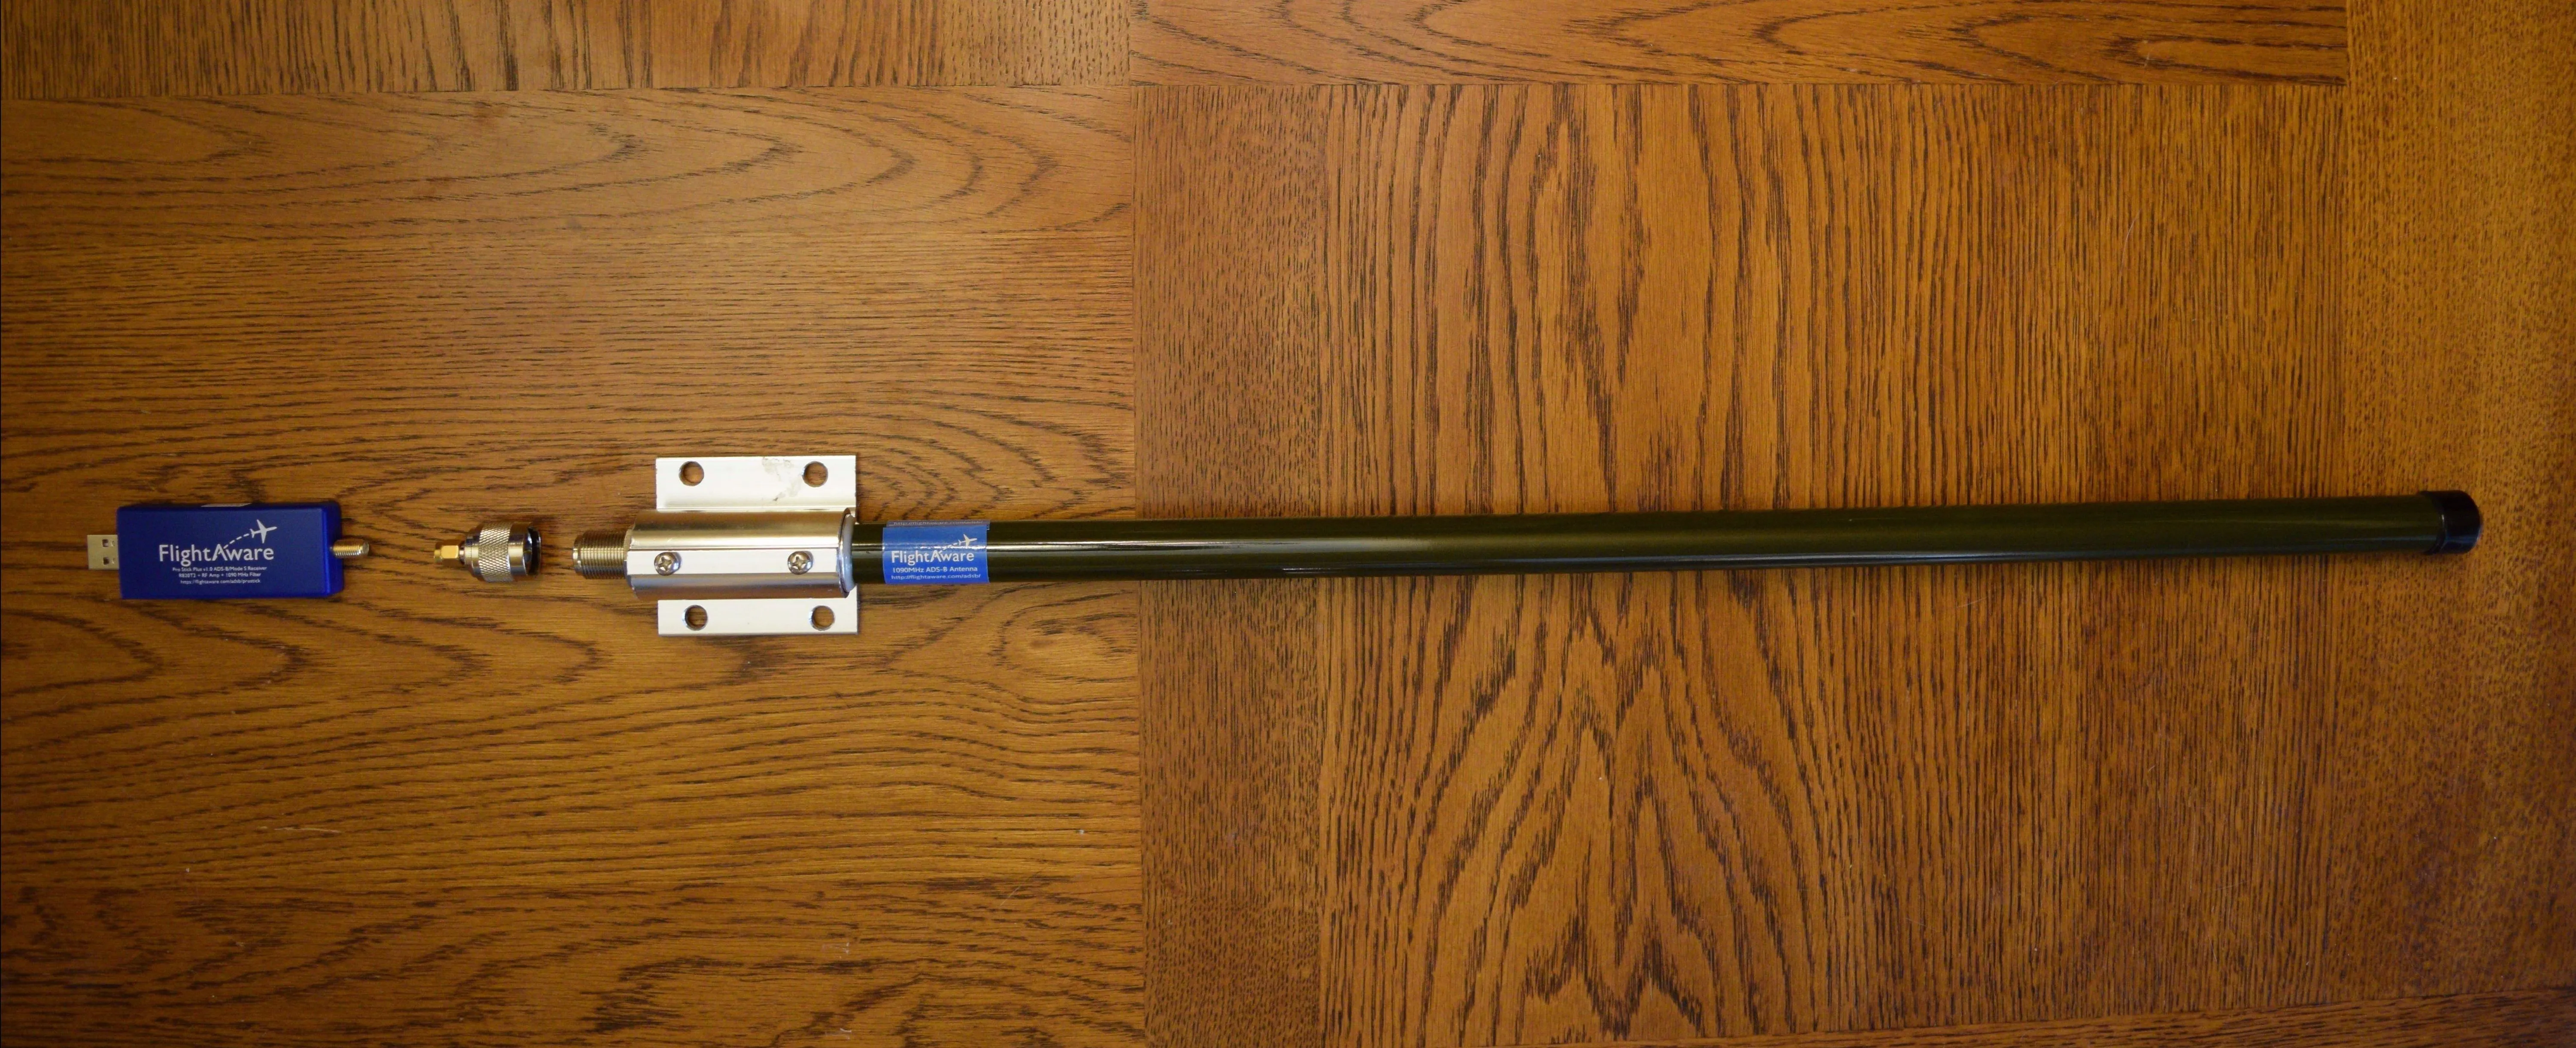
Hoid/Null Byte
Plug your adapter into the base of the antenna, and then the SDR into the other side of the adapter. We do this because longer cables and more jumps weaken the analog signal, which makes it harder for the SDR to pick up the faint signals from distant aircraft.
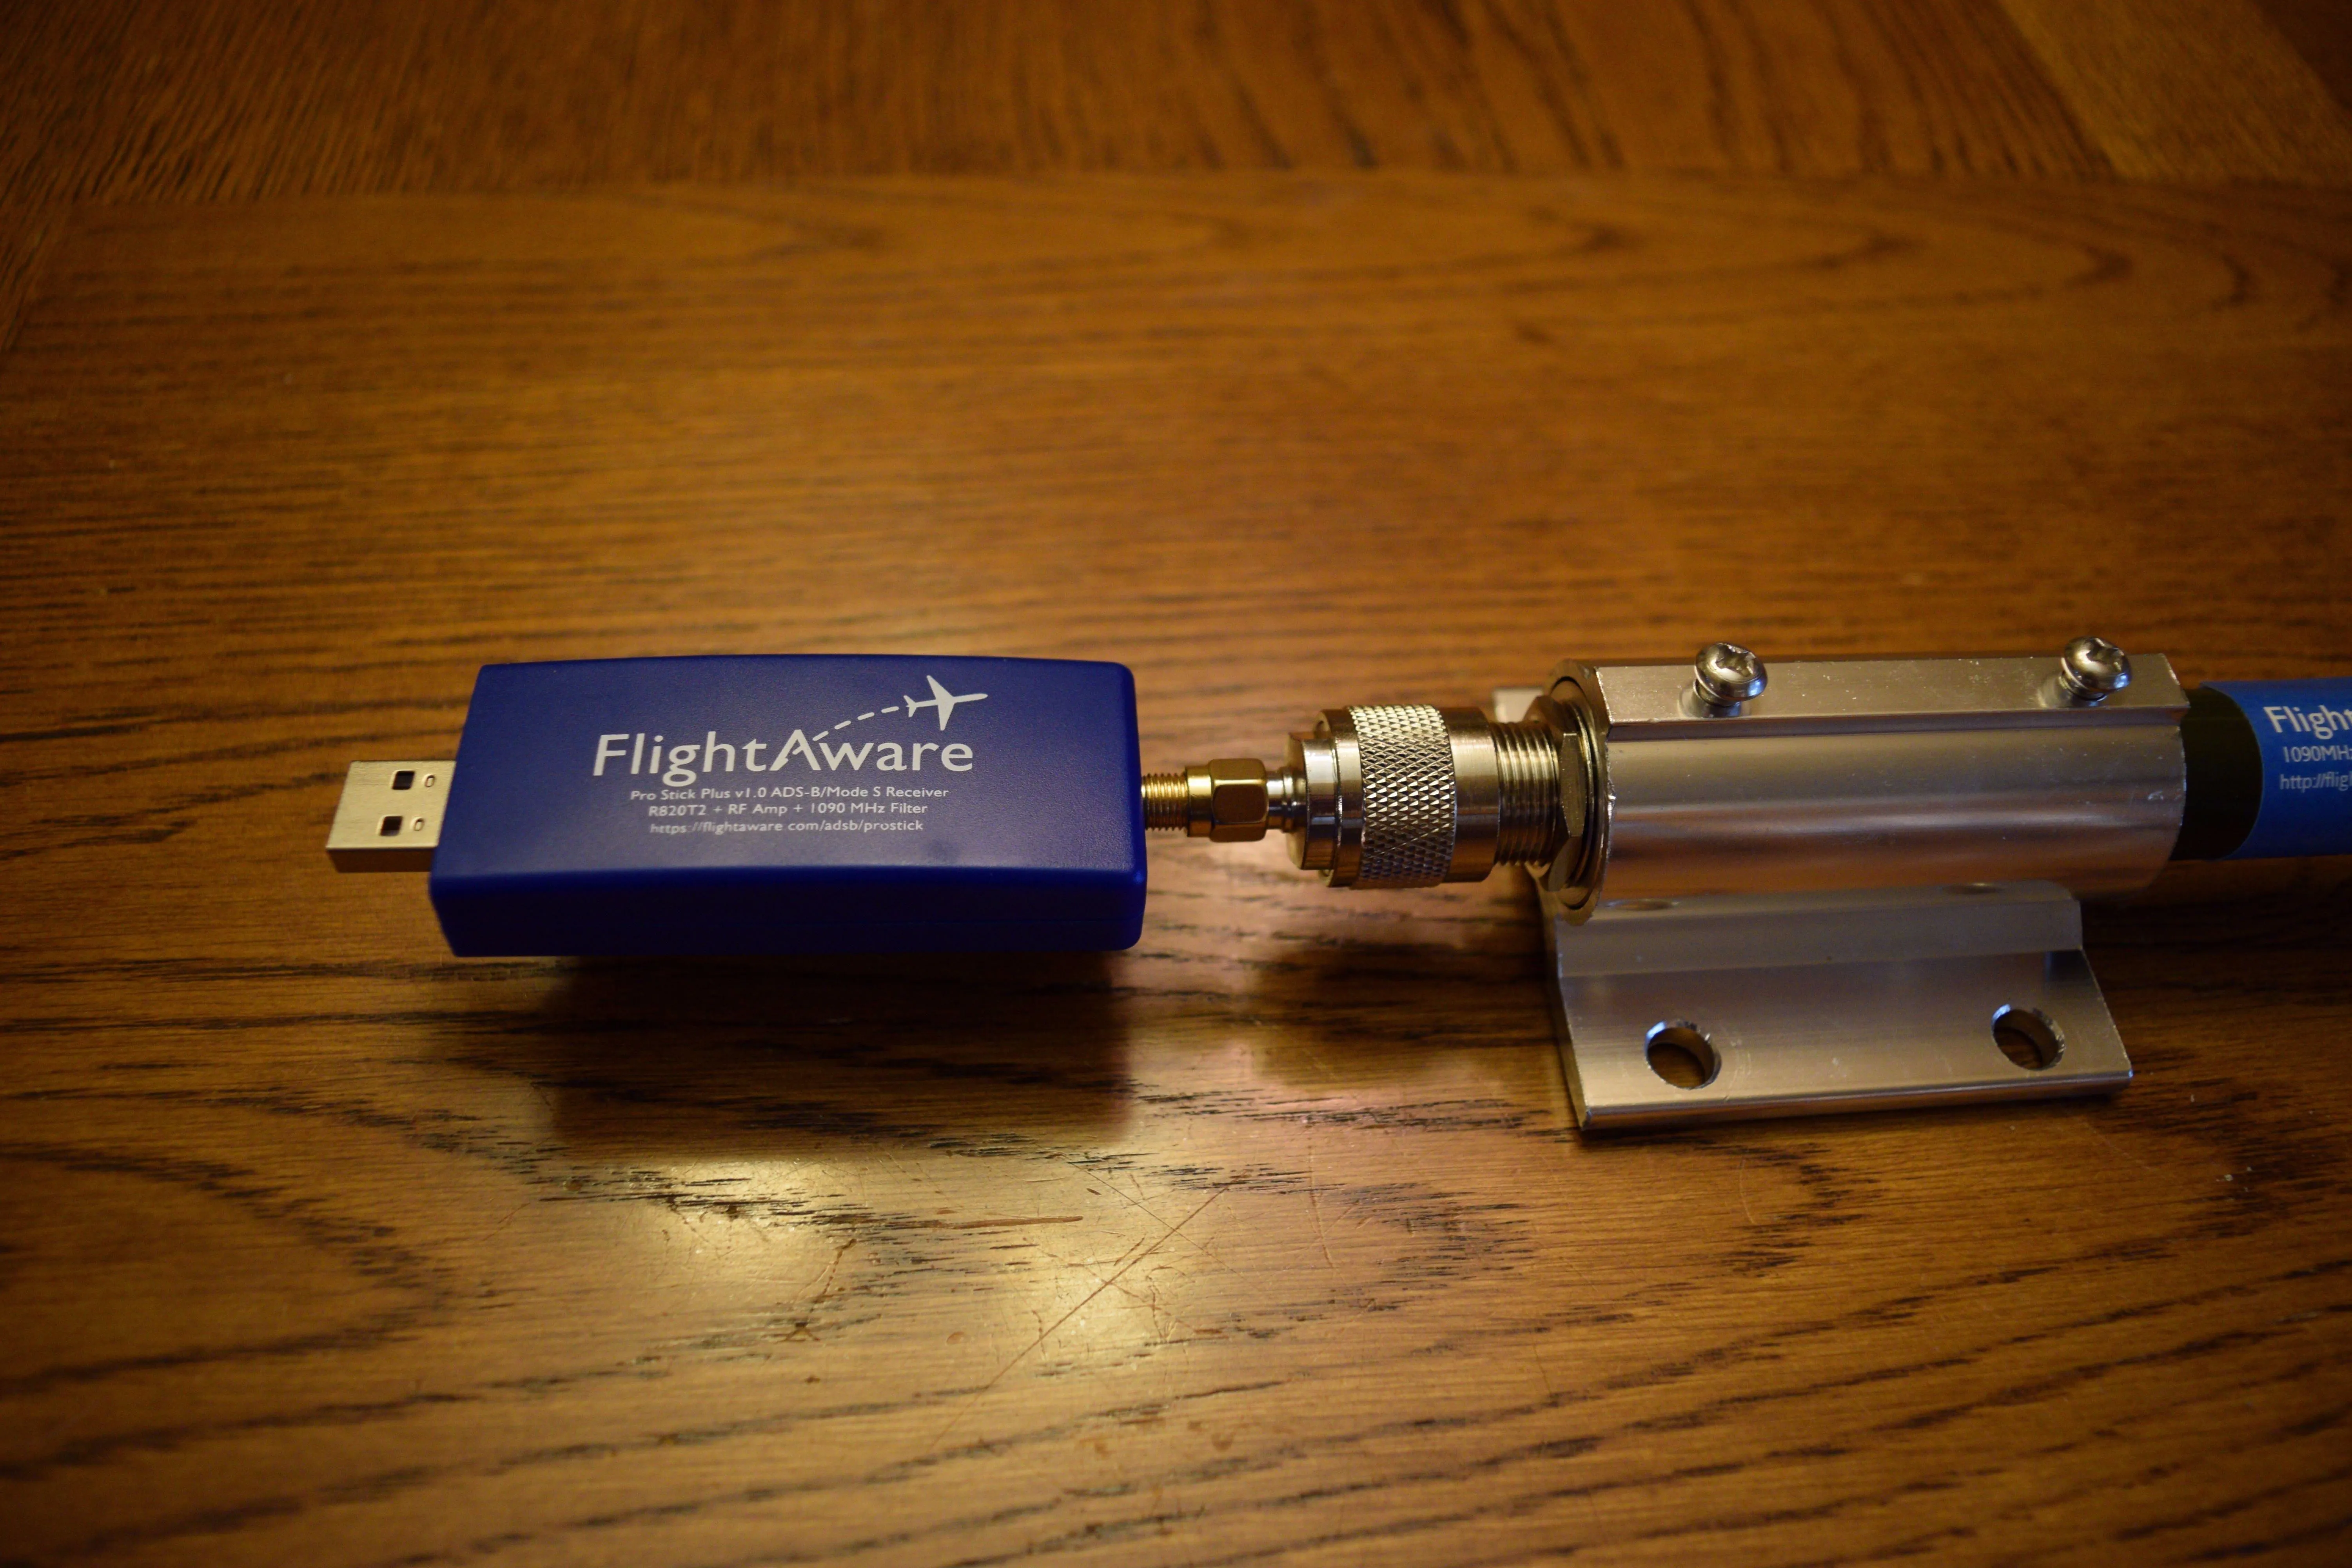
Put together it should look something like this.
Start Your Pi
Plug the flashed SD card into the bottom of the Pi, and connect the SDR to one of the USB ports. Now, connect the power. You should see a solid red and a blinking green LED on the Raspberry Pi.
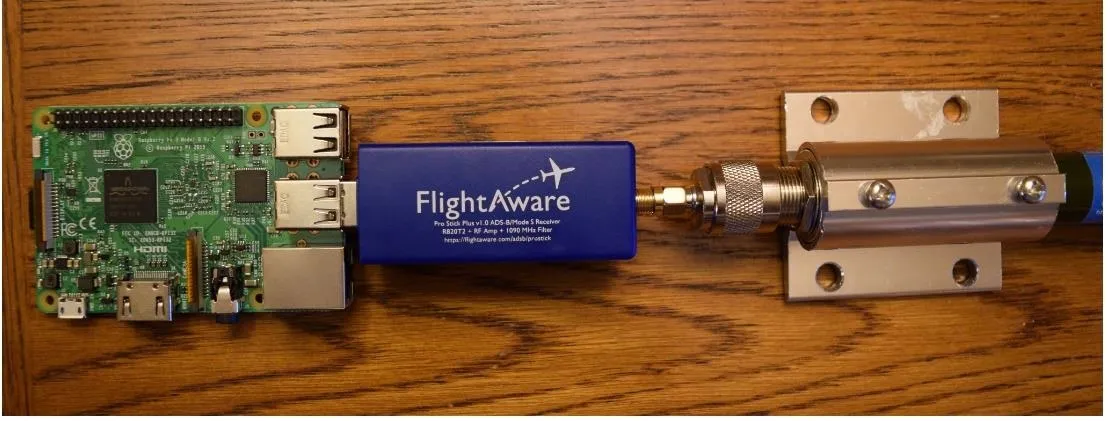
Hoid/Null Byte
Claim Your Receiver
Wait 5 minutes for the Pi to boot and get the software running, then click on the appropriate link below for whichever service you are using. If the Pi doesn't show, be sure that you connected the Wi-Fi correctly and reboot. GPS-Coordinates.net is helpful if you don't already know your GPS coordinates, or are having trouble finding them, as both services will want to know this information. Additionally, once you claim your receiver, you should be upgraded to the highest level of membership for your given company.
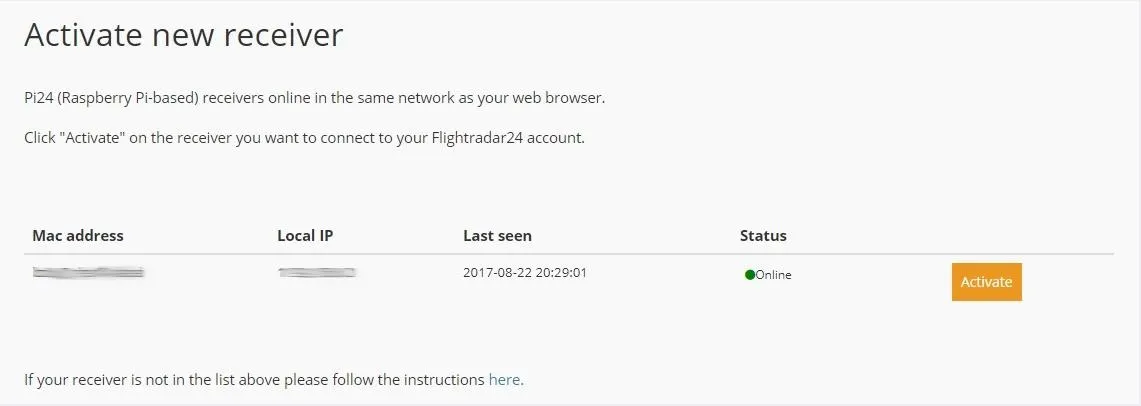
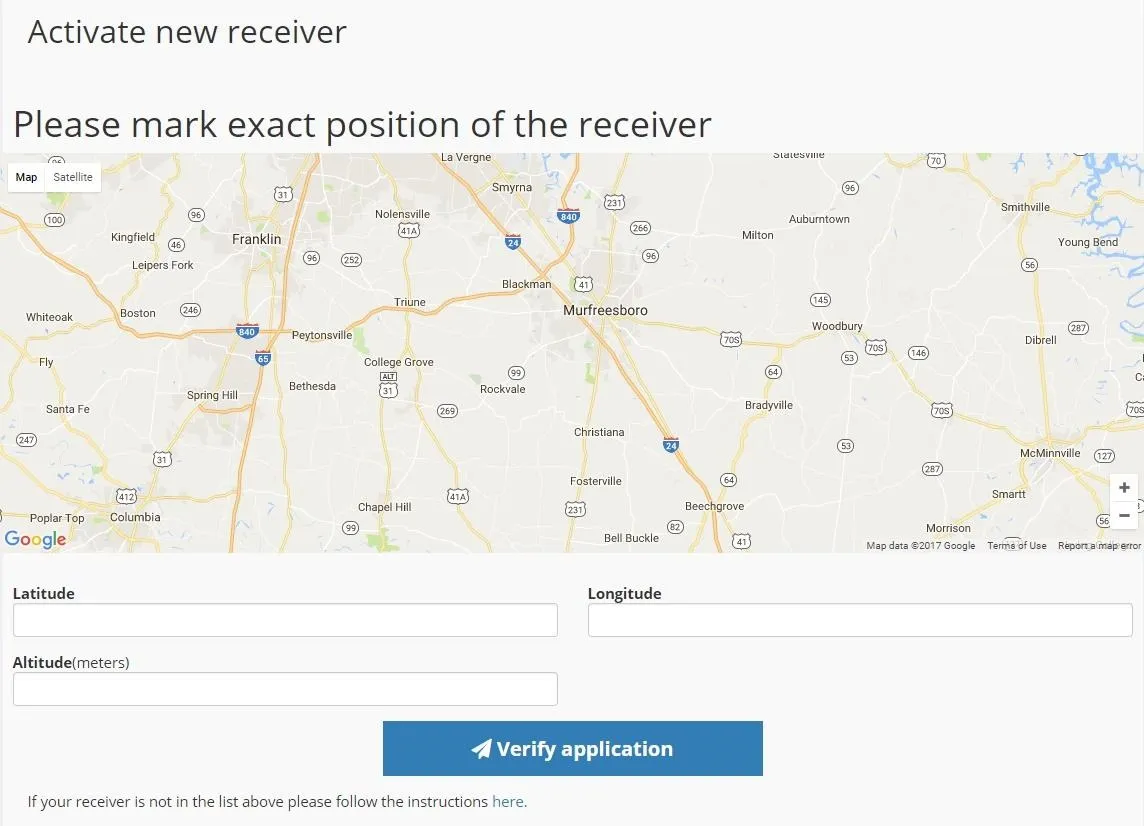
Go to flightradar24.com/activate-raspberry-pi, then click on "Activate." You may have to log in first.
Fill in your information and click "Verify application."
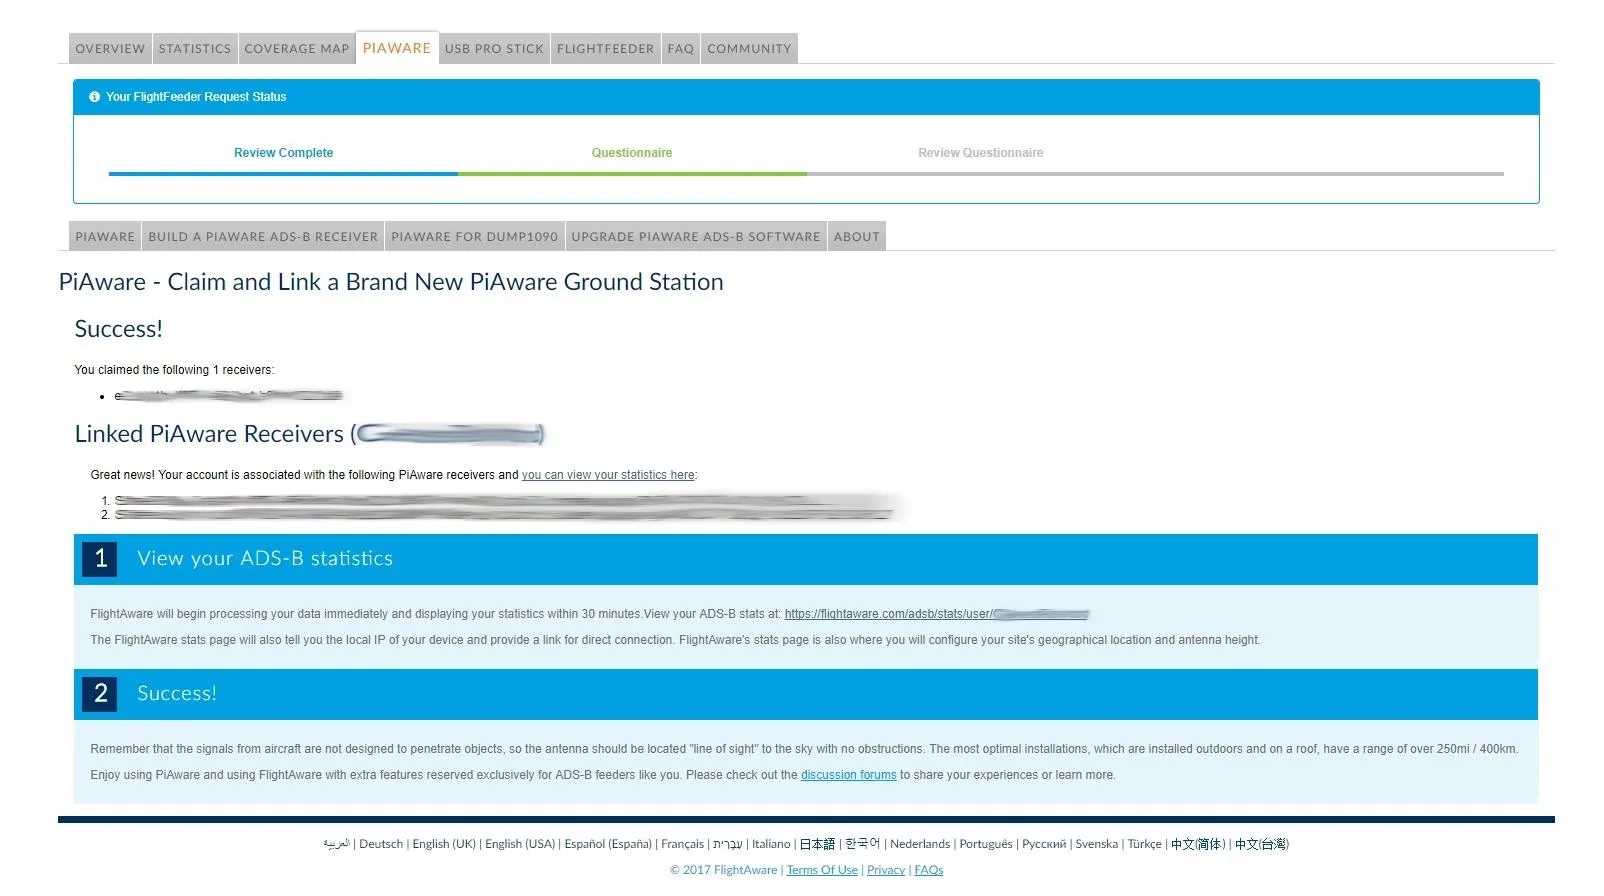
Activate on FlightAware:
Visit flightaware.com/adsb/piaware/claim. The claim page should look something like below. You may have to log in first.
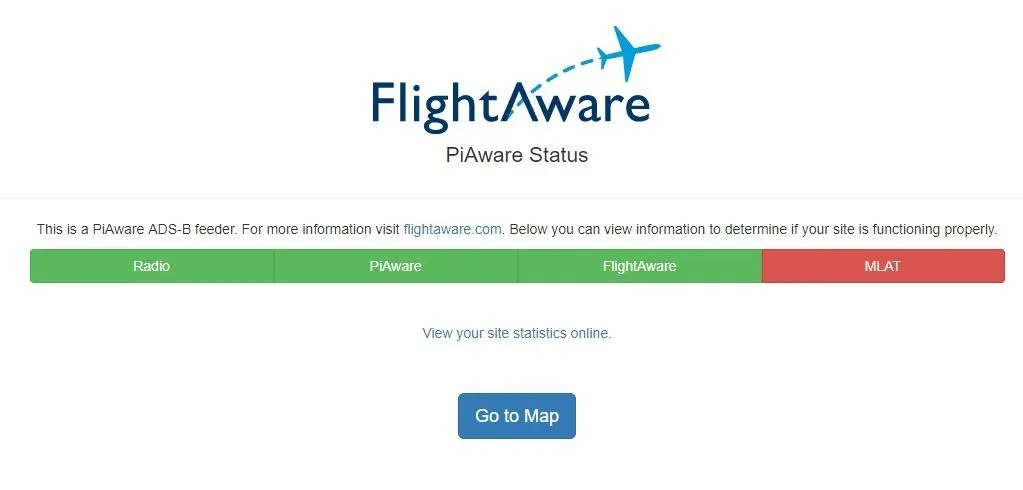
Once that is done, you can type you Pi's IP address, which can be found on the claim page, into your browser, and you'll be taken to a page like the one below. Green means that feature is working, red if it isn't. Click on "View your site statistics online" to go to your user page and configure MLAT, if you want to enable it. And now, we can use the pièce de résistance of FlightAware, click "Go to Map."
This view allows you to see aircraft that are normally blocked in the app or on the website. It's really up to your own detective work to spot the spies in the sky but the FAA does help you.

It is also useful to turn off and on the "Show All Tracks" in the top right (e.g., a plane doing perfect circles right over your house might be suspicious).
Protect Your Pi
The Pi is up and running, but not yet ready to go outside for the long term. If you only want to only use it for a few hours when it's nice out, then you don't really need any protection just mount it somewhere. However, if you are going with a long term 24/7 setup, it's recommended to use an environmentally sealed box such as a plastic electrical box (as metal ones will interfere with the Wi-Fi) found at the hardware store. It's up to you how to do this, as it will depend greatly on your mounting location. This should be as high as possible, with the antenna mounted vertically.
When you're done, only the antenna should be exposed with a power cable running to the box.
View Your ADS-B Statistics
Once you are up and running for some time, you can compare your stats with others around you and the leader board globally. This can help identify any range issues you've been having, and see how you rank collecting flight data.
In a future article, we will look more closely at how to actually identify suspicious aircraft through the use of an "R" program.
- Follow Null Byte on Twitter and Google+
- Follow WonderHowTo on Facebook, Twitter, Pinterest, and Google+
Screenshots by Hoid/Null Byte


Comments
Be the first, drop a comment!