


Analysis of photographs and social connections can be a huge component of social engineering. Understanding who a person is, as well as who they know, can establish links within a company. This information could be used by hackers to execute elaborate social engineering attacks.
OSINT (open-source intelligence) is a term used to refer to the gathering, evaluation, and application of publicly available data. To quote the Central Intelligence Agency, "Information does not have to be secret to be valuable. Whether in the blogs we browse, the broadcasts we watch, or the specialized journals we read, there is an endless supply of information that contributes to our understanding of the world."
One of the most common forms of such information found on the internet is not stored in plaintext, but rather in photographic content. Traditionally, these images had to be filtered manually by a human viewer to determine and evaluate their content, but with the availability of facial recognition software, this whole process can be automated.
Facial recognition has generated a lot of news and discussion regarding the use of biometrics, as well as the effects of this technology on data collection and privacy. While this technology is frequently used on platforms such as Facebook and is gaining widespread use in law enforcement worldwide, the backend technologies which allow one to use facial recognition for their own purposes are now easily accessible and available for use in free and open-source implementations.
In this tutorial, we'll use the Face Recognition Python library to analyze and discover images based on the people within them. We'll look at how batches of images can be crawled for and discovered, as well as look at how to generate statistics and conclusions about an individual or website.
Install the Prerequisites
The Python library we'll be using, Face Recognition, is available directly through the Pip package manager on Linux and macOS. While the package isn't officially supported on Windows, an installation guide is available, as well as a preconfigured virtual machine image.
Before beginning installation, make sure your operating system is up to date. On Debian-based Linux distros such as Ubuntu and Kali, repositories can be updated and new software installed by running the command below.
sudo apt-get update && apt-get upgrade
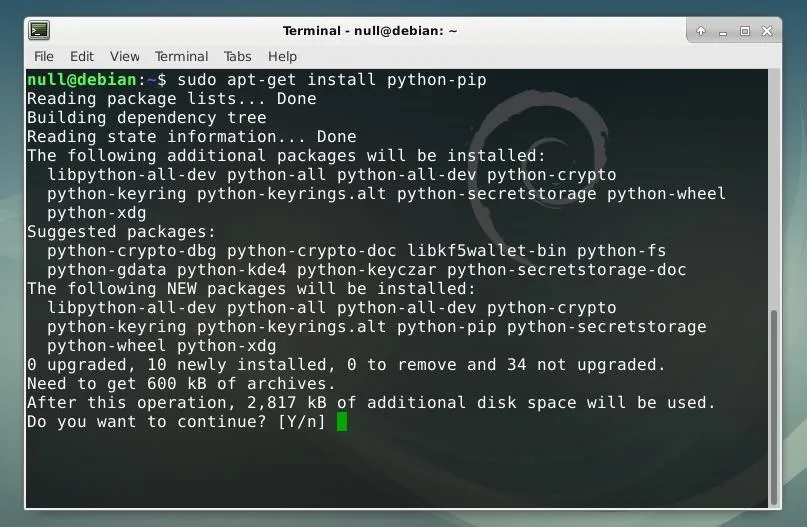
While Pip is included by default in some distributions, it can also be installed by running the command below. This command will fetch the newest version of the package and install it.
sudo apt-get install python-pip
Once Pip is installed, we can use it to install the Face Recognition library by running the command below.
sudo pip install face_recognition
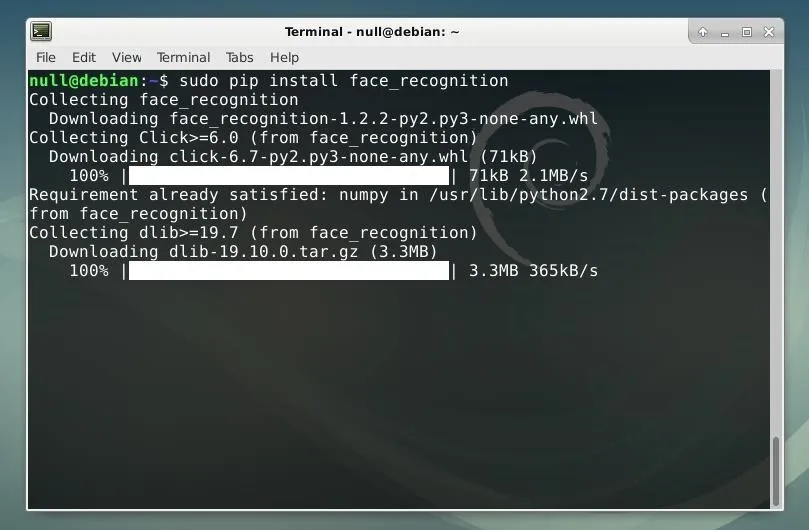
Once the Pip installation completes, the library should be ready to use!
Organize Data for Analysis
The library used for facial recognition being implemented in Python means it can be implemented into other applications with relative ease. This means that the addition of facial recognition function could be added to live webcam streams, web crawlers, or other formats where images or videos containing faces are displayed digitally. This, however, requires the writing of additional original code. Instead, in this tutorial, we'll use the included command line tool and combine it with other system utilities to perform similar tasks without the need to write new scripts.
The included command line tool is intended to work with two batches of files. One folder will contain a set of recognized faces, the other a set of images which the user desires to compare to this set.
To create a set of images to filter for specific individual faces, we can recursively download a website, such as the one below, using Wget. In real-world scenarios, a pentester or researcher may instead target a specific business's domains, image galleries, or even social media or other sources to try to download as many potentially relevant images as possible.

Wget can be operated from the command line and be used to download anything from a single page or image to an entire website. A command such as the one shown below will follow every link within a given domain and download all content available on that page. This command can be quit at any time by pressing Ctrl+C, otherwise, it will run until the given request completes.
wget -p -r -E -e robots=off --convert-links -U mozilla --level 1 whitehouse.gov

- The -p flag specifies that additional content such as images, stylesheets, and scripts are also downloaded by the tool.
- The -E flag mandates that each file downloaded is saved with its full file extension, which will make it easier for us to filter for images.
- The -r flag is for recursion so that links and other directories are also downloaded.
- Later in the string, the level of recursion is specified as --level 1. This ensures that links from the index page are followed once. To allow links to be followed to an increased depth, the number can be increased from 1 or the flag can be removed to attempt infinite recursion.
- If one wished to make sure that no files are to be downloaded from other websites, the --domain flag can be used, followed by the domain which the command should be restricted to.
- Keep in mind that recursive requests can be blocked or cause issues on some servers, so you may wish to limit your recursion or cap your request speed by using the -w flag to create a delay between requests.
- Using the -e robots=off avoids the request from being dismissed or blocked as an undesired web crawler.
- For the same reason, the -U mozilla argument is used to specify that a Mozilla useragent should be used so that the tool appears to be a web browser.
- The --convert-links flag reformats links so that the page can be more easily utilized offline. While this is not necessary for the purpose of filtering the images downloaded from the site, it may make it easier to identify where the images were located on the webpage retroactively.
Once we've let the program run for the desired duration, we can make duplicates of all of the image files in a new directory to be able to more easily work with them. First, create a new directory by running the command below.
mkdir unknown_faces
Next, copy all image files which were retrieved from the Wget request into this new directory by running the following two commands, the first for JPG files, and the second for PNG files. The urlfolder string should be replaced with the name of the folder which Wget created, usually corresponding to the URL or domain used in the initial command.
cp urlfolder**/*.jpg unknown_faces/
cp urlfolder**/*.jpg unknown_faces/
The cp command copies any matching files, followed by the directory argument, in this case, whitehouse.gov. The ** (double asterisk) following this directory specifies recursion, followed by a * (wildcard) for any JPG or PNG images. The last parameter of the string specifies that files should be copied to the unknown_faces directory.

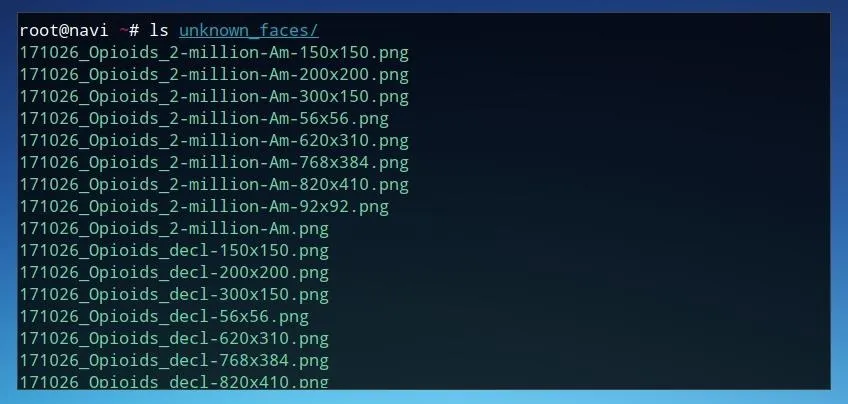
Once these images are moved to this new directory, we can use ls to view the files within this folder. The command below will list the contents of the unknown_faces folder.
ls unknown_faces/
We can also forward the output of this command using a | (pipe) redirection operator in order to get a count of how many image files were discovered. This may be useful later in order to identify the frequency of a given face within a set of images. This can be done by running the command below, where the output of the previous command is sent to wc with the -l flag to count the number of lines.
ls unknown_faces/ | wc -l

The output of this command shows that there are 178 image files which were saved by Wget. Once these images are ready to use, we can create a positive identification list for the faces we would like to find within this dataset.
Prepare Identification List
To begin preparing a list of known identities and faces, create a new folder outside of the directory of the images you wish to parse. From the Wget-created directory, one can move up one directory by running cd ../, create a new directory titled known_faces by running mkdir known_faces, and finally move into this directory by running cd known_faces.

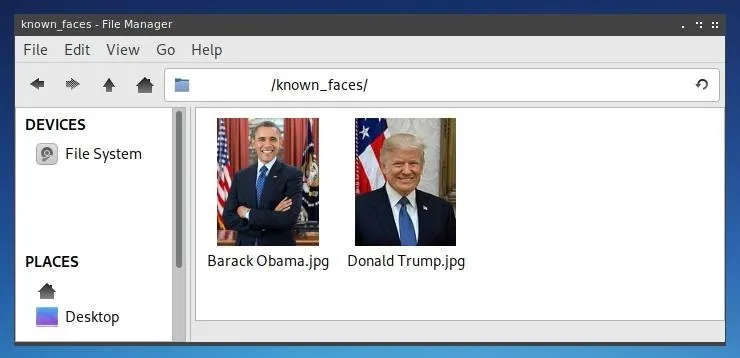
Once this directory is created, one can save any files they wish to be used as a positive identification list to this folder. Clear photographs of any person are ideal for facial recognition, such as those often used as profile photos on "Contact" webpages. Ensure sure that only one face is visible in any known face photo. One may also wish to name the files something which corresponds to the person in the photo, as the filename of the photo will be returned when any positive identification is made.
Once these directories are prepared, the face_recognition command line utility is ready to be run.
Use Facial Recognition to Identify Individuals
The command line utility included with the Python Face Recognition library is relatively simple to run, requiring only two parameters. The first is a directory of known faces, and the second is a directory containing faces to attempt to identify. With these folders titled according to the previous steps, the command below will run the tool.
face_recognition known_faces/ unknown_faces/
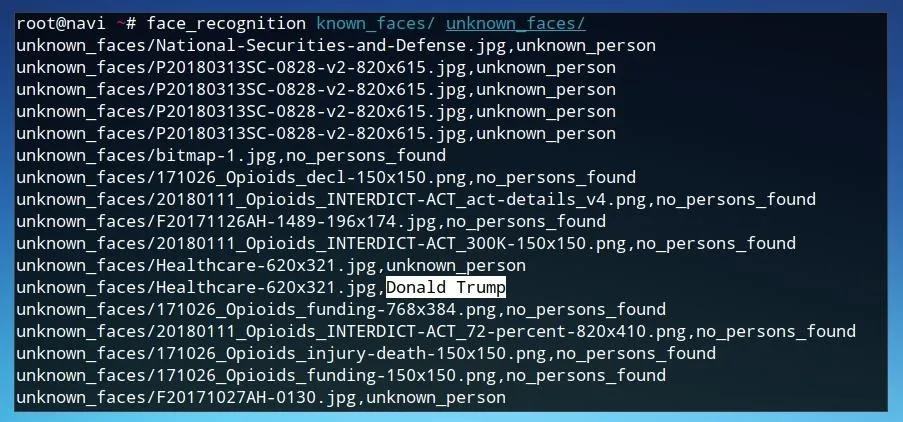
As the program runs, it will return filenames followed by either a positive identification of a specific person, a negative identification of an unknown person, or no persons found if there are no faces in the image. To make these results slightly more useful for automated data manipulation, we can run the same command followed by a > redirector to send the output of the program to a text file, such as in the example below.
face_recognition known_faces/ unknown_faces/ > results.txt
We can use this text file as a reference to analyze and utilize the results of the facial recognition matches.
Analyze Facial Recognition Matches
One possible way to understand the data results from the facial recognition tool is to look for all of the files which matched with a specifically identified face. We can use grep and the results.txt text file to see each match made with a given face. The command below will return every line in the text file which was identified with the name Donald Trump.
grep "Donald Trump" results.txt

We can also use a combination of other system utilities to determine the frequency of each result of the program by running the command below.
cat results.txt | sed 's/.*,//' | sort | uniq -c
First, running cat results.txt reads the contents of results.txt as standard input. This is sent to sed, where everything before and including the comma in each line is removed. This list of results is then sent to sort where each result is grouped together. Finally, this is used as input for uniq which as a result of the -c parameter counts the number of occurrences of each line.
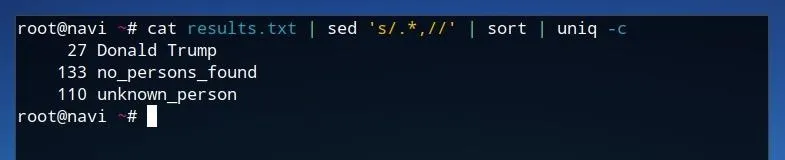
This produces a list where each result is listed with its corresponding frequency, allowing for simple analysis of larger datasets.
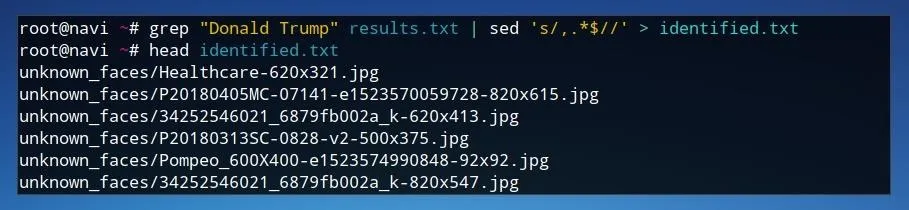
If we wish to have a look at the specific images identified by the facial recognition tool, we can use a similar technique. We can use the command below to produce a new text file which is a list of filenames which were tagged with a given result by the program and saved in the previous output file.
grep "Donald Trump" results.txt | sed 's/,.*$//' > identified.txt
In this case, all images identified as Donald Trump are searched for using grep in the results.txt text file. These results are sent as standard input to sed, where everything including and following the comma is removed from each line. Finally, the redirection operator > sends the output to a text file named identified.txt.
If we run a command like head identified.txt, we'll see that the file only contains filenames. We can use this filename list as input for a short script to copy each of these files to a new folder. We can create a new script file using Nano by running the command nano identified.sh.
#!/bin/bash
mkdir identified
while read line; do
filename=$(echo $line | sed 's/.*\///')
cp $line identified/$filename
done < identified.txt
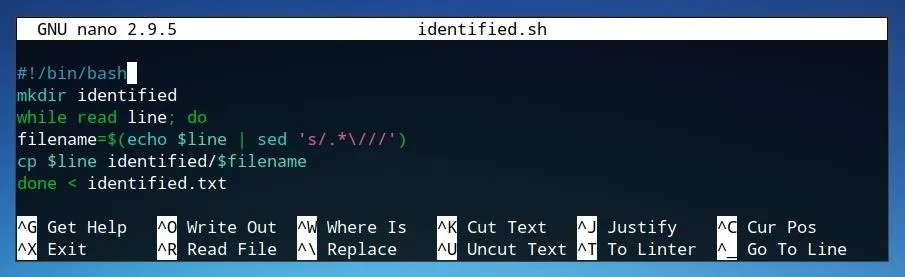
- The first line of the script, #!/bin/bash, declares the script as being intended for Bash.
- The second line creates a new directory named identified where all of the positively identified images will be moved to.
- The third line, in combination with the last line, reads the text file identified.txt as input such that each line of the file is modified individually within the while statement.
- The first line of the while statement, the fourth line of the code, creates a variable named filename. This variable is assigned to the filename of the file without the directory location, using sed to remove any characters before the slash in each line.
- This variable is utilized in the last line, where each file within the identified.txt text file is copied to the identified directory and assigned its original filename.
Once this script is written out in Nano, it can be saved by pressing Ctrl+O, and Ctrl+X can be used to then exit the program. After the script is saved as identified.sh, we can add execution privileges to the file by running the command below.
chmod +x identified.sh
Now, we can run the script itself by simply typing ./identified.sh and pressing enter/return.

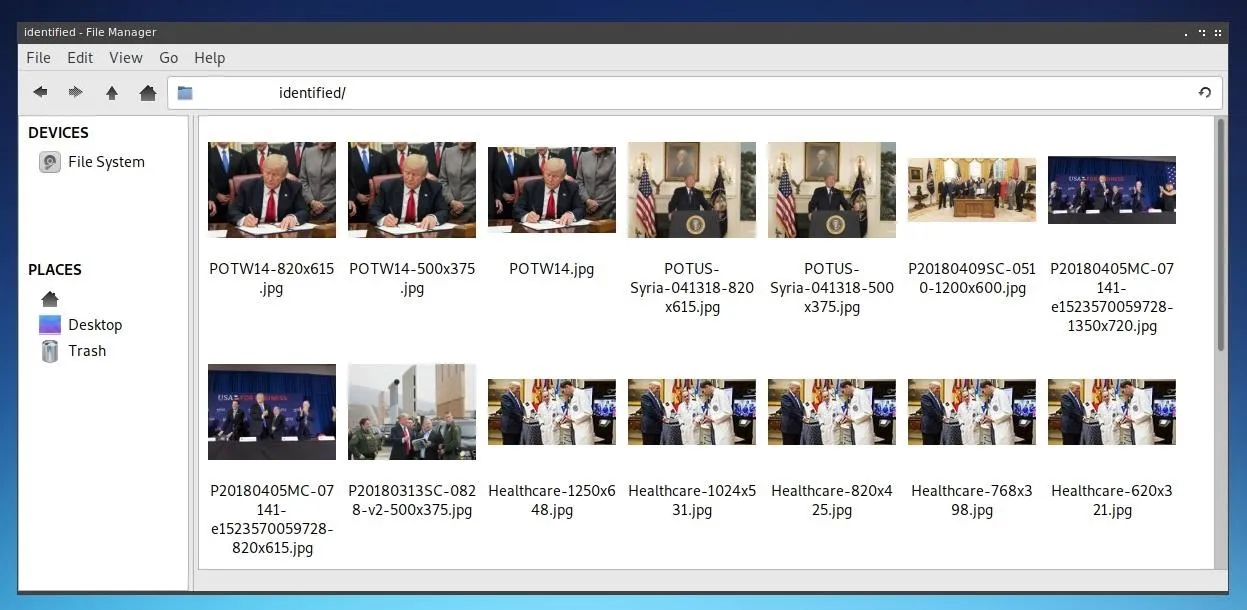
Once the script has finished running, you can navigate to the "identified" directory and see all of the images which were discovered that match your specific query! This automatically filtered process expediates a traditionally time-intensive problem requiring considerable human interaction to identify and sort images.
Protecting Against Facial Recognition
Unfortunately, the only real protection against facial recognition is to limit the exposure of your face, online or otherwise. This can mean using stricter privacy settings for accounts, choosing not to use social media, or even attempting to conceal one's face in public. Many of these precautions are relatively inconvenient.
In general, the dangers of facial recognition are more about the data attached to a given instance of an online profile or photo than the photo itself. Remember that whenever you choose to place any pictures or information online, you can never be completely certain of who may end up having access to them.
Thanks for reading! If you have any questions, you can leave a comment below or hit me up on Twitter at @tahkion.
- Follow Null Byte on Twitter and Google+
- Follow WonderHowTo on Facebook, Twitter, Pinterest, and Google+
Cover image by vchalup/123RF; Screenshots by Takhion/Null Byte


Comments
Be the first, drop a comment!