SSH is a powerful tool with more uses than simply logging into a server. This protocol, which stands for Secure Shell, provides X11 forwarding, port forwarding, secure file transfer, and more. Using SSH port forwarding on a compromised host with access to a restricted network can allow an attacker to access hosts within the restricted network or pivot into the network.
In this article, we'll look at one of the SSH port forwarding options, local port forwarding. Since this can be somewhat confusing, I'd like to talk a little bit about the idea of port forwarding first.
Why Port Forwarding Is Important
When we think of port forwarding, we usually think of it in the terms of a router. With a typical home internet setup, the router is connected to the WAN (wide area network), and it will have an IP address assigned by the ISP (internet service provider). On the other side of the router, you have your LAN (local area network). Hosts within the LAN are generally assigned IP addresses by the router.
In most home setups, the router also acts as a firewall, allowing outbound TCP connections and killing inbound connections. If you want to access a service on a machine within your local network, you will have to configure the router to forward connections on that port to your machine. This means that the entirety of the internet would have access to that service on your internal (or local) network. The router will take the incoming traffic destined for your service and forward it right on to your machine.
Now, let's expand on this a bit. Let's say the network is a little larger. We could have a Wi-Fi network for the public to use and another network for staff to use. All of the hosts would be connected to a gateway and segmented by the network. Like in our home example, we have one WAN connection, except this time we have two LANs. The router keeps the traffic from the public network from accessing the staff network.
When SSH Port Forwarding Comes in Handy
If you have administrative control of the router, you can configure it to forward traffic into the staff network. But what if you don't have administrative control? Maybe you have a low-level user account and can SSH in, but you can't access the admin panel and you can't modify any of the settings.
This is where SSH port forwarding comes in; we can use it to forward our traffic into a network we normally wouldn't be able to access, thus pivoting into the network. This doesn't just work on routers, this works on any node with SSH enabled and access to two or more internal networks.
Let's Take a Look at This in Action
In one scenario, we are connected to a public perimeter network (demilitarized zone, or DMZ) at a local university. Through enumeration, we have discovered that the firewall is running SSH with extremely weak credentials. We're coming from the DMZ, and our target is the intranet. The only thing standing in our way is the firewall, which we can log in to via SSH, but our captured account isn't privileged enough to change any settings.
The firewall protects the intranet (university staff hosts, the target) from external malicious traffic, but allows both networks access to the internet. We are unable to connect to hosts in the LAN from the DMZ, and based on the ease of access to the firewall, I suspect the hosts on the LAN are incredibly soft. Weak credentials combined with a lot of administrators not treating their internal networks as hostile means the security on the hosts within the LAN should be next to none.
Since it's an internal staff network, it probably contains or has access to quite a bit of confidential information. If we're conducting a penetration test as a white hat, we want to be able to put that confidential information in a report. If we're black or gray hats, we might be looking to exfiltrate, change, or delete that data. The question is how do we get access?
In order to access the internal network, we're going to have to get tricky and pivot into it, since we can't directly connect to it. This is where SSH port forwarding comes in handy.
The Setup
In this situation, we have three machines — our attacking machine, the firewall, and a host within the internal network. In a real engagement, there will usually be more than one machine on the internal network, but for learning purposes, all we need is one machine.
My attacking machine is on the 192.168.1.0/24 network, which represents the DMZ network. The firewall is accessible as a gateway from the DMZ on the same network. It is also accessible as a gateway from the internal network, which is in the 192.168.56.0/24 range. These addresses are represented using CIDR notation.
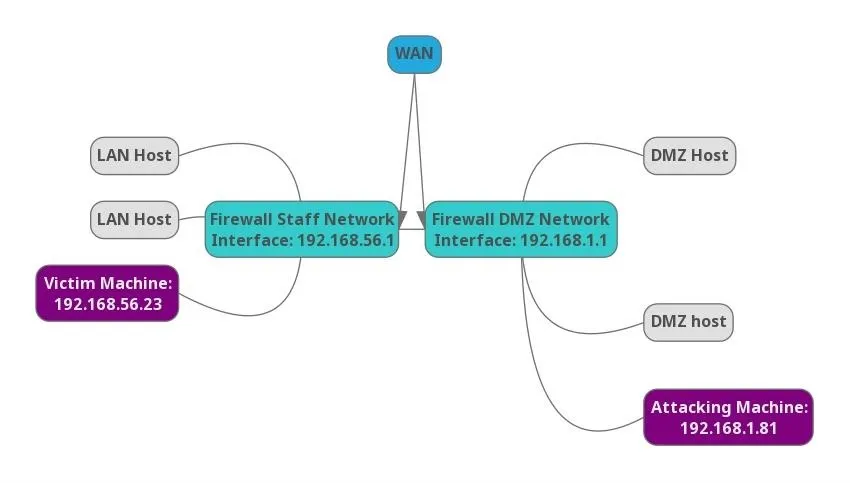
Our network.
The goal here is to be able to discover and attack hosts within the internal network from the DMZ network. Since we can't just connect directly to a host within the internal network, we will use the DMZ firewall's SSH service to reroute our traffic into the internal network.
Many beginners are not aware of the full feature set of SSH. Without a pivot into the internal network, an attacker would be totally reliant on the toolset contained on the compromised firewall. Which is likely extremely limited. Sometimes you'll get Nmap if you're lucky. An attack could be carried out in this manner, but it's much easier to work with a large toolkit like the one included in Kali Linux. Tools like Metasploit can really make things easier.
To simulate this setup, I configured a virtual machine within the compromised host with a host-only adapter. This makes the victim non-routable by traffic on my DMZ network. If you want to try this at home, simply create a Linux virtual machine with SSH enabled in VirtualBox and configure the network adapter to host only. The host operating system will need to have SSH enabled, and you will need another machine to access the host operating systems SSH service.
When all the configuration is done, we should have a setup that looks like this:

What happens when the attacking machine attempts to ping the guest machine? We can't route traffic to the victim machine, but we can access the host machine via SSH, and that's all we need.
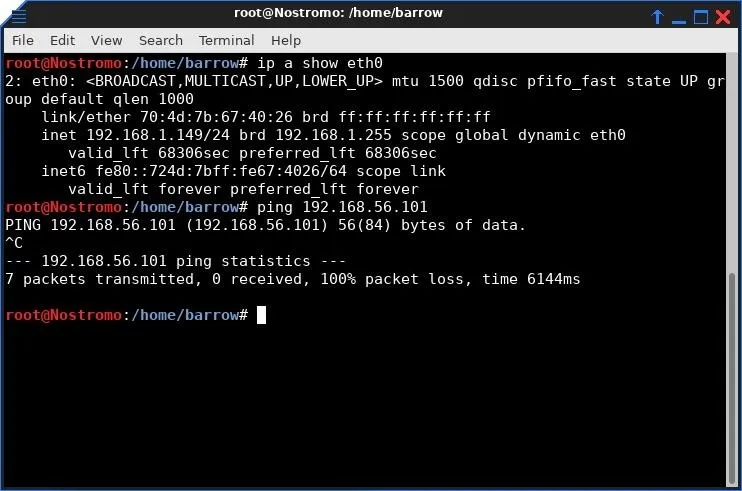
Here, we see that the attacking host cannot route to the vboxnet0 network.
Gathering Information
Before I can properly pivot in the network, it's probably a good idea to have a look at what I have access to via the firewall. I open a terminal and login with SSH by typing the following, replacing victimmachine with the IP address of the victim computer we have access to.
ssh user@victimmachine
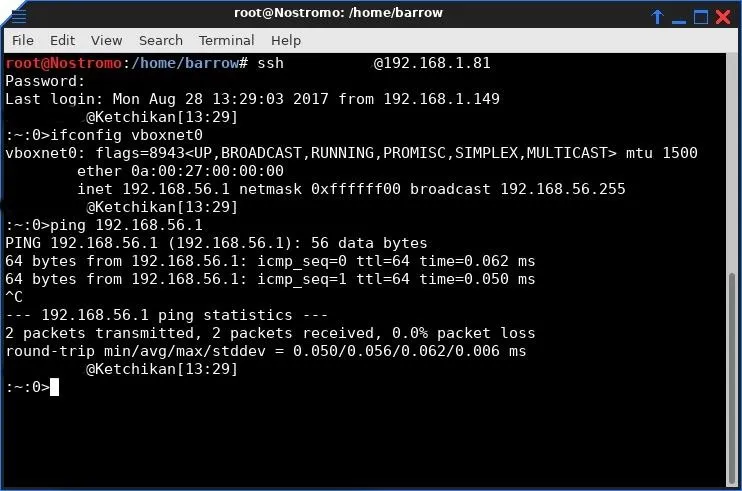
I didn't post the full output of the ifconfig here since my machine has quite a few interfaces and the full output would be confusing. Since I set up these networks, I know the interface that we are targeting. If this were an actual penetration test, part of the post-enumeration of hosts is gathering connected interfaces, just in case there is a pivot available there. If there are multiple connected network interfaces, you should be able to pivot into any of those networks.
Local Port Forwarding
Using our SSH connection to the firewall, it's advised to do a bit of network recon. You will want to discover what hosts are active within the internal network. If you're lucky, Nmap will be installed on the compromised firewall, otherwise, you may have to resort a manual approach. The manual approach would be writing a ping sweep bash script (which will not spot machines with ping blocked). For this example, there is only one machine running on the network, and port 80 (HTTP) is open.
Web applications are often an excellent attack vector. Depending on the owner of the process, a web application could return a low privilege shell all the way up to an admin shell. Except I have limited information. I know there is a web server running on the host in the internal network, I just don't know what it is.
In order to learn more about this web application, I will configure a local port forward to the application using the following command.
ssh -L 8080:internalTarget:80 user@compromisedMachine
The -L option specifies that connections to the given TCP port on the local host are to be forwarded to the given host and port on the remote side. This allows us access to the internal network via the compromised firewall.
In our case. the internal network is anything behind the vboxnet0 interface. More technically, this command creates an SSH tunnel using your local port 8080 to connect to the internal target machine through the firewall. SSH will listen on localhost port 8080 for any connections. When it receives a connection, it will tunnel data to an SSH server, in this case, our compromised firewall. The compromised firewall then connects to the target server and port returning data back across our SSH tunnel.
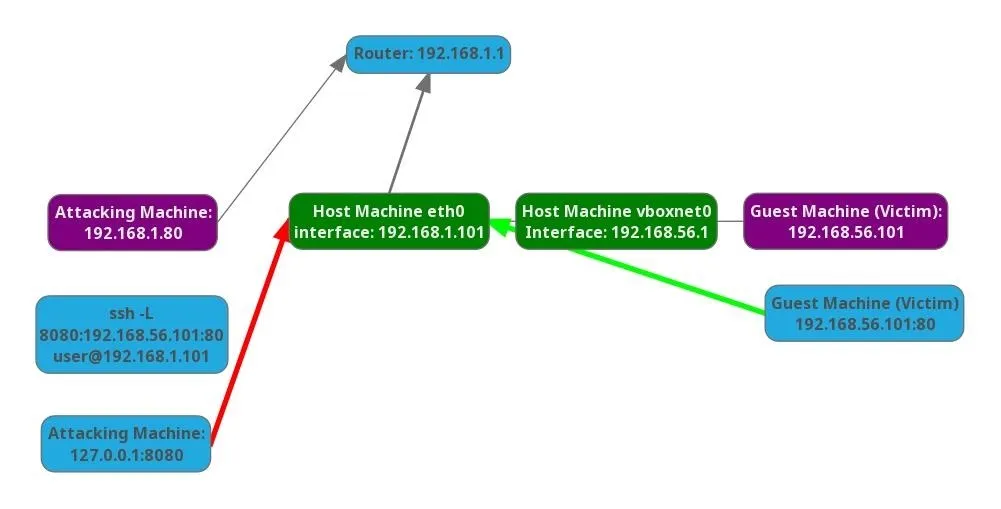
When executing this command, you get a standard interactive SSH connection to the firewall, as well as port forwarding. If you don't want the shell, you can change the argument in your command to -NTL. The N argument tells SSH to not execute a remote command, and the T argument tells SSH to disable pseudo-terminal allocation.
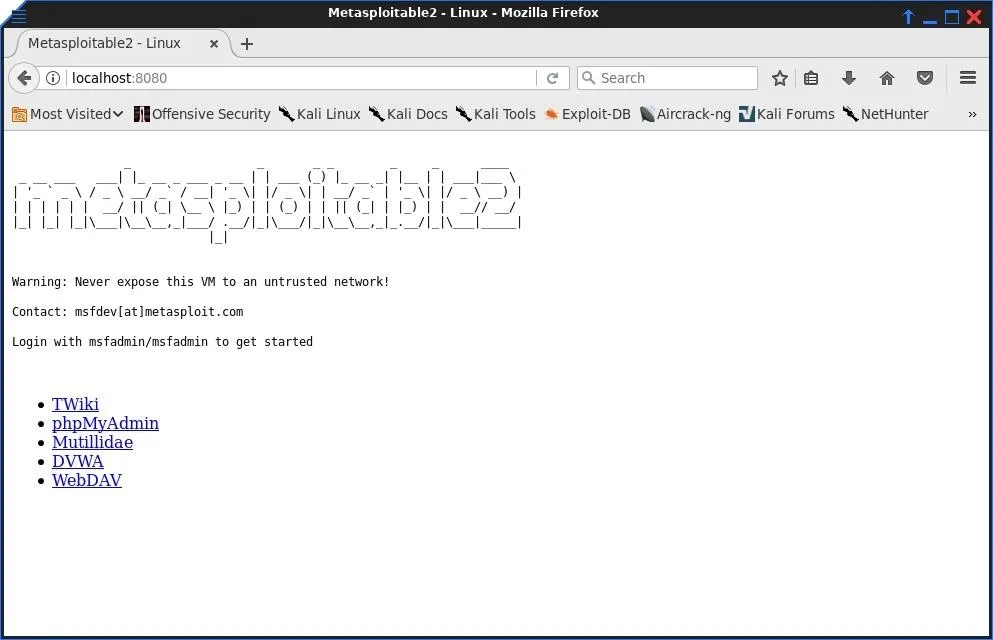
Using a simple SSH command, we have pivoted into an internal network that would normally not be accessible to us. This allows us to use our own toolkit instead of relying on the initially compromised host to have what we need.
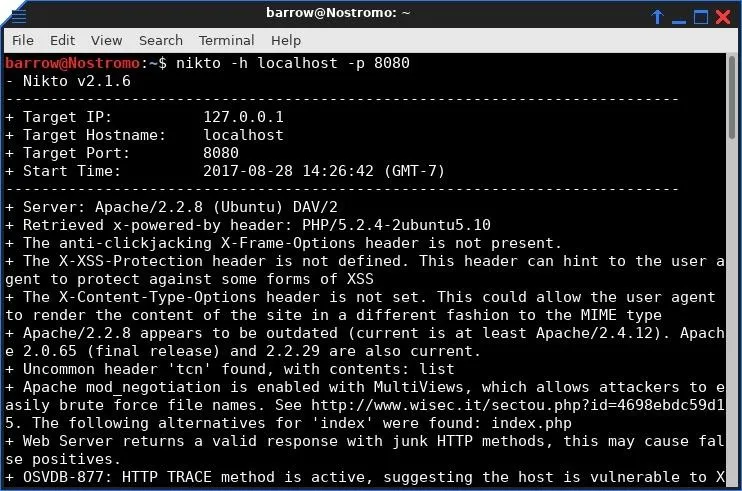
Of course, we aren't limited to forwarding HTTP. We can forward any port on the internal machine, including SSH, providing we know the port of the service we are attempting to forward.
It's as easy as changing a port number in our SSH command. Below, we forward the SSH service on the victim machine back to our local port 8080. This would allow us to brute force SSH or try credentials for login if we have them.
ssh -L 8080:internalTarget:22 user@compromisedMachine
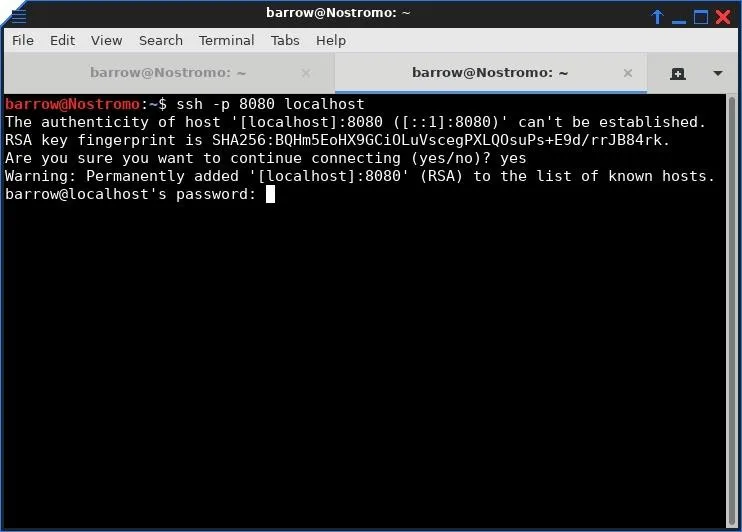
Local port forwarding is a great way to pivot into internal networks. It is also an excellent way to bypass network restrictions, such as a block on web traffic to Null Byte! Some networks, for example, may be locked down to only allow traffic to exit via a few limited ports. As an added bonus, all traffic we generate from the local host to SSH server is encrypted.
In the next article, we'll be looking at remote port forwarding. It's similar to what we're doing with local port forwarding, but as always with traffic redirection, it's a brain twister. So make sure to keep an eye out for that guide in the future.
As always, questions or comments you can reach me on Twitter @0xBarrow.
- Follow Null Byte on Twitter and Google+
- Follow WonderHowTo on Facebook, Twitter, Pinterest, and Google+
Cover image and screenshots by Barrow/Null Byte


Comments
Be the first, drop a comment!