


With Virtual Network Computing, you don't need to carry a spare keyboard, mouse, or monitor to use your headless computer's full graphical user interface (GUI). Instead, you can connect remotely to it through any available computer or smartphone.
Virtual Network Computing, better known as VNC, has been around for decades and can be used to control computers running a plethora of different operating systems including Windows, macOS, Linux, and even mobile platforms like Android.
By using VNC, you are able to see and control the host machine's desktop from another remote device. In our guide, we'll be using a headless Raspberry Pi with Kali Linux as the host machine. VNC relays the keyboard and mouse functions from your device with an interface, like a laptop or smartphone, to the Raspberry Pi while issuing graphical screen updates back to the interface device. The end result is as though you were sitting behind the screen of your Pi, even if it's miles away.
There are many reasons to use VNC to connect to a computer that doesn't come with its own screen or keyboard, such as our Kali Pi. A big reason is having discreet access to a Kali Linux box in environments where a smartphone may be the only tool you can visibly access.
In our Kali Pi tutorial, we set up the ability to SSH into the Pi, but this doesn't allow us to run multi-bash programs like Airgeddon which need to open multiple windows to function. Imagine easily creating Evil Twin networks and wreaking wireless havoc on your iPhone while controlling the full Kali Linux GUI of a discreetly placed Raspberry Pi.
This installation process will be similar across the various operating systems that support VNC, which is virtually all of them. In this tutorial, we will download and install the server portion of VNC on our headless Kali Pi, configure it to start at boot so we don't have to configure it each time, and finally install the VNC remote client on your laptop or smartphone you'll be controlling the Kali Pi through.
Requirements
- Computer or smartphone: This will be the device you use to remotely connect to the Raspberry Pi.
- Power supply: The Raspberry Pi uses a standard Micro-USB power supply from any typical phone charger.
- Ethernet cable (optional): This allows you to bypass wireless authentication by directly interfacing with local networks to which you have physical access.
- Local area network (LAN): This would be your router or modem if you are in a fixed position or your phone's wireless hotspot if you are mobile. In order for this to work, you need to be able to see your device on the same subnet, so ensure that the Raspberry Pi has an IP address and that you can ping. If you can't, it may mean you are not able to communicate with other devices on the network due to firewall or network settings.
Update the Headless Kali Pi
First, let's load up Kali on our headless Raspberry Pi. Connect to it either via SSH or by accessing it directly. We always want to run the apt-get update command in a terminal window to ensure that all our dependencies are up to date and working properly. Make sure that the Pi and the device you are using to connect to the Pi are on the same wireless or wired local area network.
Install the VNC Server Software on the Kali Pi
There are various versions of VNC, all with different purposes, but in this tutorial, we will be using TightVNC, as it's well-supported, has plenty of documentation in the Raspberry Pi community, and easy to install on any version of Pi.
Open a command window on your headless Raspberry Pi and type apt-get install tightvncserver. This will download and install the software. When that is complete, type tightvncserver. This enables the TightVNC service, and it will require you to create a password to access your device from another computer. Go ahead and create one now. You should note that TightVNC can only set up to an 8-character password when selecting one.
Once you enter a password, it will ask you "Would you like to enter a view-only password (y/n)?" Press N, because a view-only password will only allow you to see what is displayed on the machine, but not to be able to control it.
Configure TightVNC Server on the Kali Pi
Now, to be able to access our Kali Pi remotely, we need to run TightVNC on it at boot. On our headless Kali Pi, we will navigate to the directory by typing cd /etc/init.d. Next, we want to create a startup script, so you can use whatever text editor you prefer, but I like Vim. If using Vim, type vim /etc/init.d/vncboot to create the startup script. Next, we want to insert the script below into the blank document.
#!/bin/sh
### BEGIN INIT INFO
# Provides: vncboot
# Required-Start: $remote_fs $syslog
# Required-Stop: $remote_fs $syslog
# Default-Start: 2 3 4 5
# Default-Stop: 0 1 6
# Short-Description: Start VNC Server at boot time
# Description: Start VNC Server at boot time.
### END INIT INFOUSER=root
HOME=/rootexport USER HOME
case "$1" in
start)
echo "Starting VNC Server"
#Insert your favoured settings for a VNC session
/usr/bin/vncserver :0 -geometry 1280x800 -depth 16 -pixelformat rgb565
;;stop)
echo "Stopping VNC Server"
/usr/bin/vncserver -kill :0
;;*)
echo "Usage: /etc/init.d/vncboot {start|stop}"
exit 1
;;
esacexit 0
After all of that text is in place, we will save and quit by hitting the Esc key and typing :wq!. After the document is closed, we want to add permissions to this new startup script by typing chmod 755 /etc/init.d/vncboot. When that finishes, we want to add the dependencies to it by typing update-rc.d vncboot defaults.
Reboot the Kali Pi, and the VNC module will be added to the startup boot sequence.
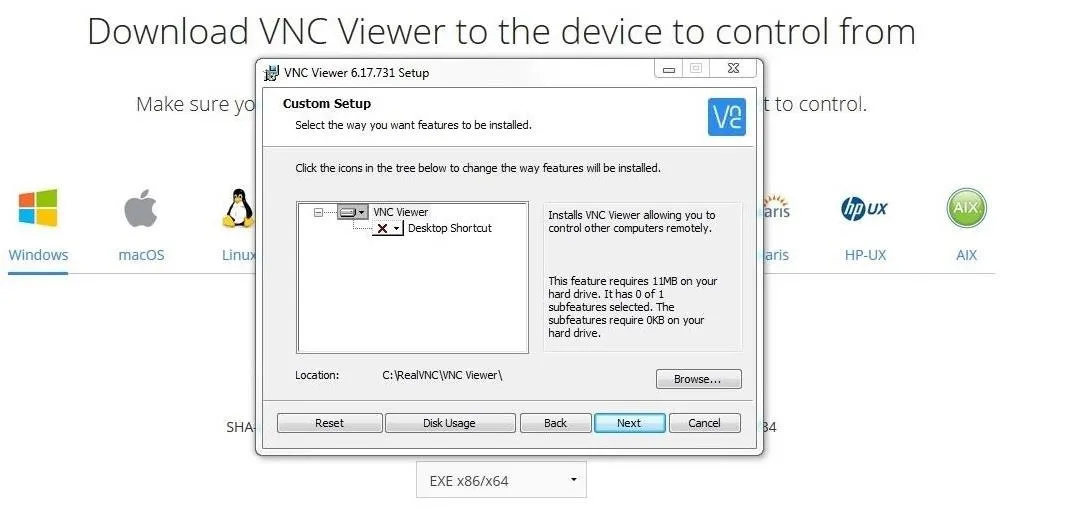
Download & Install the VNC Client
Now we can use any VNC client we want, but we are going to use RealVNC's "VNC Viewer" because it works on Linux, Android, and it's one of few that also works on Windows and iOS. You can download whichever version you want from the RealVNC website. Once downloaded, install it like you would any other program. In this guide, I'll be using Windows.
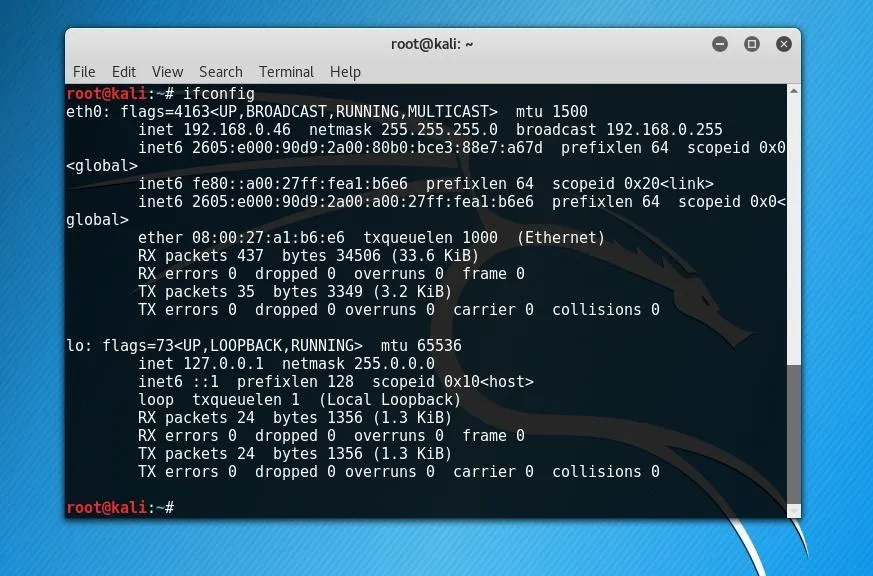
Find the Kali Pi's IP Address
After installing the client software, we want to go back into our headless Kali Pi. Again, connect either by SSHing into it or accessing it directly, then open a terminal and type ifconfig. Write down the Kali Pi's local IP address; it should look something like "192.168.0.x."
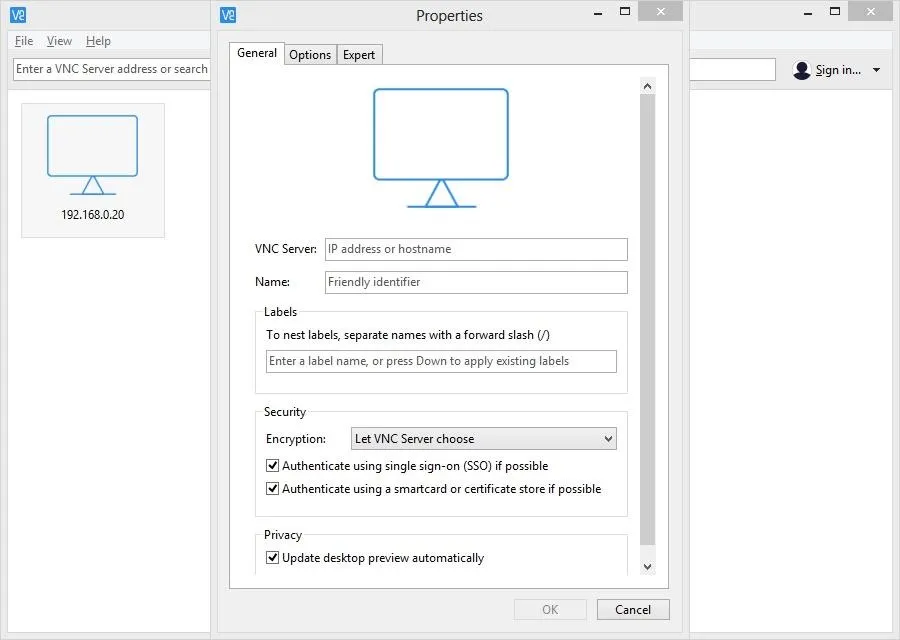
Connect to the Kali Pi via Our Computer
Next, let's jump back into our Windows machine and open up the VNC Viewer app. The following directions may be different if you are using it on another operating system.
In VNC Viewer, click the "File" option, and then click the "New Connection" tab. Now, let's add the Kali Pi's IP address to the VNC Server field. You can save this as any name that will help you remember this device in the Name field. Press "OK" to finish and save the settings.
Double-click on your new connection, and if successful, a window will pop up saying "The connection to this VNC server will not be encrypted." Because of this, it is not recommended to use this outside of your network if you are expecting privacy. Just press the "Continue" button. Another window will pop up asking for the password we created in the second step.
Finally, bam! If the connection was successful, you should see a screen like the one below.
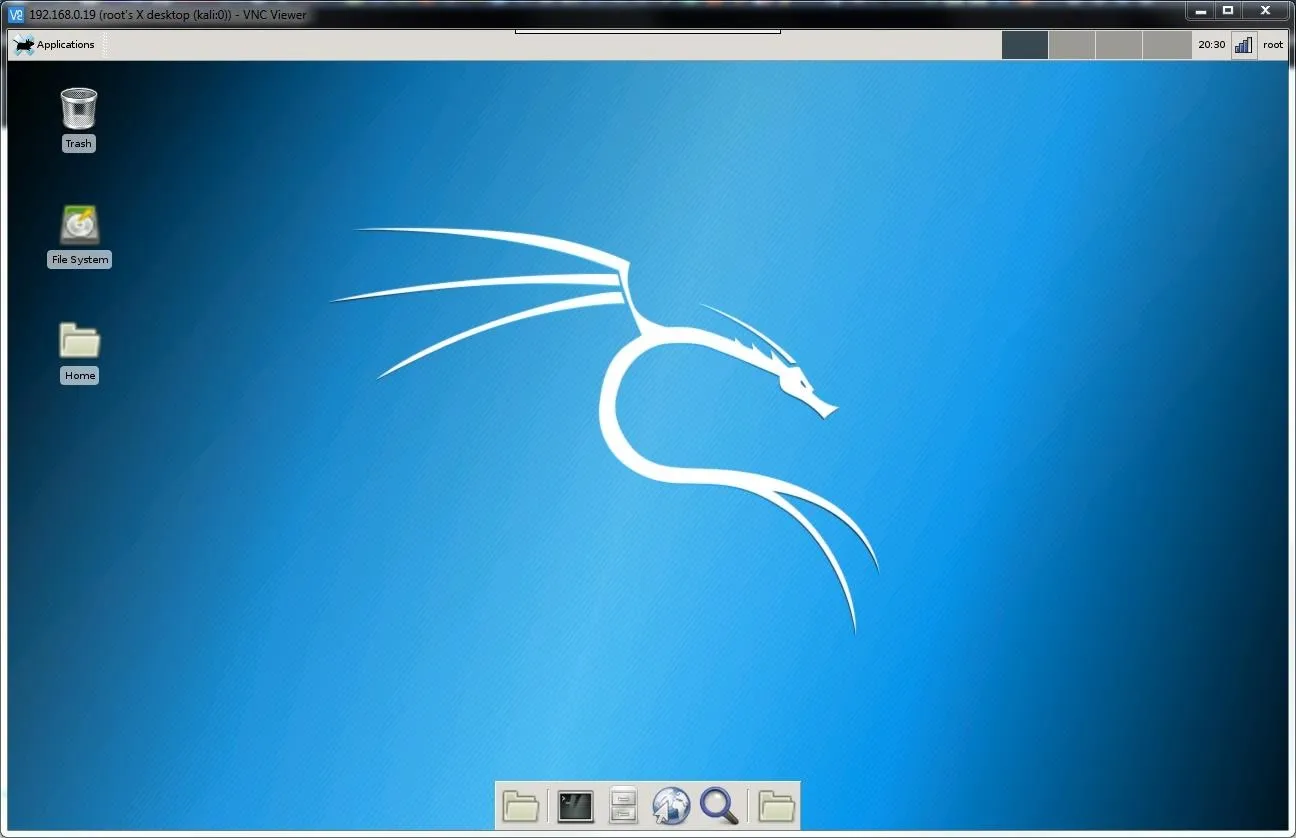
Now we can work on our Kali Pi without the need to bring a separate keyboard, mouse, and monitor. These steps should be similar across the various operating systems RealVNC supports, but there will likely be small differences between the desktop and mobile versions. You can VNC into your Kali Pi any time both your Pi and the device you wish to control it with are on the same Wi-Fi or Ethernet local area network.
If you want to do this on an iPhone, your display will look something like below.

This is just one basic foundation of the toolset that compliments our hacking environment. In practice, VNC allows us to more quickly access our headless hacking computer from any device we have handy, allowing us to deploy Kali Linux tools in the most inconspicuous way possible.
If you have any questions, you can leave a comment here or send a message on Twitter at @Nitroux2. And don't forget to stay connected and check out our social media accounts!
- Follow Null Byte on Twitter, Flipboard, and YouTube
- Follow WonderHowTo on Facebook, Twitter, Pinterest, and Flipboard
Cover photo and screenshots by Nitrous/Null Byte


Comments
Be the first, drop a comment!