Windows 10 and macOS have poor reputations when it comes to customer privacy and user policies. Our hacking Windows 10 and hacking macOS articles might make it seem like a reasonably secure operating system doesn't exist. But I'm here to tell you that there is a viable alternative that could provide some sense of security and trust.
There are quite a few noteworthy Linux distributions with excellent development records and support communities to choose from. To name just a few, there's Manjaro, BlackArch, Parrot Security OS, and Kali, but I decided to feature Ubuntu for several reasons:
- Ubuntu has a strong support community. This is the primary reason for choosing Ubuntu over other popular Linux distros. Compared to others, Ubuntu has a large support community that can be found at Ask Ubuntu, UbuntuForums, and on many IRC channels. In my experience, these communities are very receptive to beginner questions and will make users transitioning from a Windows 10 environment feel at home.
- No bloatware. Unlike Windows 10 and macOS, Ubuntu's installer features the ability to include only essential software. This means opting out of ridiculous games, commercial products, and preinstalled software that's going to waste RAM and CPU resources.
- Installing Kali tools is easy. Thanks to the Katoolin project, it's possible to quickly install hacking tools on Ubuntu that are found in Kali Linux. I don't necessarily advise users to install such tools on an Ubuntu machine, but I think Null Byte readers will appreciate this.
- Low system requirements. The Ubuntu developers recommend only 2 GB system memory (RAM) to run the operating system (OS). I've been able to run it comfortably with just 1 GB of RAM and lightweight distros like Xubuntu on just 512 MB. I've lost count of how many old computers Ubuntu has brought back to life thanks to its ability to run smoothly on old hardware.
Now, when you first set up an Ubuntu system, there are a few security considerations to keep in mind. After the initial install, there will be some tasks you'll want to perform for a more secure system, but we'll cover those in future parts of this mini-series.
Overall, this series is somewhat geared toward Windows 10 users interested in transitioning to Ubuntu, so I'll start building the operating system from scratch at the point of installation. Readers who already have Ubuntu installed can skip to later parts in the series.
Disclaimer: These articles are not meant to be an ultimate hardening guide or preventative guideline for defending against government actors or well-funded agencies. These are merely a few simple things Ubuntu users can do to improve their defenses against physical attacks and while on public Wi-Fi networks.
Download the Ubuntu ISO
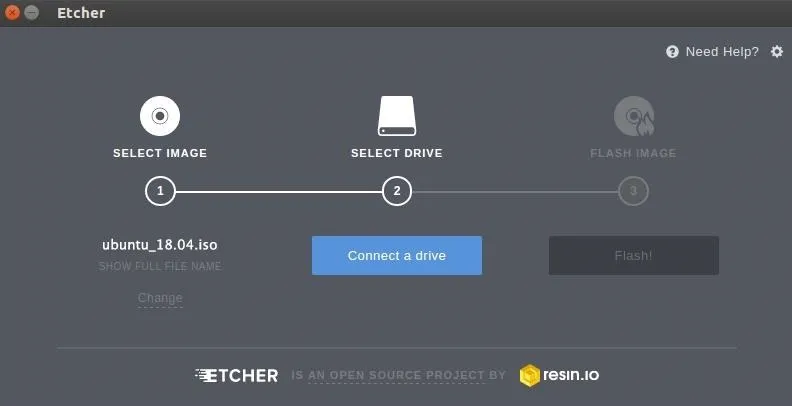
To properly protect against physical attacks, Ubuntu should be hardened from the ground up during the installation. First, download the latest Ubuntu ISO. As of Dec. 3, 2020, the newest versions are Ubuntu 20.04.1 LTS (with updates until 2025) and Ubuntu 20.10 (with updates until July 2021). Next, verify the ISO, and create a Live USB. I recommend Etcher, a cross-platform live USB creator.
Insert your USB flash drive into your computer, choose "Select image" in Etcher, then pick the Ubuntu IOS you downloaded. Next, select "Connect a drive" or just "Select drive," and choose your USB stick. Click on "Flash!" and wait until it's done.
Boot into the Ubuntu Live USB
On the computer you're installing Ubuntu on, boot from your new Live USB.
The key required to boot into the Live USB varies depending on the manufacturer of your computer. A lot of OEMs use F12, such as Dell and Lenovo. ASUS uses the Esc key. Consult your OEM's online documentation if you're unsure. You can also just start up your computer normally to see what it is; After first starting up, a lot of computers will show the shortcut key to the boot menu.
Select your Ubuntu Live USB drive, if necessary, then select "Install Ubuntu," or something similar, to begin the installation process.
Minimize the Attack Surface
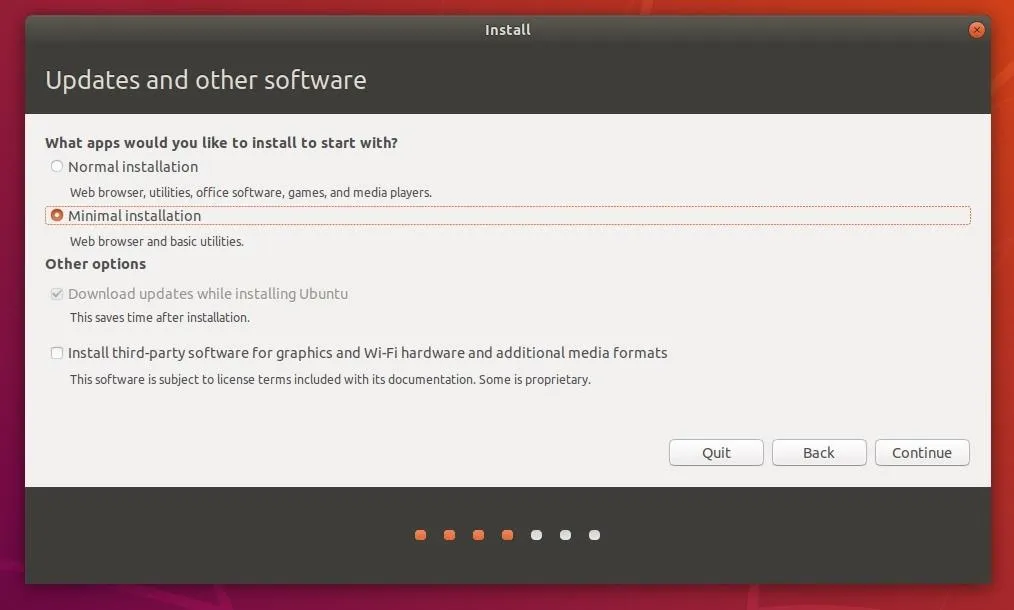
In the installer, use the "Minimal installation" option. This won't help with physical attacks, but it can only be done during the initial installation process. Minimizing the number of packages installed will prevent Ubuntu from loading unnecessary applications. If it's discovered tomorrow that Transmission, a popular torrenting application, or Thunderbird, a popular email client, are vulnerable to a new exploit, your system will be completely unaffected.
The minimal installation will decrease the attack surface for applications which may be discovered to contain vulnerabilities in the future. Third-party applications and commercial software can always be installed at a later time on an as-needed basis.
Defend Against Hard Drive Forensics
There's a constant tug of war between security and convenience. To make something secure is to make it inconvenient to access. Adversely, to make something convenient to access is to make it insecure.
Don't think that there's nothing worth protecting on your hard drive — never underestimate your worth to hackers. You may not leave sensitive files laying around in your Documents folder or compromising photos in your Pictures library, but web browser cookies where you're logged into a website can still be extracted. Files and photos which have been "deleted" from the Recycling Bin can still be dug up and brought back to life during forensic attacks.
Enabling encryption during the installation will require you to enter a password at every boot to unlock the hard drive and load the operating system. There's no doubt many of you will find this inconvenient. However, encrypting the hard drive will protect your data in the event an attacker physically removes the disk for forensics. It will also protect against single-user mode attacks, where the device is powered on using a privileged boot mode.
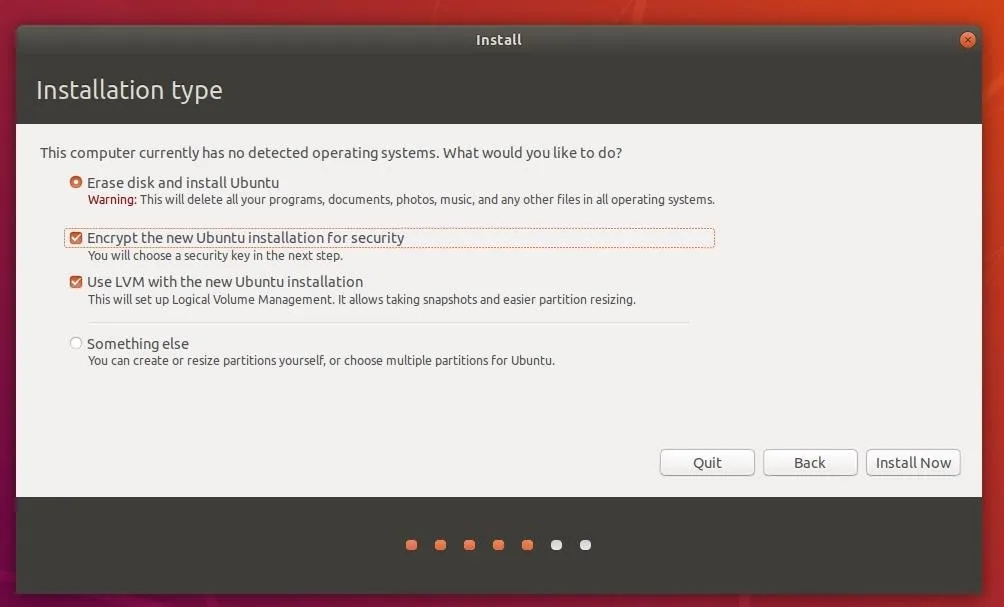
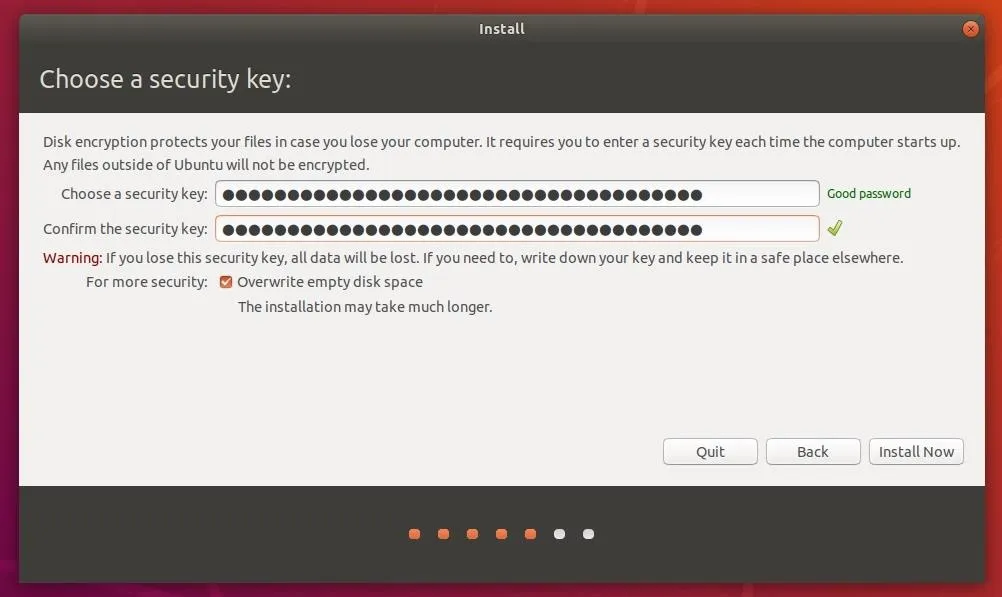
Ubuntu's default encryption settings actually provide a great degree of protection against password-guessing brute-force attacks. However, the use of a complex passphrase over 16 characters is still recommended.
Defend Against Sudo Abuse
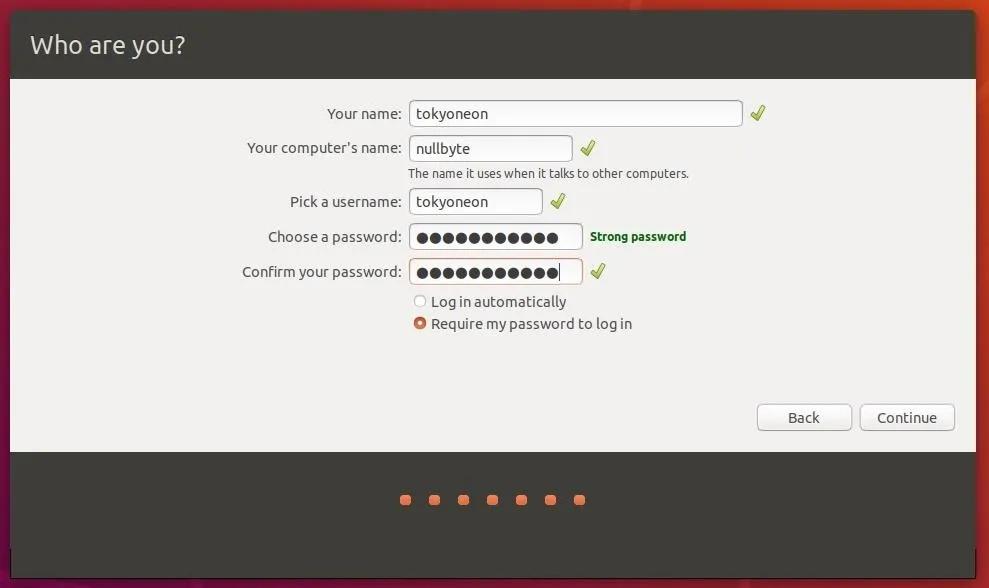
After selecting "Install Now," you'll be shown the "Who are you?" screen. Yeah, this means another password to remember. This password will be used to log into the newly created user account (the "Your name" part), when the computer is waking from sleep or hibernation, and when sudo is used to execute privileged commands.
As someone who uses sudo a lot, I completely understand how inconvenient it can be to type a complex password several times a day. However, it's important to set a strong password here as well. Someone with physical access to an unlocked operating system may be able to guess a weak password and execute a nefarious command with elevated privileges.
Defend Against USB Rubber Ducky Attacks
By default, Ubuntu operating systems are just as vulnerable to USB Rubber Ducky attacks as Windows 10 or macOS. Such attacks can be prevented by disabling Ubuntu's ability to accept input from USB mice and keyboards entirely. For desktop users, this may not be a realistic option. Laptop users who never use external keyboards, on the other hand, may appreciate such a modification.
To disable external mice and keyboard input, use the below command. USB mass storage devices will still be allowed to connect to the operating system.
~$ sudo echo 'blacklist usbhid' > /etc/modprobe.d/usbhid.confThen, use the following update-initramfs command to update the boot configuration. Reboot for the changes to take effect.
~$ sudo update-initramfs -u -k $(uname -r)

update-initramfs: Generating /boot/initrd.img-4.15.0-23-generic
Next Up: Network Attack Defense
Following the above steps should provide a reasonable degree of defense against physical attacks. In the post-installation hardening sections of this series, we'll be talking about network security best practices, application hardening, and auditing tools that can be used remediate nearly every weakness of the operating system. To jump right to the next part on network attack defense, hit up the link below.
Cover image by Pathompong Nathomtong/123RF; Screenshots by tokyoneon/Null Byte


Comments
Be the first, drop a comment!