


If you want to follow Null Byte tutorials and try out Kali Linux, the Raspberry Pi is a perfect way to start. In 2018, the Raspberry Pi 3 Model B+ was released featuring a better CPU, Wi-Fi, Bluetooth, and Ethernet built in. Our recommended Kali Pi kit for beginners learning ethical hacking on a budget runs the "Re4son" Kali kernel and includes a compatible wireless network adapter and a USB Rubber Ducky.
You should be using a system separate from your day-to-day computer for testing out hacking tools and downloading hacking software, and a Raspberry Pi brings the price of keeping your hacking endeavors siloed from your personal computer down to between $45 to $50. While the Pi is small, it's powerful, and can be used to follow the majority of the tutorials on Null Byte.
Kody/Null Byte
Why Use a Raspberry Pi to Learn Hacking
The Raspberry Pi has a lot of fans, which means a lot of support for beginners. Aside from security professionals and hackers using it to run Kali Linux, many developers use the Pi for scientific and industrial applications. While the original Pi was made to introduce schoolchildren to programming, today's Raspberry Pi is capable of some truly amazing things with the right accessories and creativity. For building a prototype cyberweapon, the Raspberry Pi has been the foundation for proof of concept attacks ranging from drone takeovers to mass Wi-Fi jamming.
The Pi's small size and ability to do some powerful things have also seen it featured in shows like Mr. Robot, where it's used to remotely hack into the climate control system of a data center. That being said, it's not a supercomputer, so it's important to set your expectations for this tiny, discreet computer. Things like brute-force cracking won't be practical on the Pi except for the most simple of lists, but most of this work can be outsourced to the cloud in a real-world attack.
Kody/Null Byte
Learning on the Raspberry Pi means you're not just tied to the Kali Linux operating system. In fact, projects like BerryBoot enable you to have an SD card with many operating systems for the Pi stored on it, allowing you to mount whichever OS you want to work with. This means you can have a Pi act as both a hacking workstation and a deliberately vulnerable server to attack just by rebooting the system and selecting a different disk image.
The Raspberry Pi also runs Raspbian, the official OS of the Raspberry Pi. This Debian-based OS can also be used to learn basic Linux and hacking tools, although it requires much more customization before it's suitable for this. If you're stuck learning about software-defined radio or NFC in Kali Linux on the Pi, sometimes switching to Raspbian can get all the hardware to work together when all else fails.
Using the Pi 3 Model B+ for Hacking
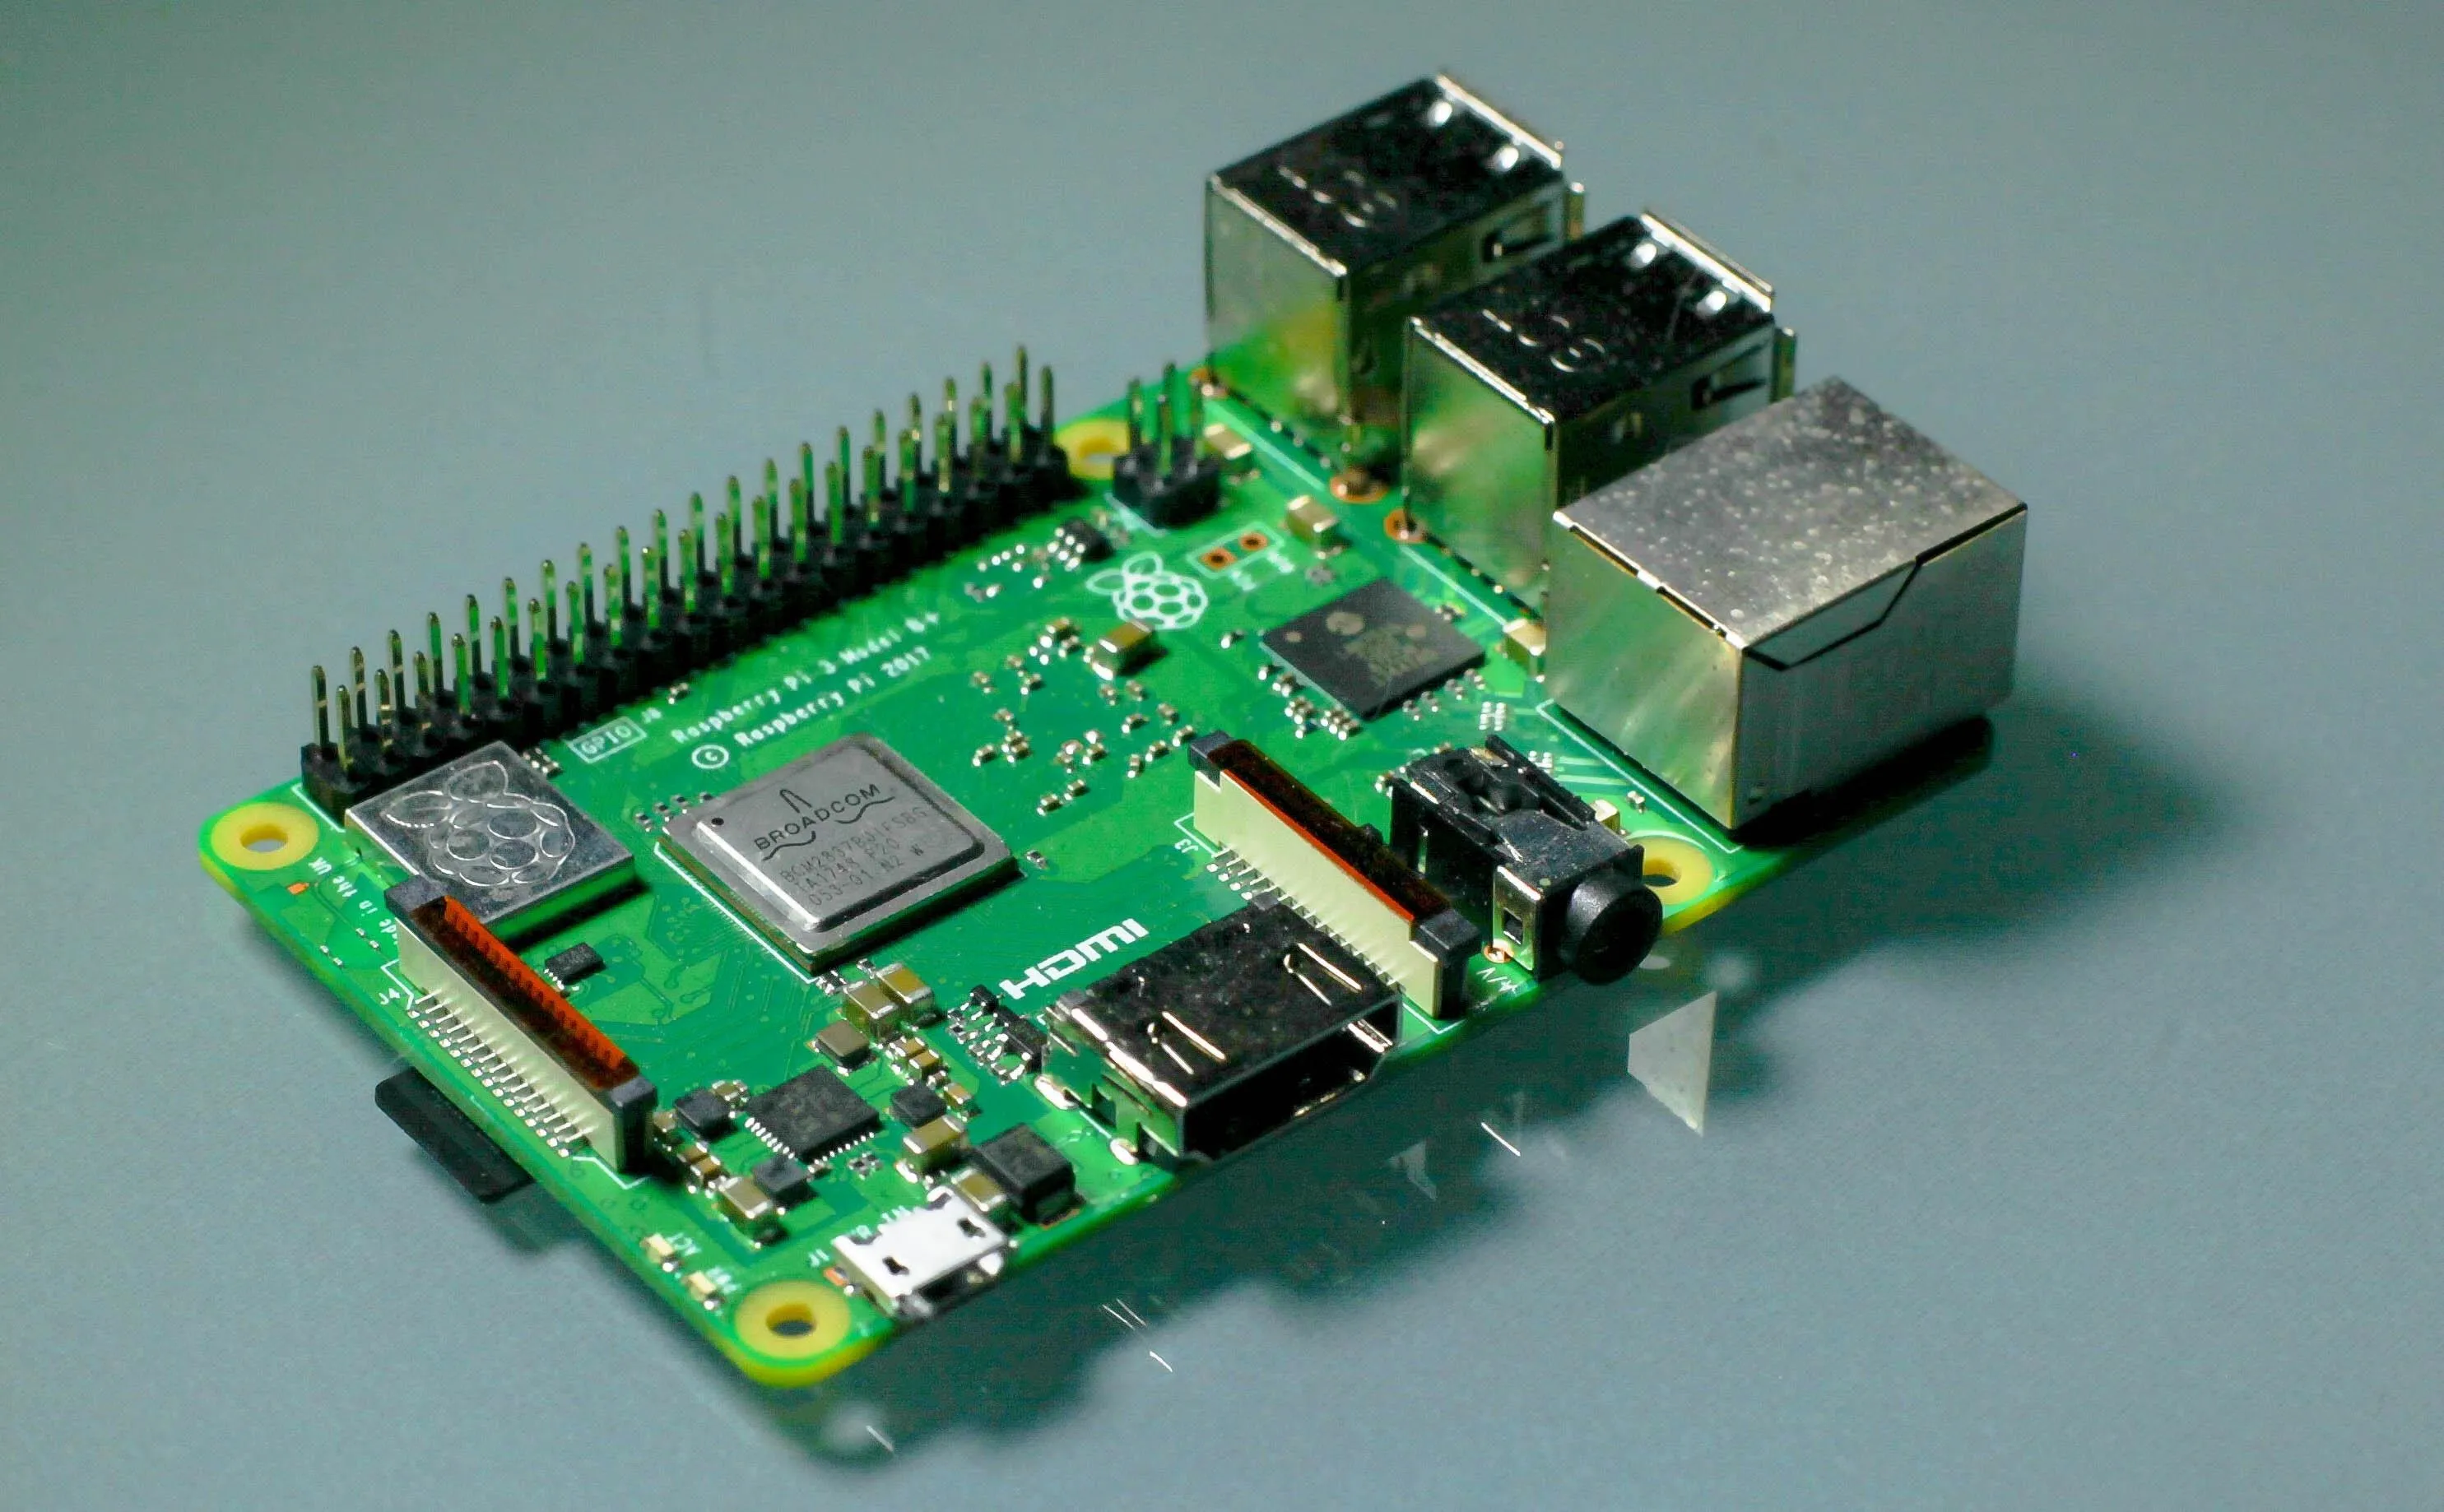
Thanks to the Re4son kernel, the improved specs and updated networking performance can be used with the hacking tools Kali has to offer. The new Pi features a 10/100/1000 Gigabit LAN controller, as well as dramatically improved Wi-Fi speeds, making the Pi ideal for networking applications like running a static web server, NAS, or proxy server. It also makes it an ideal platform for Wi-Fi and network hacking, making the Pi much more versatile in a pentesting kit.
In addition to the networking improvements, the Pi 3 Model B+ enjoys a 16.7% processing speed increase from the previous model, running a 1.4 GHz 64-bit quad-core processor. While this performance increase isn't enough to bring the Pi into the realm of most desktop or laptop computers, the increase does make Kali feel more responsive.
Kody/Null Byte
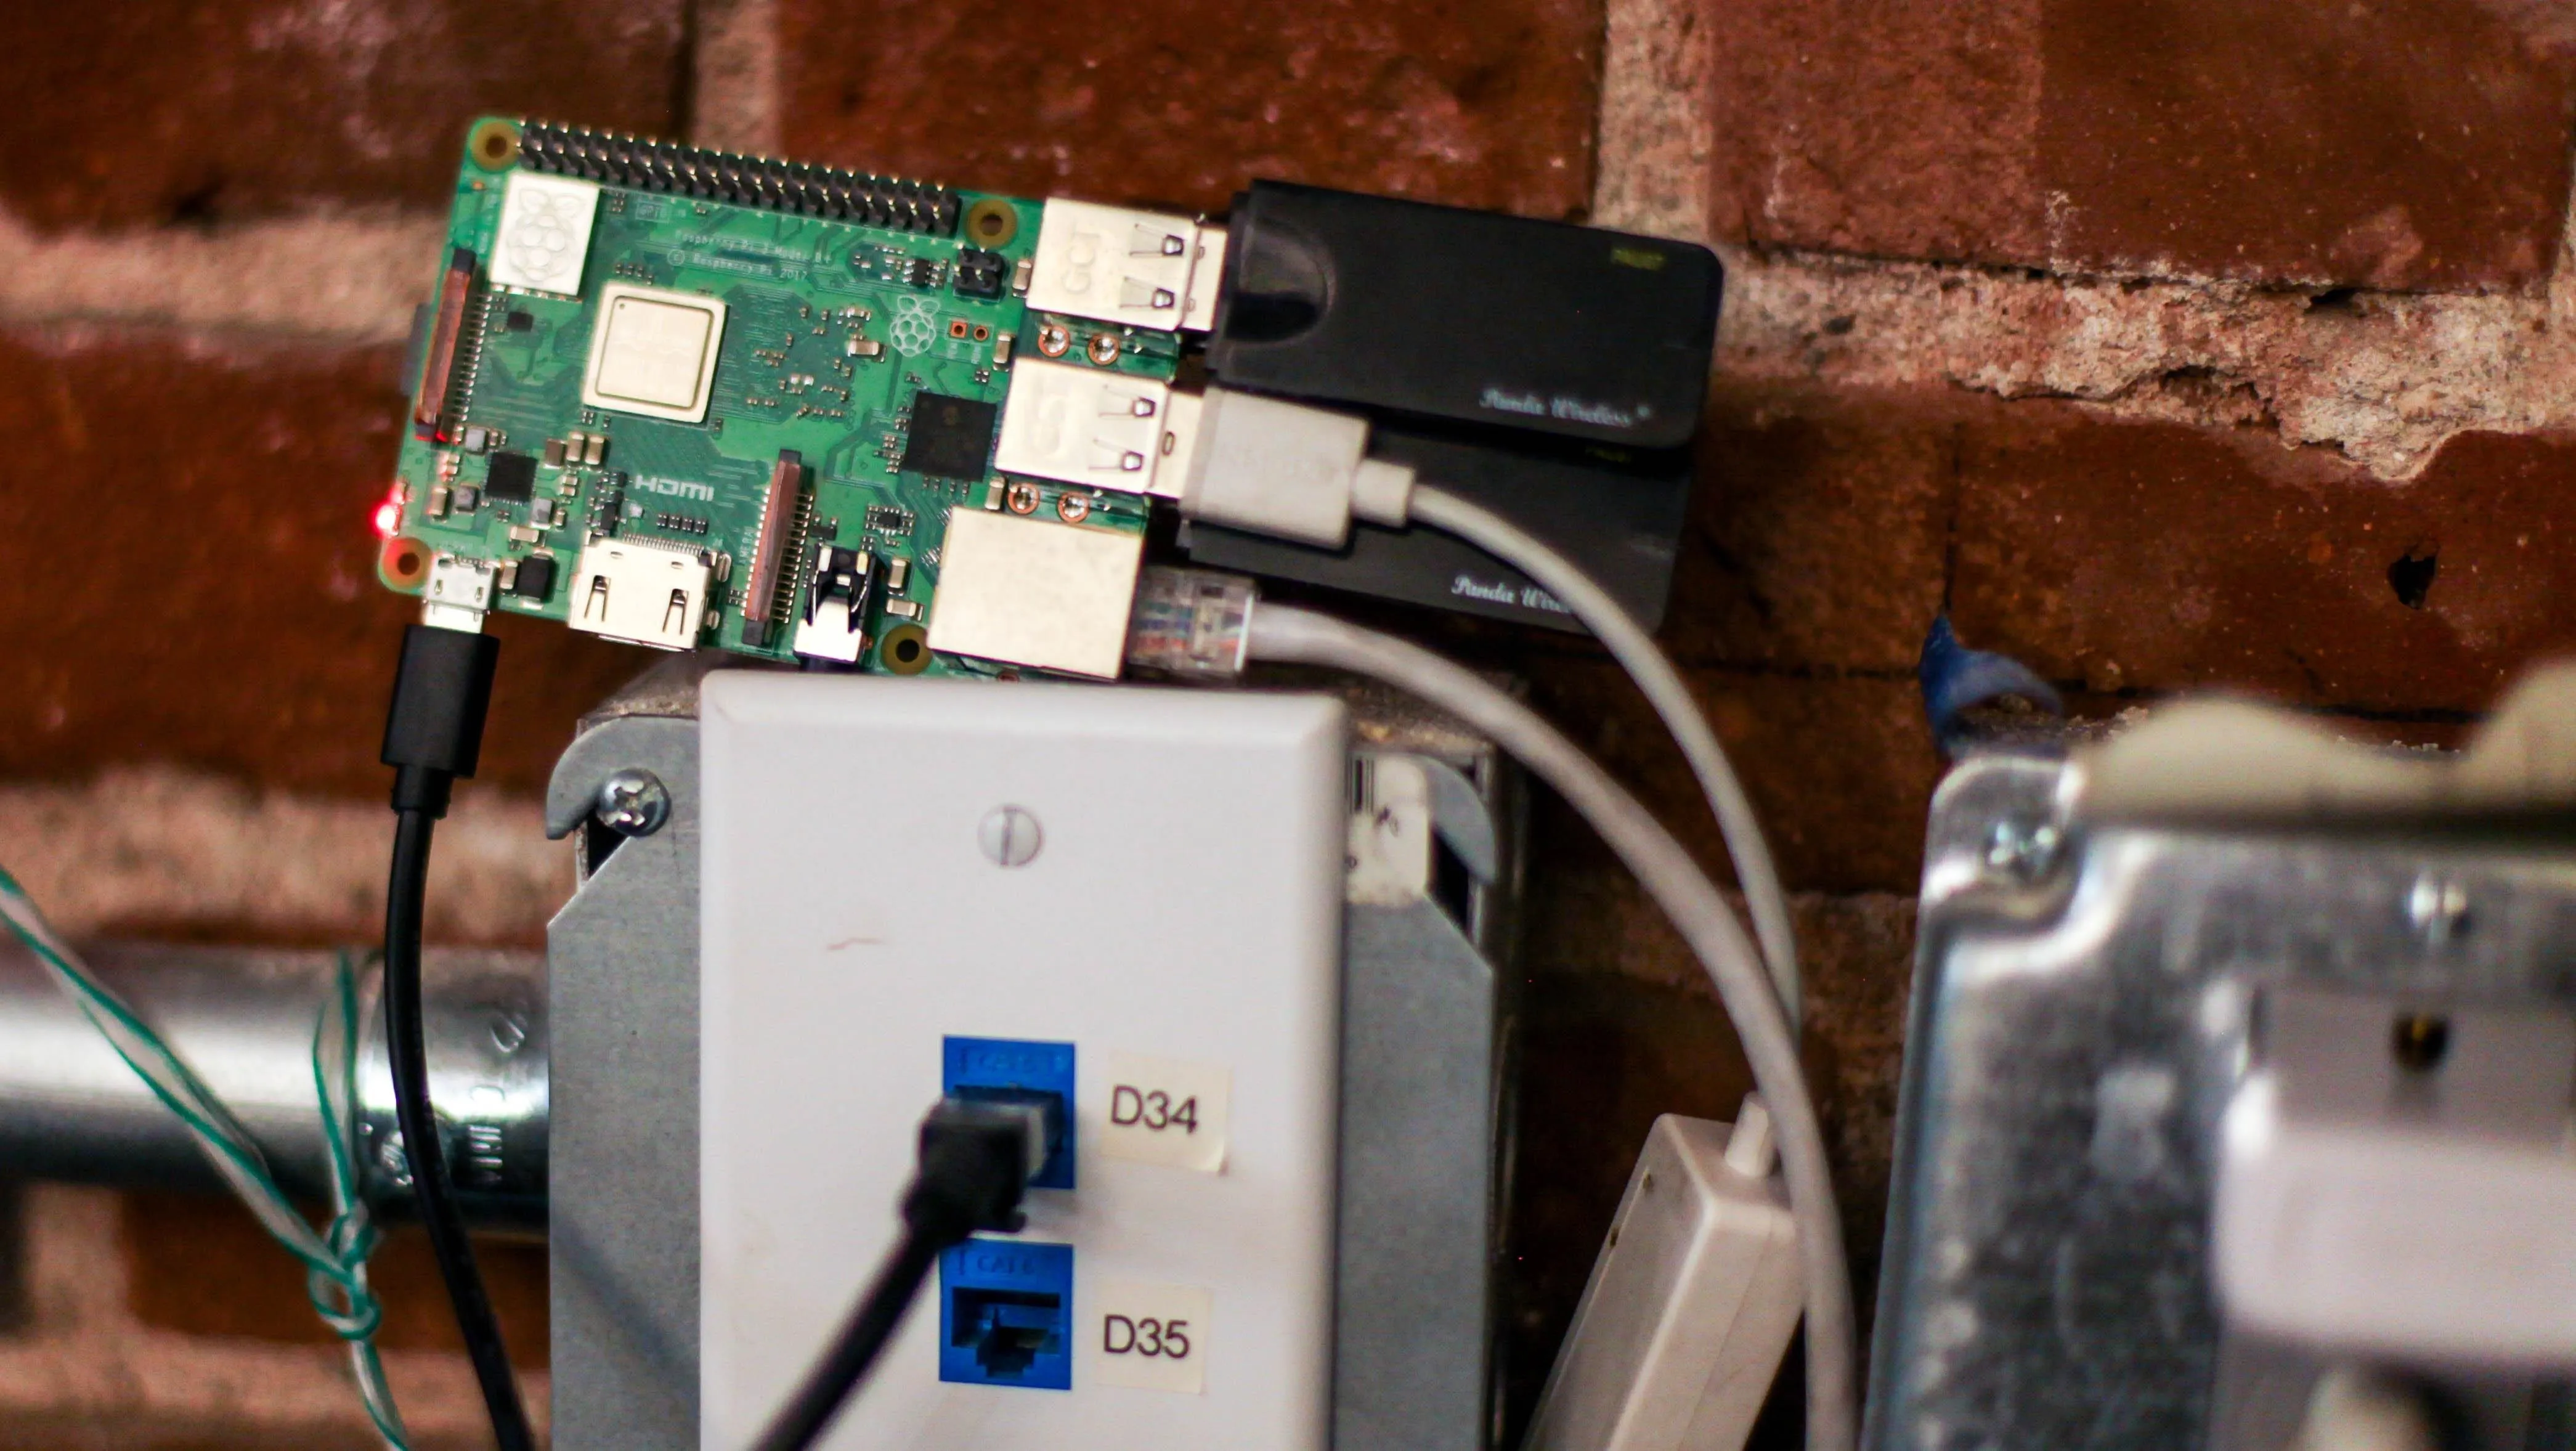
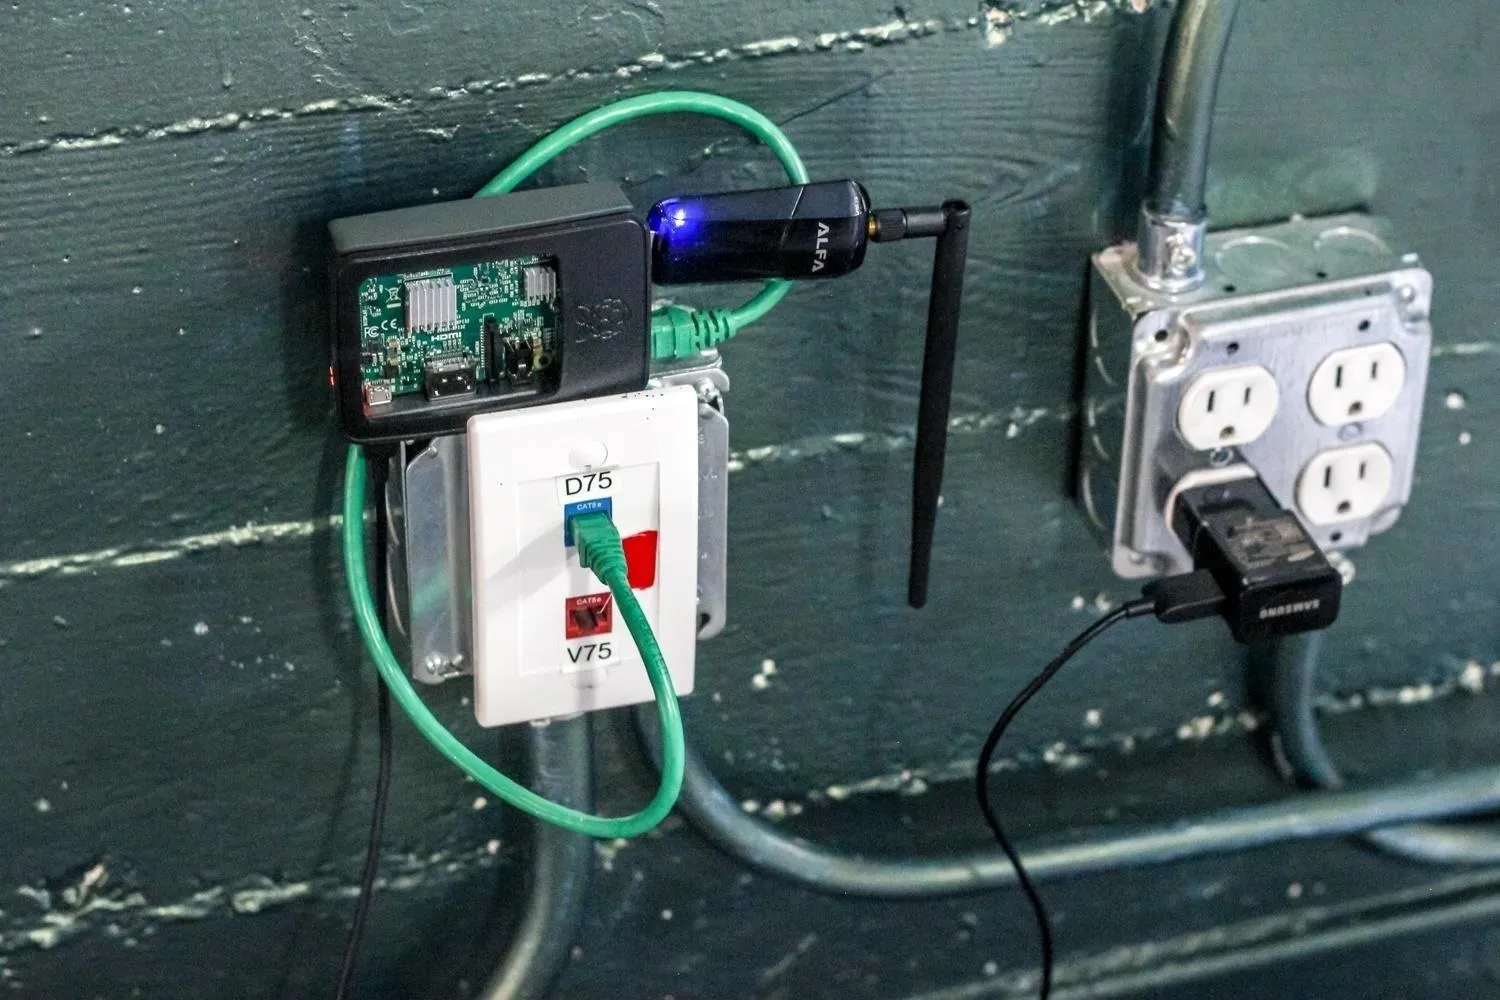
Like the previous KaliPi builds, it's easy to get started using your Pi once you've booted Kali for the first time. You can plug your Pi into an available screen via HDMI, or you can connect to your Pi without a screen via SSH over an Ethernet or Wi-Fi connection. Adding a battery pack can give you access to a Kali Linx system anywhere, allowing you to connect to your Pi from a laptop or smartphone over your home Wi-Fi network or cell phone's data hotspot.
Why We're Using the Re4son Kernel
While the new Raspberry Pi comes with Bluetooth, Wi-Fi, and other options that can be used with Kali Linux, getting them working isn't always straightforward. We found many beginners had trouble setting up the Bluetooth on the Pi to work with tools in Kali. To fix this, we looked to the Re4son kernel, a special version of Kali Linux optimized for the Raspberry Pi. This version of Kali was working on the Raspberry Pi 3 Model B+ before an official release was availible from Offensive Security (it still is not as of this writing).

Kody/Null Byte
Another issue the Re4son kernel fixes is the ability to log in upon startup. In order to power up your Pi and log in while on the go, you'll need your Pi to be able to start Kali Linux and join a familliar Wi-Fi network. After doing so, you can log into the Pi via SSH from any device on the same network. This doesn't work, however, if the Pi gets stuck on the login screen that requests your username and password when Kali starts. Our previous solution for this was a little complicated and some readers had a hard time following the steps, so I'm pleased that in this version, our Pi image comes with a setup scrip that takes care of enabling this for us.
Reccomended Hacking Kit for Beginners
To get started with the Raspberry Pi as a hacking platform, you'll need a few key components to get the Pi up and running. Initially, you'll need access to another computer to burn your Kali image to an SD card.
Aside from the Pi 3 B+ itself ($36.97), a good power adapter is necessary to power the Pi. The Pi takes a microUSB power cord, and the CanaKit beginner kit version ($52.99) of the Pi includes an appropriate adapter. In general, a dedicated 2.4-amp power supply is the best way to go.
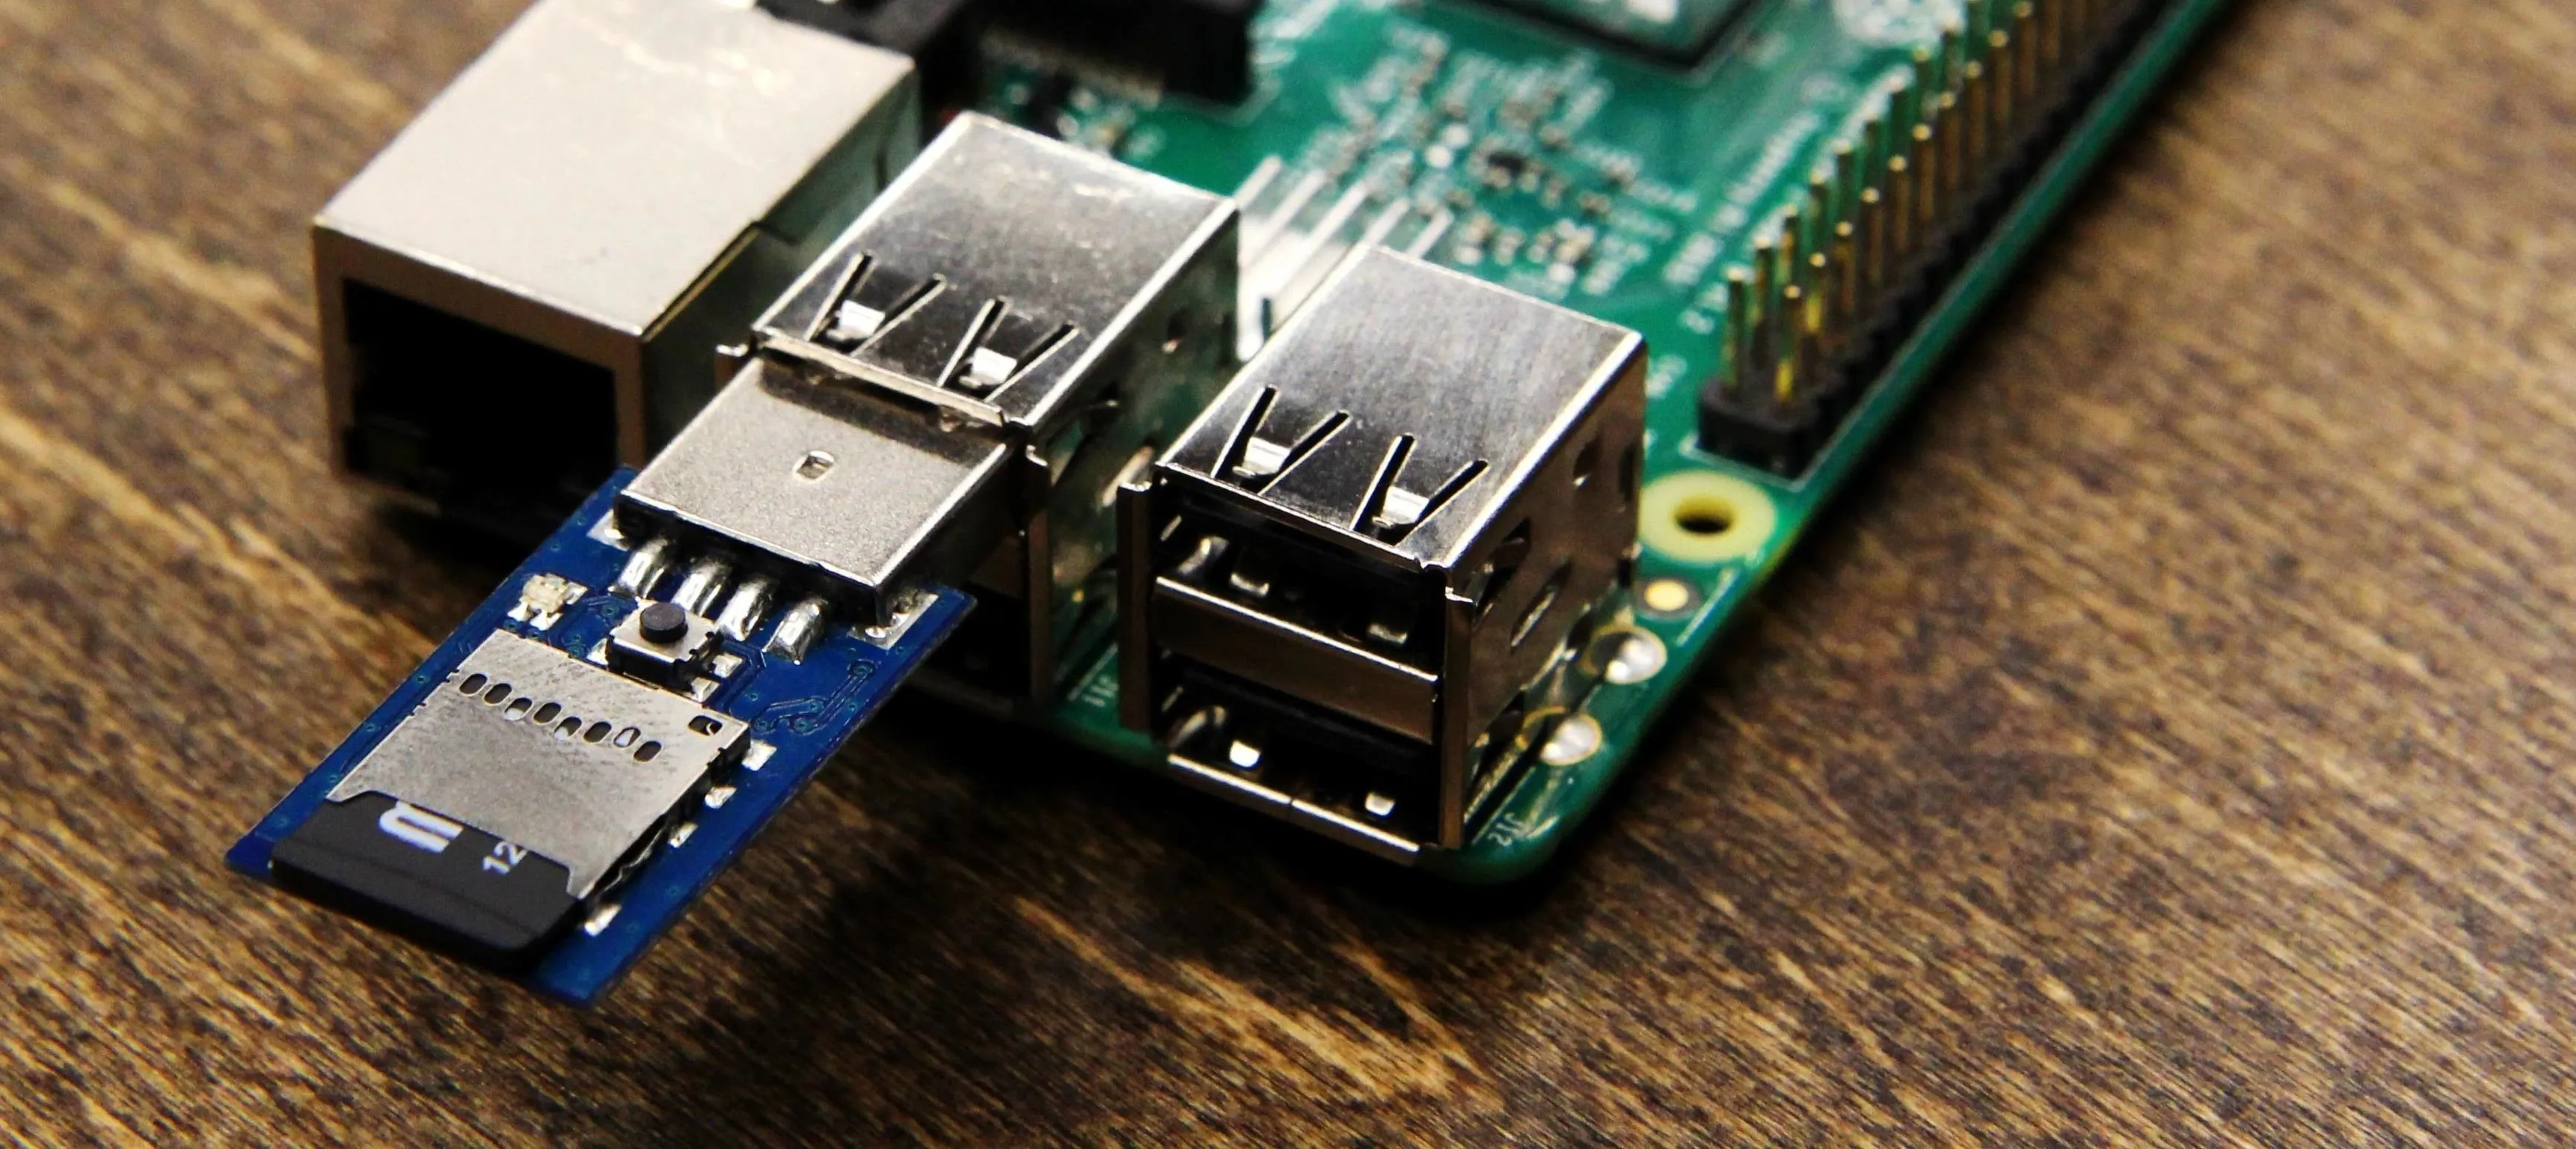
Next, you'll need an SD card to put the operating system on. There are a lot of available options, but you should opt for a faster SD card with 16 GB of space. In particular, we recommend SanDisk Extreme ($17.91 for 64 GB) or the SanDisk Extreme Plus ($22.99 for 32 GB). You can get away with 8 GB, but things will be tight.
To interact with the Pi, you'll need a keyboard and mouse. It's easiest to use a wireless keyboard and mouse combination like the Rii 2.4G Mini Wireless Keyboard with Mouse Touchpad Remote Control ($16.99), since we recommend avoiding Bluetooth versions at all cost. They do not work well with Kali and take forever to configure.
Kody/Null Byte
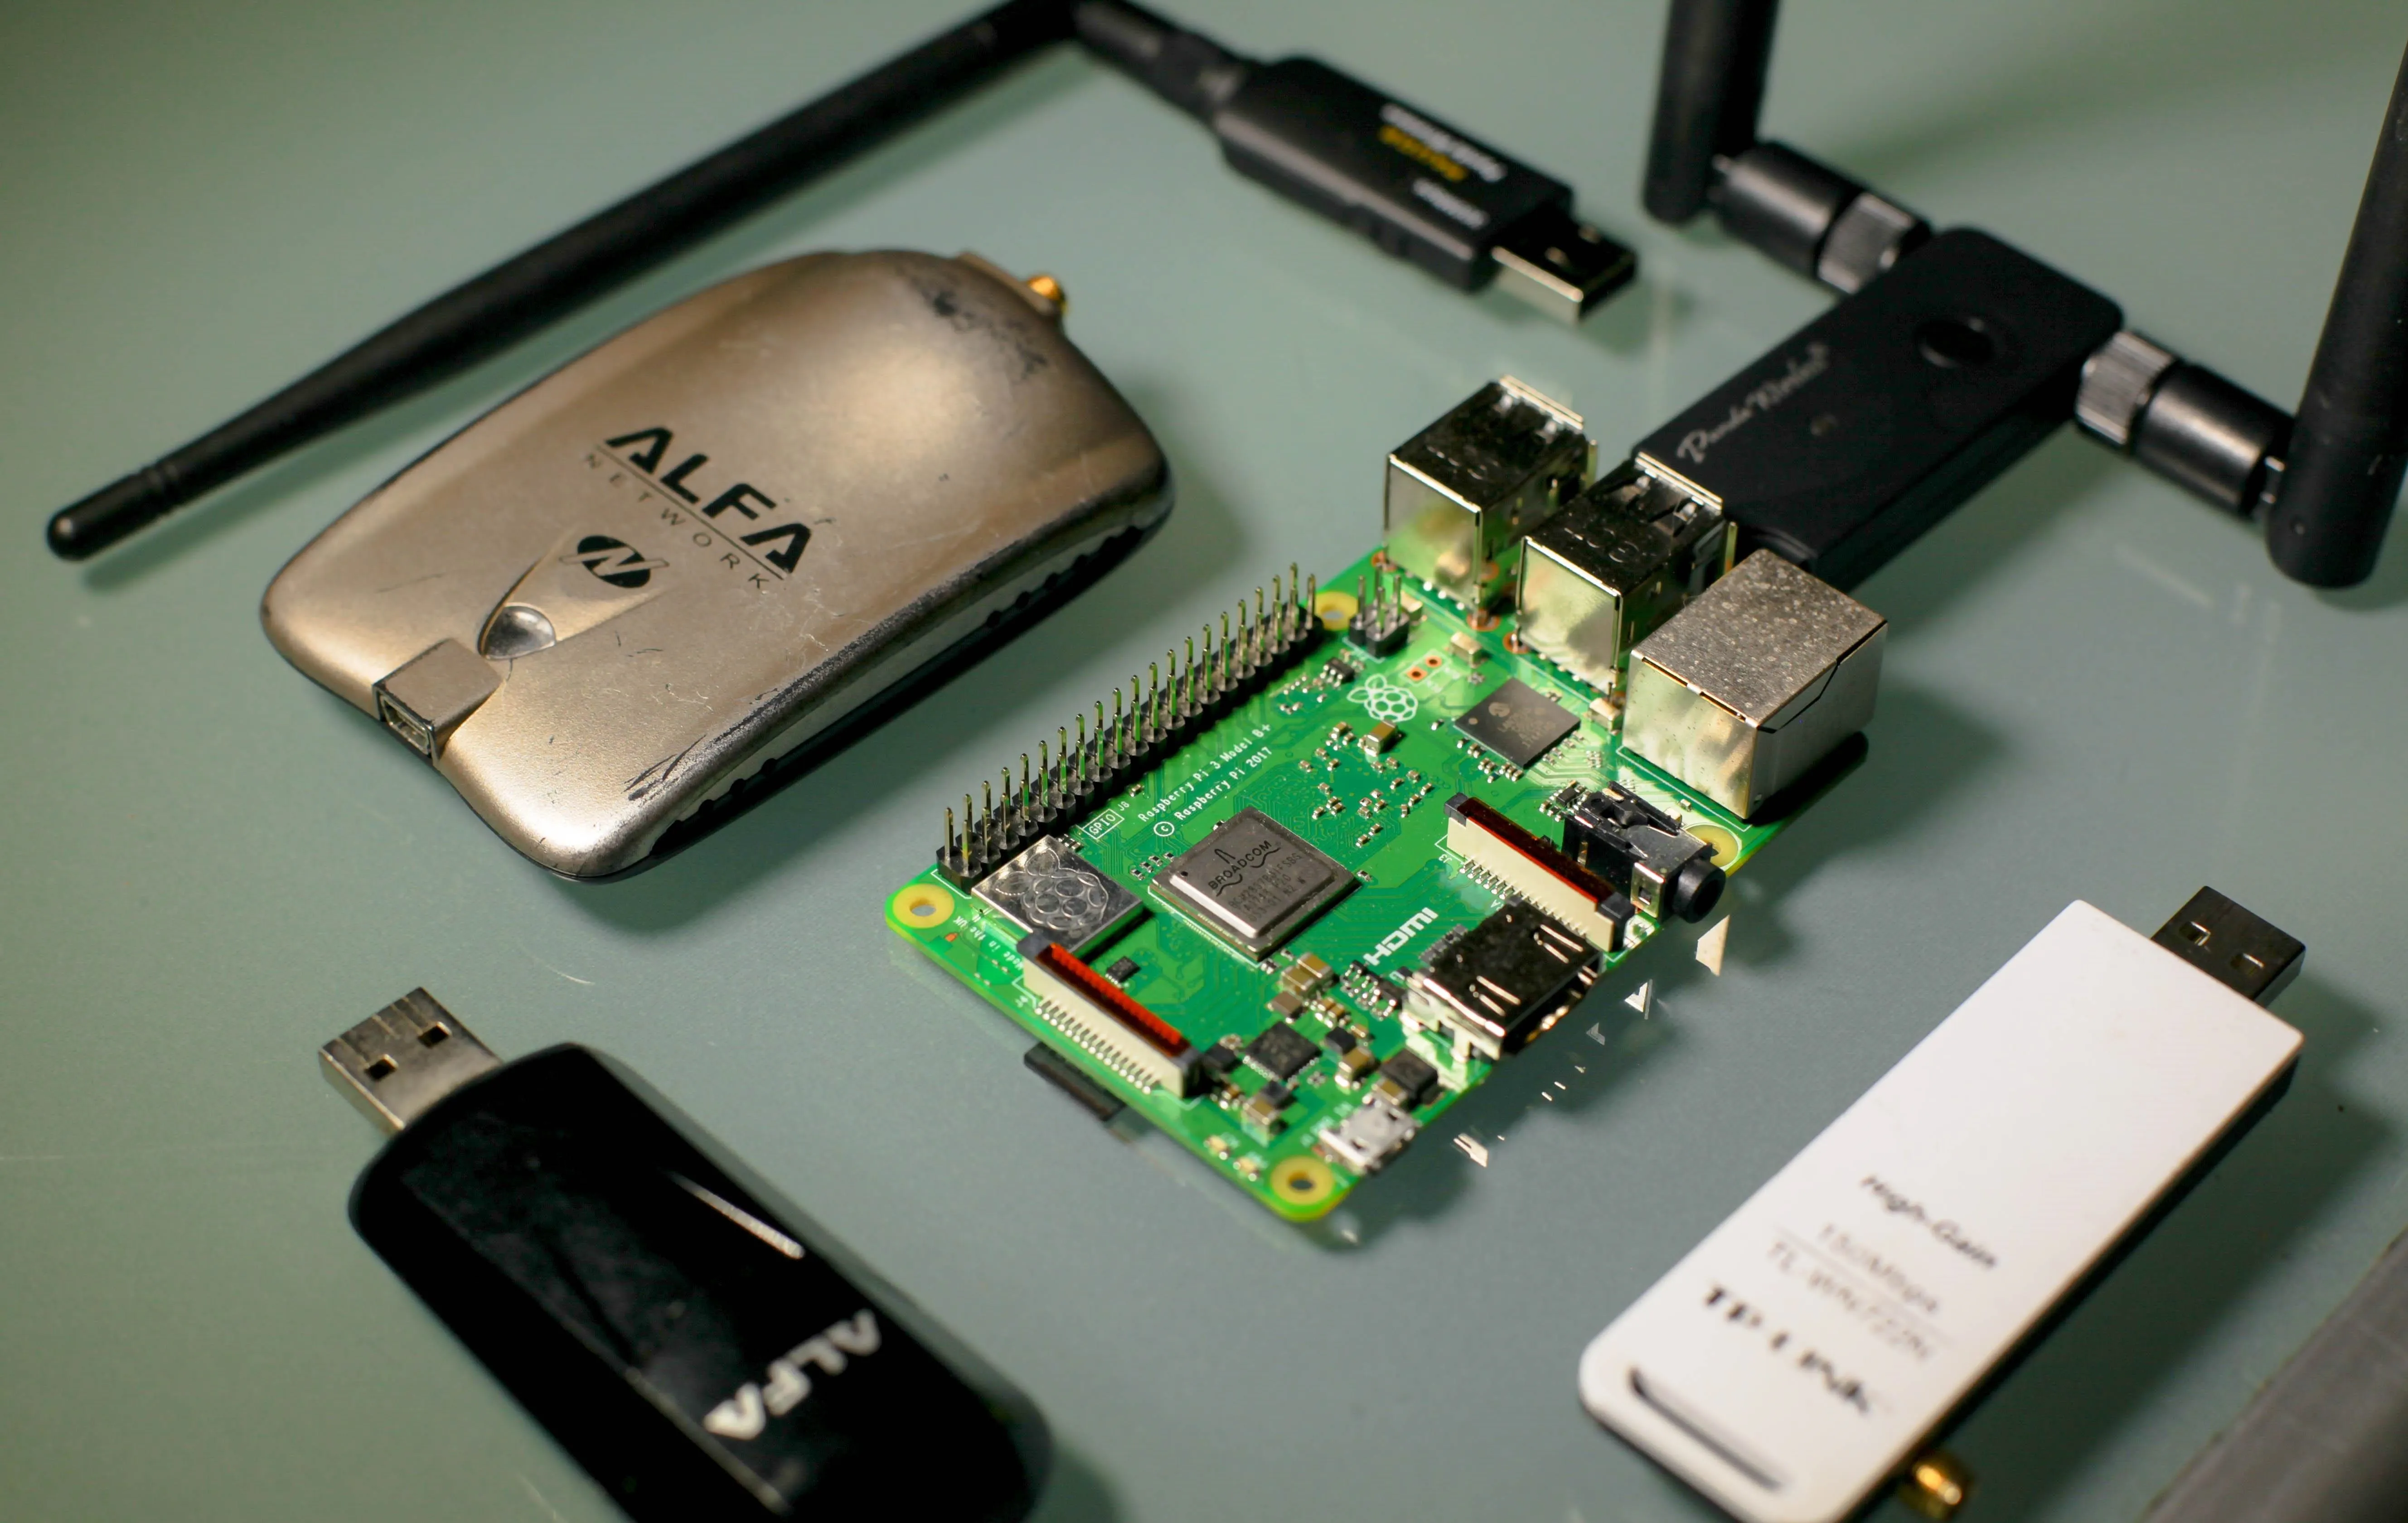
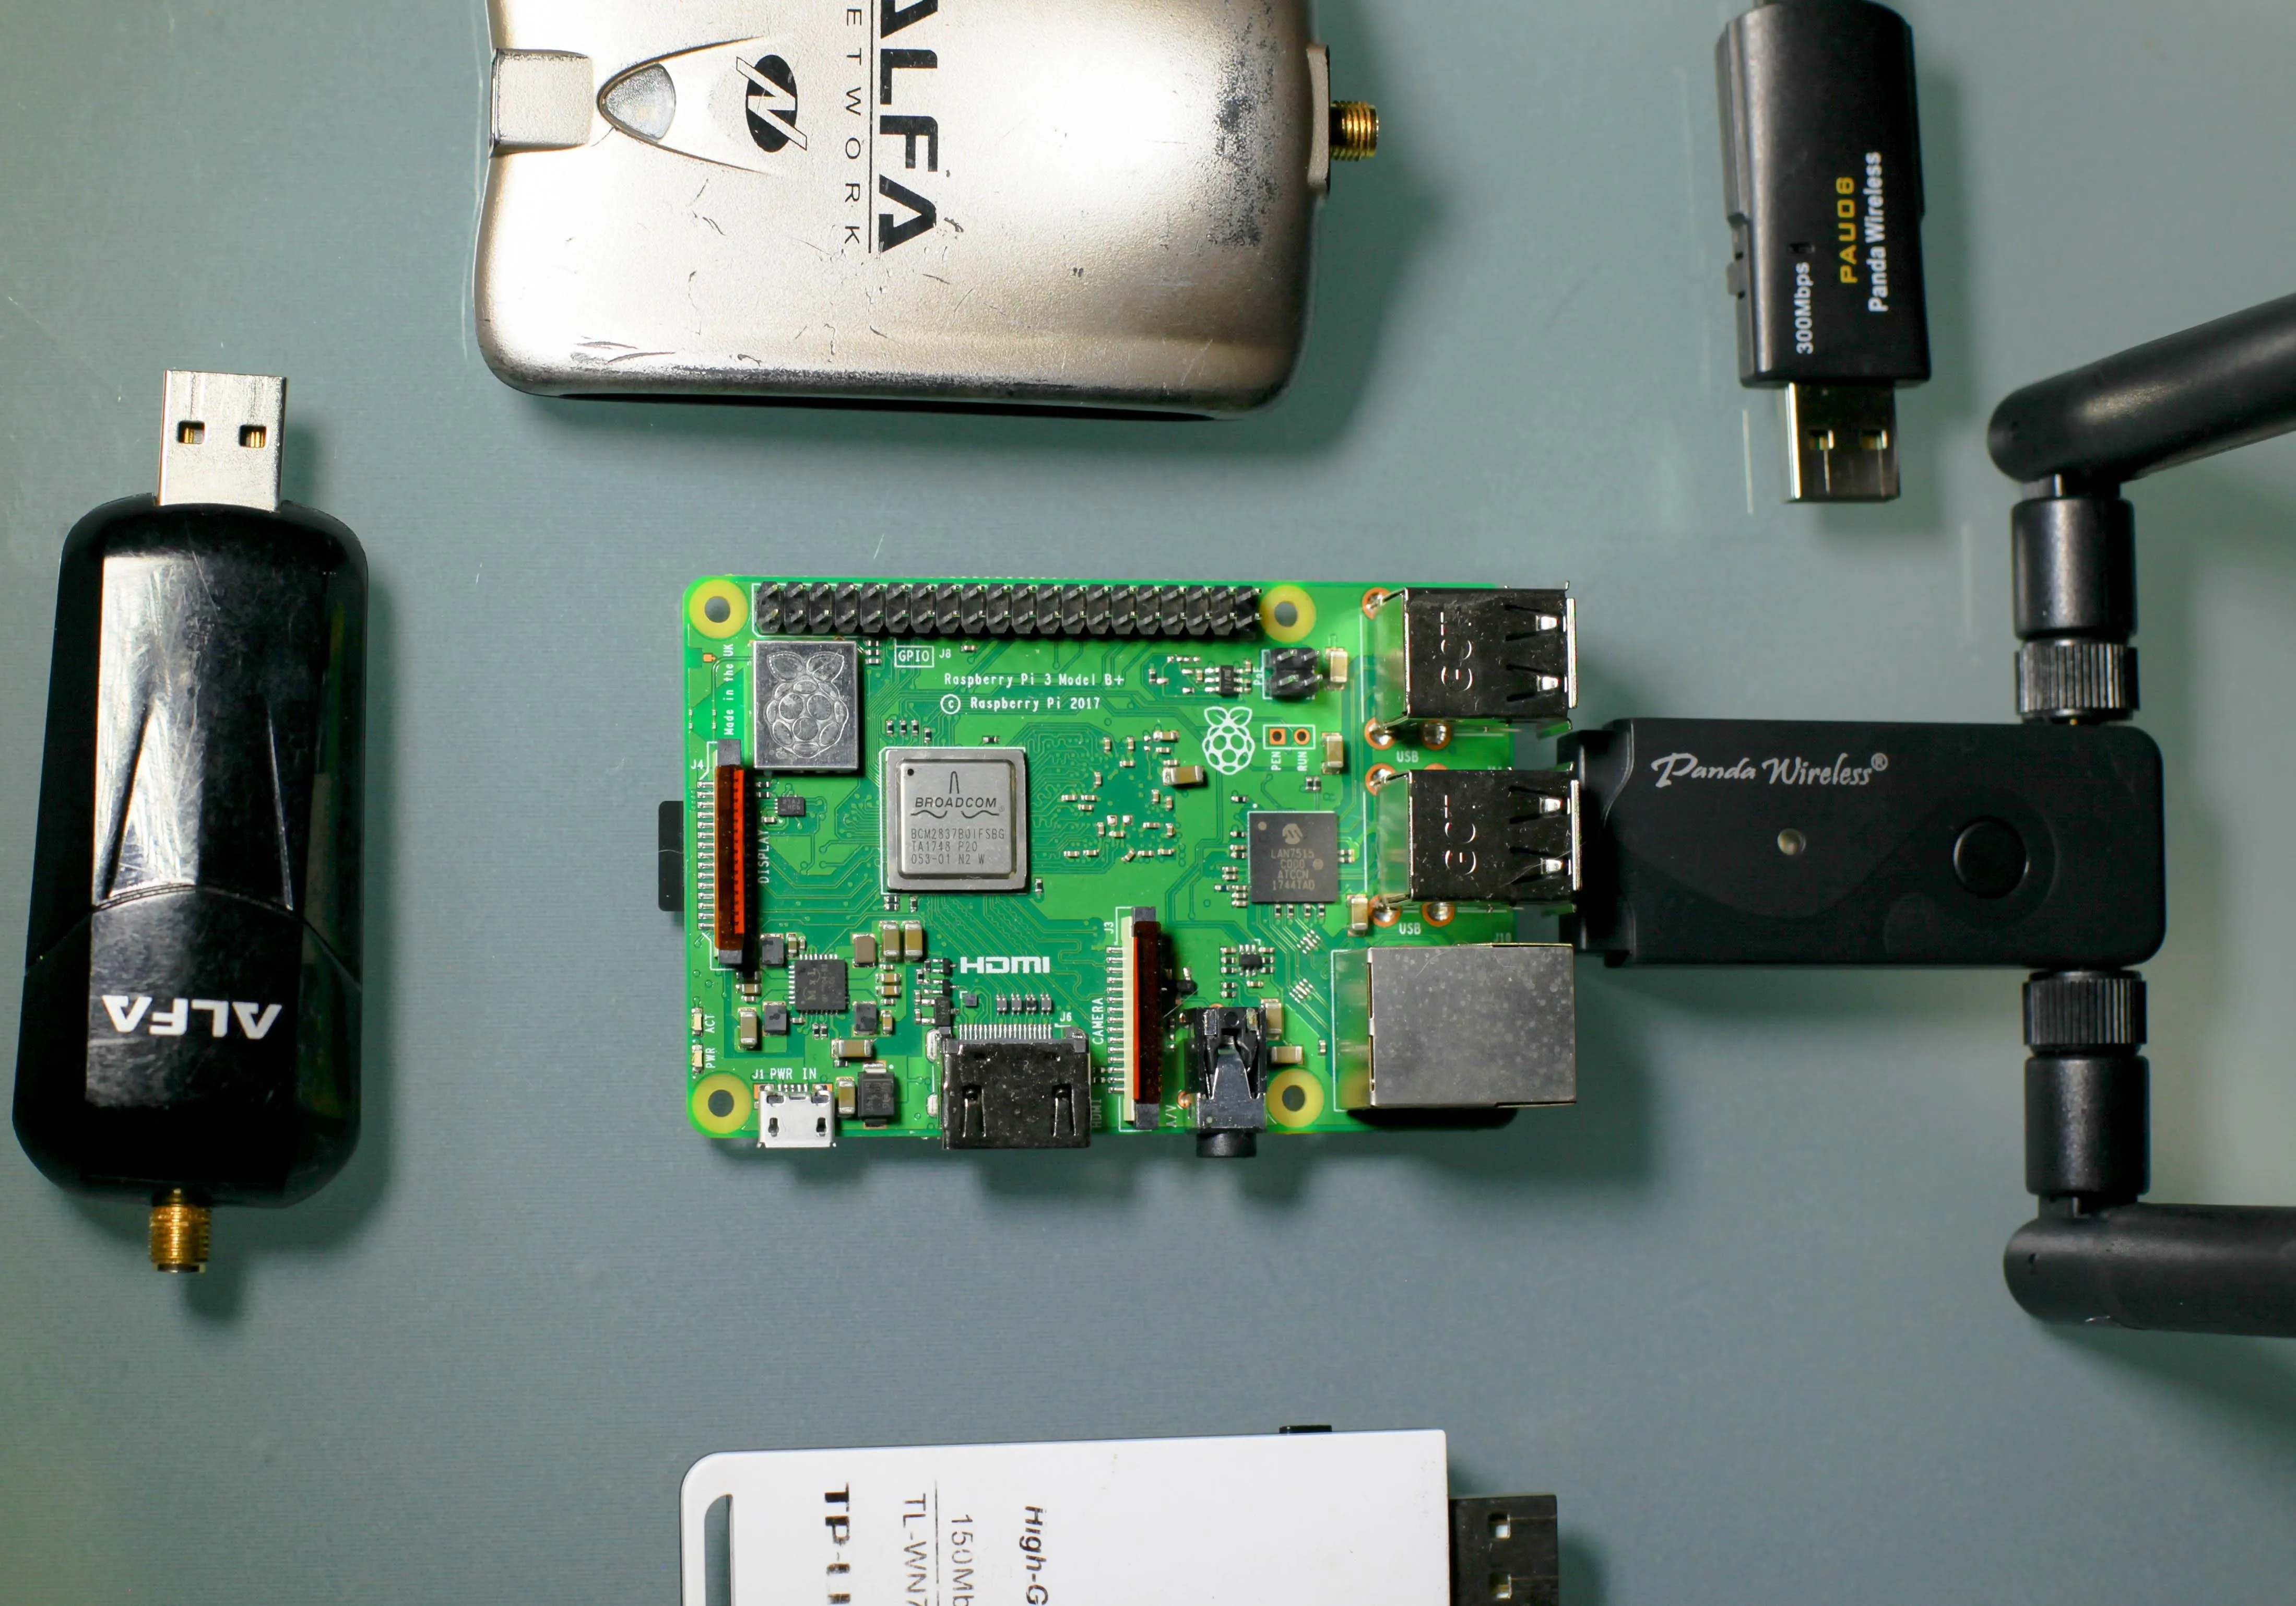
To get started with Wi-Fi hacking, you'll need a Kali-compatible wireless network adapter. After testing many, we were pleased with the performance of Panda Wireless network adapters, in particular, because of their small size and 2.4/5 GHz capabilities. For discreet Wi-Fi hacking, we recommend the PAU05 for 2.4 GHz ($13.99) or the PAU07 for 2.5 and 5 GHz ($24.99). If you want to connect a directional or high-gain antenna to the adapter, the PAU06 ($14.99) is great for 2.4 GHz hacking, while the PAU09 ($34.99) is a powerful dual-band adapter with two swappable antennas.
Finally, we recommend beginners include a Hak5 USB Rubber Ducky running the Twin Duck firmware. The Twin Duck firmware allows us to mount the Rubber Ducky as USB mass storage, which means we can write and encode Ducky Script on our Pi with the Rubber Ducky plugged in. While the Rubber Ducky doesn't ship with the Twin Duck firmware, it can easily be flashed.
Kody/Null Byte
Download & Flash Kali Linux to the SD Card
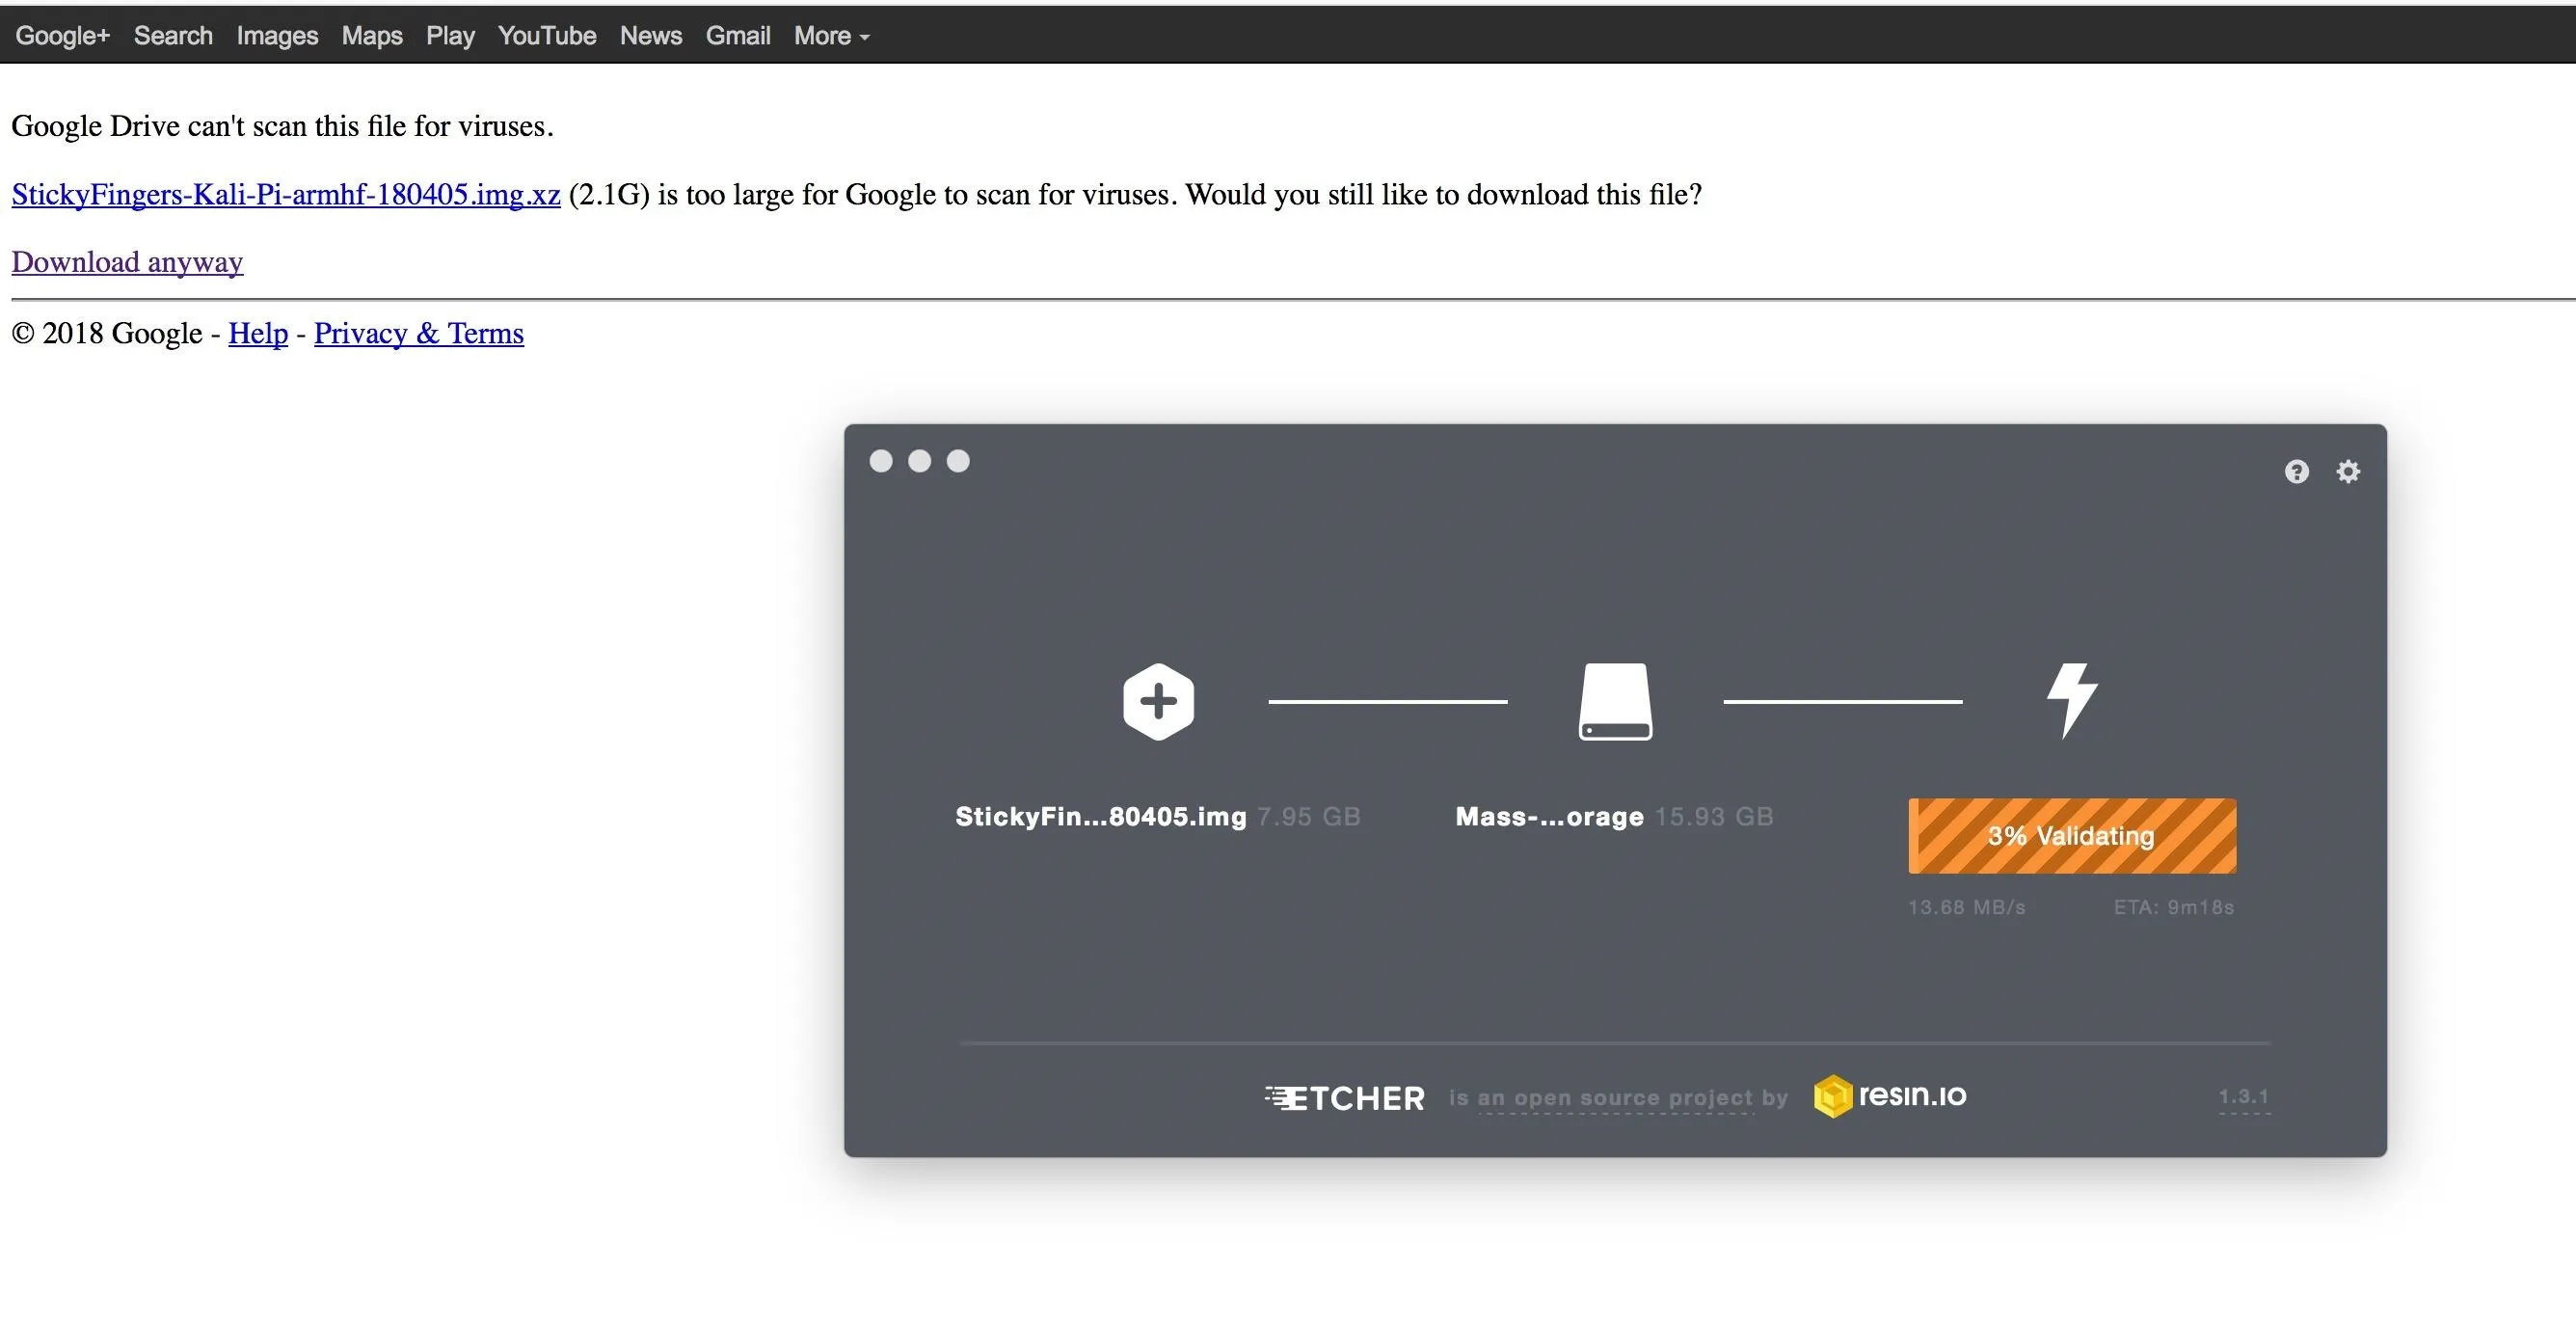
The SD card is the brain of your Pi, so you'll need to download Kali Linux to load it on the card. Navigate to Re4son's website, where you'll find the Kali Linux download in a compressed file. Make sure to select the version for the Raspberry Pi 3 B+ model.
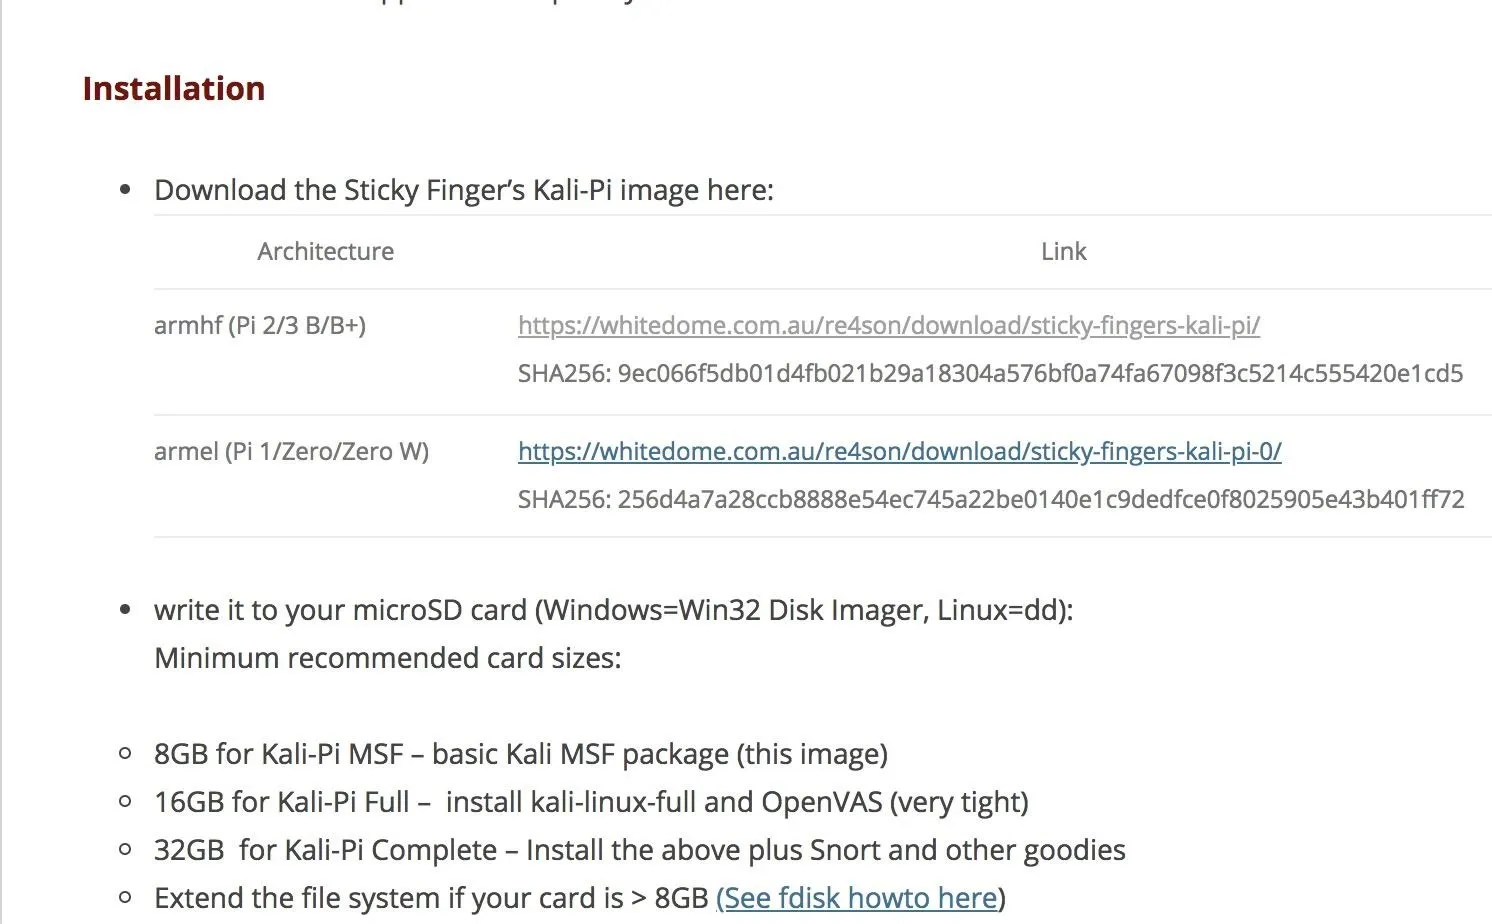
The file we're looking for is the top link.
If you use Windows, you can use Win32 Disk Imager to put your image on the card. On a Mac, you can use a tool like ApplePiBaker or Etcher to load your Kali image onto your SD card. In our video guide above, we went with Etcher since it's the easiest method. If this causes errors for you, you can also write a bootable SD image is via a terminal using the below instructions.
On a Mac, before plugging in your SD card, run the following in a terminal:
df -h
This will display a list of all the disks attached to your system. Attach your SD card and run the command again, and note the filesystem name of your SD card (it's the one that wasn't there before). It should look like "/dev/disk2s1," and you should be very careful not to mix this up in the next steps since doing so could overwrite your hard drive.
Now we'll use the dd command to load the Kali image onto the card. First, let's unmount the partition so you can write to it with the following command, with X being the correct disk number:
sudo diskutil unmount /dev/diskX
Next, run the following command to load the image onto the SD card. If there is an "s" after the initial disk number (like rdisk2s1), do not include the "s" or following number. So, "rdisk2s1" should look like "rdisk2." Here's what it should look like all together:
sudo dd bs=1m if=LocationOfKaliImage of=/dev/rdiskX
Press enter to begin the process and note that dd does not provide any on-screen information unless there is an error or it finishes. To view the progress during the transfer, you can hit Ctrl-T. Wait for the process to complete. You'll know the process is complete when you see a readout of bytes transferred over the time the process ran.
Load Up Kali Linux & Update
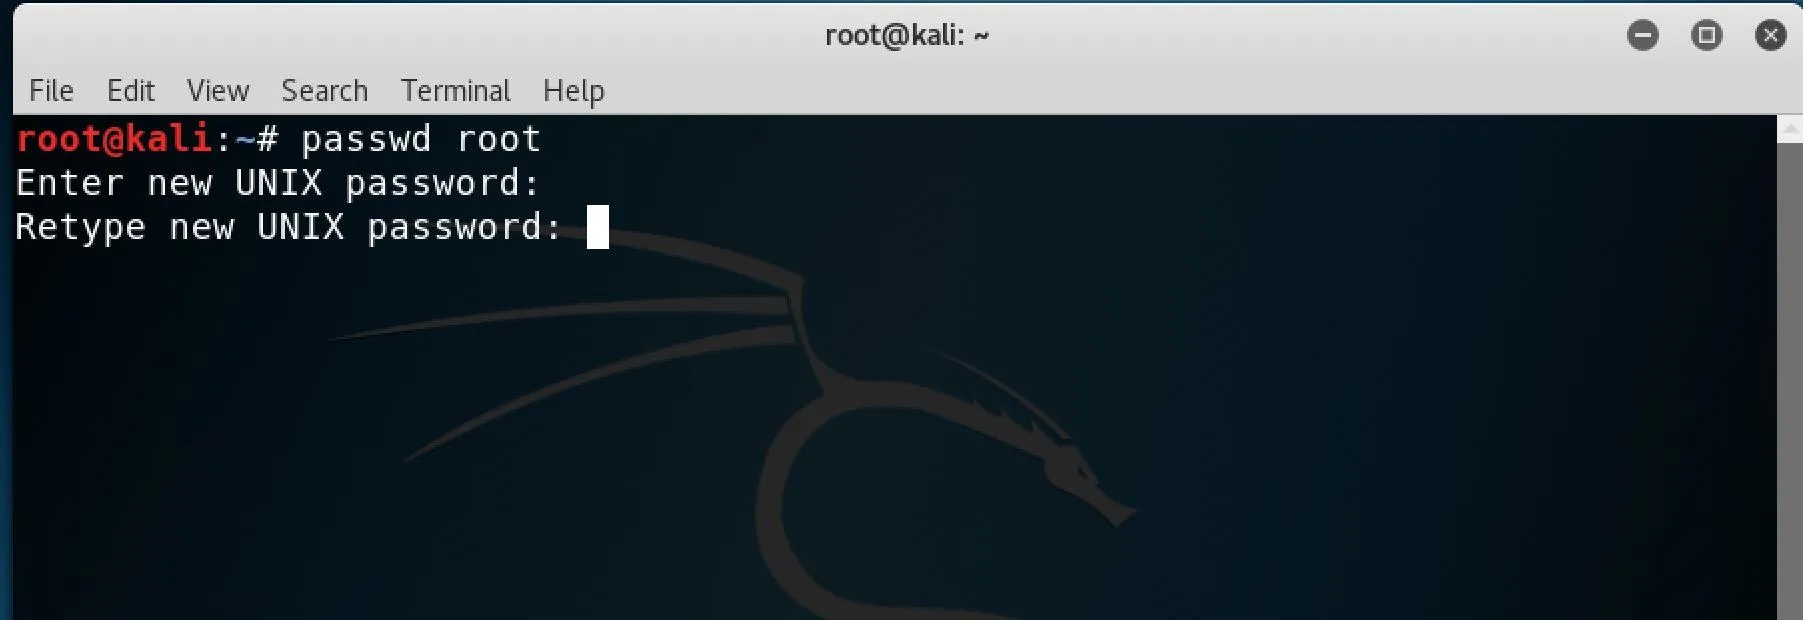
Once Kali Linux loads, you should see a login screen. The default credentials are root for login and toor for the password. When Kali loads, open a terminal window. First, we'll need to change the default password so we have some level of control over who accesses our device. To do so, type passwd root into the terminal window and enter your new password twice to set it.
Next, you'll need to update the system. Now is when you'll need to connect your Pi to the internet via an Ethernet cable or by clicking the Wi-Fi icon in the top-right corner and selecting a network with internet access. In a terminal window, type the following apt-get commands, allowing each command to complete before starting the next. This may take some time.
apt-get update
apt-get upgrade
apt-get dist-upgrade
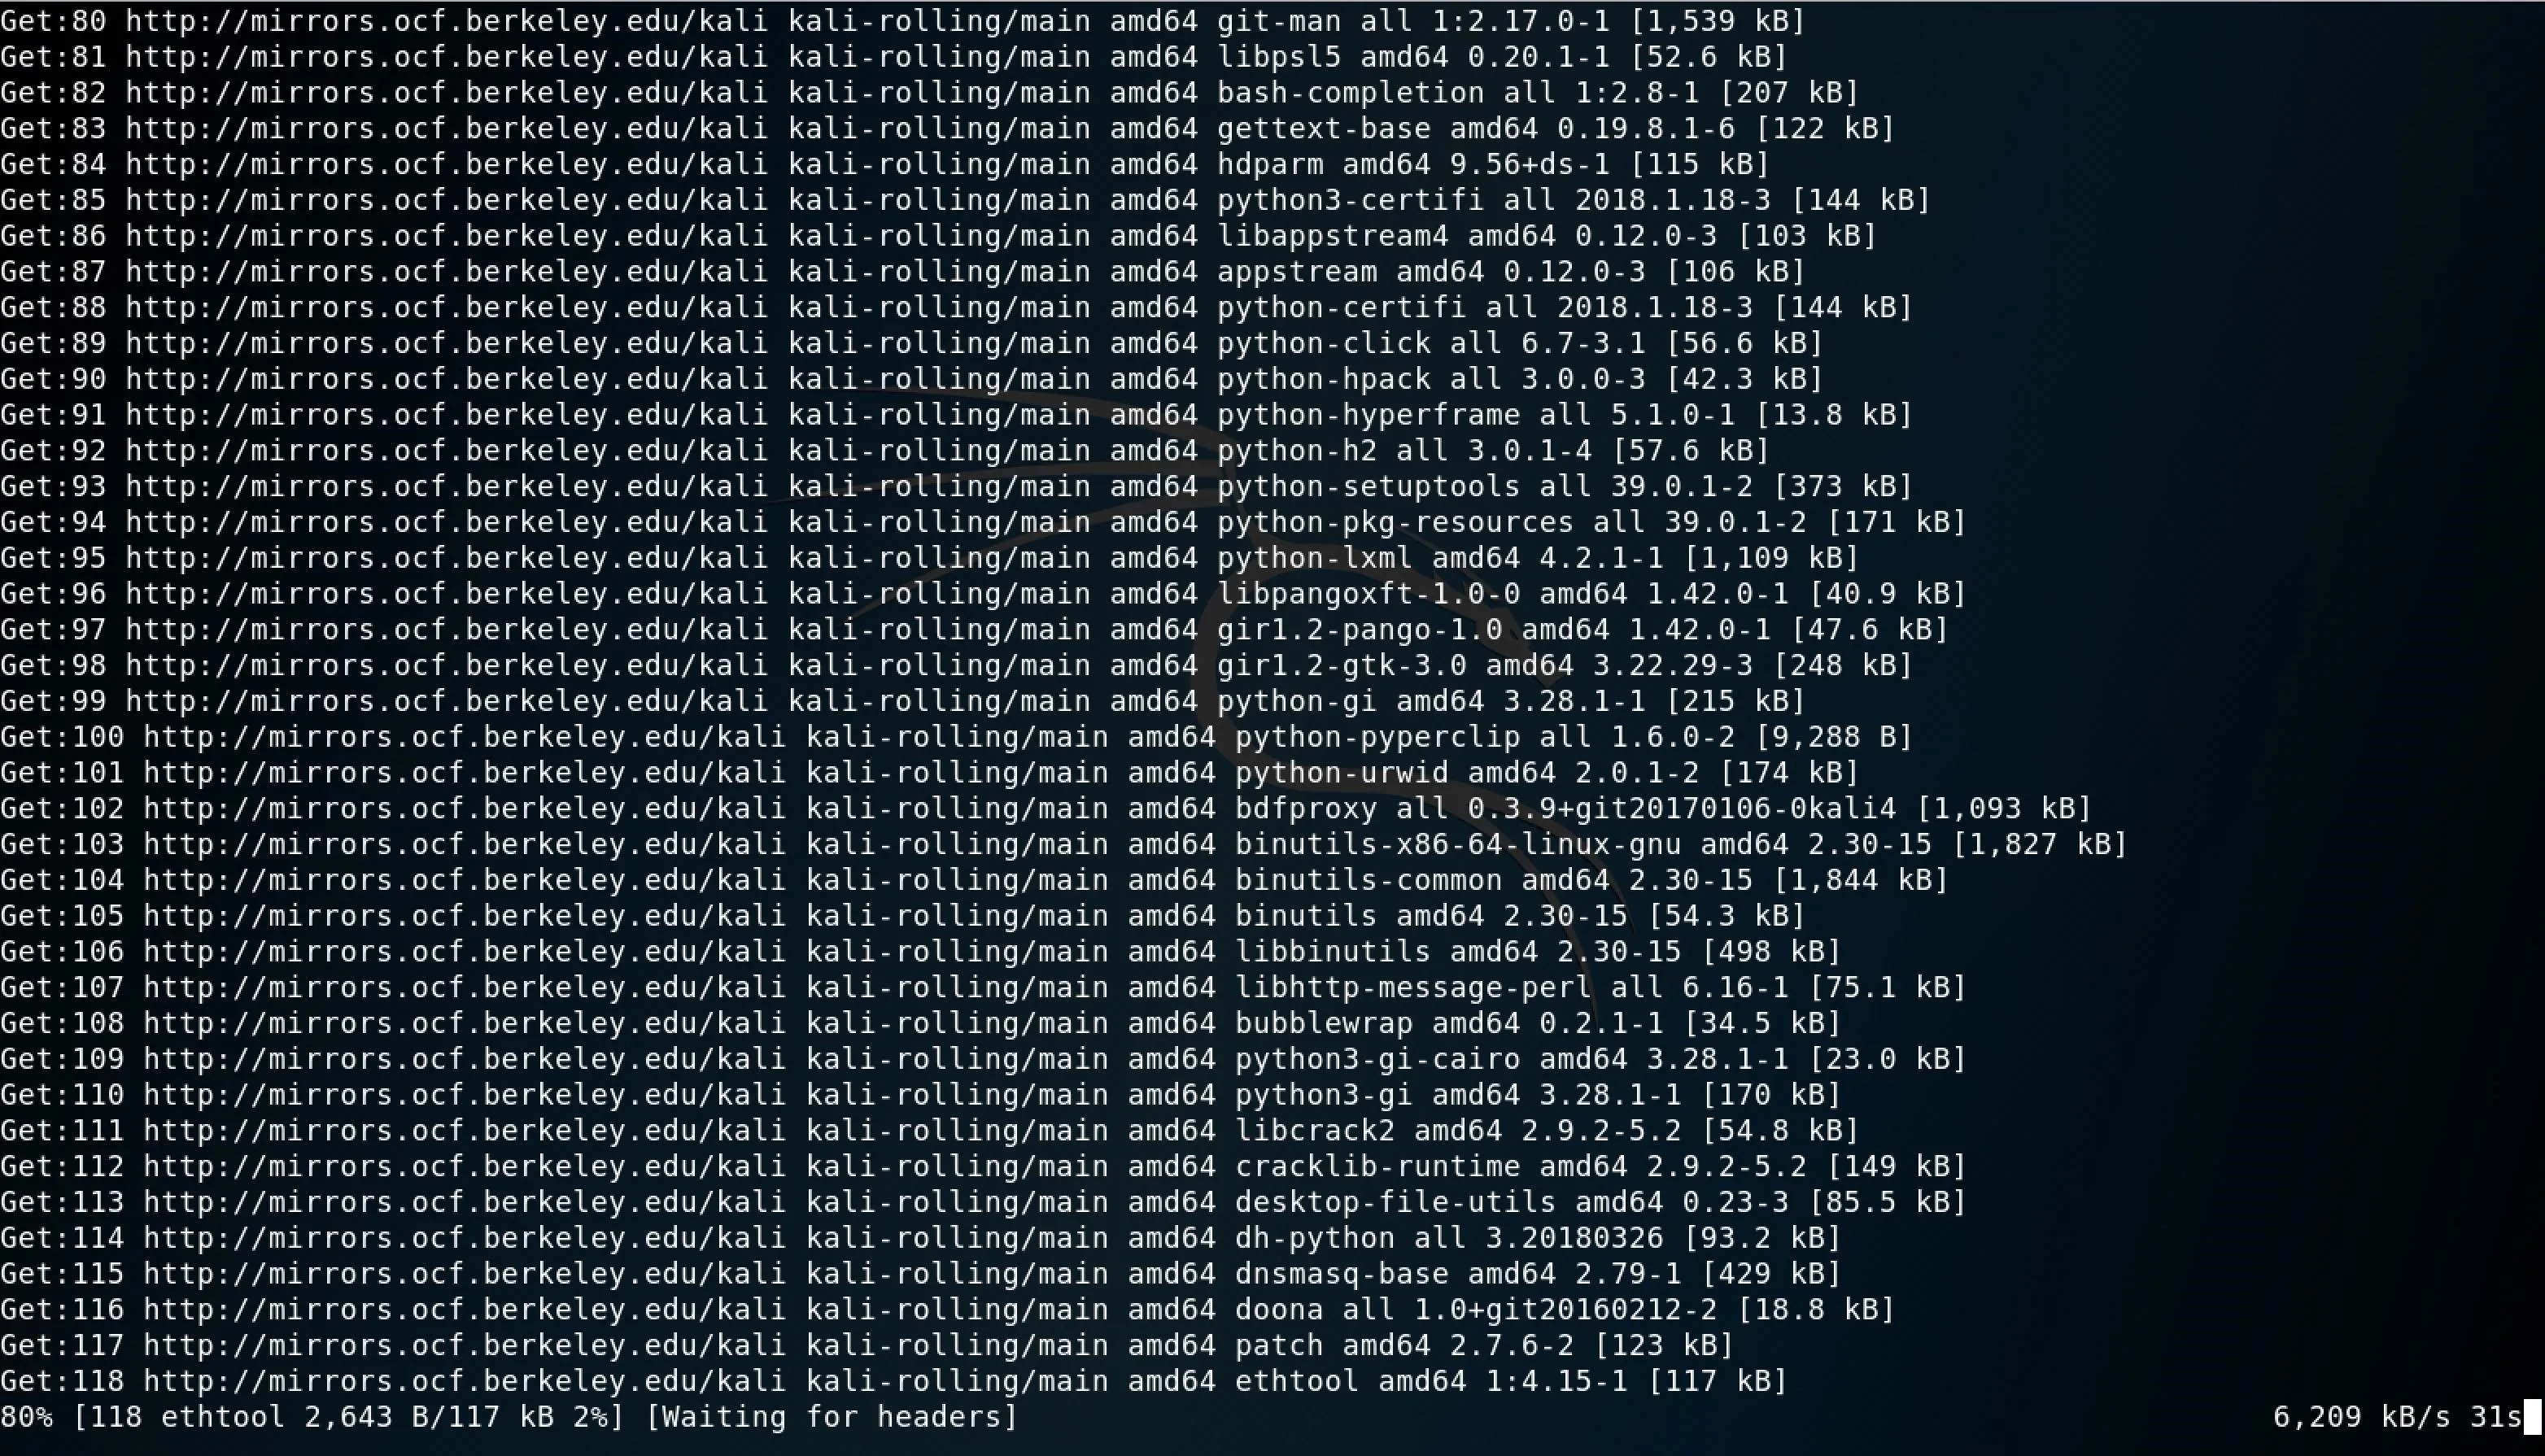
You should see some output like below. After all this finishes updating, we'll be ready to start configuring our Raspberry Pi.
Enable Bluetooth
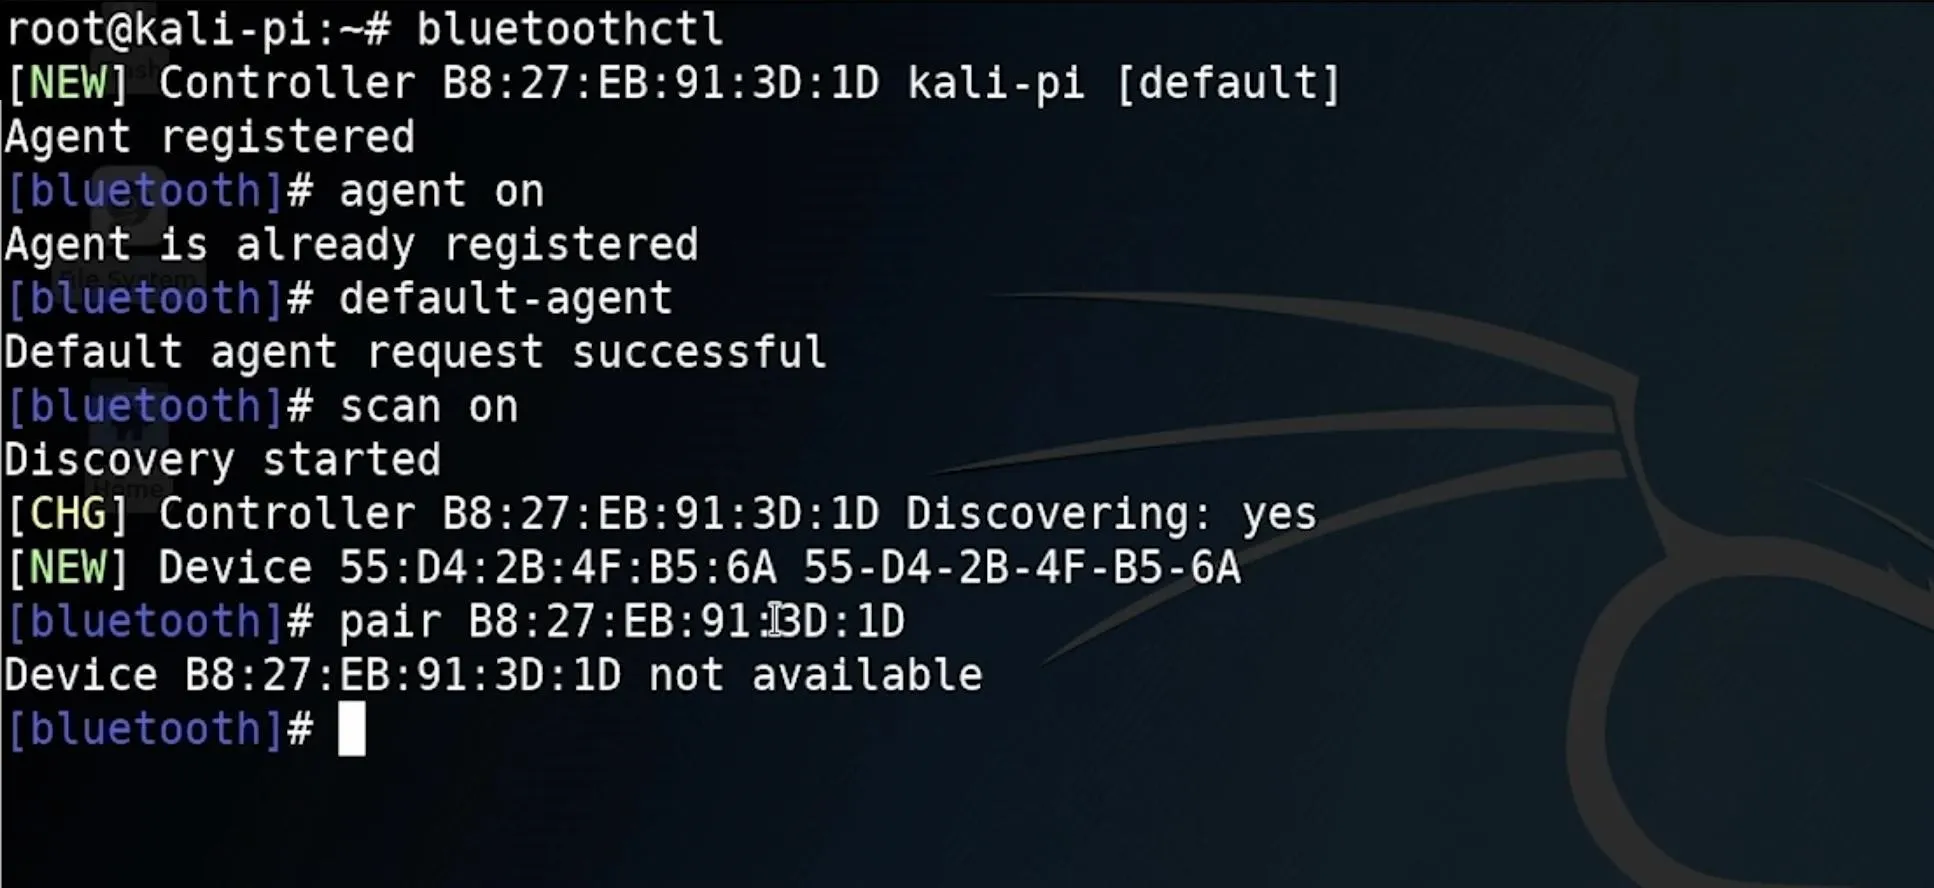
To enable Bluetooth, we can use the handy Bluetoothctl built into our Re4son Kali. To use it, type bluetoothctl into your terminal window. Next, to turn on the Bluetooth agent, type agent on. When the agent is registered, type default agent to register the default agent and enable the Bluetooth controller.
To start a scan for Bluetooth devices, type scan on, and you should see a list of devices begin to populate if there are any Bluetooth devices nearby. Finally, to pair with any devices you see, type pair and then the MAC address of the device you see on the list.
Change the SSH Keys
Using default SSH keys is bad, and can lead to being the victim of a man-in-the-middle attack. To defend against this, we'll need to change our default SSH keys and enable SSH to run at boot.
In your terminal window, cd to the SSH keys and reconfigure the server.
cd /etc/ssh/
dpkg-reconfigure openssh-server
This should create new SSH keys. Next, we'll run a few commands to enable runlevels for SSH and allow us to start the service at boot so we can log in remotely.
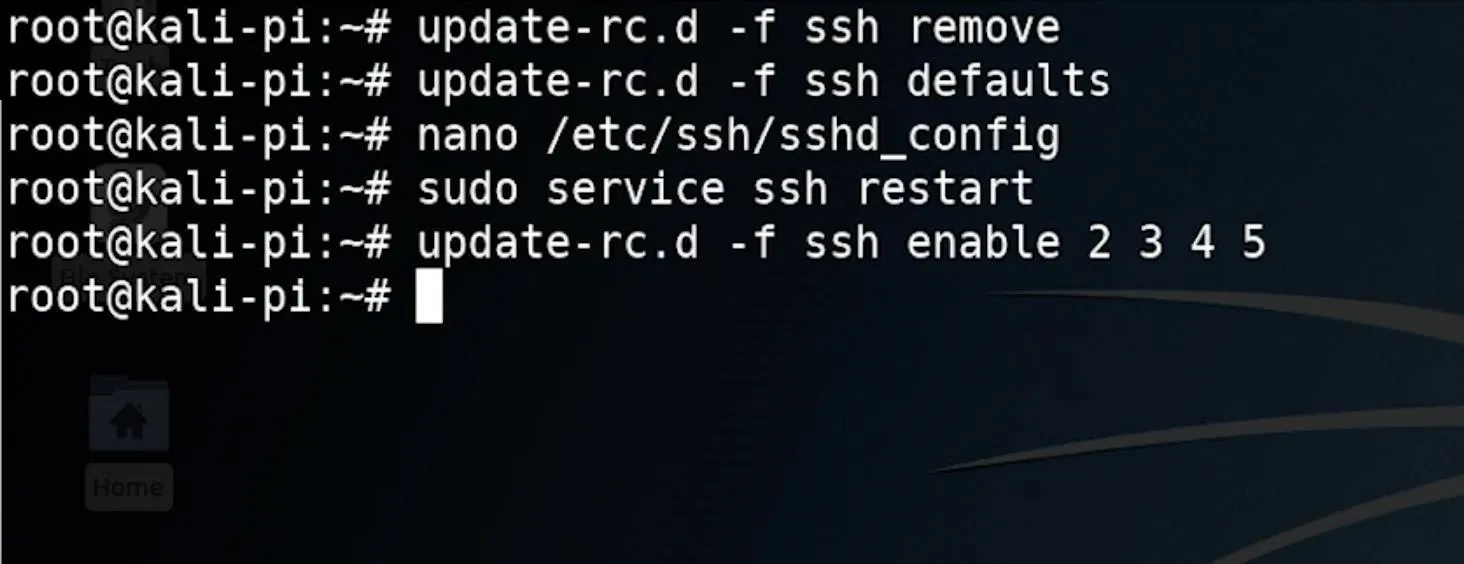
update-rc.d -f ssh remove
update-rc.d -f ssh defaults
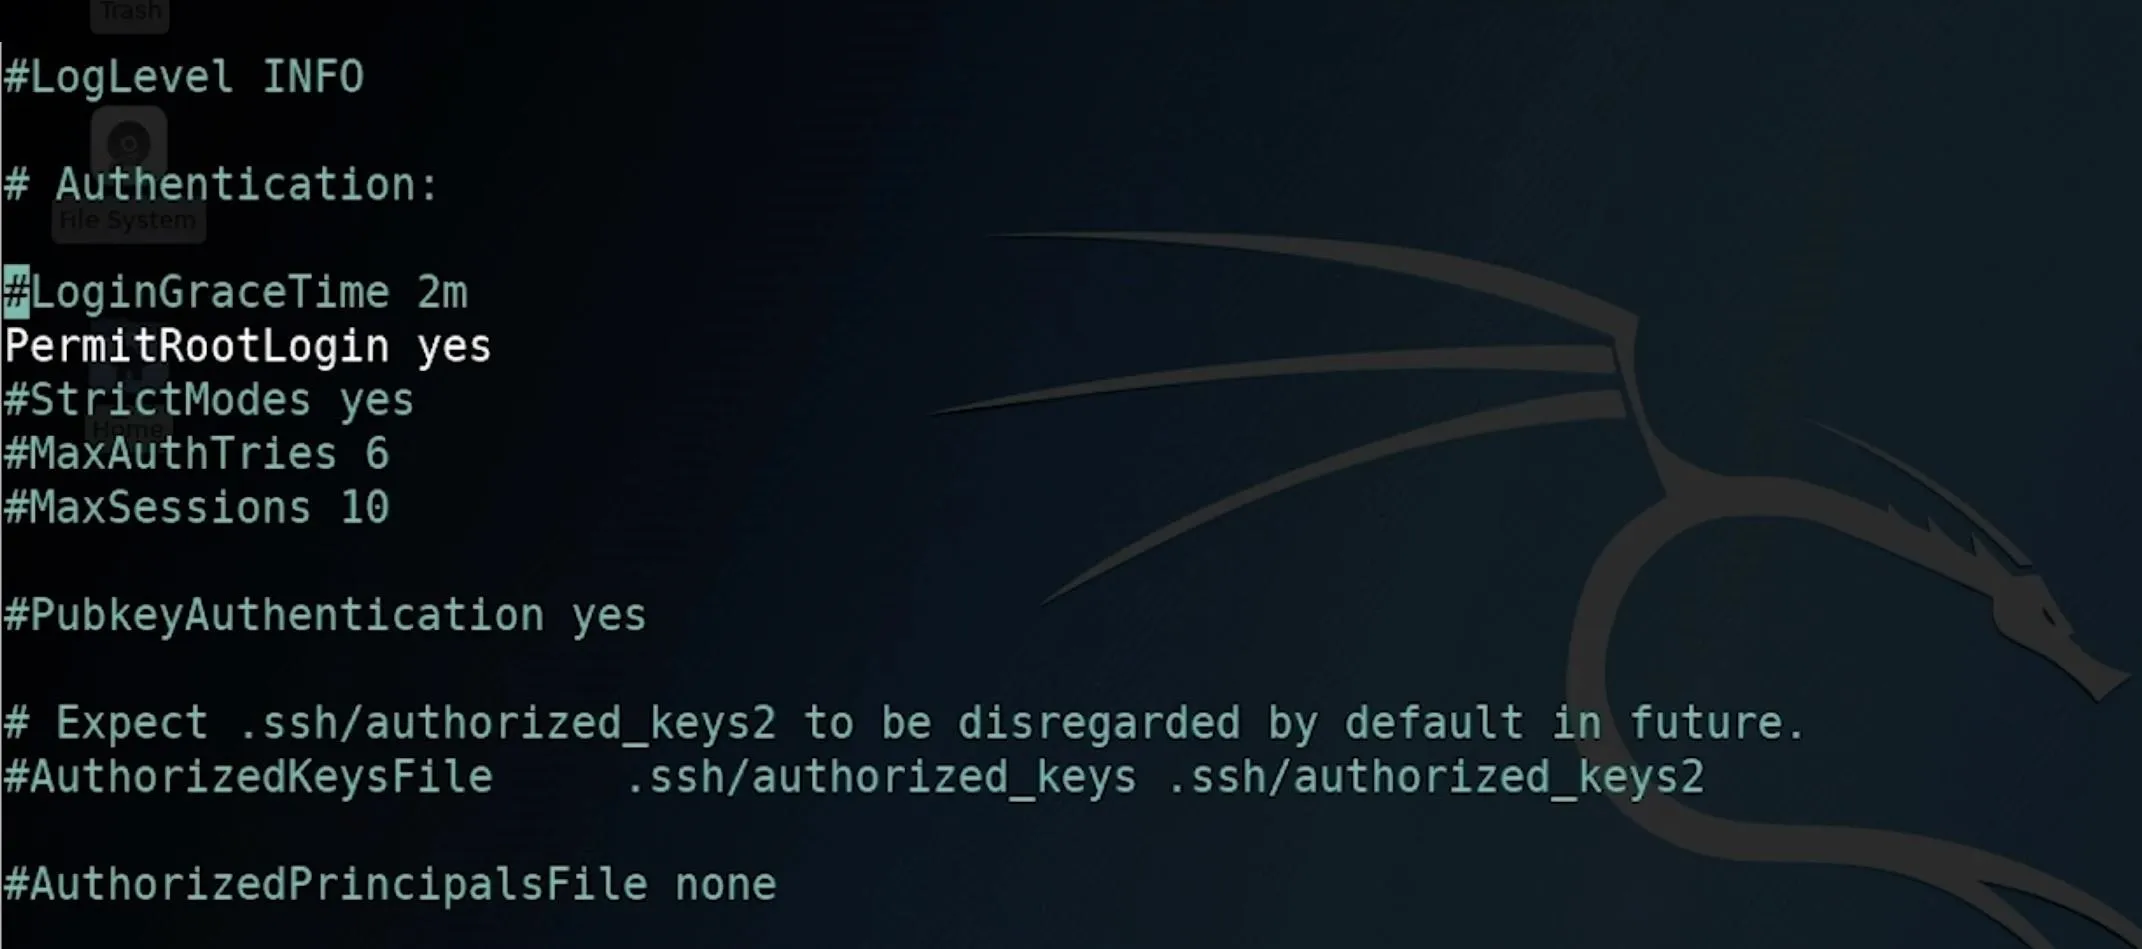
nano /etc/ssh/sshd_config
In the nano window that opens, make sure that "PermitRootLogin" is un-tabbed, as seen in the image below.
After this is done, you can hit Ctrl-X to exit the nano window after applying the changes. Next, type sudo service ssh restart to apply these changes. Finally, type update-rc.d -f ssh enable 2 3 4 5 to enable SSH at boot with the settings we've applied.
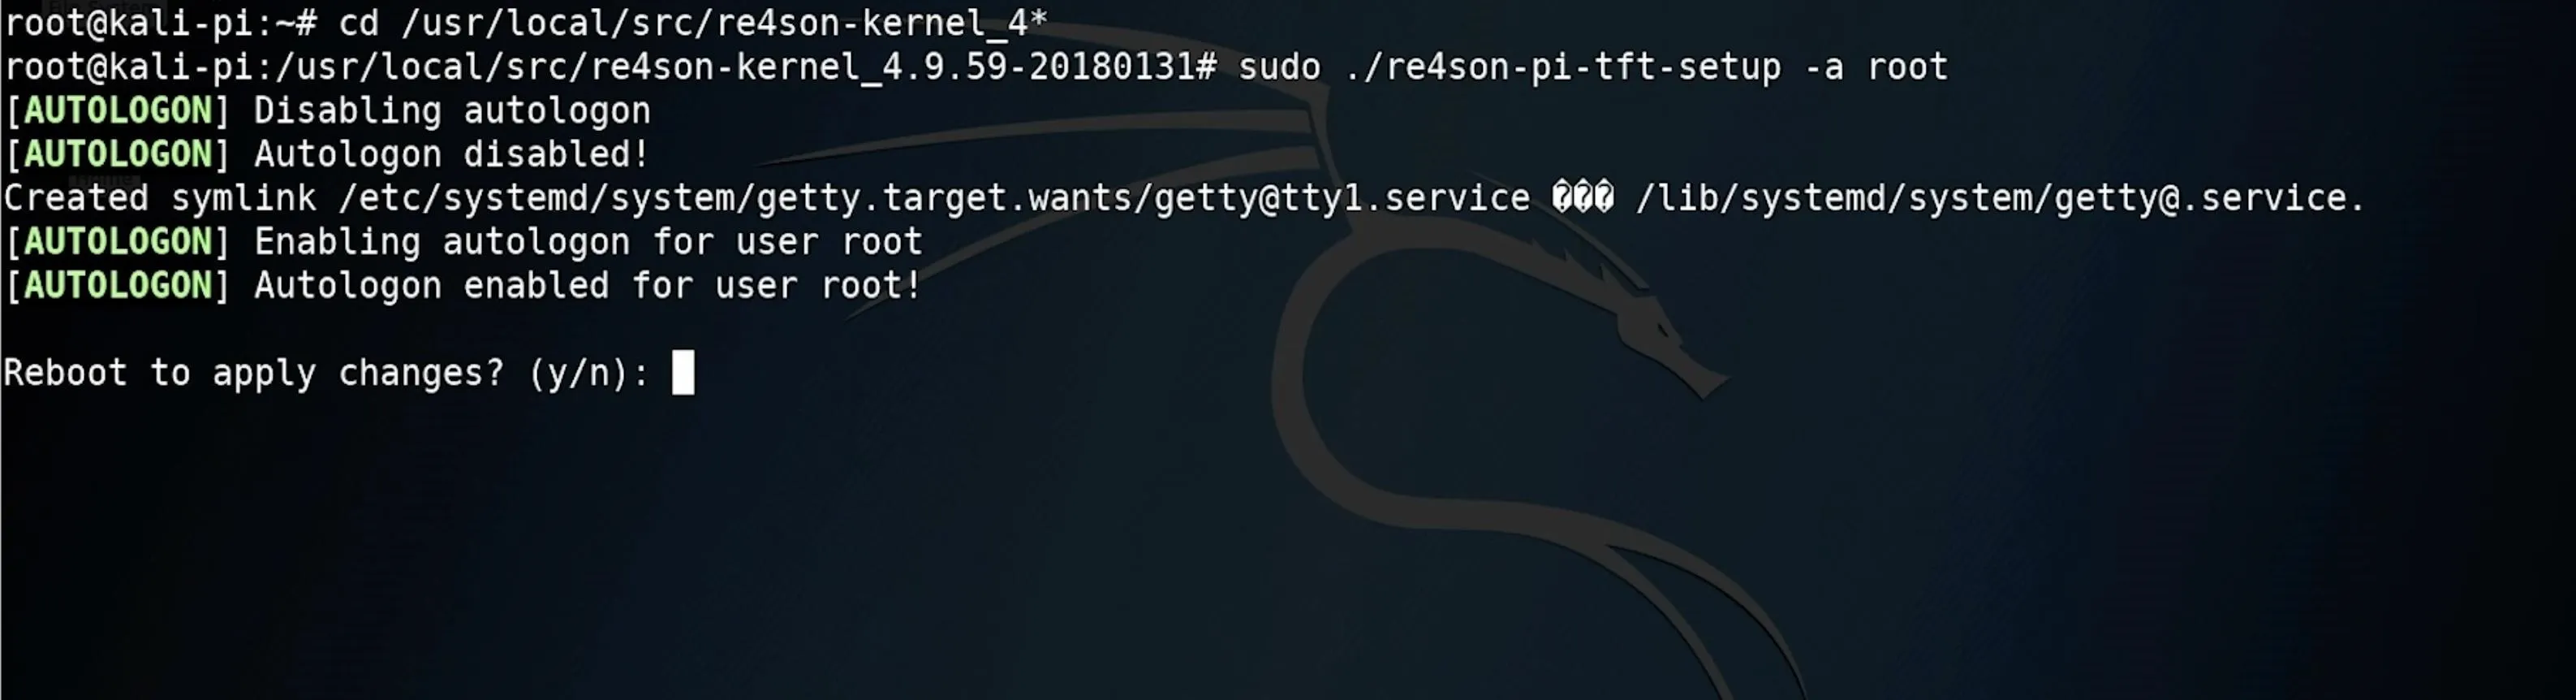
Enable Autologin
In our last Pi tutorial, enabling autologin to bypass the login prompt was by far the most annoying step. This time, thankfully, the process couldn't be more simple. This step is critical to use the Pi without a keyboard or screen, as SSH or VNC will not start if the Pi gets stuck at the login screen.
To enable autologin, type the following into your terminal window.
cd /usr/local/src/re4son-kernel_4*
./re4son-pi-tft-setup -a root
You should see output like below. To apply the changes and boot into your newly configured Pi, type Y to confirm and reboot.
Other Pi Projects on Null Byte
If you've got your Pi up and running, there's a lot you can do to get started! Check out some of our other guides on using the Raspberry Pi for hacking on Null Byte.
- Log into Your Raspberry Pi Using a USB-to-TTL Serial Cable
- Use VNC to Remotely Access Your Raspberry Pi from Other Devices
- Set Up a Practice Computer to Kill on a Raspberry Pi 3
- Build a Pumpkin Pi: The Rogue AP & MitM Framework That Fits in Your Pocket
- Wardrive with the Kali Raspberry Pi to Map Wi-Fi Devices
- Boot Multiple Operating Systems on the Raspberry Pi with BerryBoot
- Automate Hacking on the Raspberry Pi with the USB Rubber Ducky
Kody/Null Byte
I hope you enjoyed this guide to setting up a Raspberry Pi 3 Model B+ running Kali Linux! If you have any questions about this tutorial or the Pi as a hacking platform, feel free to leave a comment or reach me on Twitter @KodyKinzie.
- Follow Null Byte on Twitter, Flipboard, and YouTube
- Follow WonderHowTo on Facebook, Twitter, Pinterest, and Flipboard
Cover photo and screenshots by Kody/Null Byte


Comments
Be the first, drop a comment!