The Deauther Watch by Travis Lin is the physical manifestation of the Wi-Fi Deauther project by Spacehuhn, and it's designed to let you operate the Deauther project right from your wrist without needing a computer. That's pretty cool if you want to do all the interesting things that the Wi-Fi Deauther can do without plugging it into a device.
If you missed our guide on using an ESP8266-based Wi-Fi Deauther, you might be confused about what the Deauther does. For one, it can create deauthentication and disassociation packets, which can kick devices off the same Wi-Fi network the Deauther is attacking. It can do this over and over again, constantly jamming the network so that devices can't connect or stay connected.
Wi-Fi security cameras are an interesting use-case for this type of attack. You could use the Deauther Watch wearable hacking tool, then hunt down the Wi-Fi network that a security camera you come across is connected to, then send out a deauth attack to kick the cameras off the network so you can skate by unnoticed.
The Wi-Fi Deauther project can scan for both nearby access points and connected devices, and it can even clone any Wi-Fi network it sees. It can also generate dozens of fake Wi-Fi networks with any names you want, monitor channels for packet traffic between devices, and do all of this from a fancy built-in interface.
What You'll Need:
Now, you can actually build a Deauther Watch yourself if you want to buy all the components separately, but I recommend checking out one of the links below to pick a pre-flashed one up with all the parts included.
- Amazon: DSTIKE Deauther Watch v1 ($49.99 + tax and Prime shipping)
- Amazon: DSTIKE Deauther Watch v2 ($47.99 + tax and Prime shipping)
- Amazon: DSTIKE Deauther Watch v3 ($51.99 + tax and Prime shipping)
- DSTIKE: DSTIKE Deauther Watch v1 ($35 + tax and shipping)
- DSTIKE: DSTIKE Deauther Watch v2 ($45 + tax and shipping)
- DSTIKE: DSTIKE Deauther Watch v3 ($65 + tax and shipping)
- Aliexpress: DSTIKE Deauther Watch v1 ($35 + tax and shipping)
- Aliexpress: DSTIKE Deauther Watch v2 ($45 + tax and shipping)
- Aliexpress: DSTIKE Deauther Watch v3 ($65 + tax and shipping)
Python 3 is also needed if you need to install the firmware from scratch.
Flash from Scratch (If Needed)
The Deauther Watch should come pre-flashed with the right firmware, but if it's missing the software, has corrupted software, or something's not working right, you can install or reinstall it. In any of those cases, make sure you have the esptool installed with:
~$ pip3 install esptool

Collecting esptool
  Downloading https://files.pythonhosted.org/packages/68/91/08c182f66fa3f12a96e754ae8ec7762abb2d778429834638f5746f81977a/esptool-2.8.tar.gz (84kB)
    100% |████████████████████████████████| 92kB 928kB/s
Requirement already satisfied: ecdsa in /usr/lib/python3/dist-packages (from esptool) (0.13)
Collecting pyaes (from esptool)
  Downloading https://files.pythonhosted.org/packages/44/66/2c17bae31c906613795711fc78045c285048168919ace2220daa372c7d72/pyaes-1.6.1.tar.gz
Requirement already satisfied: pyserial>=3.0 in /usr/lib/python3/dist-packages (from esptool) (3.4)
Building wheels for collected packages: esptool, pyaes
  Running setup.py bdist_wheel for esptool ... done
  Stored in directory: /root/.cache/pip/wheels/56/9e/fd/06e784bf9c77e9278297536f3df36a46941c885eb23593bb16
  Running setup.py bdist_wheel for pyaes ... done
  Stored in directory: /root/.cache/pip/wheels/bd/cf/7b/ced9e8f28c50ed666728e8ab178ffedeb9d06f6a10f85d6432
Successfully built esptool pyaes
Installing collected packages: pyaes, esptool
Successfully installed esptool-2.8 pyaes-1.6.1
Next, go to the Releases page of Spacehuhn's Wi-Fi Deauther project on GitHub to make sure you're getting the most recent firmware version. Find and download the BIN file for the most recent Deauther Watch, which is currently one of these:
https://github.com/SpacehuhnTech/esp8266_deauther/releases/download/2.6.0/esp8266_deauther_2.6.0_DSTIKE_DEAUTHER_WATCH.bin

https://github.com/SpacehuhnTech/esp8266_deauther/releases/download/2.6.0/esp8266_deauther_2.6.0_DSTIKE_DEAUTHER_WATCH_V2.bin
If you have any problems installing the firmware, Spacehuhn's Wi-Fi Deauther Wiki on GitHub is a great resource to find the commands needed and some tips and tricks for installing the BIN file on the Watch.
Plug in the ESP8266 microcontroller on the Deauther Watch to your computer using a Micro-USB cable, then locate the port that it's connected to. To do that, use ls /dev/cu.* on macOS, dmesg | grep tty on Linux, or by looking in the Device Manager for the com port in Windows. We have manymicrocontrollerguidesthatshowlocating the port in more detail, so check one of those out if you have any issues.
When you've got the right port, flash the firmware using the following command. Make sure to replace /dev/ttyUSB0 with the port your Deauther Wristband is connected to, and change the BIN file name if it's not the same version.
esptool.py -p /dev/ttyUSB0 write_flash -fm dout 0x0000 esp8266_deauther_2.6.0_DSTIKE_DEAUTHER_WATCH.binThis should write the firmware to the device, but the screen may not turn on.
Enable the Screen (If Needed)
If your Deauther Watch's screen isn't working, then you'll need to enable it. The Wi-Fi Deauther Wiki has a good Setup Display and Buttons resource if you need it at any point.
With your Deauther Watch still connected to your computer via Micro-USB cable, connect to it using screen with the following command. You'll need to replace the port with the one your Deauther Watch is connected to.
~$ screen /dev/ttyUSB0 115200

MicroPython v1.15 on 2021-05-14; ESP module with ESP8266
Type "help()" for more information.
>>>
Alternatively, you can connect to it in Arduino IDE. If you want to go that route, open Arduino IDE, click "Tools" in the menu, select "Port," and choose the port of your connected Deauther Watch. Then, press Command-Shift-M on your keyboard or click on the serial monitor button in the current window to open the serial monitor
Once connected, either through a terminal or Arduino IDE, type help to see a list of commands and confirm you're connected properly. You should see output like below.
>>> help

[===== List of commands =====]
help
scan [<all/aps/stations>] [-t <time>] [-c <continue-time>] [-ch <channel>]
show [selected] [<all/aps/stations/names/ssids>]
select [<all/aps/stations/names>] [<id>]
deselect [<all/aps/stations/names>] [<id>]
add ssid <ssid> [-wpa2] [-cl <clones>]
add ssid -ap <id> [-cl <clones>] [-f]
add ssid -s [-f]
add name <name> [-ap <id>] [-s]
add name <name> [-st <id>] [-s]
add name <name> [-m <mac>] [-ch <channel>] [-b <bssid>] [-s]
set name <id> <newname>
enable random <interval>
disable random
load [<all/ssids/names/settings>] [<file>]
save [<all/ssids/names/settings>] [<file>]
remove <ap/station/name/ssid> <id>
remove <ap/station/names/ssids> [all]
attack [beacon] [deauth] [deauthall] [probe] [nooutput] [-t <timeout>]
attack status [<on/off>]
stop <all/scan/attack/script>
sysinfo
clear
format
print <file> [<lines>]
delete <file> [<lineFrom>] [<lineTo>]
replace <file> <line> <new-content>
copy <file> <newfile>
rename <file> <newfile>
run <file>
write <file> <commands>
get <setting>
set <setting> <value>
reset
chicken
reboot
info
// <comments>
send deauth <apMac> <stMac> <rason> <channel>
send beacon <mac> <ssid> <ch> [wpa2]
send probe <mac> <ssid> <ch>
led <r> <g> <b> [<brightness>]
led <#rrggbb> [<brightness>]
led <enable/disable>
draw
screen <on/off>
screen mode <menu/packetmonitor/buttontest/loading>
========================================================================
for more information please visit github.com/spacehuhn/esp8266_deauther
========================================================================
Now, run the following commands in your terminal or Arduino IDE to enable the screen.
>>> set display true;;save settingsYou may need to restart the device for the settings to take effect. When you boot back up, the screen should now be working!
Create a Reactive Target (Optional)
To have something legal to practice on, it's good to create a reactive target, which is basically a device on a Wi-Fi hacking test network. One can be made based on the default Arduino IDE "WiFiAccessPoint" sketch for ESP8266-based microcontrollers like the D1 Mini.
Kody Kinzie has a modified sketch on his WiFiHackingWorkshop project on GitHub. The sketch is the ReactiveTarget.ino file, so make sure that's the one you grab. Download that, then flash it over to your ESP8266. The code box below shows the ReactiveTarget.ino file contents if you want to rebuild it yourself.
If you need help with this, check out my previous guide on playing Wi-Fi hacking games legally using microcontrollers, which shows a similar step.
// SIMPLE Wi-FI LINK MONITOR BY SKICKAR - Based on Henry's Bench Wi-Fi link checker
// This project has the goal to connect an ioT device to a Wi-Fi network and monitor the ability to establish a normal wireless connection.
// The project uses only three componants - A nodeMCU, a breadboard, and one RGB LED.
    #include <ESP8266WiFi.h> // First, we include the libraries we need to make this work on the ESP8266
#include <ESP8266WiFi.h>
#include <ESP8266HTTPClient.h>

    const char* ssid     = "Control"; // Next, we set the name of the network to monitor.
    const char* password = "testytest"; // After that, we enter the password of the network to monitor.
    int wifiStatus; // Here, we create a variable to check the status of the Wi-Fi connection.
    int connectSuccess = 0, highTime = 500, lowtime = 500; // And now, we set a variable to count the number of times we've been able to successfully connect, and how long the LED will stay on and off for.

void red() { // Here, we will map a function called "red" to the right pin that will light up the red LED for the amount of time we defined in hightTime for how long it is lit, and lowTime for how long it is off each time we pulse a red LED.
      digitalWrite(D1, HIGH), delay(highTime), digitalWrite(D1, LOW), delay(lowtime);  // We map the red function to the D5 pin, so that each time we call red() it will pulse power on the D5 pin.
}
void green() { // We do the same with green, mapping the D6 pin to the green() function.
      digitalWrite(D2, HIGH), delay(highTime), digitalWrite(D2, LOW), delay(lowtime);
}
void blue() { // Finally, we do the same with blue, mapping it to the D7 pin.
      digitalWrite(D3, HIGH), delay(highTime), digitalWrite(D3, LOW), delay(lowtime);
}
void setup() { // The setup function runs only once when the device starts up.
  unsigned long previousMillis = 0;        // will store last time LED was updated

// constants won't change:
const long interval = 1000;           // interval at which to blink (milliseconds)

  pinMode(D1, OUTPUT), pinMode(D2, OUTPUT), pinMode(D3, OUTPUT); // In this case, we will activate the D5, D6, and D7 pins for output mode.
      WiFi.begin(ssid, password); // The last part of setup we will write is to start the Wi-Fi connection process.
      }

void loop() { // This loop will run over and over again, unlike the setup function, which will only run once.
          HTTPClient http;
          http.begin(/*client, */ "https://192.168.4.1");

        int httpCode   = http.GET();
        String payload = http.getString();

        if (httpCode > 0) {
        } else {
            Serial.printf("ERROR %d\n", httpCode);
        }

      //delay(1000); // Set a delay of one second per cycle of checking the status of the link.
      wifiStatus = WiFi.status(); // First, we'll check the status of the Wi-Fi connection and store the result in the variable we created, wifiStatus.
      if(connectSuccess == 0){ blue();} // If device is not connected and never has successfully connected, flash the blue light. This could mean the network doesn't exist, is out of range, or you misspelled the SSID or password.
      if(wifiStatus == WL_CONNECTED){ green(), connectSuccess ++; } // If the device is connected, flash the green light, and add one to the count of the "connectSuccess" variable. This way, we will know to flash the red light if we lose the connection.
      else if(connectSuccess != 0){ red(); } // If the connection is not active but we have been able to connect before, flash the red LED. That means the AP is down, a jamming attack is in progress, or a normal link is otherwise impossible.

}
This sketch continually checks to see if a Wi-Fi network is accessible, if the device can connect successfully to it, or if it's being blocked. If it's being blocked, then the ESP8266 will go ahead and warn me with a red flash, and if it's able to connect successfully, it'll let me know with a green flash. If it's never able to connect at all, meaning something's wrong with my access point, the ESP8266 will flash blue.
Scan for Target Networks
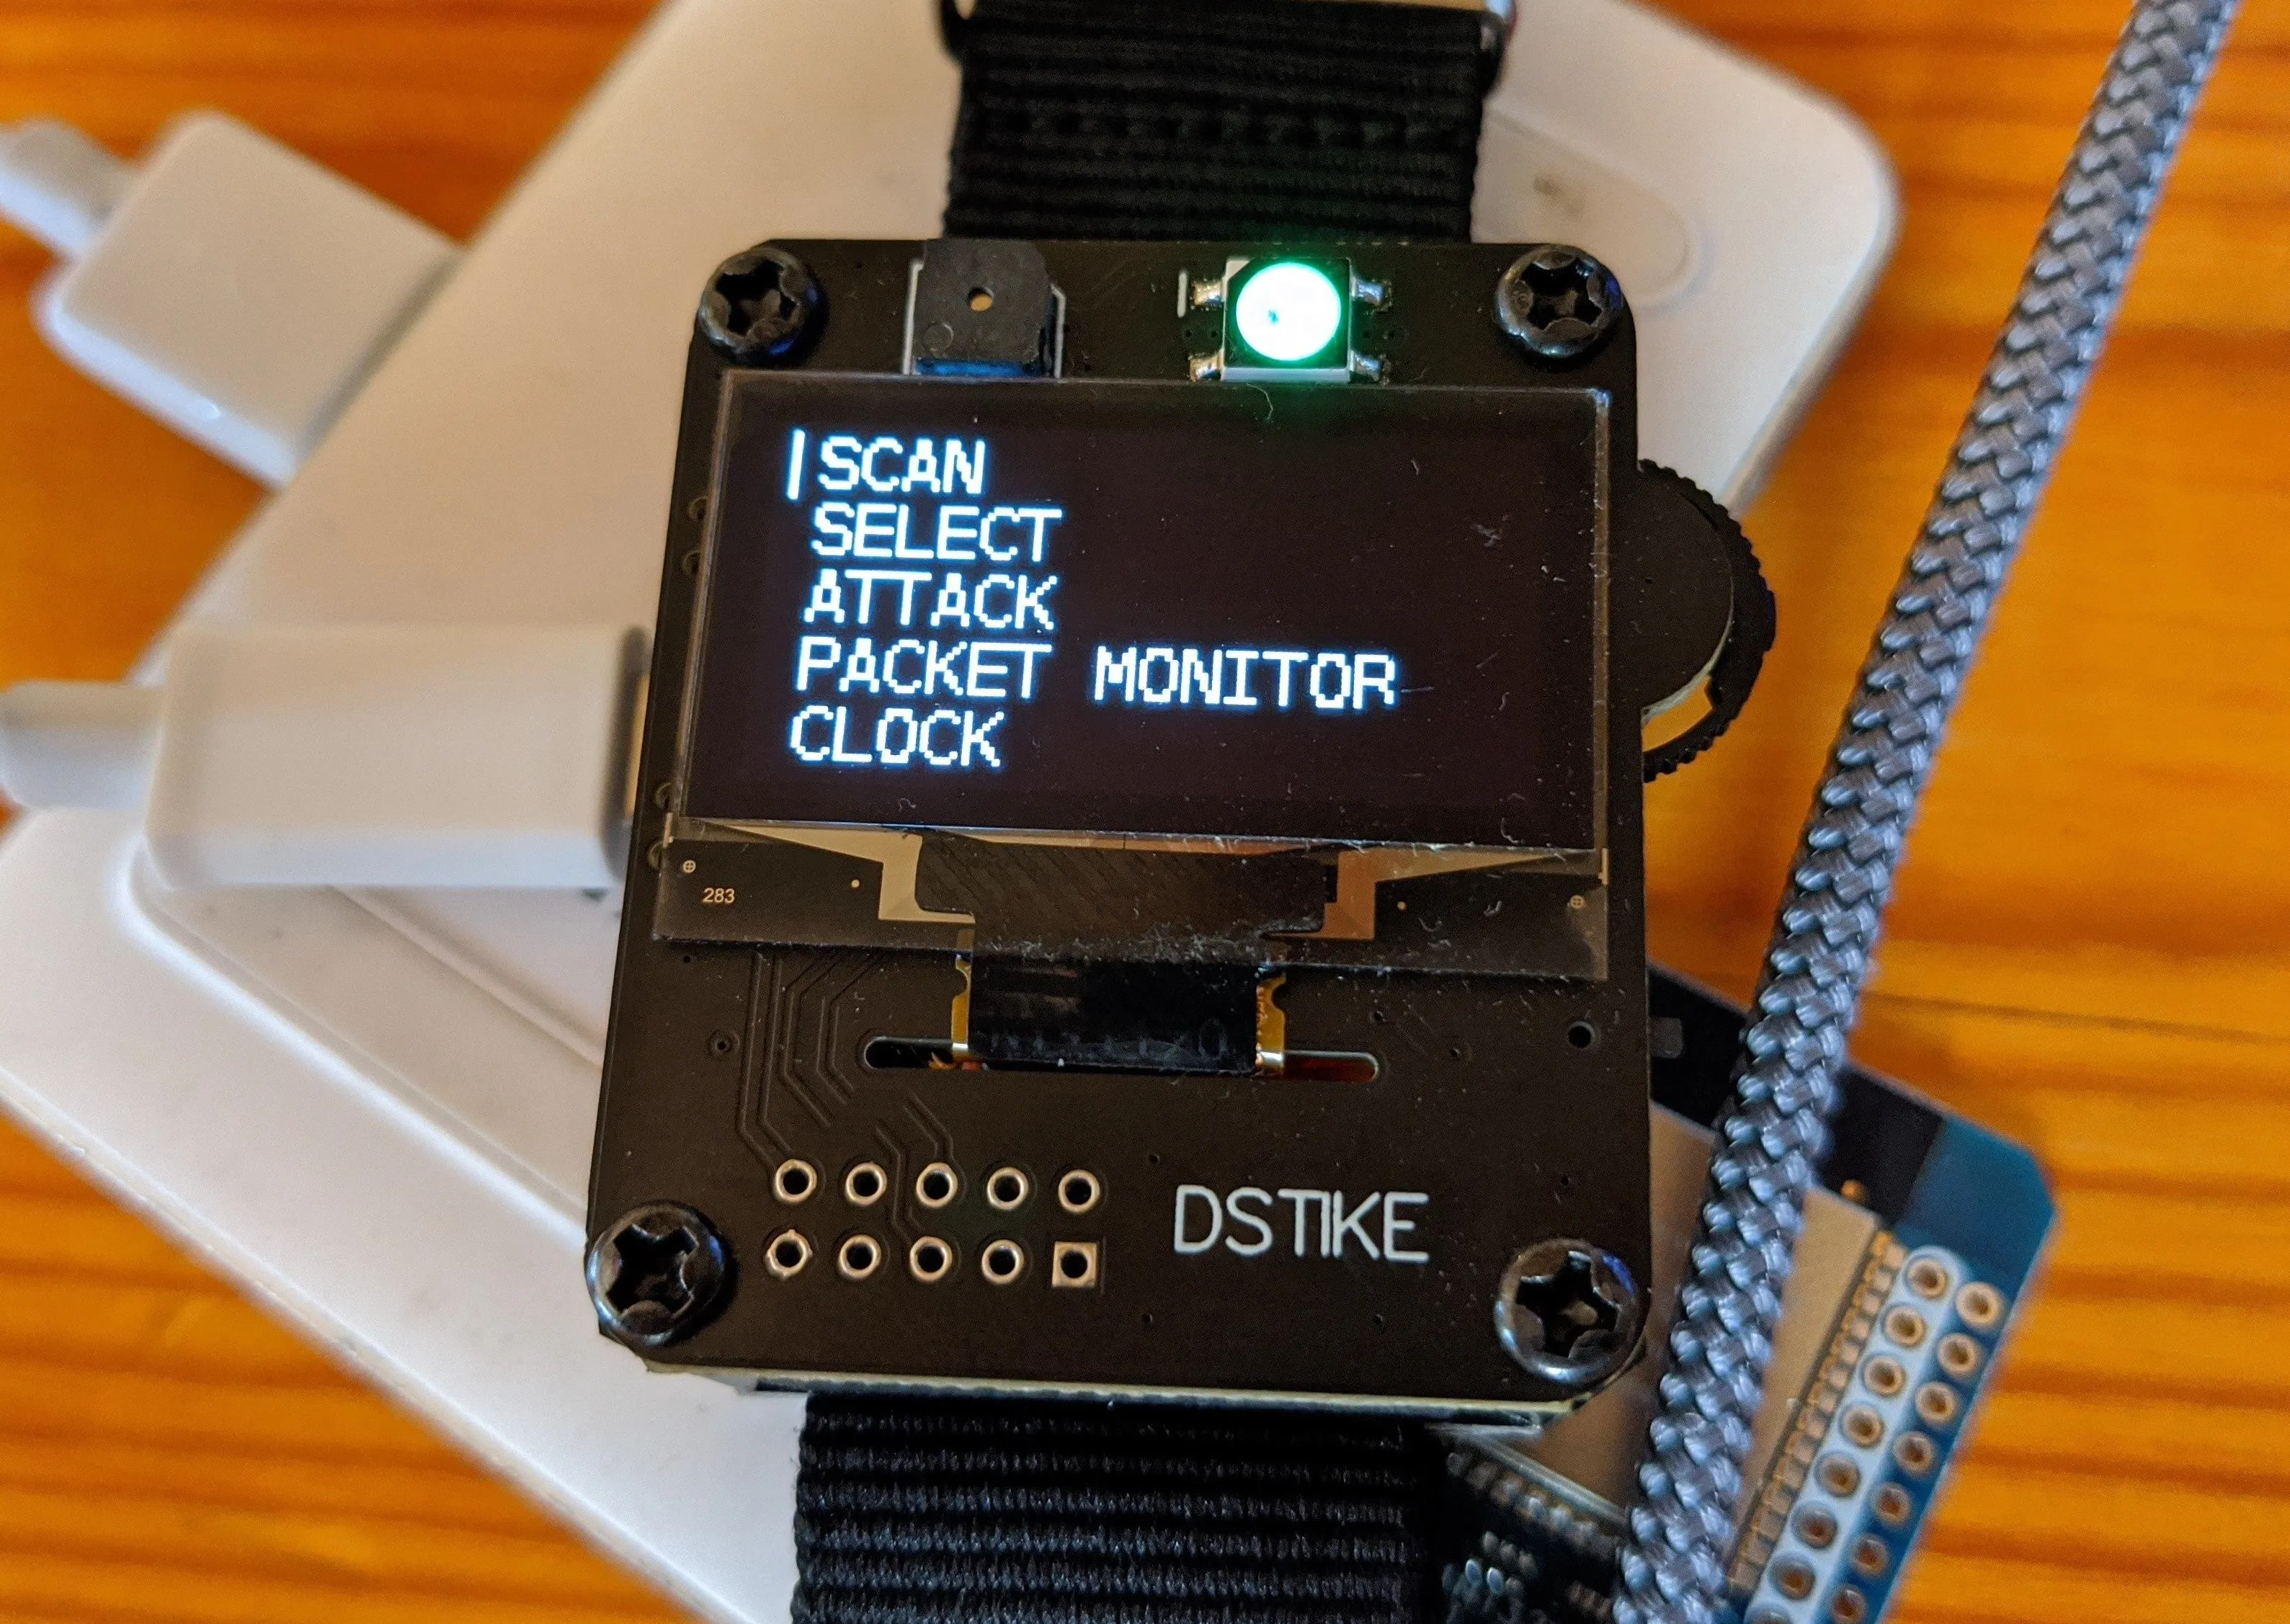
Now, we can turn on the Deauther Watch by flipping the switch on the side. From the main watch menu, use the scroll switch to select the SCAN option, then press the scroll switch to enter the scan menu.

Retia/Null Byte
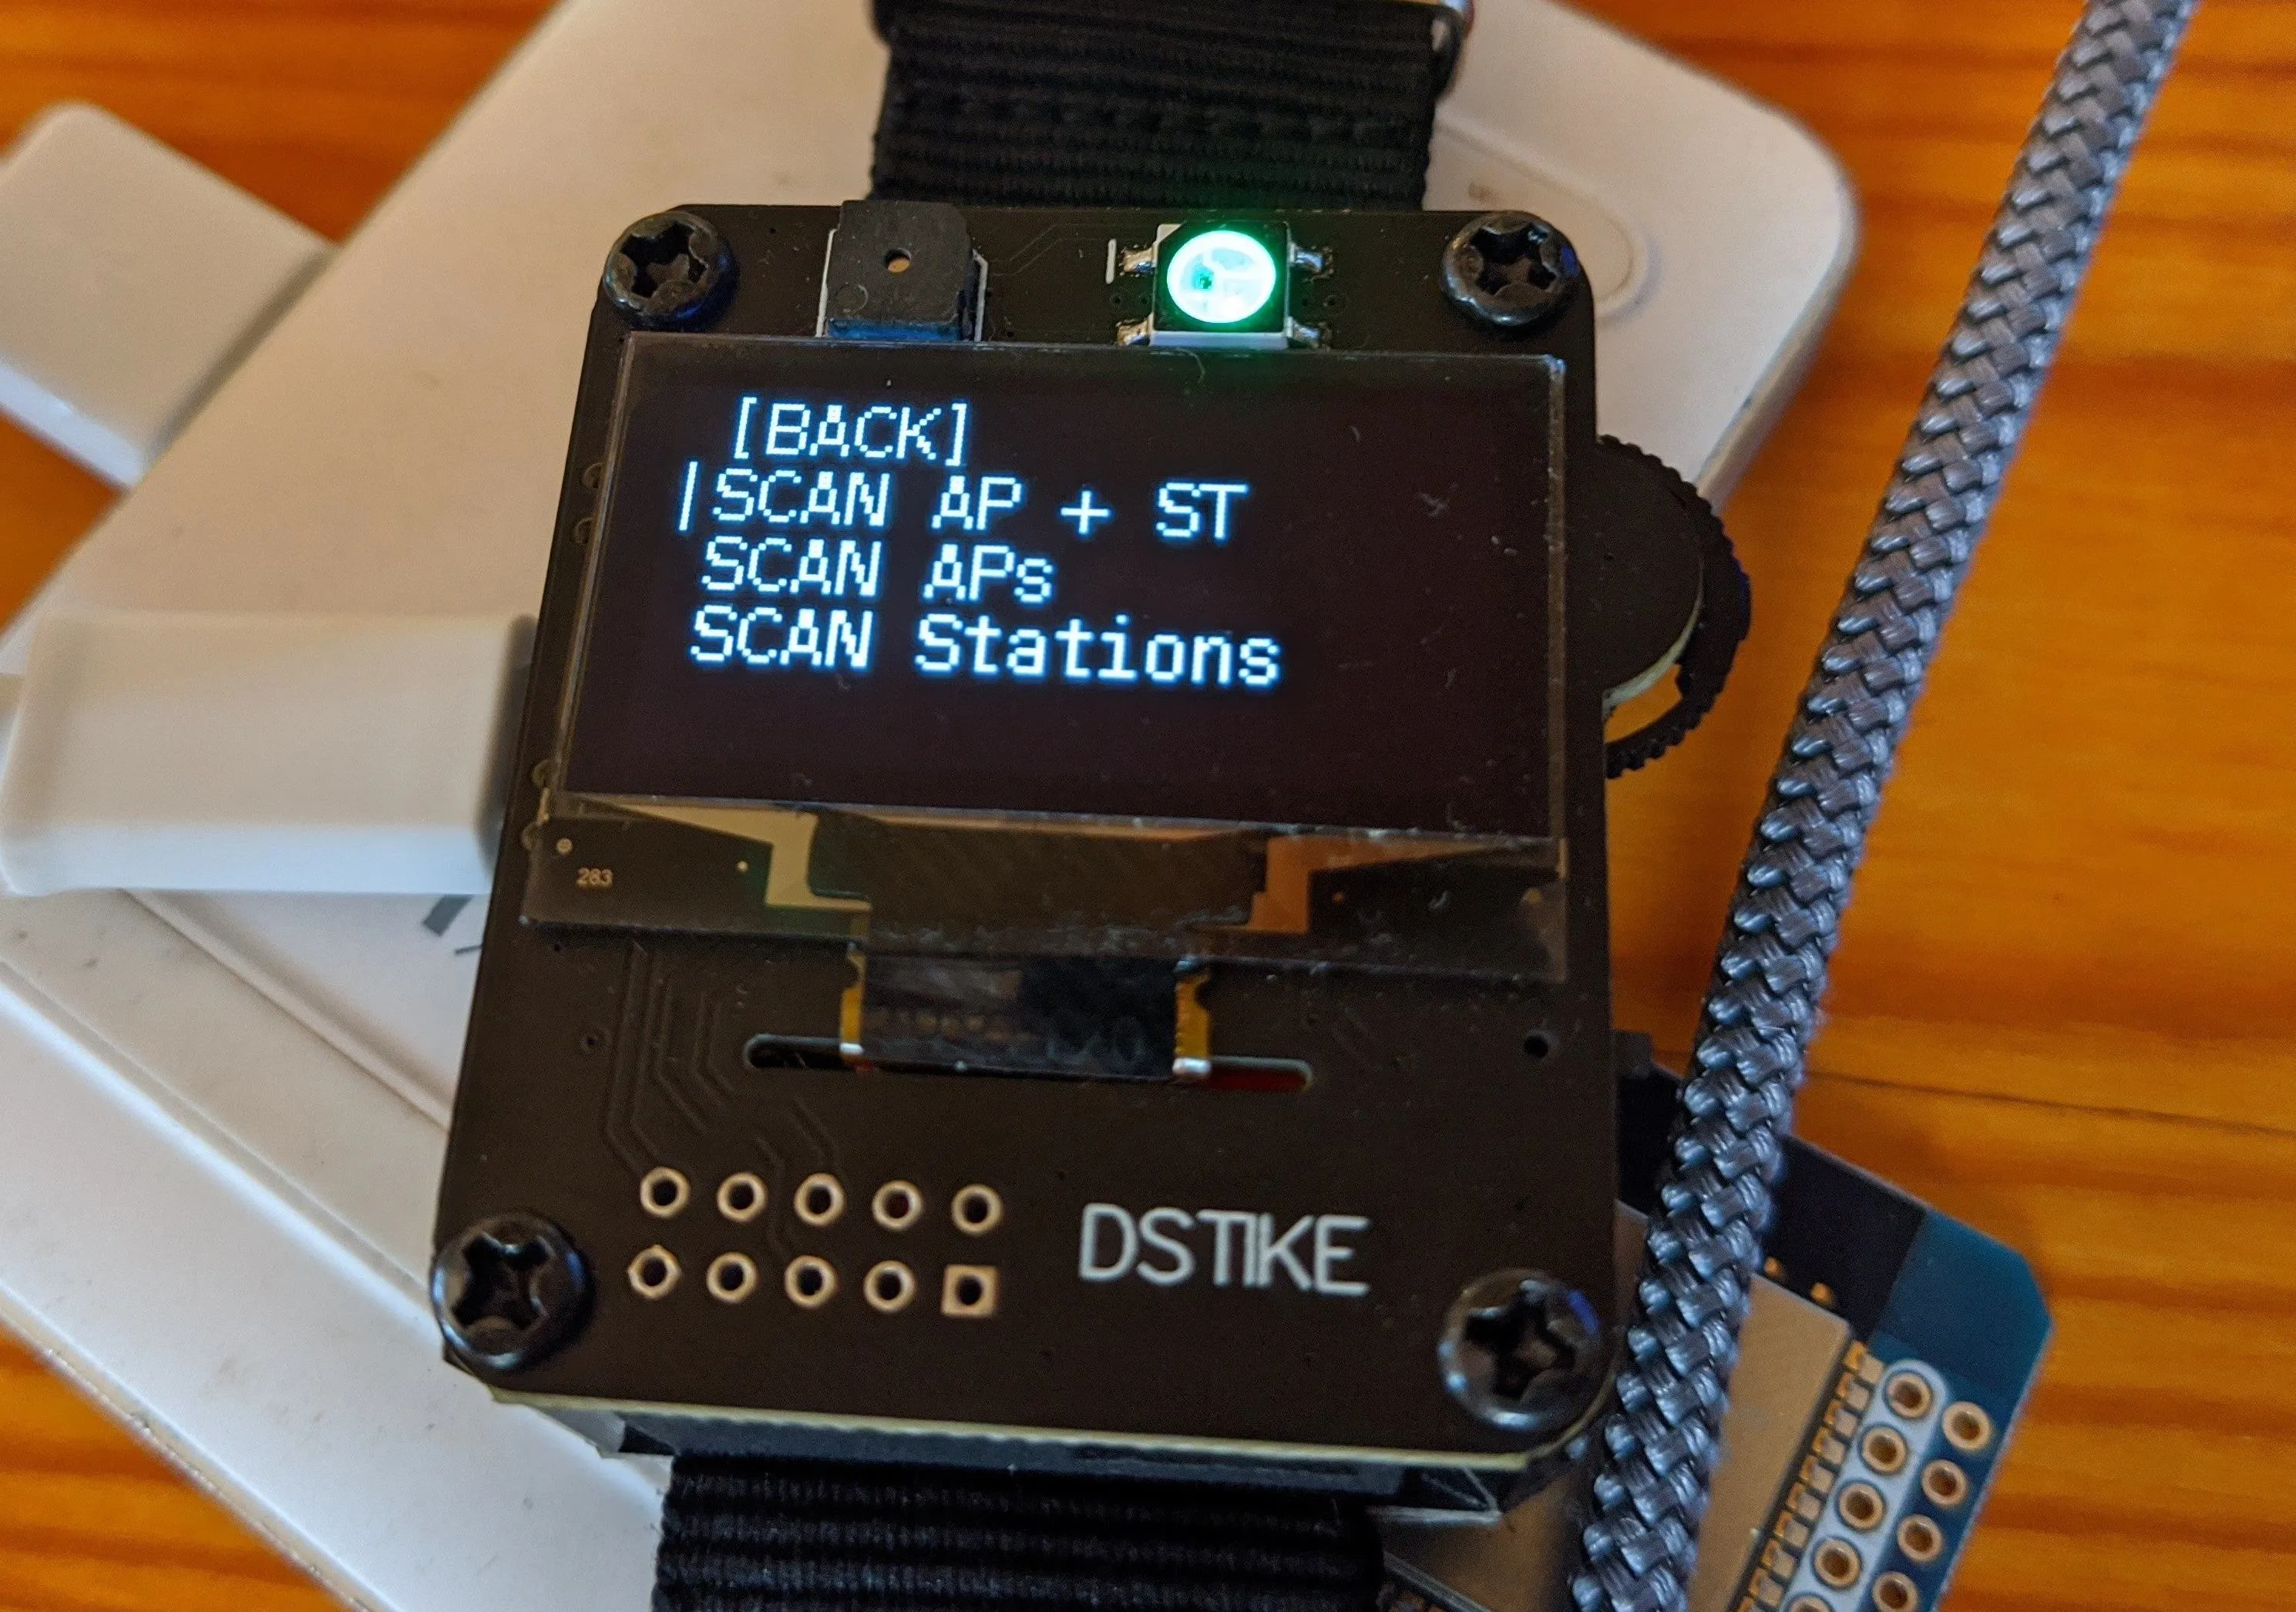
From the scan menu, you can decide to scan for access points (SCAN APs), stations (SCAN STATIONS), or both (SCAN AP + ST). After you decide which to scan for and have selected it with the scroll switch, press the scroll switch to begin the scan.

Retia/Null Byte
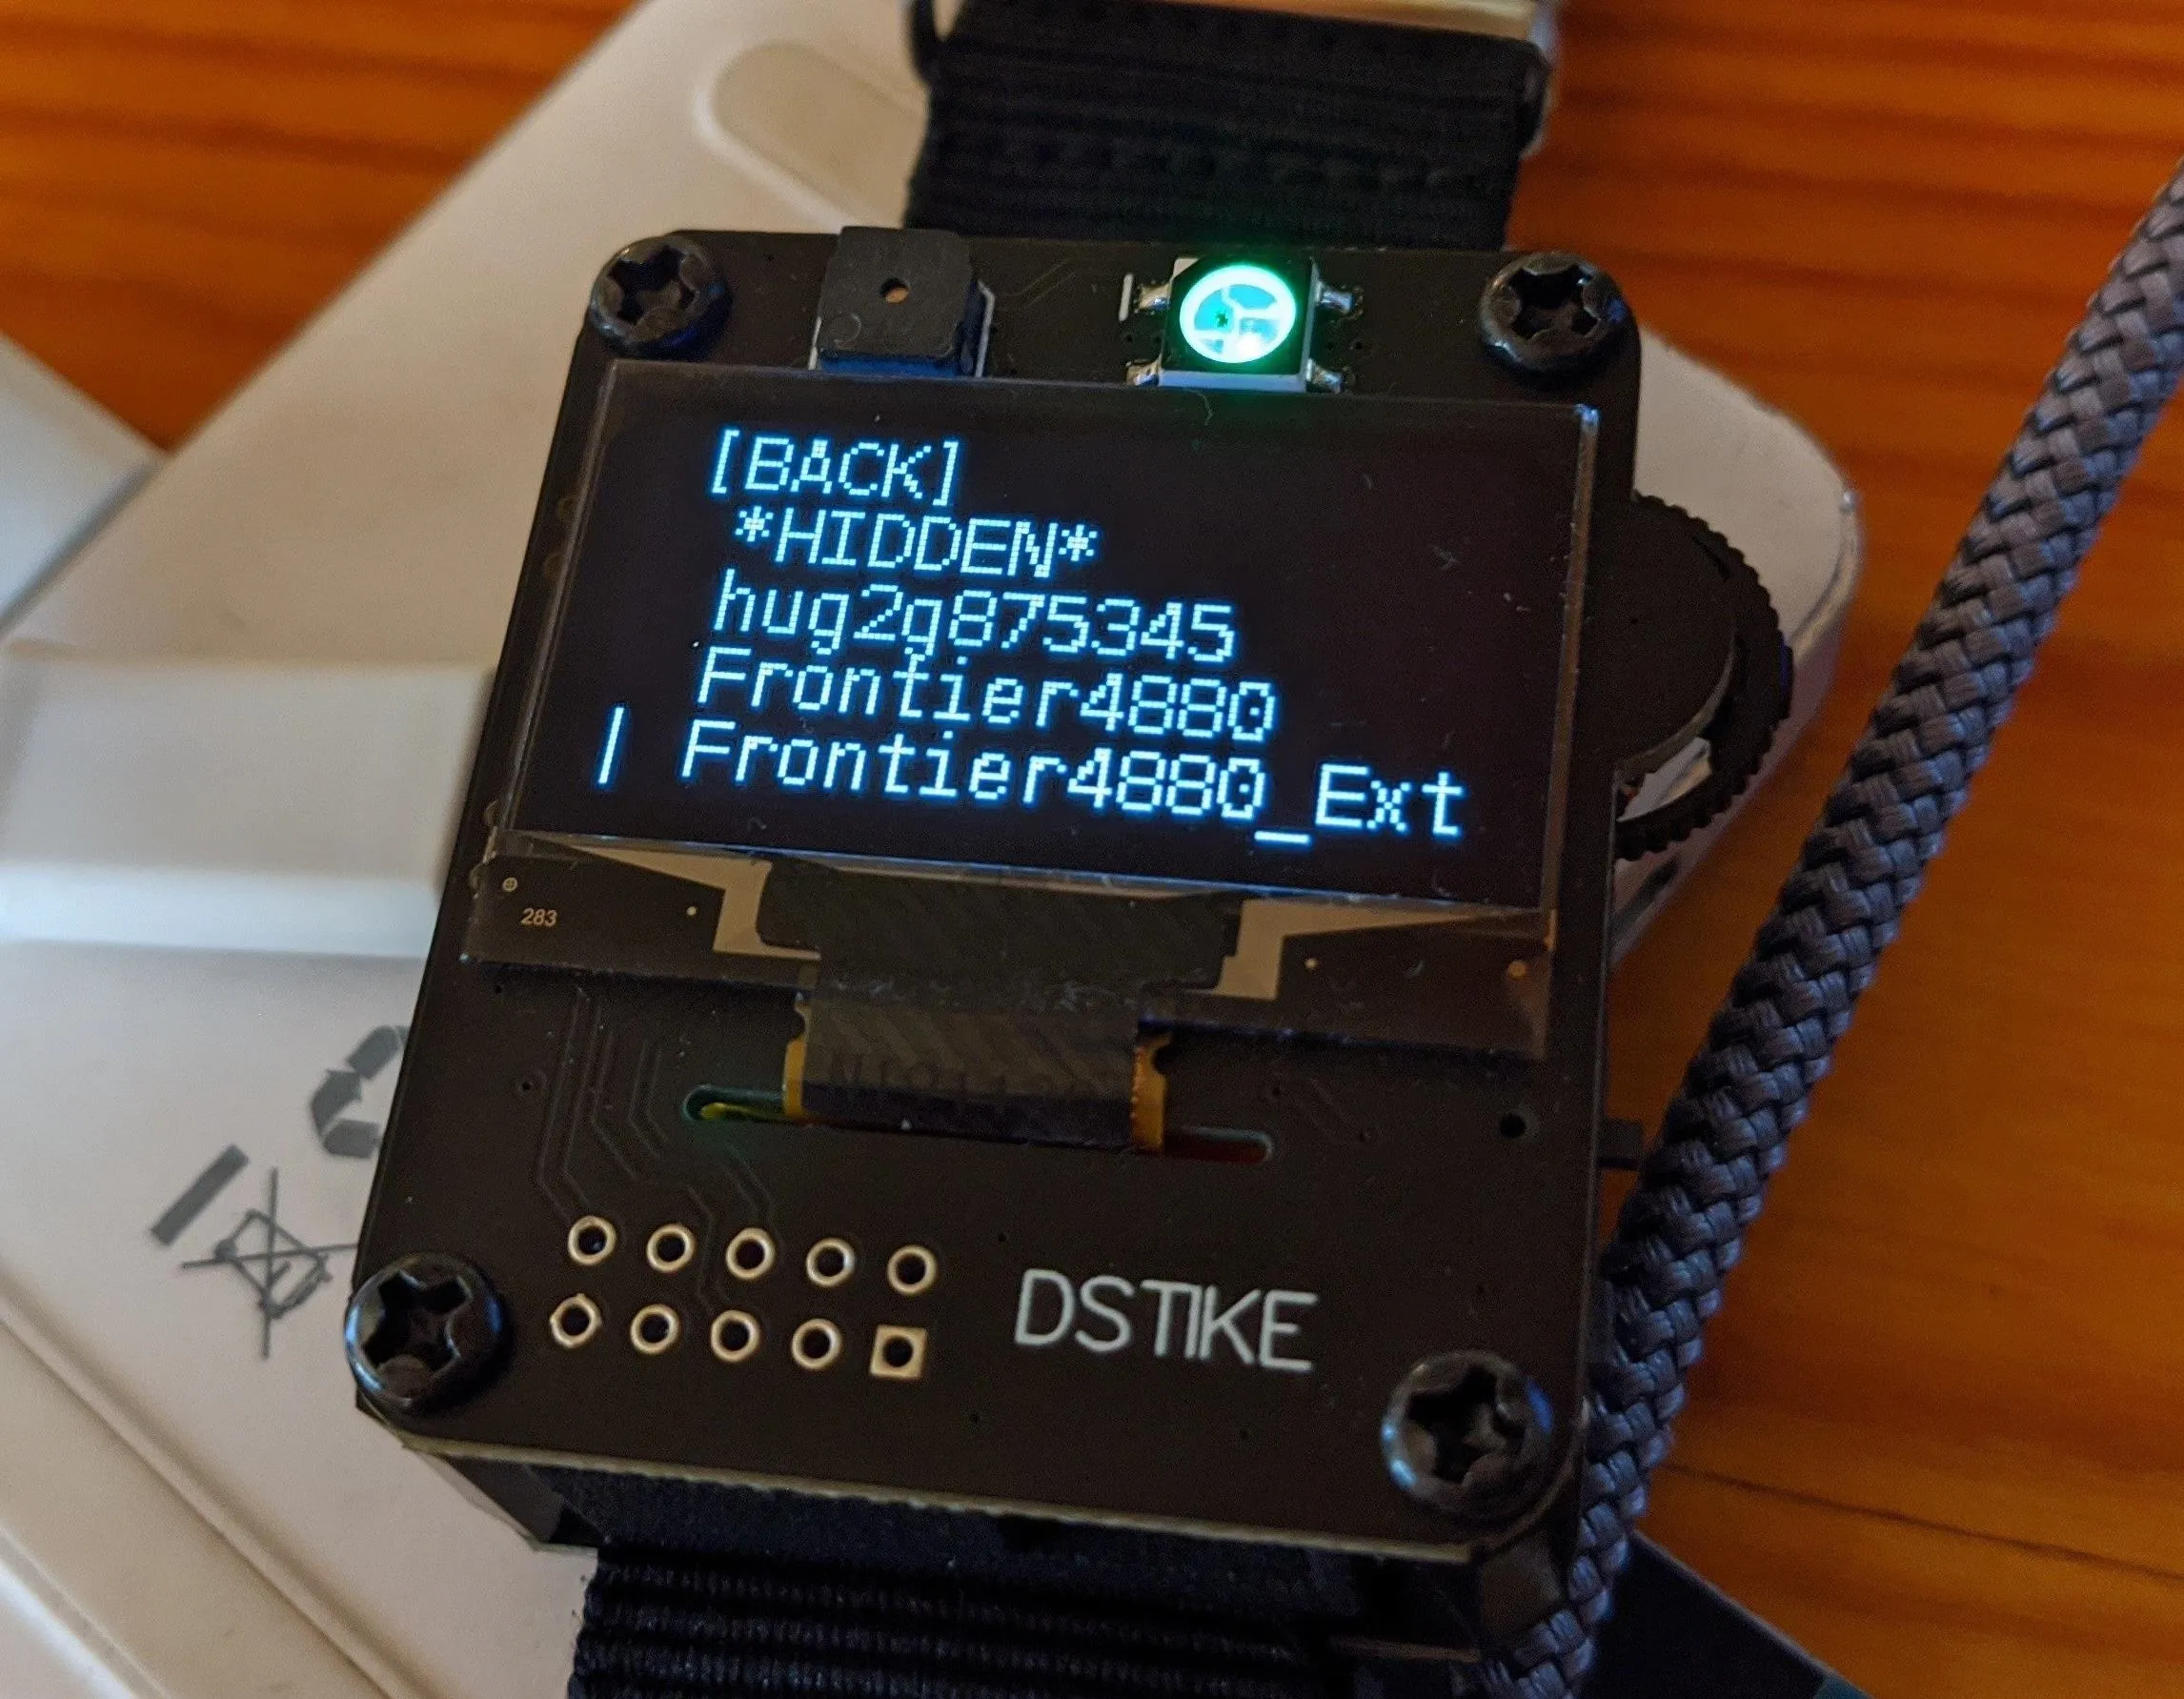
After the scan is complete, it will show you how many APs, stations, or both were found. Now, go back to the main menu and open the SELECT menu. Here, you can see APs or stations that were detected by the scan.

Retia/Null Byte
Next, go through the APs, Stations, Names, and SSIDs options until you find your reactive target. Select your target, and press the scroll wheel to mark the target with an asterisk (*) and save it to the target list.
Attack a Targeted Network
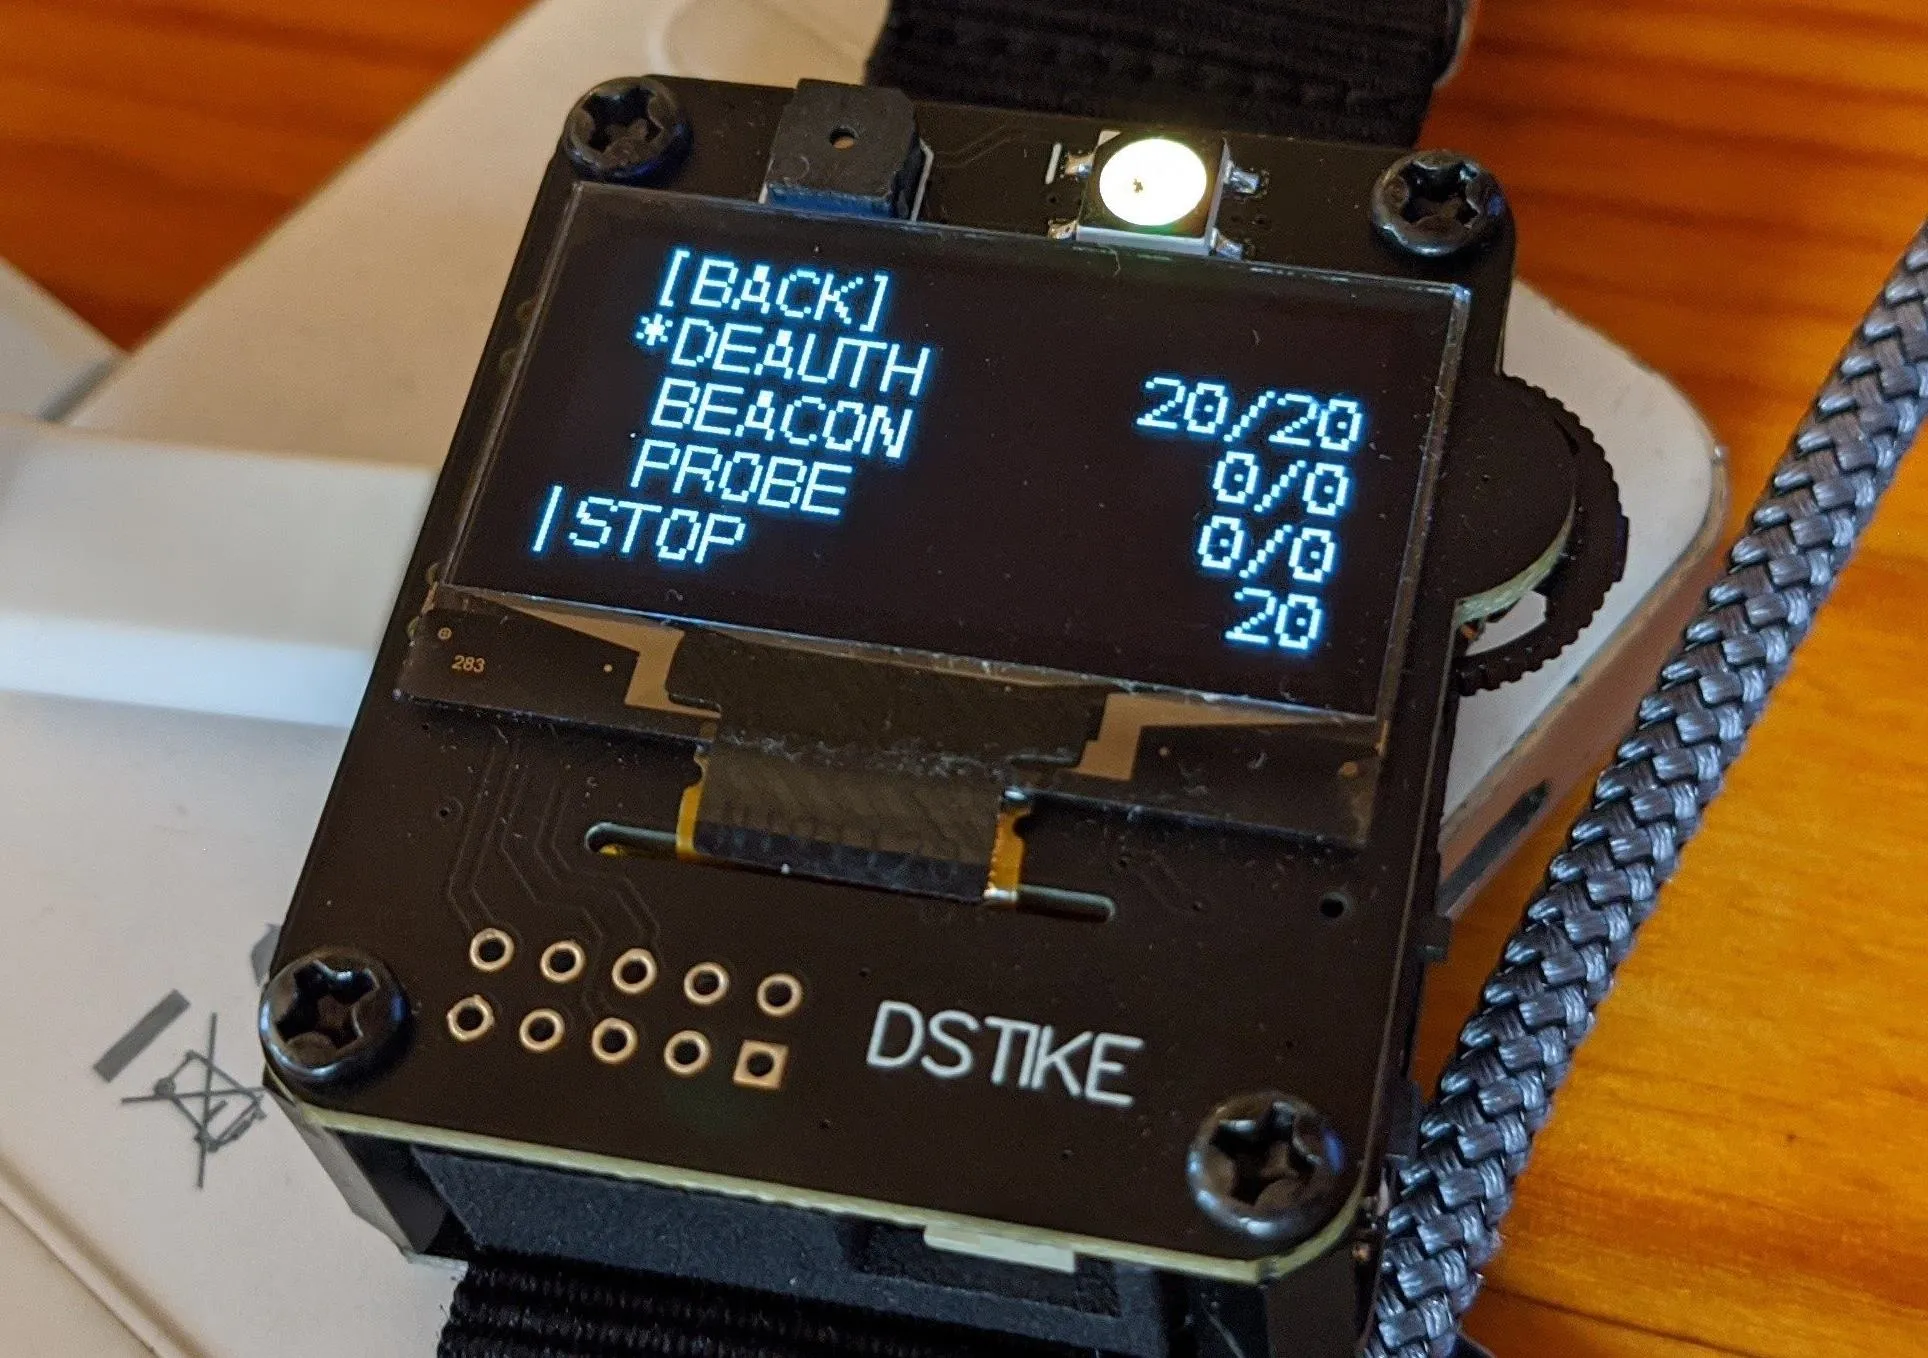
Go back to the main menu and select the ATTACK menu item this time. Once there, you'll have the option to use the DEAUTH, BEACON, or PROBE attacks.
If you want to clone this over and over, you could use the beacon attack. If I want to send out a bunch of probe frames looking for this network or device, try the probe attack.
I'm going to select the deauth attack. Select DEAUTH, then go down to START and press the button to begin. This should disconnect the target from its network, and the ESP8266 reactive target should start blinking red in distress.

Retia/Null Byte
You should be successfully jamming the Wi-Fi of the target, and the reactive target should no longer connect to the Wi-Fi network. Once you're ready to stop, you can press the scroll button again to stop the attack, and the reactive target can join the network again.
This was just a quick little demonstration of how you can use the Deauther Watch to scan, select, and attack a network. To start attacking the device again, just start the attack again.
Play Safe with Your Deauther Watch
The Deauther Watch is a really amazing project and a great way to support the developers of the Wi-Fi Deauther project. If you want to pick one of these watches up, keep in mind that it can do some things that might be illegal in your country or region, like hacking a Wi-Fi network that you don't have permission to attack. That could be a serious problem, so make sure you check your local laws before you start firing off this device on networks you don't have permission to test.
Cover photo by Retia/Null Byte


Comments
Be the first, drop a comment!