

Now that we've talked about encryption and managing your passwords, let's continue this series on getting your Mac ready for hacking by turning our attention to the terminal.
The terminal is a key component of any pentester's setup. We're going to be spending a lot of time working with the terminal, so the goal is to be comfortable with it. We want something that is appealing to our eye, feature-rich, and stable. A good terminal emulator will help us manage our workflow efficiently. For macOS, my preferred terminal emulator is iTerm2. An honorable mention goes out to Cathode, which attempts to replicate the feel of using an old terminal.
In this article, we will be using your Mac's default Terminal app to install iTerm2. Doing the installation in this way will help new users get familiar with the CLI (command line interface). If you're old hat and already have a solid grip on the command line, a refresher never hurts.
- Previously: How to Manage Your Passwords with KeePassX
Terminal vs. iTerm2
The default macOS terminal app is simply called Terminal and is located in the "Utilities" folder in Applications. You can just search Spotlight for "Terminal" to open it quickly.
Terminal.app features a plethora of color schemes, window groups, terminal tabs, a split pane, some man page integration, and transparency. It's a solid choice, but it lacks some features that I personally like having access to. This is why I recommend iTerm2, which has all of the features of Terminal and more.
A few of my favorite iTerm2 features are a mouse-less copy, autocomplete, and, last but not least, a hotkey terminal window. You can download iTerm2 directly from its website, but I want to show the install process using the macOS Terminal app instead. As I said, this is to help new hackers get used to command line.
Step 1: Get iTerm2
First, go ahead and open the Terminal app. When Terminal is first opened, the working directory is your home directory. Since we're about to download a file, I think the best place to put it is in our "Downloads" folder, so let's navigate there with the below command. The ~ character represents the home directory.
cd ~/DownloadsNext, we need to get iTerm2 using the download link on its website. In order to do this, we will need to use the curl command, since wget isn't built into macOS. However, not that iTerm2 is constantly updating, so you should check the site's downloads to make sure you're getting the latest version. In our case, that's 3.2.7.
curl -O https://iterm2.com/downloads/stable/iTerm2-3_2_7.zip

  % Total    % Received % Xferd  Average Speed   Time    Time     Time  Current
                                 Dload  Upload   Total   Spent    Left  Speed
100 6847k  100 6847k    0     0  9031k      0 --:--:-- --:--:-- --:--:-- 9021k
Curl is a powerful command line tool for getting or sending files using URL syntax. The -O option is equivalent to --remote-name, which writes curl output to a local file name based on the remote file we get. Without using the -O option, the data for our download is simply printed to stdout. You can read more about curl or almost any other command in the man pages. For curl, the command would be:
man curlStep 2: Verify the Checksum
Let's confirm that the file we have hasn't been tampered with. The site lists the SHA-256 of the ZIP file for version 3.2.7 as below. You can find this info from the site's downloads (select "Show Changelog" and it should be at the bottom).
ac71ddf4b9378fb87a30c64aa9bde543300728ed5e5ab996f1687f40fd7e2ae1
Since the developer did not include a properly formatted SHA checksum file, we have to do this manually. The command below generates a shasum hash of the given file. The -a switch selects which algorithm to use. Since this is an SHA-256 checksum, we use 256.
shasum -a 256 iTerm2-3_2_7.zip

ac71ddf4b9378fb87a30c64aa9bde543300728ed5e5ab996f1687f40fd7e2ae1
With the checksum verified, we know that the file hasn't been tampered with. It also lets us know that the download isn't corrupted.
Step 3: Unzip iTerm2
Now we need to unzip the file with unzip iTerm2-3_2_7.zip (or whatever the file name is for the version you're using).
unzip iTerm2-3_2_7.zip

Archive:  iTerm2-3_2_7.zip
   creating: iTerm.app/
   creating: iTerm.app/Contents/
   creating: iTerm.app/Contents/_CodeSignature/
  inflating: iTerm.app/Contents/_CodeSignature/CodeResources
   creating: iTerm.app/Contents/MacOS/
  inflating: iTerm.app/Contents/MacOS/iTerm2
   creating: iTerm.app/Contents/Resources/
  inflating: iTerm.app/Contents/Resources/MainMenu.strings
  inflating: iTerm.app/Contents/Resources/PrefsMouse.tiff
  inflating: iTerm.app/Contents/Resources/iTermEditKeyActionWindowController.nib
 extracting: iTerm.app/Contents/Resources/PTYTextViewTest-golden-nonretina-testCustomUnderline.png
  inflating: iTerm.app/Contents/Resources/rsa_pub.pem
  inflating: iTerm.app/Contents/Resources/Erase.tiff
  inflating: iTerm.app/Contents/Resources/Alert.tiff
 extracting: iTerm.app/Contents/Resources/Warning.png
......................................................
[ TRIMMED ... YOU DON'T NEED TO SEE ALL THE PROGRESS ]
......................................................
  inflating: iTerm.app/Contents/Frameworks/ColorPicker.framework/Versions/A/ColorPicker
    linking: iTerm.app/Contents/Frameworks/ColorPicker.framework/Versions/Current  -> A
    linking: iTerm.app/Contents/Frameworks/ColorPicker.framework/ColorPicker  -> Versions/Current/ColorPicker
  inflating: iTerm.app/Contents/Info.plist
 extracting: iTerm.app/Contents/PkgInfo
finishing deferred symbolic links:
  iTerm.app/Contents/Frameworks/Sparkle.framework/PrivateHeaders -> Versions/Current/PrivateHeaders
  iTerm.app/Contents/Frameworks/Sparkle.framework/Resources -> Versions/Current/Resources
  iTerm.app/Contents/Frameworks/Sparkle.framework/Versions/A/Resources/fr_CA.lproj -> fr.lproj
  iTerm.app/Contents/Frameworks/Sparkle.framework/Versions/A/Resources/pt.lproj -> pt_BR.lproj
  iTerm.app/Contents/Frameworks/Sparkle.framework/Versions/Current -> A
  iTerm.app/Contents/Frameworks/Sparkle.framework/Headers -> Versions/Current/Headers
  iTerm.app/Contents/Frameworks/Sparkle.framework/Modules -> Versions/Current/Modules
  iTerm.app/Contents/Frameworks/Sparkle.framework/Sparkle -> Versions/Current/Sparkle
  iTerm.app/Contents/Frameworks/NMSSH.framework/Resources -> Versions/Current/Resources
  iTerm.app/Contents/Frameworks/NMSSH.framework/NMSSH -> Versions/Current/NMSSH
  iTerm.app/Contents/Frameworks/NMSSH.framework/Versions/Current -> A
  iTerm.app/Contents/Frameworks/NMSSH.framework/Headers -> Versions/Current/Headers
  iTerm.app/Contents/Frameworks/ColorPicker.framework/Resources -> Versions/Current/Resources
  iTerm.app/Contents/Frameworks/ColorPicker.framework/Versions/Current -> A
  iTerm.app/Contents/Frameworks/ColorPicker.framework/ColorPicker -> Versions/Current/ColorPicker
Once the file is unzipped, we will do a quick listing (ls) of the directory to verify the file is in the right place.
ls

iTerm.app
iTerm2-3_2_7.zip
We see that we have both iTerm2 and the ZIP archive. Next, we move the iTerm.app into our Applications folder with the mv command.
mv iTerm.app/ /Applications/Lastly, we remove the ZIP — there's no reason to have it taking up system space.
rm iTerm2-3_2_7.zipStep 4: Launch iTerm2
The next step is to launch iTerm2. Depending on your system's security settings, you may have to make an exception before you can open iTerm2. I trust the iTerm dev team and feel comfortable making this exception. If you do not, I recommend staying with the default Terminal app included with macOS.
We could easily create the exception by navigating to the iTerm2 app in the Applications folder. Then, control-click (or right-click) on it and select "Open. We could also do it in the Terminal:
spctl --add /Applications/iTerm.app/After executing this command, you may be prompted to enter your username and password via a prompt. Spctl is macOS's CLI way of interacting with Gatekeeper. In this command, we simply added iTerm2 to our security exceptions list.
With that out of the way, we're ready to launch iTerm2, as seen with the below command. We use nohup (no hang up), which will keep our command running even if we close the Terminal.app that spawned our iTerm2 process. Open tells the Terminal to open the file as if we had double-clicked on it. Next is the path to the file we are opening. Lastly &>/dev/null redirects stdout and stderr to /dev/null. Normally, nohup would create a nohup.out file containing both stdout and stderr, but in this case, we don't need it. The & at the end of the command tells it to run in the background, thus returning us to our shell prompt.
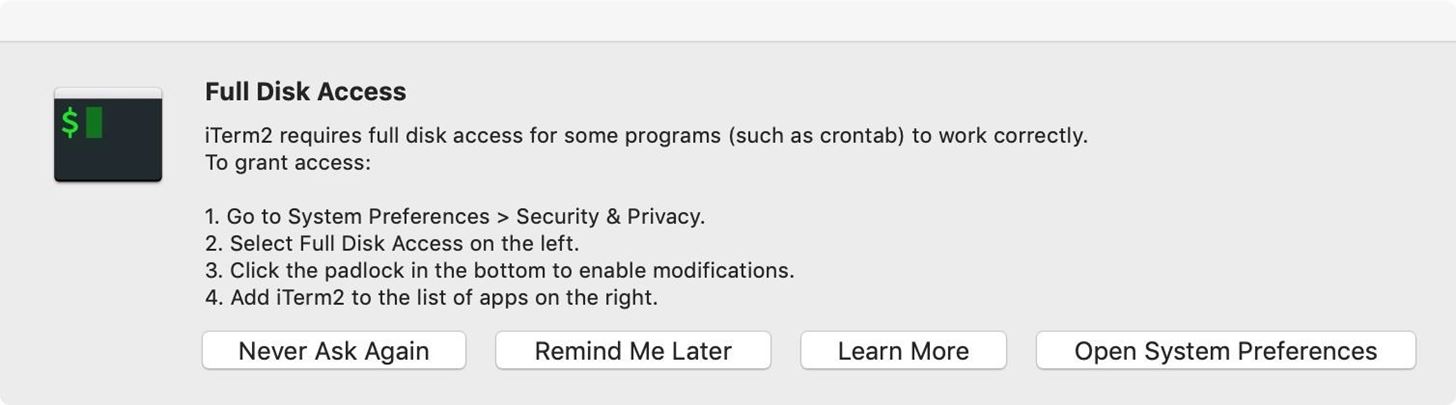
nohup open /Applications/iTerm.app/ &>/dev/null &You may be prompted at this point to give iTerm2 "Full Disk Access," which is recommended if you're using iTerm2 as a Terminal replacement.
With that out of the way, we can quit Terminal. We also have iTerm2 working!
Stay Tuned for More Mac Guides for Hackers
If you haven't been in the terminal for a while, or if this is your first excursion into the CLI, think of this as a warm-up. We could have installed this app entirely in the GUI, but these tutorials will begin relying on a terminal more in the future. If you are interested in learning more, I recommend reading the first couple of articles in our Linux Basics series. If there is enough interest, I would be willing to do a similar series revolving around macOS.
We've covered a lot of ground on terminal usage — even if it was just doing something as basic as installing an application — and also got ourselves a great terminal emulator! Still to come in this series on getting a Mac ready for hacking, we will be looking at a package manager, basic vim, Ruby, and more. As always, if you have any questions or comments, feel free to post them below.
Just updated your iPhone? You'll find new emoji, enhanced security, podcast transcripts, Apple Cash virtual numbers, and other useful features. There are even new additions hidden within Safari. Find out what's new and changed on your iPhone with the iOS 17.4 update.


9 Comments
Same system same issue.
Great tutorial! But what can iTerm do that Terminal cannot?
I need some help. After getting to Step 3, I entered the command in the Terminal and it returned this:
iTerm2-3010.zip
End-of-central-directory signature not found. Either this file is not
a zipfile, or it constitutes one disk of a multi-part archive. In the
latter case the central directory and zipfile comment will be found on
the last disk(s) of this archive.
unzip: cannot find zipfile directory in one of iTerm2-3010.zip or
iTerm2-3010.zip.zip, and cannot find iTerm2-3010.zip.ZIP, period.
Has something changed on iTerm2?
Should I install directly from the site and not use Terminal?
Please advise.
Thanks!
I went directly to the website to download http://iterm2.com/downloads.html
Awesome page. Thank you for posting!
Hello. I got a different result when I did the SHA-256. What I got is 250c4c9b4c00cd4d89a473eabd51ca413752ef5149eb5bd364354ad0cbe6e0fd. Is this legit? Or does this mean my file has a virus?
The checksum will be posted on the site.
I also got a different result when I entered SHA-256. Same as Kenn Flynn,250c4c9b4c00cd4d89a473eabd51ca413752ef5149eb5bd364354ad0cbe6e0fd. I checked the website and its not showing up? any idea on how I can fix this?
Hey. I am unable to unzip it. I followed every step it says:
End of central directory signature not found ....
Share Your Thoughts