
Kali Linux is the obvious first choice of an operating system for most new hackers, coming bundled with a curated collection of tools organized into easy-to-navigate menus and a live boot option that is very newbie-friendly. But Kali isn't the only distribution targeted at pentesters, and many exciting alternatives may better fit your use-case. We've already covered BlackArch Linux, now it's time to talk about Parrot Security OS.
The Many Flavors of Parrot Security OS
Parrot Security OS is a Debian-derived operating system for general use, pentesting, and forensics. Initially released in 2013, Parrot has grown rapidly and currently offers many different flavors targeted towards different use-cases.
- Parrot Home, targeted towards desktop users, strips out the penetration-testing packages and presents a nicely configured Debian environment.
- Parrot Air is focused on wireless penetration testing.
- Parrot Studio is designed with multimedia creation in mind.
- Parrot Cloud targets server applications, giving the user access to the full suite of penetration testing tools included in Parrot Security, minus the graphical front end. It's designed to deploy on a VPS and function as a jump box.
- Parrot IoT is designed for low-resource devices such as the Pine64, OrangePi, and Raspberry Pi 3.
- Parrot Security is the original Parrot OS and is designed with penetration testing, forensics, development, and privacy in mind. Parrot OS has quite a few targeted use-cases, but that doesn't detract from the main distribution. Parrot Security OS is a solid general use desktop workstation with plenty of security tools included to keep us happily hacking away!
Fans of Kali Linux will appreciate that Parrot is Debian-derived. Working with the operating system itself will feel familiar, and there is no need to re-learn package management or distribution specifics.
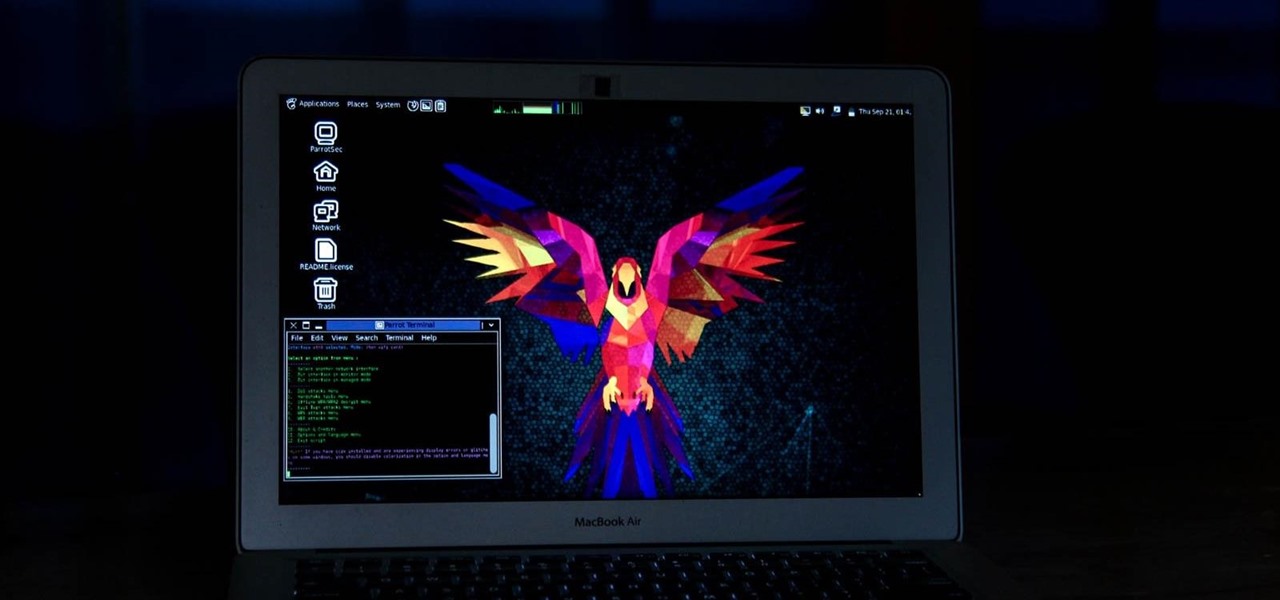
With the background out of the way, let's take a look at Parrot Security. I installed Parrot Security in a VirtualBox VM. Parrot Security does work as a live ISO, but I generally like to try things out installed and persistent.
Step 1: Get Parrot Security OS
The first step is to grab a copy of the Parrot Security ISO. You can find it on the Parrot Security site along with the hashes for the ISO. Once the download is complete, it's essential to verify the hash. If the hashes do not match up, you may have a modified copy or a corrupted ISO, neither of which you should use.
The hashes for the current version of Parrot Security (4.6) are available from Parrot's site. To verify the hash in Windows, open a command prompt and execute certutil.
certutil -hashfile Parrot-security-4.6_amd64 SHA1To verify the hash in macOS, open a terminal and execute shasum.
shasum Parrot-security-4.8_amd64.ovaTo verify the hash in Linux, open a terminal and use sha1sum.
sha1sum Parrot-security-4.6_amd64If your hash matches up, you're good to move on to the next step, booting the OS. If the file name is different or a newer version, make sure to swap that out in the command you use above.
Step 2: Create a Virtual Machine
Before we can boot up the OS, we need a machine to try it out on. We could write the image to a thumb drive, then boot on a physical machine, but that's much more time-consuming than merely creating a VM (virtual machine). Most modern computers are more than capable of running a Linux guest, making virtualization incredibly appealing. Not only that, but your machines are also disposable. If something goes wrong, you can burn the VM and call it a day.
I will be using VirtualBox in Windows, which is free from the VirtualBox website, though these steps should work on all major platforms. You can view the process for using VirtualBox on macOS in our video above. Launch VirtualBox, and you will see the VirtualBox manager.
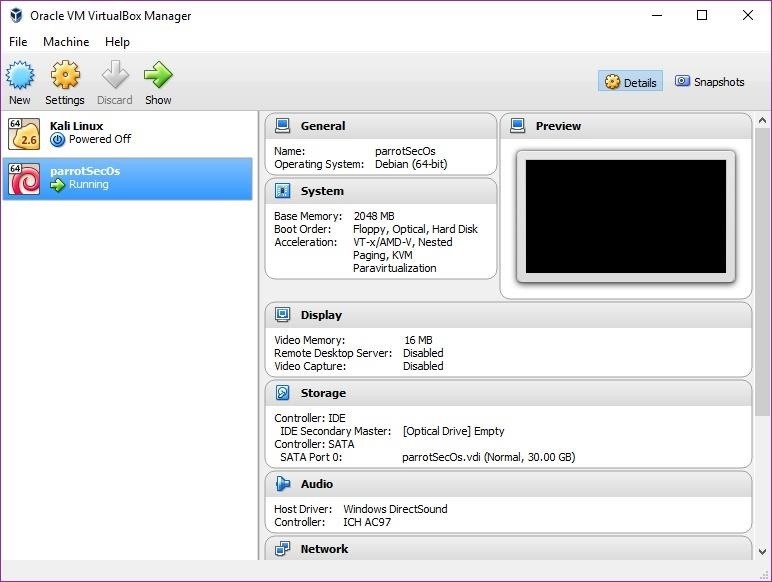
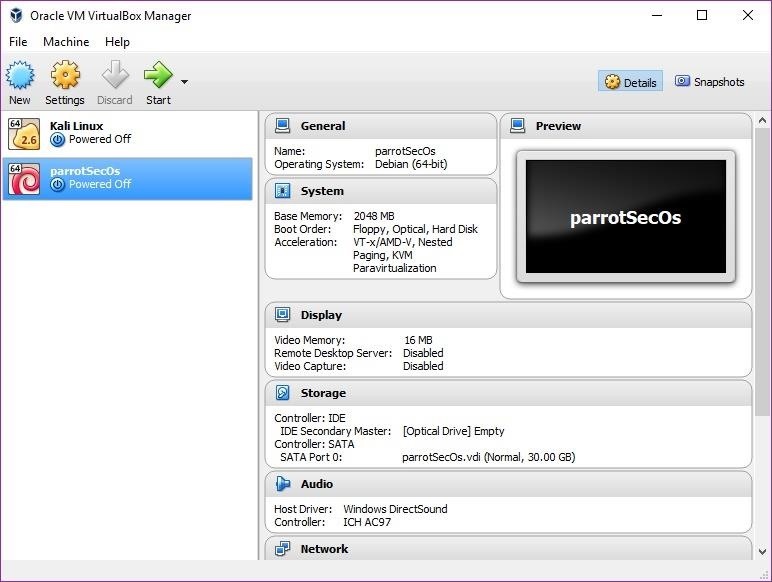
I currently have an instance of Parrot Security running. To start a new one, click on the "New" button in the top left of the window.
Give the machine a name, then in the Type drop-down menu, select "Linux." In the Version drop-down, select "Debian (64-bit)." If you downloaded a 32-bit version, choose "Debian (32-bit)." As far as memory size, 2 GB should be sufficient. At maximum, I would use half or under my machine's RAM.
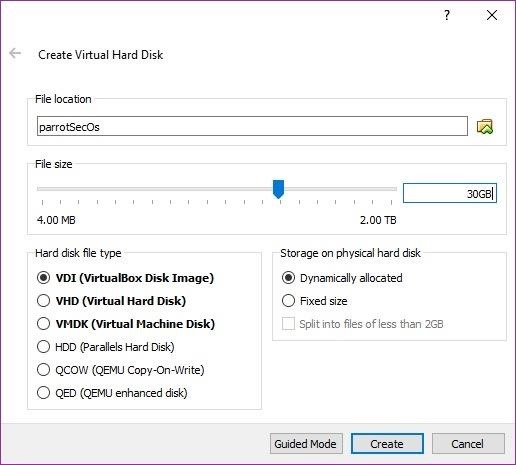
I selected Create a virtual hard disk now since I was installing Parrot Security. If you want to try it out with a live CD, select Do not add a virtual hard disk instead. Once you are satisfied with your selections, click on "Create."
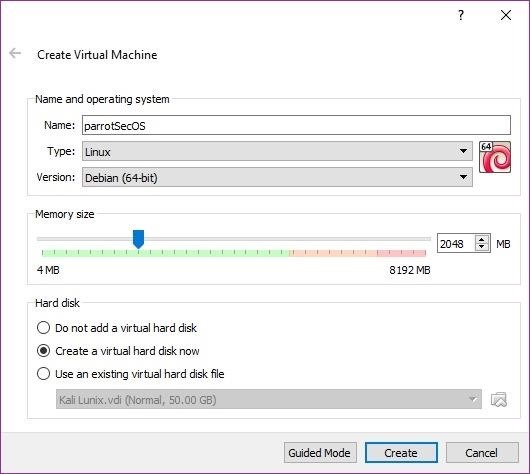
If you opted to add a virtual disk, VirtualBox would prompt you to create the virtual disk. I selected a 30 GB dynamically allocated VDI. Select whatever size you are comfortable using. A fixed-size disk performs a little faster than one that is dynamically allocated; however, a dynamically allocated disk only uses HDD space as needed. I prefer dynamically allocated. Click on the "Create" button to continue.
You will be returned to the VirtualBox manager with your new machine available in the list.
Step 3: Boot Up Parrot Security
Select the machine you created to test out Parrot Security, then click the "Start" button in the VirtualBox Manager.
VirtualBox will prompt you to select boot media for the new machine. Select the location of the Parrot Security OS image you wish to boot, then click "Start" to begin. When the machine starts, you will see the GRUB.
- More Info: What Is the GRUB Bootloader in Linux?
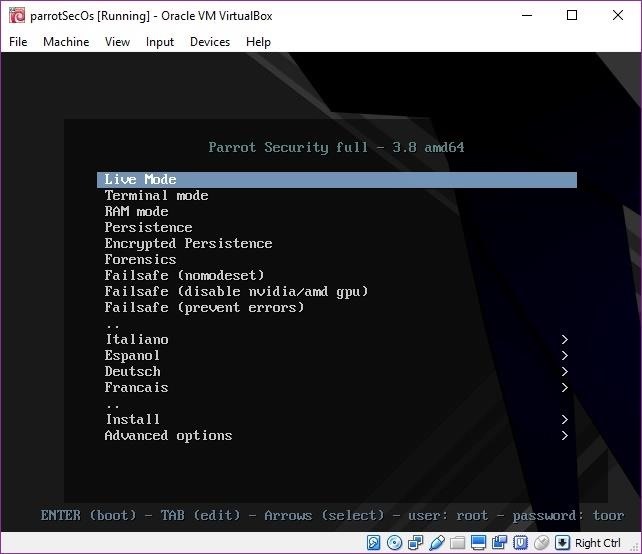
The Parrot Security ISO is very flexible. There are quite a few options for live boot.
- "Live Mode" is just a standard live USB boot. Your machine will boot from the USB stick, and you can work with Parrot Security from there. It's an excellent way to get a feel for the system and also gives you a portable penetration testing OS.
- "Terminal mode" is another live boot option but without a GUI.
- "RAM mode" loads the operating system into RAM, which allows you to pull the USB stick from a host and continue to work in Parrot Security until the host reboots.
- The standard "Persistence" option will enable you to retain changes to the OS on your USB drive.
- The "Encrypted Persistence" option offers encrypted persistence, obviously.
- "Forensics" allows you to boot without mounting disks.
- The "Failsafe" options are for convenience. Each one sets kernel parameters to deal with various common Linux boot problems. These are nice to have in a live image because they allow you to try a few fixes to common issues if your machine doesn't boot up without having to look up the kernel parameters.
- The various language options are self-explanatory but are great if English isn't your native language.
The Parrot Security installer is a modified Debian installer, which will make it familiar to most Kali Linux users. Installation is quick and easy. The live ISO offers a Curses-based installer, a graphical installer, and a speech synthesis-based installer.
I used "Install" to install Parrot Security, but you can get a feel for it just by running the live mode.
Step 4: Customize & Navigate the Layout
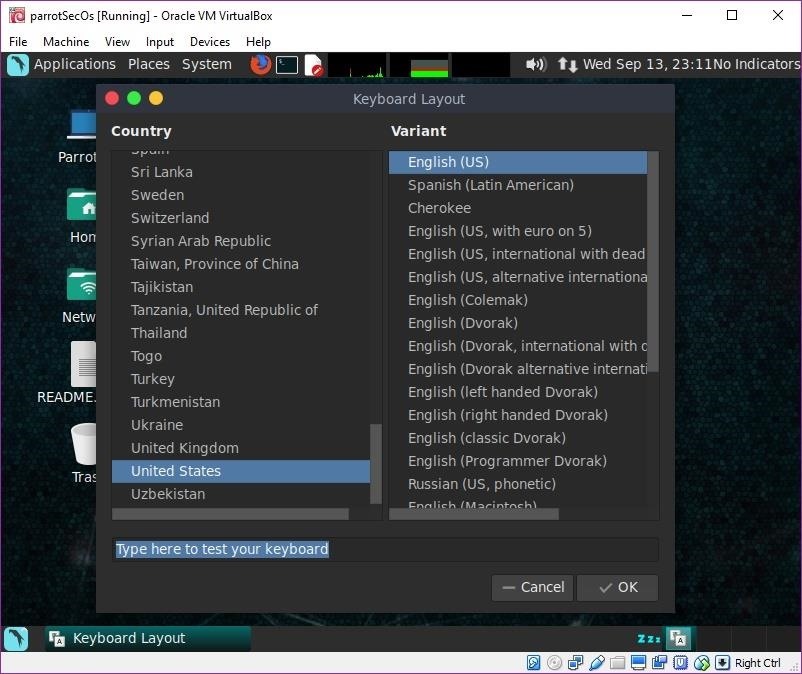
On first boot, the machine boots you into a MATE desktop environment. If you choose to install, you will see a lightdm login screen. After logging in with the default credentials of root and toor, you will be prompted to select your keyboard layout.
If you are using live mode, you will boot directly into a MATE desktop environment. Installed and persistent versions of Parrot Security will automatically detect when updates are available and prompt you to update the system.
The system is laid out in a very straightforward manner, with a collection of tools that will be familiar to Kali Linux users. The menu system is similar to Kali Linux and is easy to navigate. The real difference here is that Parrot Security is meant to be a daily driver, and it shines at this. While you can use Kali Linux as a desktop workstation, it's a penetration-testing distribution first. With Kali, you need to build the system towards being a daily use system. Using Parrot Security, your penetration-testing tools are there, and your day-to-day applications are too.
These additional features do take up about 1 GB more disk space. My standard Kali install weighs in at ~11 GB. The standard Parrot Security install comes in at ~12 GB.
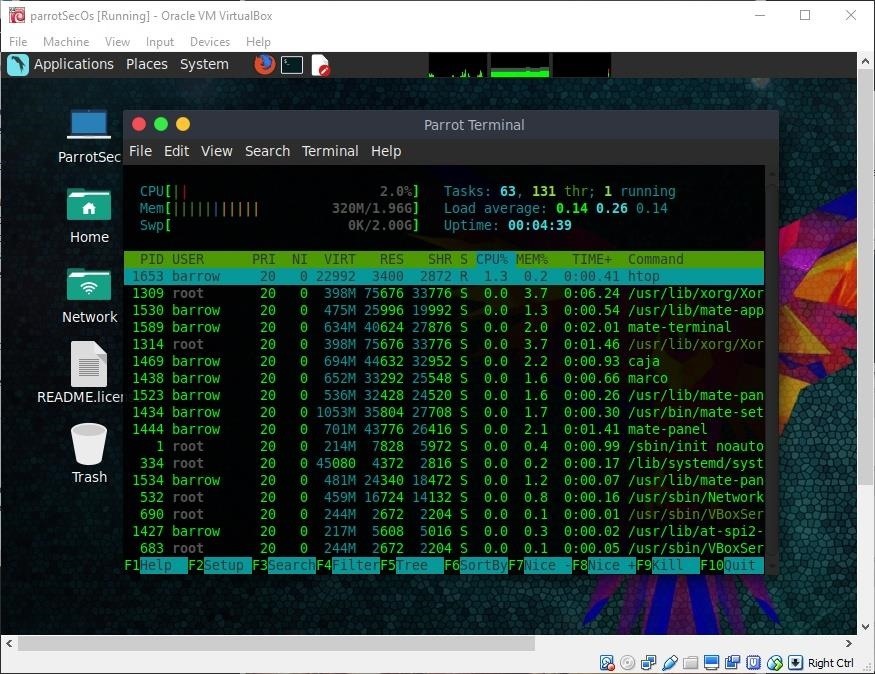
The default Parrot Security install uses about 313 MB of RAM, which is relatively light. Of course, this is with only system-related processes running. By comparison, my default Kali Linux install uses about 604 MB of RAM with only system-related processes running. It's a significant difference, though, with some modifications, Kali can be brought down in RAM usage.
Parrot Security comes with some reasonably nice quality of life tools that can help with day-to-day tasks. It includes the Libre Office suite, Atom (an excellent IDE made by the Git team), edb, and more. You can complete many everyday tasks without the use of a terminal, such as starting and stopping services.
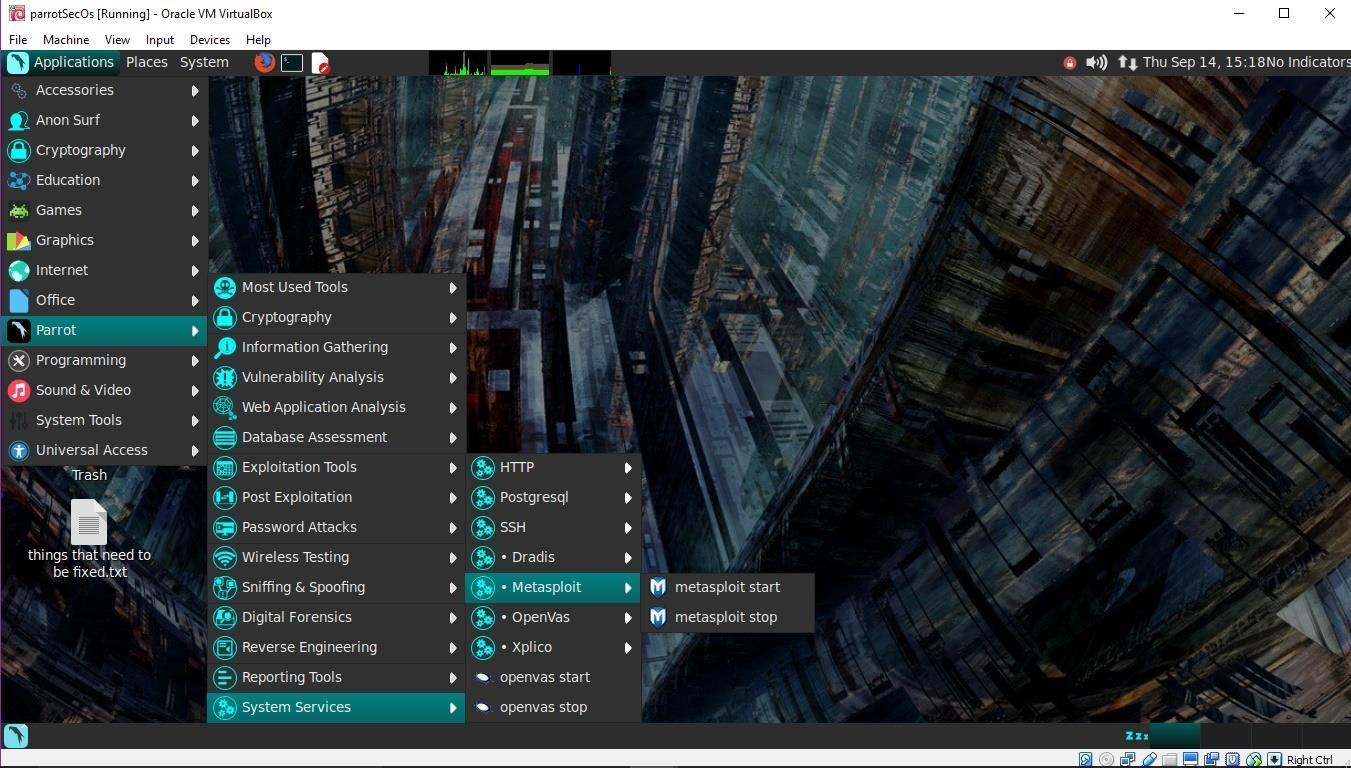
Parrot Security packs a few cryptography tools such as Zulucrypt, a graphical utility that will help you manage your encrypted volumes. Cryptkeeper is another graphical utility that allows you to manage encrypted folders and more. These utilities make confidentiality easily accessible, even with minimal experience.
Parrot Security doesn't stop with plain cryptography — the developers have included easy to use utilities for anonymization of internet traffic.
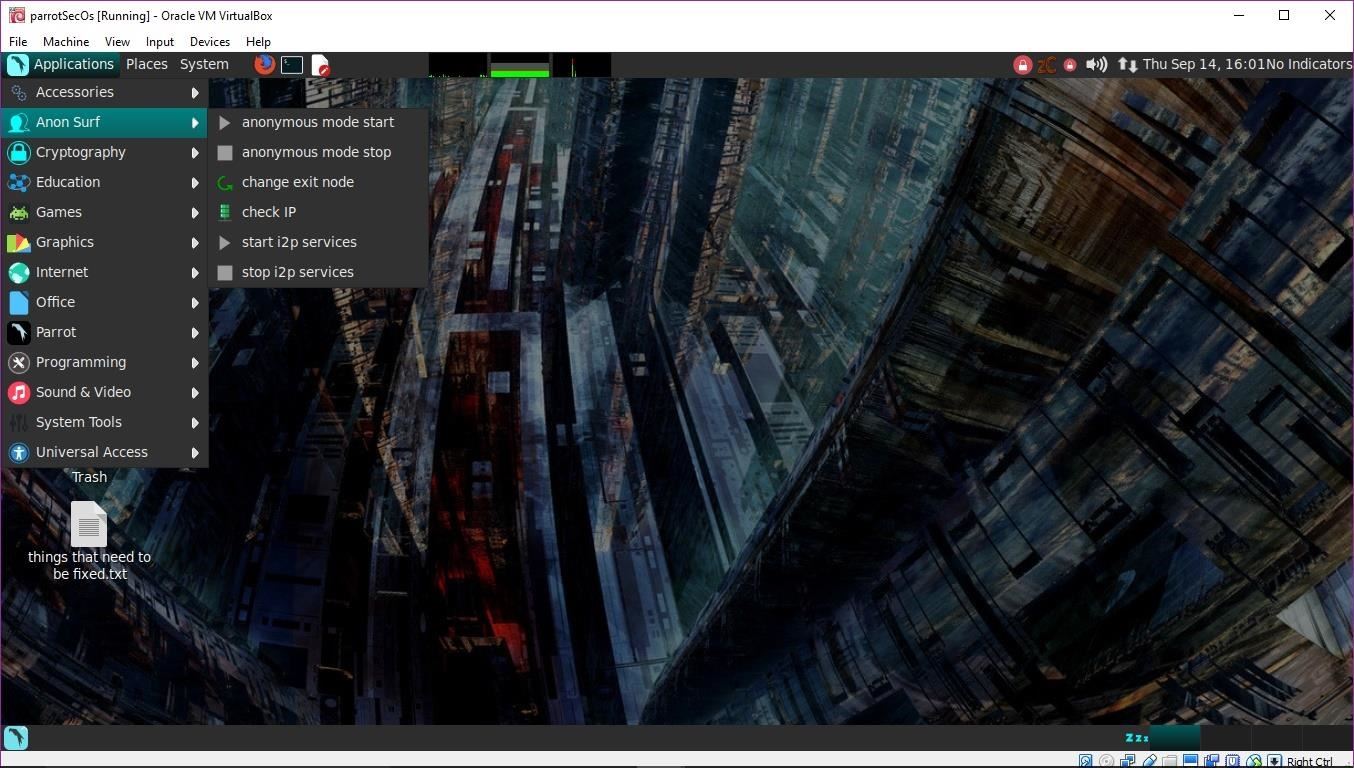
The "anonymous mode start" tool will attempt to kill dangerous processes that can de-anonymize you, clear cache files, modify iptable rules, modify your resolv.conf, disable IPV6, and only allow outbound traffic through Tor. This would be quite a bit of effort manually, but with the script, it's just a click away. Parrot Security also includes a similar script for i2p. Once activated, there are also options to check your current IP address and change your exit node.
Step 5: Get Help When Needed
Parrot Security is not very complicated to use, but you may find yourself in a situation where you need to get some help. Since this is a Debian-derived distribution, support will be straightforward to come by with a little bit of Google searching. The developers have also provided a Parrot Security Wiki which is not very well-developed. There is an ambassador program in place where users can directly contact Parrot Security experts in many countries with their questions. However, this program is still in its infancy. There is also a small IRC community on the Freenode network in #parrotsec.
Is Parrot OS the Pentesting Distro for You?
Parrot Security is an excellent distribution for use by beginners and old pros alike. The installation comes with around 550 security-oriented tools, giving the user more than enough to get some work done. At the end of the day though, this distribution is also suitable for development or privacy-oriented users who don't want to spend a lot of time in a terminal.

Parrot Security OS is still growing. In the years since the initial release, this distribution has become a serious contender in my book. If anything, it's a bit lacking on documentation, which is excellent for users who are comfortable Googling issues that arise.
Thanks for reading, and stay tuned for more articles! You can ask questions here or on Twitter @0xBarrow.
Just updated your iPhone? You'll find new emoji, enhanced security, podcast transcripts, Apple Cash virtual numbers, and other useful features. There are even new additions hidden within Safari. Find out what's new and changed on your iPhone with the iOS 17.4 update.


Be the First to Comment
Share Your Thoughts