


Ports allow network and internet-connected devices to interact using specified channels. While servers with dedicated IP addresses can connect directly to the internet and make ports publicly available, a system behind a router on a local network may not be open to the rest of the web. To overcome the issue, port forwarding can be used to make these devices publicly accessible.
Networked services and apps running on various devices make use of ports at specific numbers as a means to initiate connections and establish communications. Different ports can be used simultaneously to separate and parse different types of traffic or requests easily. Ports are generally associated with specific services, such that a client can connect to a server on a particular port and assume that the server will accept a connection at that port and respond appropriately.
Some commonly used ports are shown below.
- 21: FTP (File Transfer Protocol)
- 22: SSH (Secure Shell)
- 23: Telnet (Teletype Network)
- 25: SMTP (Simple Mail Transfer Protocol)
- 80 : HTTP (Hypertext Transfer Protocol)
- 194: IRC (Internet Relay Chat)
- 443: HTTPS (HTTP Secure)
If you are viewing this guide on the internet and using a web browser, you're probably connected using HTTPS, which operates over port 443.
While ports make it simple to identify and address specific requests, port-numbering conventions are a standard, not a rule. Ports can be used for whatever a person may choose to host on them, so long as the connection between the client and server on a given port uses a consistent protocol.
In web browsers, non-standard HTTP ports can be specified following a colon at the end of an IP address or URL to attempt to load HTTP content over that port. If a web server is running on a local machine on port 8080 rather than the conventional port 80, it would be possible to access this in a web browser by navigating to localhost:8080 or 127.0.0.1:8080, but if either of the two aforementioned addresses were entered without the ":8080" suffix, the same page would not load.
localhost:8080While any open port should allow connection attempts, for these attempts to be made, a client device needs network access to the device. While this isn't necessarily an issue for a server connected to the internet directly or a connection across a local area network, it becomes problematic when one attempts to access a specific port on a device that is protected by a router or firewall.
Most home or office networks are connected to the internet through a router. A router can manage internet usage for a network and centralize the traffic at one IP address. All requests and packets are sent through the router before being distributed back to the respective devices, which made the original requests. By default, routers do not handle incoming requests on specific ports. If one attempts to connect over SSH to a router, the router has no way to handle that request, nor does it know who on the network to forward the requests to. This problem can be solved by configuring port forwarding within the router.
Identify Your Router & Control Panel
Routers generally provide an HTTP administration panel on port 80. This control center can be accessed by using the local network IP of the router, 192.168.0.1 or 192.168.1.1, in most cases. On Microsoft Windows, one can identify the location of the connected router or "Default Gateway" by opening a Command Prompt window and running ipconfig/all.
C:\> ipconfig/all

Windows IP Configuration

   Host Name . . . . . . . . . . . . :  █████████
   Primary Dns Suffix  . . . . . . . :  █████████
   Node Type . . . . . . . . . . . . :  █████████
   IP Routing Enabled  . . . . . . . :  █████████
   WINS Proxy Enabled  . . . . . . . :  █████████

Ethernet adapter Ethernet:

   Connection-specific DNS Suffix  . :  █████████
   Description . . . . . . . . . . . :  Intel(R) PRO/1000 MT Desktop Adapter
   Physical Address  . . . . . . . . :  █████████
   DHCP Enabled  . . . . . . . . . . :  Yes
   Autoconfiguration Enabled . . . . :  Yes
   Link-local IPv6 Address . . . . . :  █████████
   IPv4 Address  . . . . . . . . . . :  █████████
   Subnet Mask . . . . . . . . . . . :  255.255.255.0
   Lease Obtained  . . . . . . . . . :  █████████
   Lease Expires . . . . . . . . . . :  █████████
   Default Gateway . . . . . . . . . :  192.168.0.1
   DHCP Server . . . . . . . . . . . :  192.168.0.1
   DHCPv6 IAID . . . . . . . . . . . :  █████████
On Linux, the same can be done using netstat. Open a new terminal window and run the following command to see the IP of the router you're connected to.
~$ netstat -rn

Kernel IP routing table
Destination     Gateway         Genmask         Flags   MSS Window  irtt Iface
0.0.0.0         192.168.0.1     0.0.0.0         UG        0 0          0 enp0s25
█████████       ████████████    █████████       ███      ██████        ████████████
█████████       ████████████    █████████       ███      ██████        ████████████
On macOS, you can use the same command as on Linux.
~% netstat -rn

Routing tables

Internet:
Destination        Gateway            Flags        Netif Expire
default            192.168.0.1        UGSc           en0
█████████          █████████          █████████      ███   ████
█████████          █████████          █████████      ███   ████
█████████          █████████          █████████      ███   ████
█████████          █████████          █████████      ███   ████
█████████          █████████          █████████      ███   ████
█████████          █████████          █████████      ███   ████
Access the Router Configuration Panel
Once you've identified the local IP address of your router, you can access the configuration panel by opening the address in your web browser, just as you would any other URL. (Note: some routers, such as Amplifi, actually have mobile apps that make it easier.)
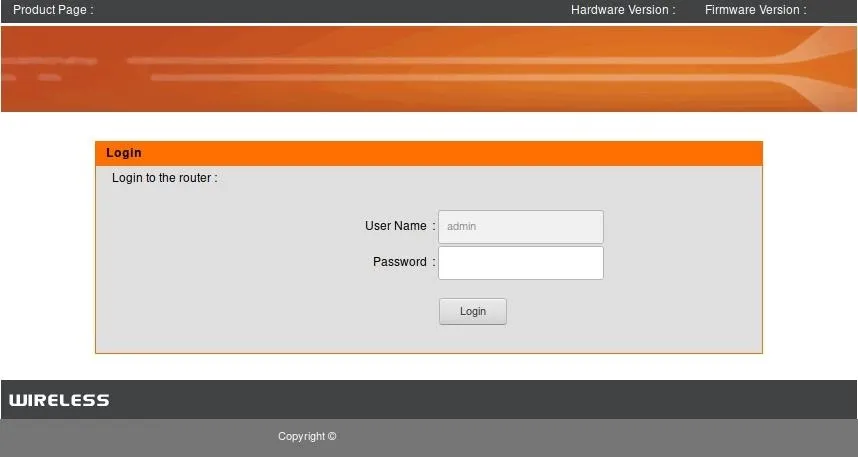
Once the router management page is open, log in to the router. The username and password may have been set by yourself (if you know what's good for you) or an internet service provider, or it could be the router manufacturer's default credentials. This information can generally found online in the router's documentation and sometimes even physically on the side of the router.
While all routers will have slightly different interfaces, once logged in, look for an "Advanced" area, or something which includes "Port Forwarding." In the case below, the relevant area was titled "Advanced Port Forwarding Rules."
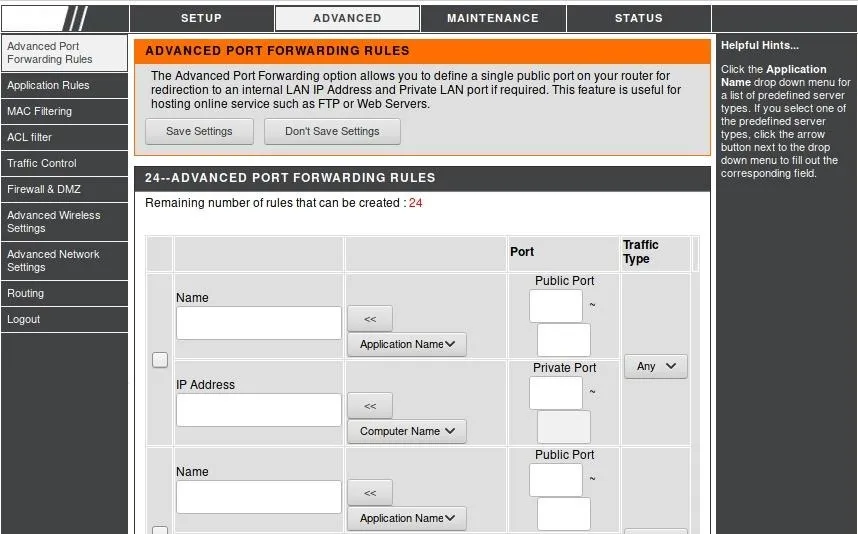
Now, you can begin configuring port forwarding settings for the router.
Define Your Port Forwarding Rules
To demonstrate usage of port forwarding rules, we'll use a sample use case. In this scenario, a user has a Raspberry Pi connected to their home network router. The Pi has an SSH service running, allowing a user to log in if they have the correct username and password. The current IP address of the Pi is 192.168.0.105.
- The user names the rule "RBPi SSH" to make it easier to identify for future administration. The name of the rule does not matter beyond personal preference, as it does not affect how the port is used.
- The Public Port (sometimes called Source Port) range is set to 22 through 22, or the standard SSH port 22. This is the port which the router will reveal to the internet as being open, and the port which a user will connect to if they wish to connect to the Pi.
- The Private Port (sometimes Destination Port) is set to 22 as well, as the SSH daemon is running on port 22 on the Pi.
- The Traffic Type is set to TCP, as SSH is TCP traffic.
- The IP Address is set to that of the Pi on the local network, 192.168.0.105.
- Finally, the checkbox at the left of the rule is checked to enable the new setting.
While your router's interface may work slightly different, the concept is the same.

This rule, when saved, means that now a user can connect to SSH to the IP address of the router from anywhere on the internet and be forwarded to their Raspberry Pi server. This could also be used to create an HTTP web server on port 80 or perhaps facilitate a video game server on a specific port. Keep in mind that some ISPs have defined rules regarding hosting servers and other content, and be sure to check any applicable rules before choosing to host an internet-accessible server on a local network.
Protect from Port Scanning & Attacks
One vulnerability that arises when exposing ports to the internet through port forwarding is port scanning. Attackers on the internet can use automated drones to scan sets of IP addresses or will use tools like Shodan to find potentially vulnerable devices with specific ports active. SSH ports are a prime target, as they represent a shell environment where data could be stolen, and malware could potentially be installed.
In the case of port forwarding, to protect against port scanning, it may be advantageous to change the public or source port in the router configuration. Rather than using a common port like 22, which is frequently scanned for, a more uncommon port such as 9022 can serve just as well to connect over SSH to the Raspberry Pi without leaving a low-numbered port available to be discovered through scanning.

With this port changed, the only difference in usage is that a client connecting to the devices over SSH from outside the network will need to specify port 9022 rather than assuming the default port, 22, is in use. Attempting to connect to port 22 will not work outside of the local network, as while the SSH daemon on the Pi is running on that port, it is being forwarded over port 9022, not port 22.
You can also use a service like Fail2ban, an intrusion prevention software framework designed to protect your system from brute-force attacks once an attacker finds out the real port you're using. A tool like Fail2ban will rate-limit the number of login attempts that can be made on the network.
System-Level Port Forwarding on Linux
While router-based port forwarding is useful for internet-facing network configuration, port forwarding can also be established at the system level when using Linux.
Much in the same way that a router port can be linked to a specific port on a device within a network, one port can also be linked to another to facilitate easier use. For instance, when installing the Cowrie honeypot, the SSH daemon is moved from port 22 to port 9022, and then port 2222, where the honeypot is running, is forwarded to port 22, where it will be scanned and attacked on the internet.
To begin configuring local port forwarding on Linux, one may first need to enable it within Linux itself. To do this, run the command below to set the value of ip_forward to 1 or true.
~$ echo "1" > /proc/sys/net/ipv4/ip__forwardOnce IP forwarding is enabled, ensure that you know the current port of the service you intend to forward. During the configuration of the Cowrie honeypot, this is done by changing the SSH daemon configuration to move the service to port 9022.
GNU nano 2.7.4        File: /etc/ssh/sshd_config           Modified

#       $OpenBSD: sshd_config,v 1.100 2016/08/15 12:32:04 naddy Exp $

# This is the sshd server system-wide configuration file. See
# sshd_config(5) for more information.

# This sshd was compiled with PATH=/usr/bin:/bin:/usr/sbin:/sbin

# The strategy used for options in the default sshd_config shipped with
# OpenSSH is to specify options with their default value where
# possible, but leave them commented.  Uncommented options override the
# default value.

Port 9022
#AddressFamily any
#ListenAddress 0.0.0.0
#ListenAddress ::
Finally, to enable local port forwarding, iptables can be used. The command below redirects requests on port 22 to port 2222, where the honeypot handles them.
~$ sudo iptables -t nat -A PREROUTING -p tcp --dport 22 -j REDIRECT --to-port 2222Other Uses for Port Forwarding
Port forwarding can be applied to other implementations, such as forwarding port 8080 to port 80 to make a test server more easily accessible or to add additional ports to use for a particular service. Port forwarding is a valuable technique for remote access, server administration, network configuration, and even for post-exploitation and pivoting. Understanding it can be the key to countless other security projects!
I hope that you enjoyed this tutorial on port forwarding! If you have any questions about this tutorial or port forwarding in general, feel free to leave a comment or reach me on Twitter @tahkion.
Cover photo and screenshots by TAKHION/Null Byte


Comments
Be the first, drop a comment!