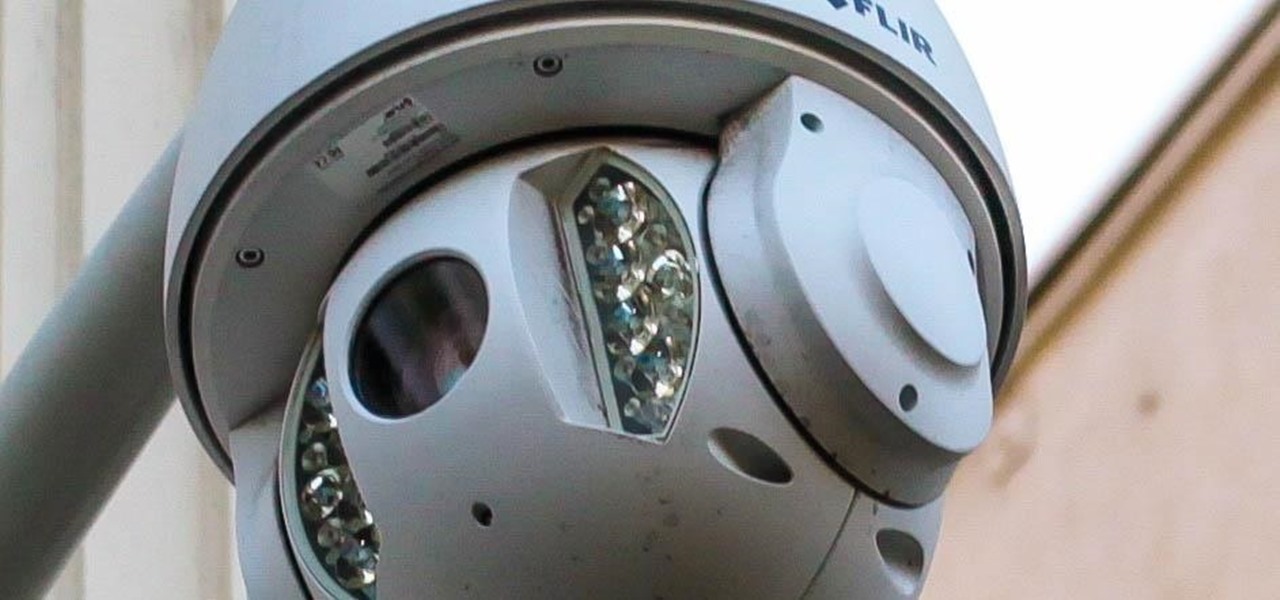

It's common for IoT devices like Wi-Fi security cameras to host a website for controlling or configuring the camera that uses HTTP instead of the more secure HTTPS. This means anyone with the network password can see traffic to and from the camera, allowing a hacker to intercept security camera footage if anyone is watching the camera's HTTP viewing page.
IoT Devices & Administration Pages
One thing internet-of-things devices typically have in common is a lack of focus on security. Convenience is often more important, so details like ensuring the administration page for a device is secure may seem like an afterthought to some developers. As a result, it's common to see these devices appear on Nmap searches with insecure ports open. Even worse, some of these devices are designed to be exposed directly to the internet rather than just the internal network.
On security cameras, this problem is made much worse if the camera also hosts an insecure webpage where the owner can watch video play directly from the camera. If this is the case, anyone else who knows the Wi-Fi password can see exactly what the target is watching on the security camera. Because most businesses or homes with a camera have a monitor set up to view the camera, this can be a real concern for users with weak passwords or others sharing the network.
Ports 80 & 81 Are Insecure
When scanning devices with Wireshark, there are a few ports you're very likely to see open on devices like routers, security cameras, and other Wi-Fi enabled IoT devices. If you see a port 80, 81, 8080, or 8081, this very likely means there is an insecure HTTP website being hosted on that port. While you must know the password of a Wi-Fi network to scan for these ports, you can access them over the Wi-Fi network to inspect the web application they host.
While port 443 is used for secure HTTPS traffic, which is encrypted and doesn't present the same kind of interception risk, any port exposing an insecure HTTP port over the local network is an invitation for an attacker to snoop around for more information on the connected device. This can mean trying to log in, gathering information about the firmware the device is running, or attacking it with a program like RouterSploit to attempt to break in.
- Don't Miss: Seize Control of a Router with RouterSploit
A lesser-known risk involves someone intercepting passwords and other information as it passes through the insecure web application. If a target has logged in and is viewing images from the security camera from an insecure web app live, it's relatively simple to intercept the web traffic and decode the intercepted packets into image files.
Intercepting Traffic with Wireshark
To make this work, we'll need to use Wireshark to sniff Wi-Fi traffic between our target computer and the router. Our goal will be to capture unencrypted HTTP traffic flowing to our target's computer as they view the security camera feed. To do this, though, there will be a few things we need to take care of first.
We'll need to break the encryption of the network. If we know the password, we can always join the network ourselves, but this opens up a further risk of detection. Instead, we can add the Wi-Fi keys we know to Wireshark, and decrypt the data we sniff without ever connecting to the network. This means our attack will be mostly passive, leaving little opportunity for us to be detected.
One critical thing we'll need that isn't passive is a Wi-Fi handshake to see the traffic. Because Wireshark needs to observe a Wi-Fi handshake to decrypt subsequent traffic, simply knowing the password is not enough. To succeed, we'll need to isolate traffic from the computer we're interested in with a Wireshark filter, capture a four-way WPA handshake, and then decrypt the data with the password we know.
What You'll Need & Practical Limitations
Conditions must be favorable for this attack to have a chance of succeeding. In particular, if the camera does not use an insecure interface, then the data will be encrypted, and we will not be able to see it.
If no one is watching the camera feed or it's not left displaying on a monitor, there will be no insecure traffic to intercept, so we will not see anything. If we do not know the network password, we cannot intercept the encrypted traffic. If we cannot kick a client off the network momentarily to generate a four-way handshake, then knowing the password won't do us any good. And finally, if we're out of range of the network, we won't be able to intercept the traffic we can't hear.
While this may seem like a lot of requirements, it's fairly common to be able to do this. If the target has a Wi-Fi security camera and keeps a monitor viewing the display, the Wi-Fi password should be all you really need, aside from a Kali Linux-compatible wireless network adapter.
Once you're in range and have Kali Linux loaded up, you should be ready. Plug in your wireless network adapter, and make sure you have Wireshark installed to begin. If you don't have Wireshark, you can download the installer from its website.
Step 1: Access the Web Camera on the Insecure Interface
To start, you'll need to access the built-in interface on whatever webcam or Wi-Fi security camera you want to intercept. In a browser window on your "target" computer, navigate to the HTTP interface, enter any password required, and then begin viewing the live webcam view.
If you need to find your camera on the network, you can run a Nmap scan to discover different devices on the network running insecure HTTP ports.
For this command, you'll need to know the network range. You can find this by typing ifconfig and copying down the IP address assigned to your computer. Then, you can type ipcalc and your IP address to calculate the network range. It should be something like 192.168.0.0/24. Run the following command, substituting 192.168.0.0/24 for your own network range.
sudo nmap -p 80,81,8080,8081 192.168.0.0/24Look for devices with this port "open," and when you find one, you can navigate to it by typing the IP address and then :81 to go to port 81 on that IP address. If you want to navigate to port 8081 on 192.168.0.1, type 192.168.0.1:8081 to your browser window.
Step 2: Identify the Channel & Prepare Wireless Card
You'll need to plug in your Kali-compatible wireless network adapter, such as the Alfa AWUS036NHA. You'll need to do two things before starting up Wireshark, the first being putting the card into wireless monitor mode, and the second being identifying the channel the router you're targeting is broadcasting on.
To put your card into wireless monitor mode, identify the name of your card by running ifconfig in a terminal window. It should be named something like wlan0.
Once you've found the name of your wireless card, we'll need to put it into monitor mode. Run the following command in a terminal window, with the name of your card substituted for "wlan0."
airmon-ng start wlan0
airodump-ng start wlan0mon
This will put your card in wireless monitor mode, changing the name of the card to add "mon" at the end. It will also start Airodump-ng, which will start scanning for nearby wireless networks.
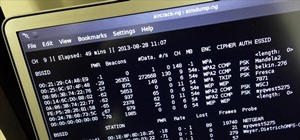
Look for the Wi-Fi network that you're looking to sniff, and note the channel that it's on. We'll need to switch our card to that channel to intercept the images in Wireshark.
CH  4 ][ Elapsed: 0 s ][ 2018-12-24 02:42

 BSSID              PWR  Beacons    #Data, #/s  CH  MB   ENC  CIPHER AUTH ESSID

 C0:8A:DE:39:CD:D9  -46        2        0    0   1  130  WPA2 CCMP   MGT  TWCWiFi-Passpoint
 C0:8A:DE:F9:CD:D8  -47        2        0    0   1  130  OPN              TWCWiFi
 C0:8A:DE:B9:CD:D8  -46        2        0    0   1  130  OPN              SpectrumWiFi
 C0:8A:DE:39:CD:D8  -47        2        0    0   1  130  OPN              CableWiFi
 78:96:84:00:B5:B0  -42        2        0    0   1  130  WPA2 CCMP   PSK  The Daily Planet
 00:9C:02:D2:5E:B9  -60        3        0    0   1  54e. WPA2 CCMP   PSK  HP-Print-B9-Officejet Pro 8600
 20:10:7A:92:76:43  -51        2        0    0   1  130  WPA2 CCMP   PSK  SBG6580E8
 DE:F2:86:EC:CA:A0  -45        1        0    0  11  195  WPA2 CCMP   PSK  Bourgeois Pig Guest
 D6:04:CD:BD:33:A1  -55        1        0    0  11  130  WPA2 CCMP   PSK  DirtyLittleBirdyFeet

 BSSID              STATION            PWR   Rate    Lost    Frames  Probe

root@kali:~/Desktop#
If our target is on channel 11, we'll run the following command to set our card to channel 11.
airmon-ng start wlan0mon 11Step 3: Start Wireshark
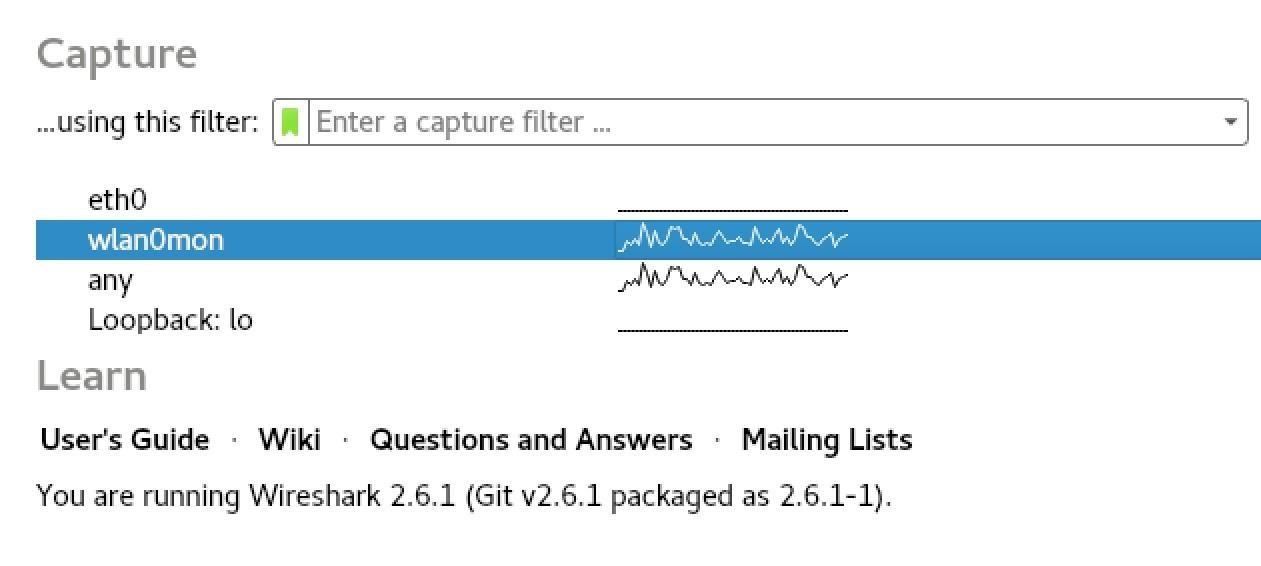
Now that our wireless network adapter is listening on the same channel as the traffic we want to intercept, it's time to start Wireshark. When Wireshark opens, double-click the card you put in monitor mode to start the capture.
Our card should now be scanning on the correct channel, but without the network password, we won't be able to see anything. To solve that, we'll need to add some encryption keys to Wireshark.
Step 4: Add the Network Password to Decrypt Traffic
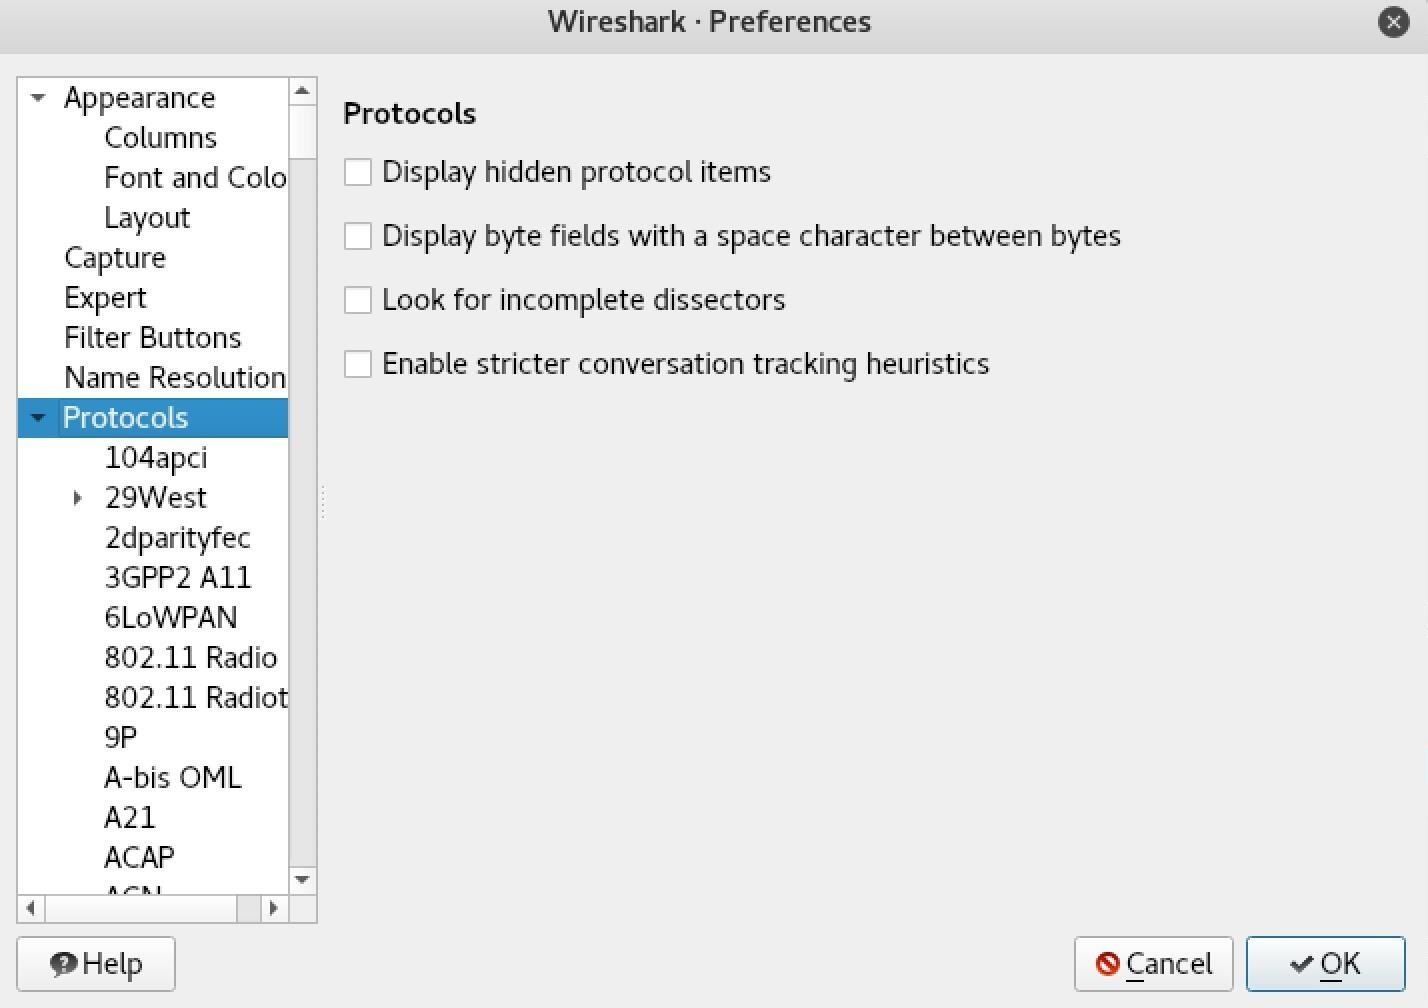
To add encryption keys to Wireshark, click on "Edit" in the menu bar, then "Preferences" to show the preferences menu. Next, select "Protocols" from the sidebar to see a list of protocols that Wireshark can translate.
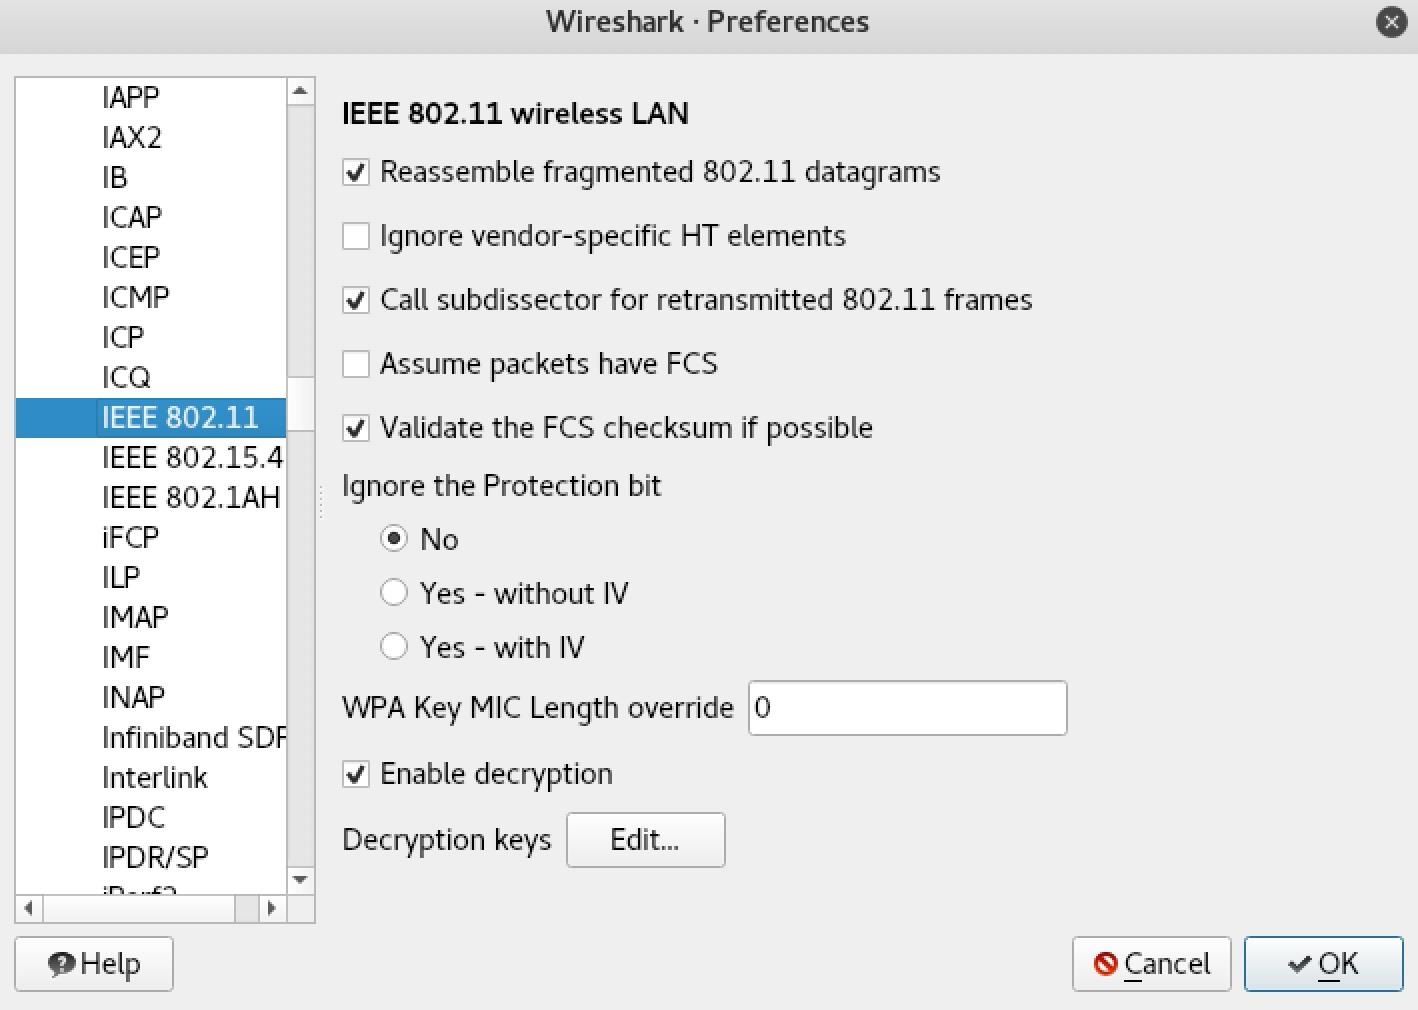
In the Protocols drop-down menu you just opened, you'll want to select "IEEE 802.11" to show options for decrypting Wi-Fi. Make sure that the "Enable decryption" box is checked, and then click the "Edit" button next to "Decryption keys" to open the list of keys Wireshark will try to use to decrypt traffic.
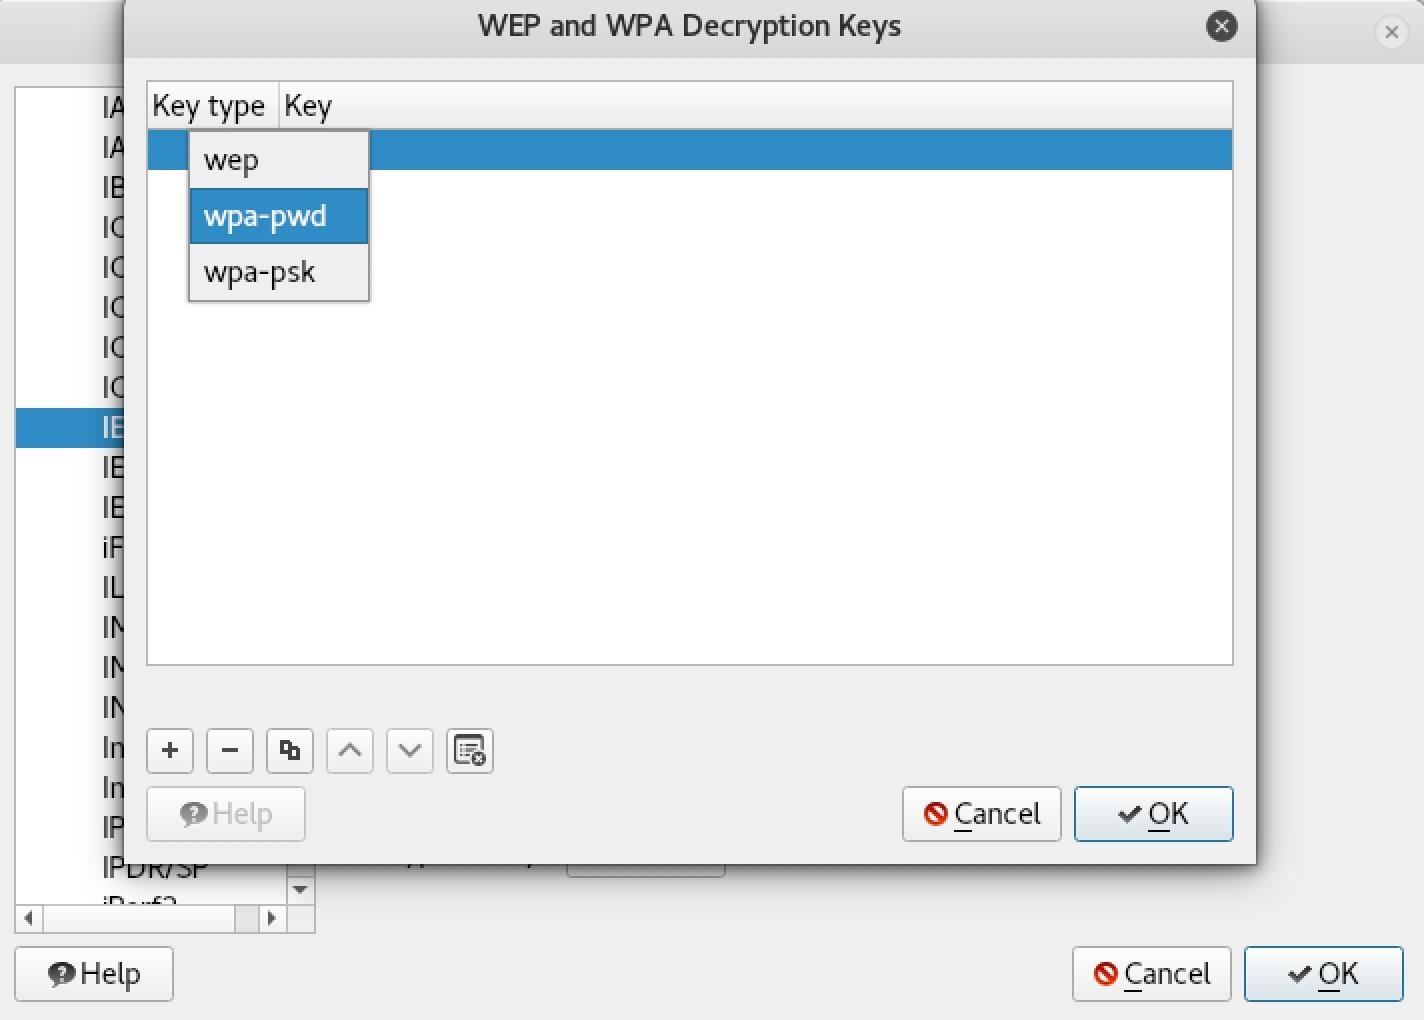
Once the WEP and WPA decryption key menu is open, click on the field to the left and select "wpa-psw" to add. While we can also add a "wpa-psk" here, we would have to calculate it ourselves, which is more complicated than simply entering the password.
For the decryption to work, you must add the key by clicking on the plus (+) icon, and then enter the key in the format password:networkname to add it to the list.
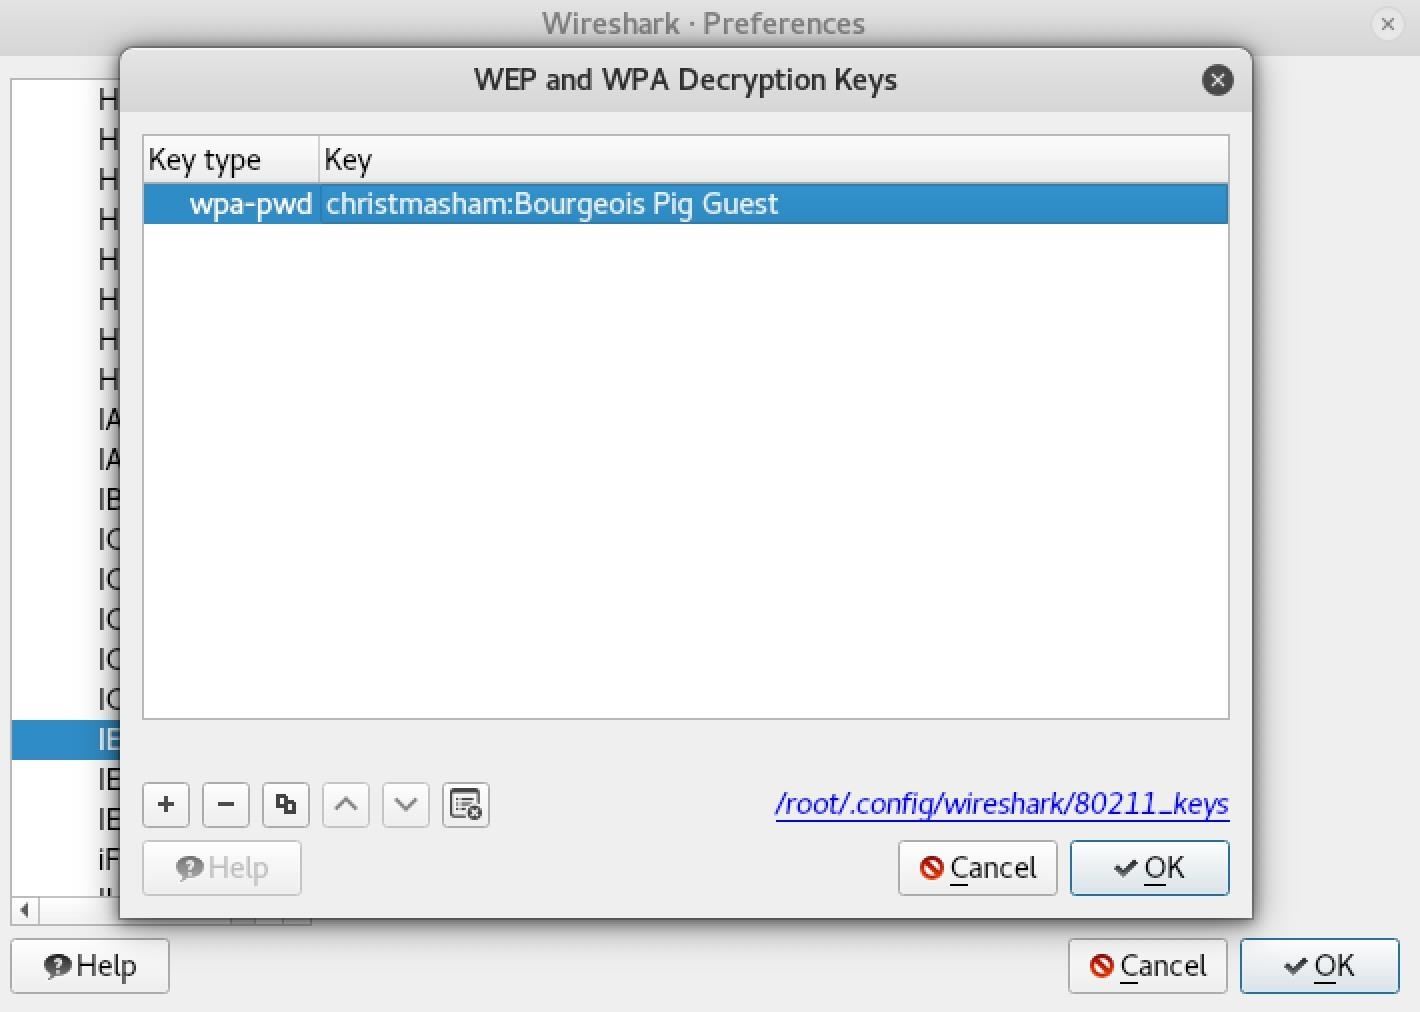
Click "OK" to save the key, and now we should be able to decrypt traffic from this network — if we can grab a four-way Wi-Fi handshake.
Step 5: Build a Filter to Capture Traffic Between Devices
In our Wireshark capture, we're sure to be seeing a lot of traffic. While we can't yet decrypt it because we don't have a handshake, we can build a filter to make sure we're only seeing traffic to the device we're sniffing.
The best way to do this over a Wi-Fi network is to find a piece of traffic to the computer we're looking for, and then make a display filter to show only packets heading to that MAC address. That means that any traffic directed to the target computer will be displayed, and any other network traffic will be ignored.
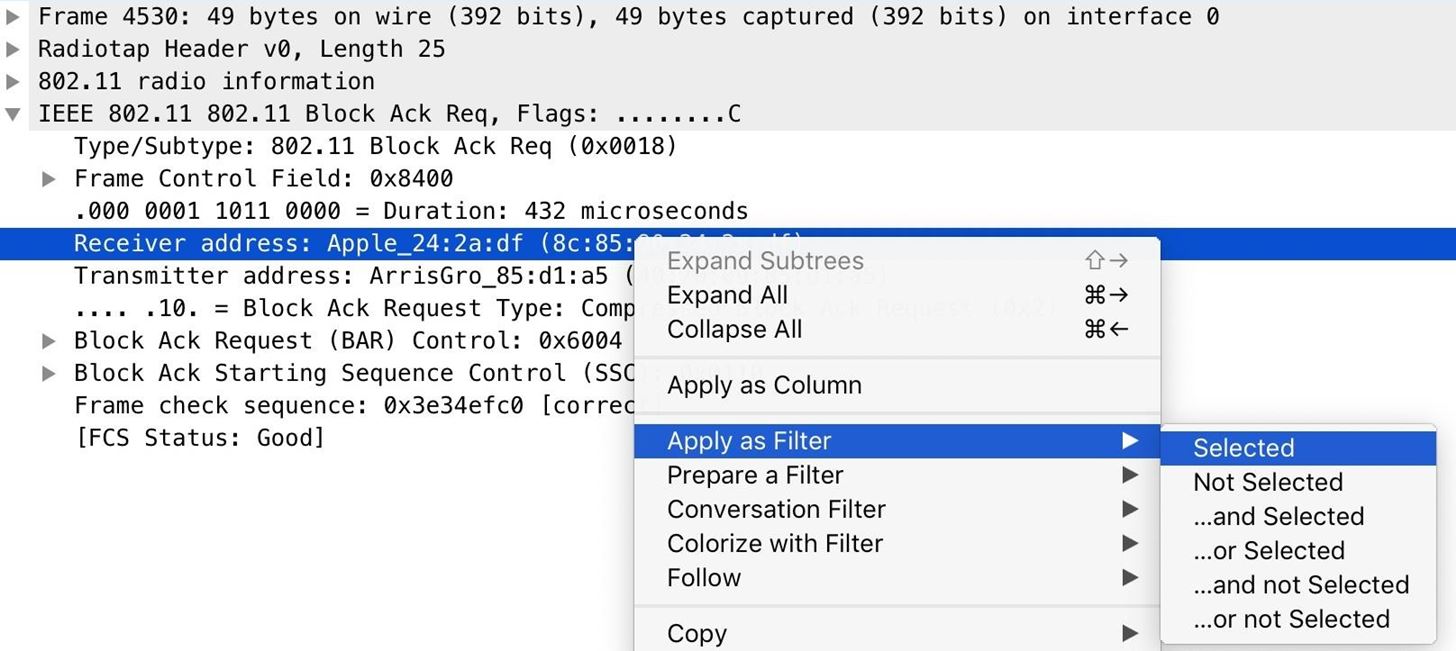
Looking under the packet information, right-click the "Receiver address" for a packet being sent to the target device, select "Apply as Filter," and then "Selected." Now, we should see only packets to the target.
Step 6: Deauth the Target to Grab a Handshake
Now that we've isolated the traffic from our target device, we need to generate a four-way handshake by kicking the target computer off the network momentarily while Wireshark is listening. To do this, we can use a tool from a previous guide called MDK3, which is able to kick any devices connected to Wi-Fi off and generate a handshake.
- Don't Miss: Use MDK3 for Advanced Wi-Fi Jamming
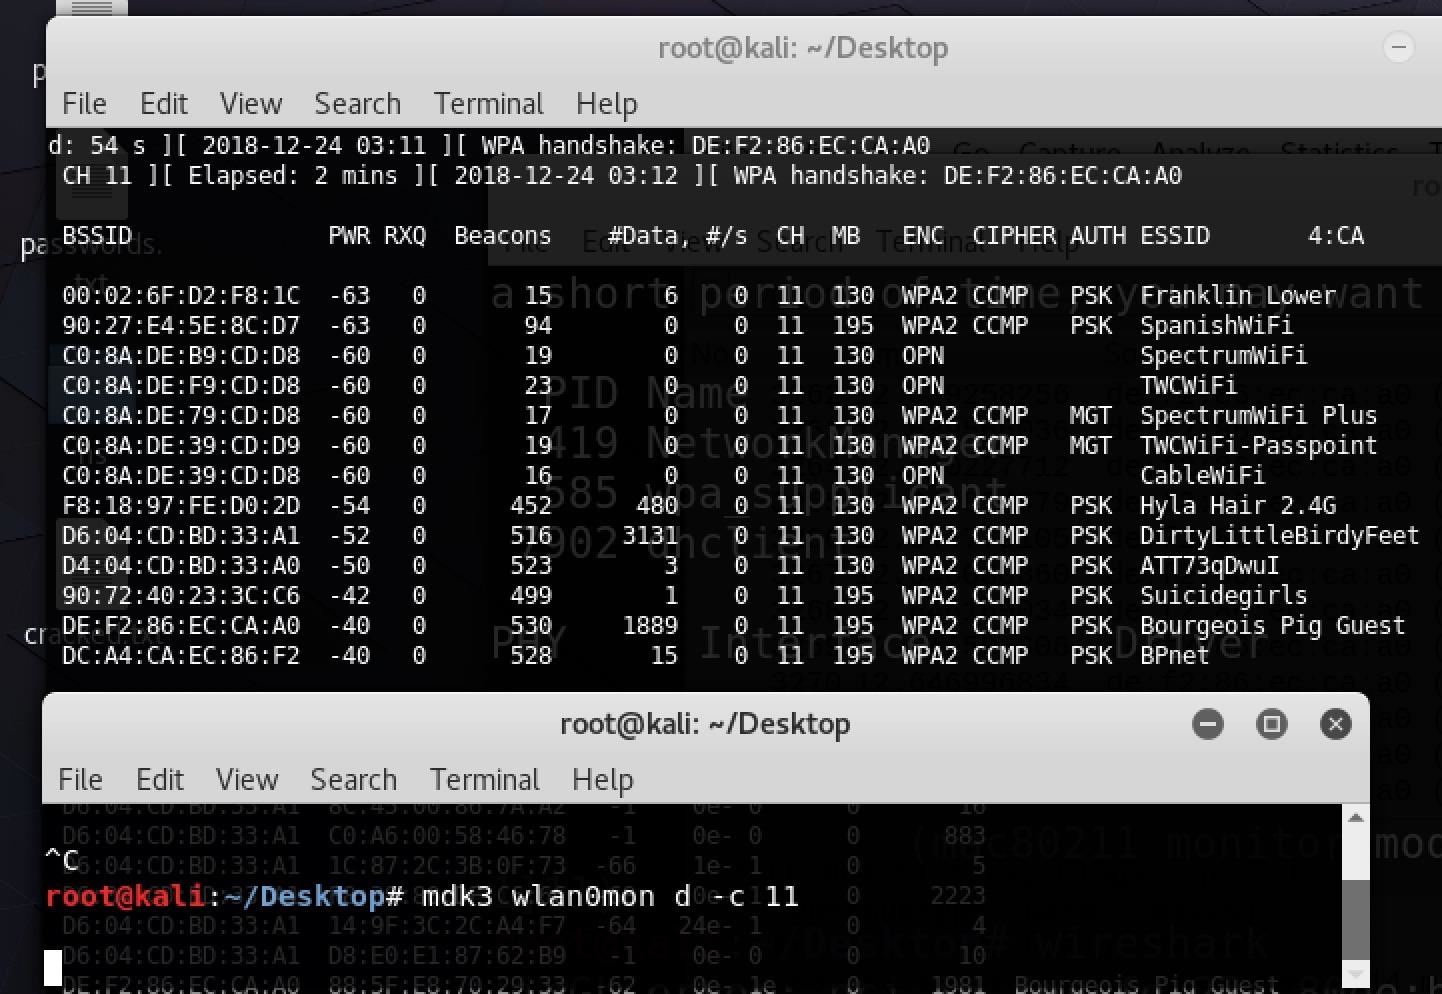
Because we already know the channel our Wi-Fi network is on, we can use MDK3 to take out any device operating on that channel. You should not need long to generate a WPA handshake. With "wlan0mon" swapped for the name of your wireless card, and "11" swapped for the channel you're attacking, run the following command in a terminal window to start jamming the network.
mdk3 wlan0mon d -c 11After a few moments, nearby devices on the network should automatically reconnect, allowing you to intercept the WPA four-way handshake. If you want to make sure you have it, you can open a new terminal window and run Airodump-ng to see when you get a WPA handshake.
To do so, type airodump-ng wlan0mon 11 (substituting "wlan0mon and "11" for your actuals) to watch for WPA handshakes while you run MDK3.
Once you see the result above, you've captured a WPA four-way handshake! Make sure to match the MAC address shown with the wireless network you're targeting to avoid getting a handshake for the wrong network.
Now that we have a four-way handshake and have entered the network key, we should have full access to data flowing over the network. While HTTPS is still off the table, we should be able to see raw HTTP just fine.
Step 7: Filter the Traffic to Find HTTP Traffic
While we've gained access to the network traffic and narrowed it down to the target computer, there may be other traffic that's unrelated and makes it difficult to focus on what we're looking for. To cut through this, we'll add another network filter to show only HTTP traffic flowing on the network.
In the Wireshark main view, type http into the display filter bar.
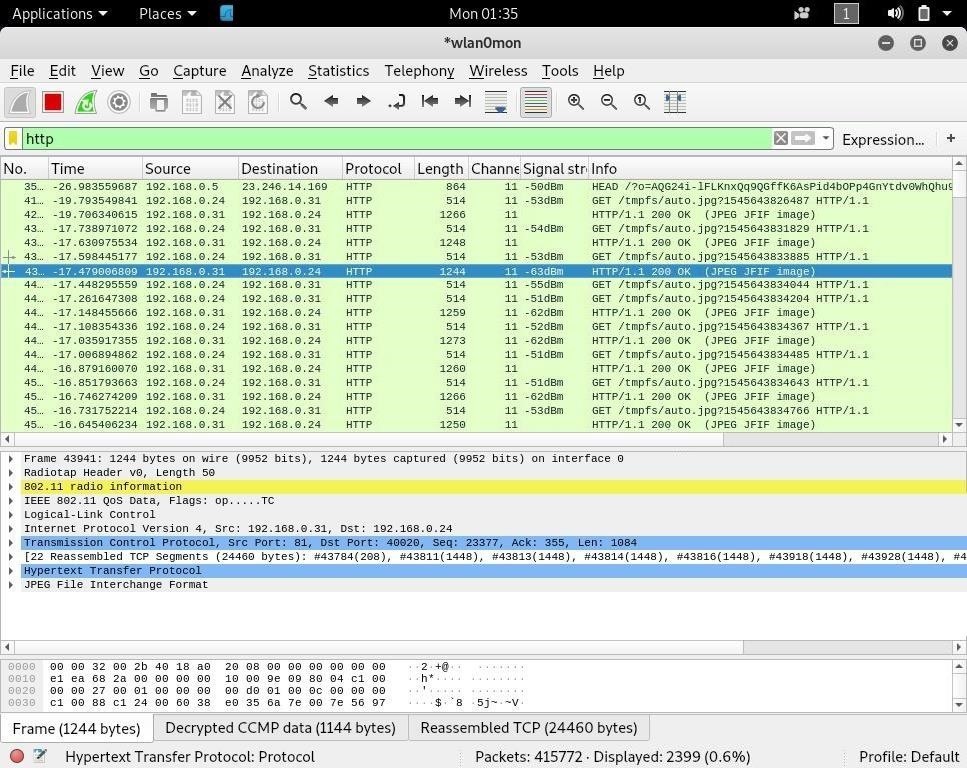
This will only allow HTTP traffic being sent to the computer we're monitoring to be displayed, filtering our view even further until we're only looking at the traffic to our insecure web app. Now, we'll need to actually decode the intercepted packets into images so we can see what our target is seeing from the security camera.
Step 8: Decode, Export & View the Intercepted JPEGs
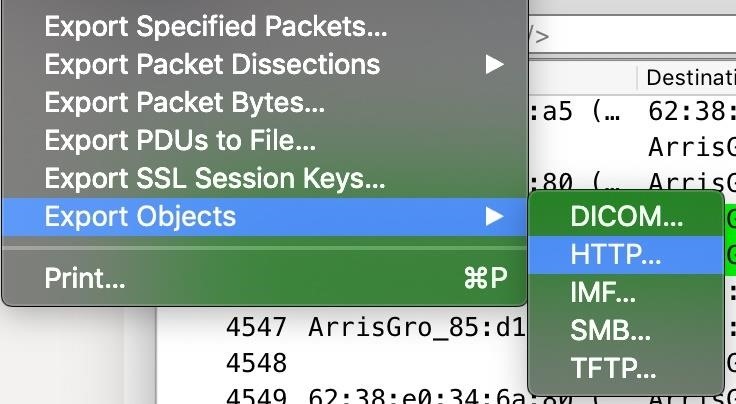
Now that we can see the HTTP traffic from the web app, we'll need to select the encoded JPEG files in order to turn them into something we can work with. Stop the capture, and then click on "File," then "Export Objects." We'll be exporting the HTTP objects we've found, so click on "HTTP" to open the object list.
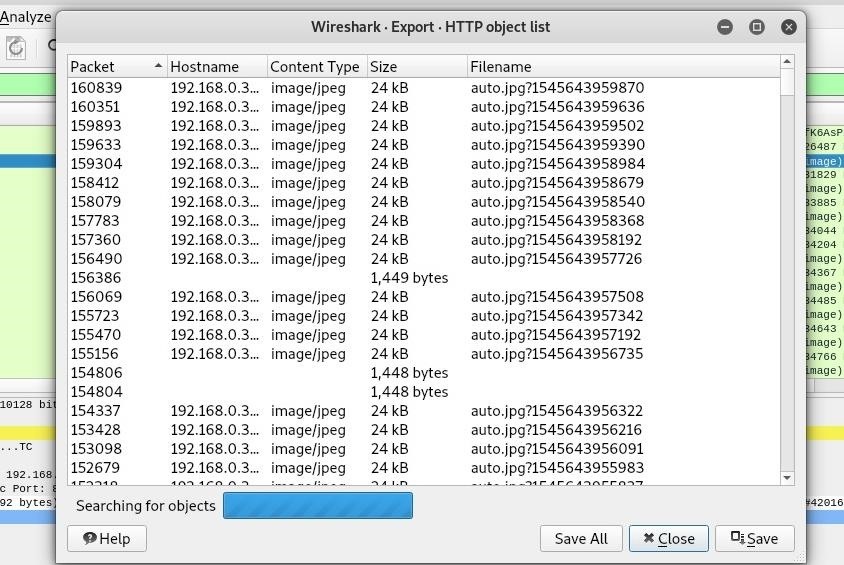
In the HTTP object list, we'll see a list of HTTP objects we've intercepted. Here we can see the JPEG images we want to decode. You can select one or all of them, and then click "Save" or "Save All" and pick a location to export the files to.
Click "Close," and then navigate to the folder you exported the images to. You should see a list of files that Wireshark exported from our capture. This will be more or less depending on how long you ran the capture for.
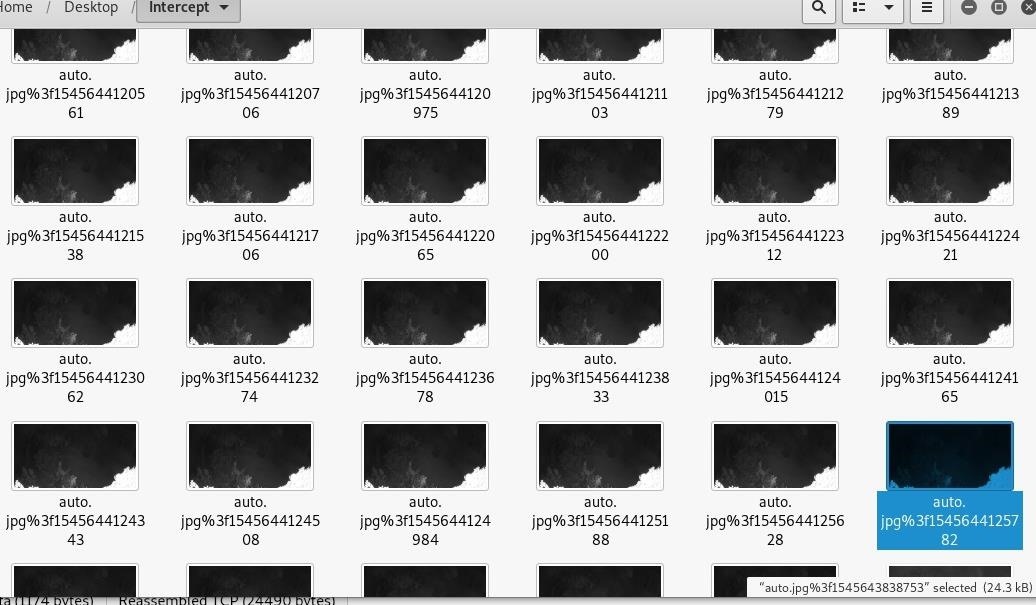
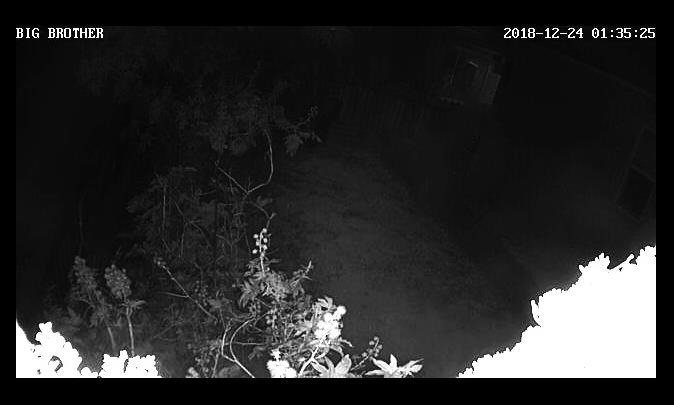
Finally, click on one of the images to see the image that was intercepted on the way to the target computer. You should see a frame from the video feed!
Defending Against the Attack
The best way to ensure no one is snooping on your security camera feed is to make sure that your camera is using HTTPS, has a strong password set, and is on a network that you don't openly share the password to. Because a weak Wi-Fi password can give an attacker direct access to the web application, it's critical you secure your Wi-Fi network with a strong password and disable options like WPS setup on your router that allows bypassing of other security features.
I hope you enjoyed this guide to intercepting security camera footage with Wireshark! If you have any questions about this tutorial on Wireshark or you have a comment, there's the comments section below, and feel free to reach me on Twitter @KodyKinzie.
Just updated your iPhone? You'll find new emoji, enhanced security, podcast transcripts, Apple Cash virtual numbers, and other useful features. There are even new additions hidden within Safari. Find out what's new and changed on your iPhone with the iOS 17.4 update.


5 Comments
Thank you for your effort, if i may ask what about the metropolitan security camera linked through a wireless bridges or if i am not mistaken the ppp working on 5ghz and 802.11 a / or whatever , that transmit directly to the center, since what you mentioned above is login to an insecure random HTTP rather than hacking the AP or being in the middle if its possible? any suggestions would be appreciated .
once you have the handshake how do you incorporate it into this attack. Doesn't seem to be covered
Can't you just simply launch an evil twin attack instead of knowing/cracking the WiFi's password?
If you are close enough to the camera, you would get the unencrypted traffic from the camera wouldn't you?
What does the handshake do for this attack?
Please answer.
Great tutorial!
What security camera did you use that relies on http web server?
Share Your Thoughts