
In 2013, Offensive Security released Kali Linux, a rebuild of BackTrack Linux derived from Debian. Since then, Kali has gone on to become somewhat of a standard for penetration testing. It comes preconfigured with a collection of tools accessible by a menu system, tied together with the Gnome desktop environment. However, Kali Linux isn't the only penetration-testing distribution available.
BlackArch is an Arch Linux derived distribution oriented towards penetration testing. It's also a rolling distribution, meaning that issuing an update command is all that is required to have the latest and greatest software on your machine.
Even more impressive, BlackArch is fully compatible with existing Arch Linux installs. Because of this, if you don't like the default BlackArch setup, you can use any Arch Linux setup you prefer and add the BlackArch repos without fear of damaging your system. This can make for a very clean, custom pentesting environment.
The Arch Linux philosophy is "keep it simple." Accordingly, Arch maintains a very minimalistic approach to their distribution. This minimalism can make Arch difficult for newcomers, although if you're comfortable with Linux, Arch is a very snappy clean distribution. If you aren't comfortable, Arch Linux provides an incredibly helpful wiki.
With that out of the way, let's have a look at BlackArch Linux. I will be using a VirtualBox disk image from the BlackArch site, which you can download from BlackArch's website.
Step 1: Verify Your Image
It's important to verify the integrity of your image. If the SHA1 checksum doesn't match up, your system may not function, or worse — you may have a system with malicious software installed! You can find the SHA sum for your image on the BlackArch site, next to the download link.
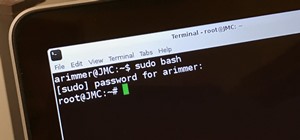
To verify your image in Linux, open your favorite terminal emulator and use sha1sum by typing the following command.
sha1sum blackarch-linux-2017.06.18-x86_64.ova
To verify your ISO in macOS, open your favorite terminal emulator and use shasum as seen below.
shasum blackarch-linux-2017.06.18-x86_64.ova
Using Windows, you can verify the SHA1 sum in cmd.exe using certutil with the following command.
certutil -hashfile blackarch-linux-2017.06.18-x86_64.ovao SHA1
Once you are satisfied that the SHA sum matches, proceed to run the live image with your preferred virtualization software. I will be using VirtualBox, which is free to use, and you can download it from the VirtualBox website. I highly recommend trying out Linux distributions in a virtual machine before installing them.
Step 2: Install the BlackArch Image
Before we can try out BlackArch, we'll need to add the new virtual machine. I'll be demonstrating this in Windows with VirtualBox, though the process should be similar across platforms.
The prebuilt image is rather large, clocking in at around 17 GB, whereas the live ISO is around 7 GB. The 7 GB image is good for installation or for creating a bootable thumb drive. The VirtualBox image is ideal for our purposes since the system comes completely set up and is just an upgrade away from having all of the latest versions of our tools and software.
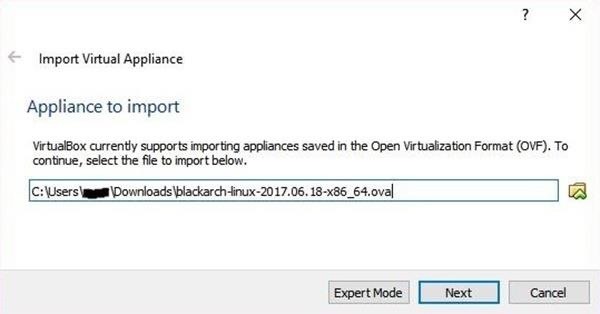
First, we launch VirtualBox. Then, in the file menu, select "Import Appliance" or use the keyboard shortcut Cntl-i. You will need to click on the folder to the right of the text field and navigate to the location of your BlackArch.ova file. Once it is filled in, click "Next."
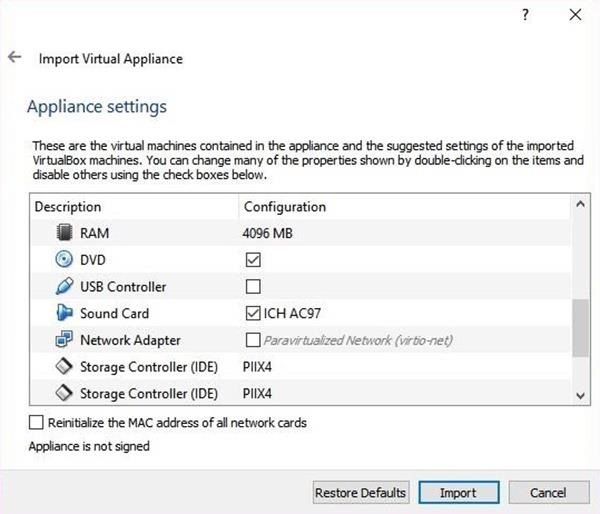
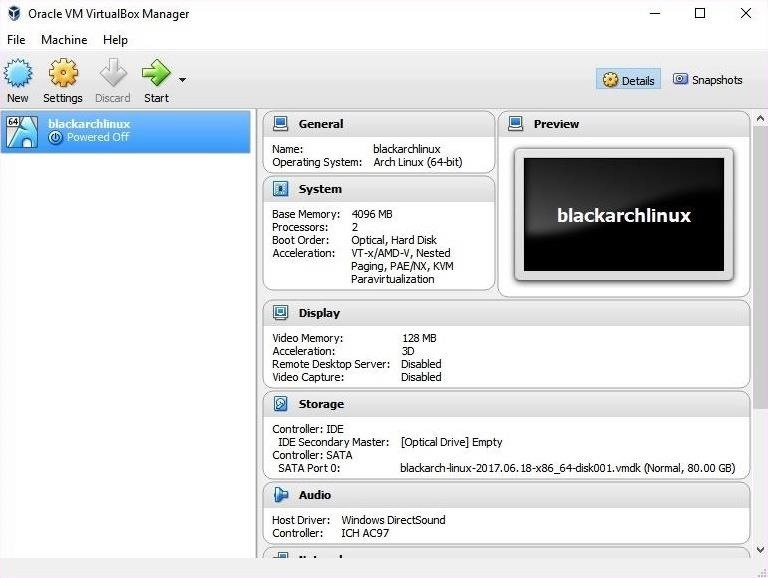
You will be presented with a window showing the current machine setup. I needed to make a couple of changes in order to get this working on my system. First, uncheck the USB Controller, then uncheck the Network Adapter. Both of these settings caused my machine to be unbootable.
Once you are satisfied with your options, click on the "Import" button.
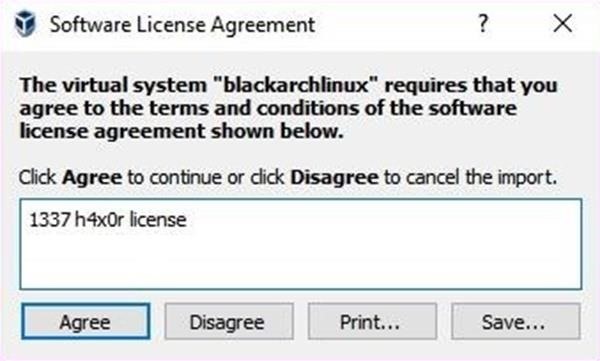
You will have to agree to the licensing agreement. The BlackArch team has a sense of humor, which I find enjoyable.
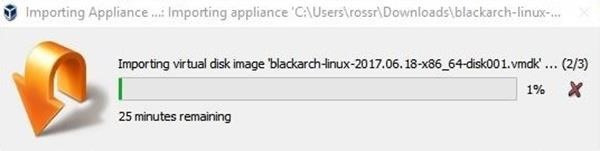
Once you have clicked on the "Agree" button, you will be presented with a progress bar indicating the time remaining on the installation. I have a regular HDD, but if you have an SSD, your import time will be faster.
Once the import completes, select the machine and go to the "Machine" menu, and select "Settings" (or use the Cntl-s shortcut). Select "Network" on the left side, check Enable Network Adapter, then select "NAT" from the drop-down.
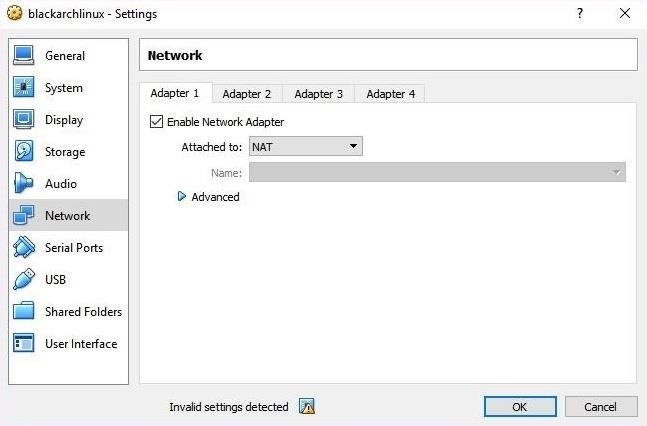
As you can see above, VirtualBox warns about invalid settings. This is because there is no USB controller emulation selected. When we confirm our settings, VirtualBox will automatically enable the emulation, so click "OK" to confirm your settings.
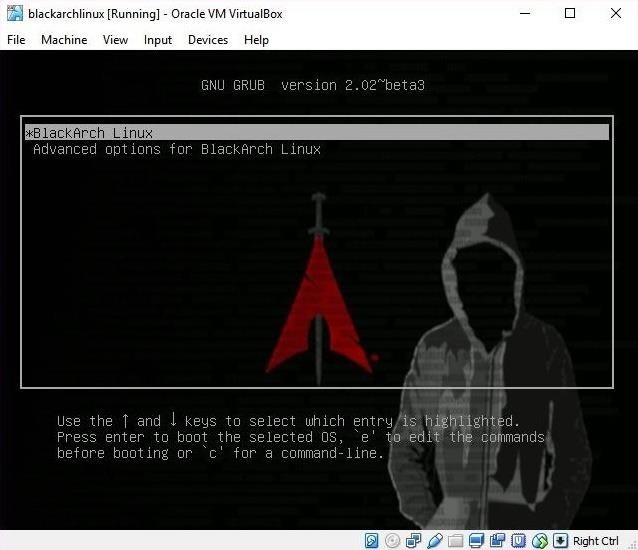
Step 3: Boot BlackArch
To start your new virtual machine, select the machine and press the "Start" machine button.
On start, VirtualBox will warn you that the machine is set to full-screen mode and that your host key is the right control key. The host key allows you to escape inputting into the VM. You will be greeted with a GRUB bootloader menu. Select BlackArch Linux and press enter.
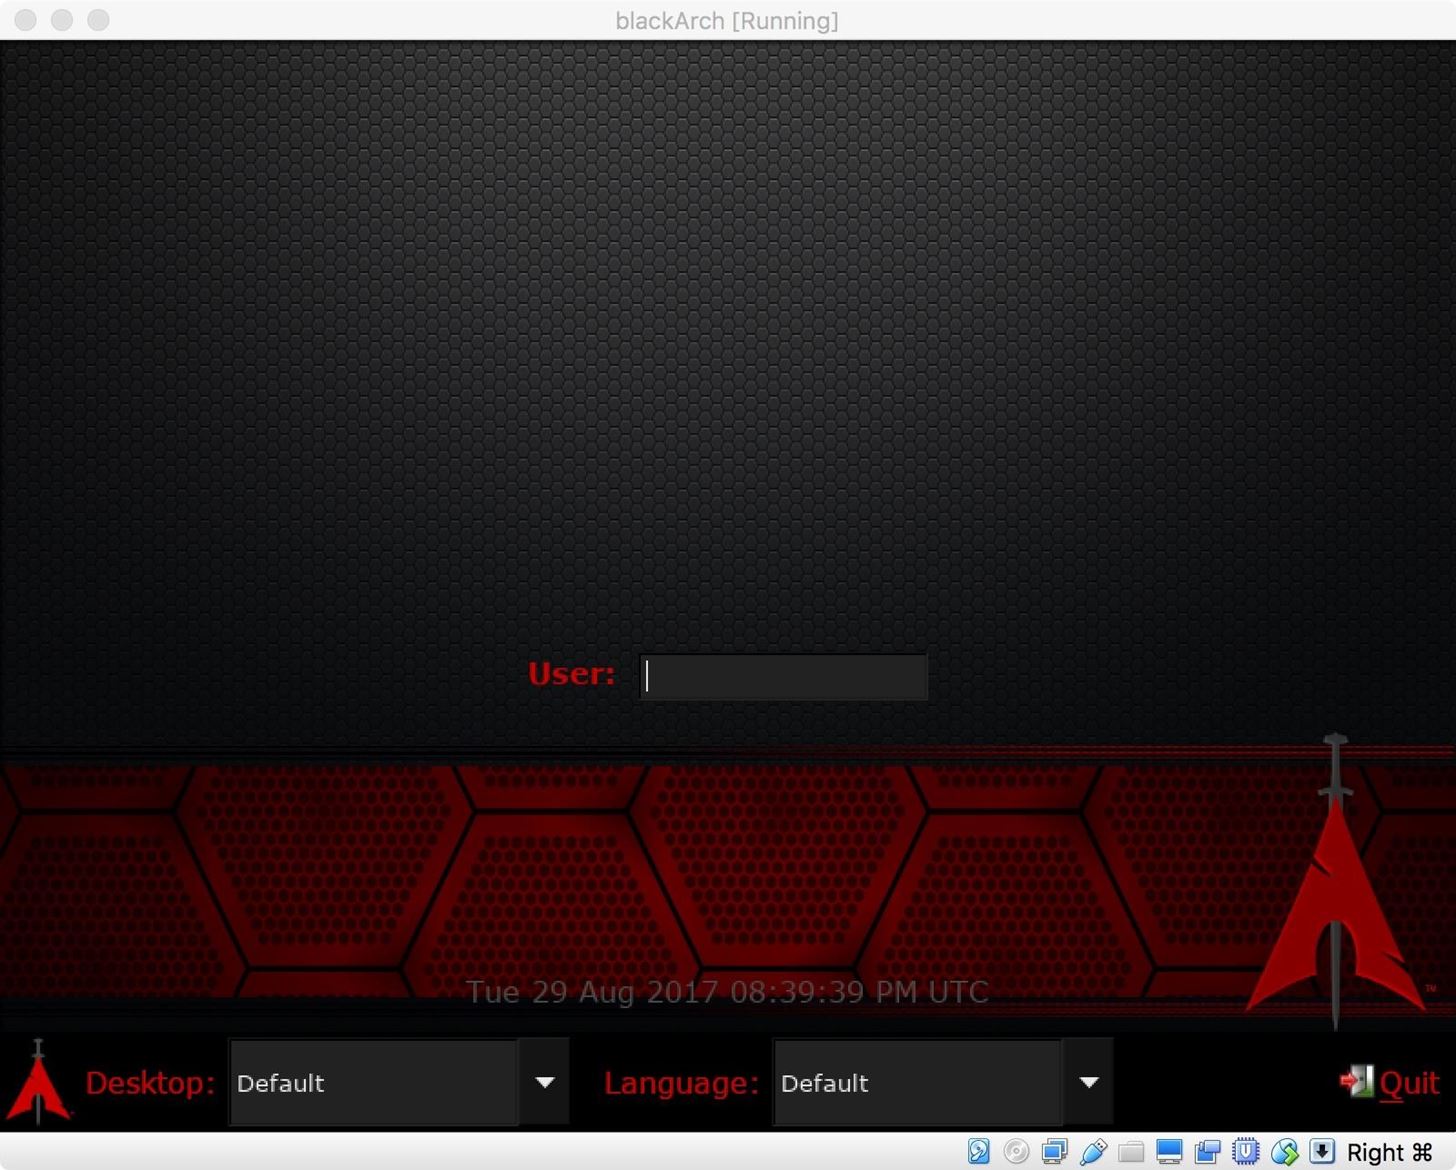
Step 4: Log In
After boot, you will be presented with a customized LXDM login screen.
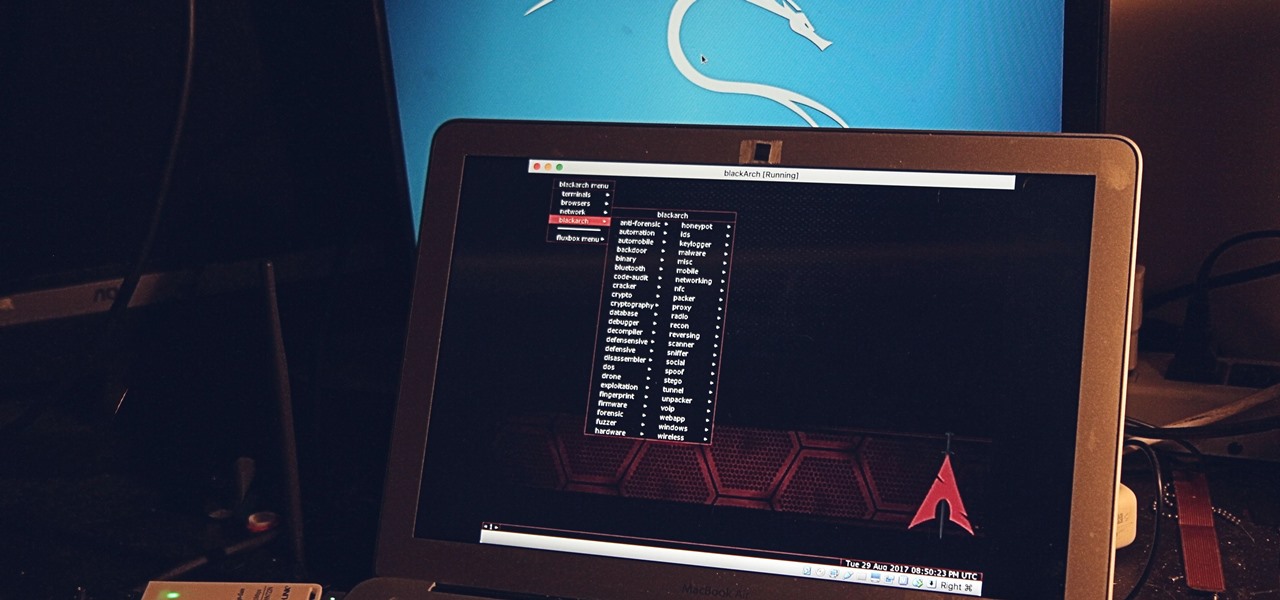
The default window manager in BlackArch Linux is Fluxbox, though it also ships with a few others. Compared to Kali, all of the options are incredibly lightweight. This minimalistic design makes BlackArch an excellent option for machines that have a hard time with more resource-intensive desktop environments. The default account is root, and the password is blackarch.
If you are coming from a default Kali Linux installation, you may be surprised by the sparse desktop environment provided by BlackArch. Don't be fooled by the minimalist layout — BlackArch packs 1,860 tools into organized menus. This can be a little overwhelming. For comparison purposes, the Kali Linux default installation contains 383 tools. BlackArch has almost 5 times the tools preinstalled!
Where Arch, and BlackArch, really shine is the availability of packages, including ARM packages. If a piece of software is designed for Linux and not distro-specific, there is almost always a version available. These packages can come from the default Arch repositories, the BlackArch repositories, or community repositories.
To access the tool menu, right-click anywhere on the desktop.
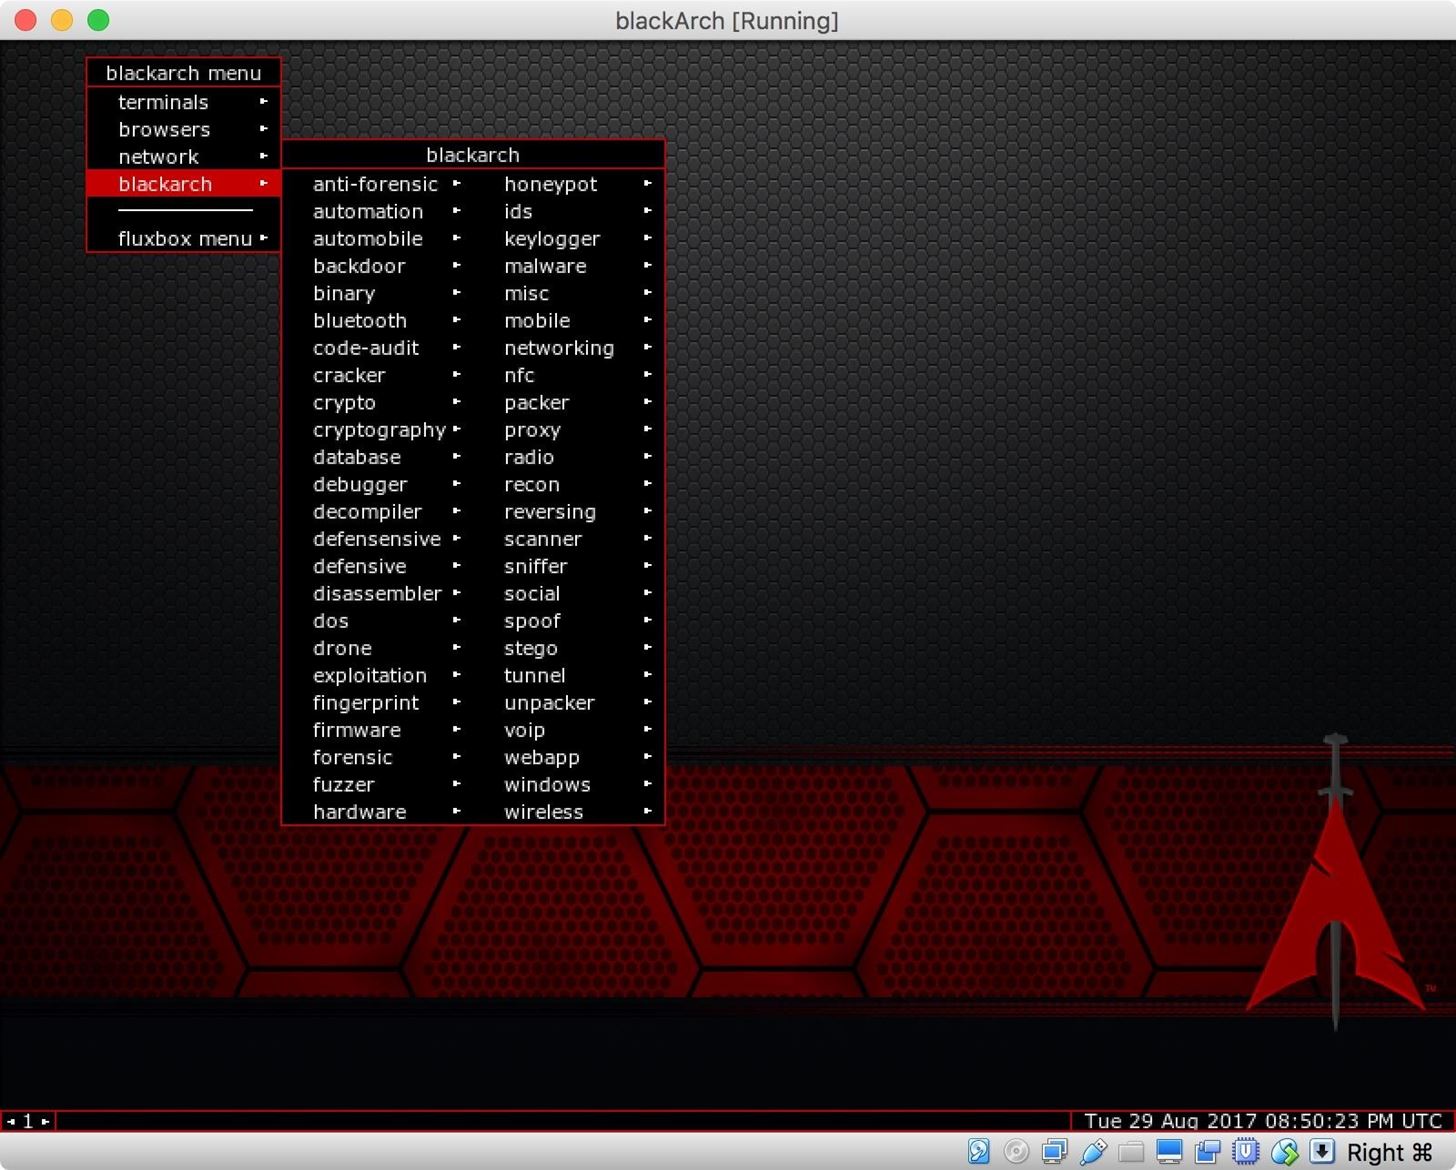
Despite the considerable amount of tools, these tools are less curated than what you would expect to find in Kali Linux. This means that some of the tools will require additional user setup. This can range from easy to complex, depending on the tool.
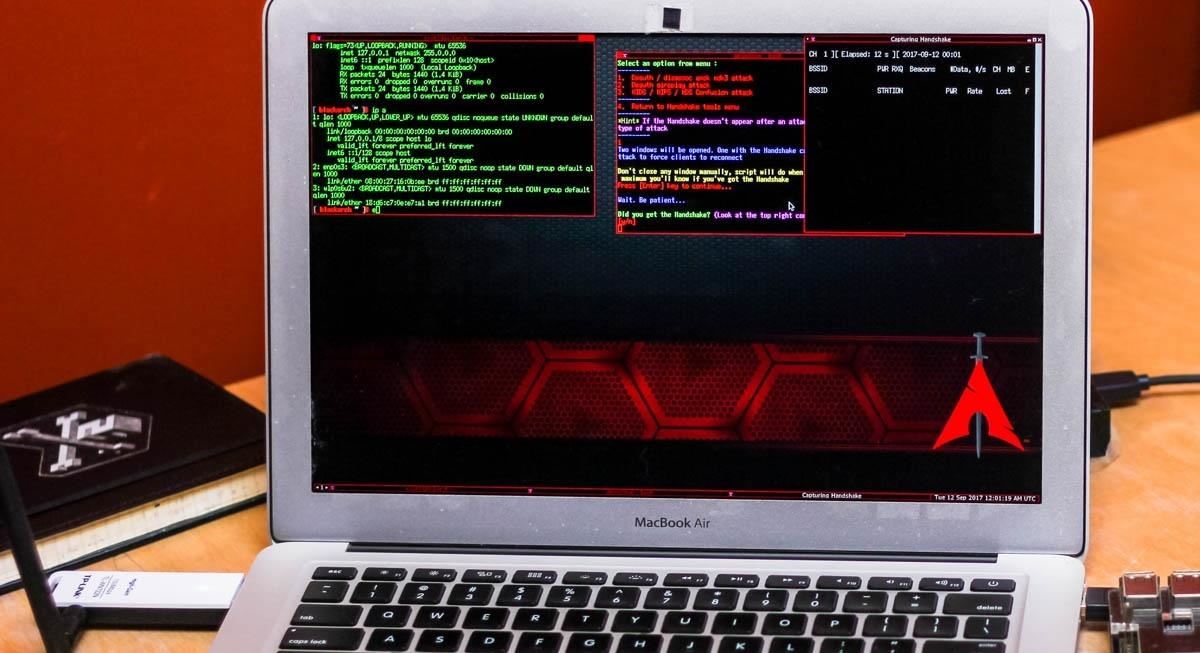
Step 5: Connect to Internet
By default, DHCPD is not started at system boot, and the network interfaces are down.
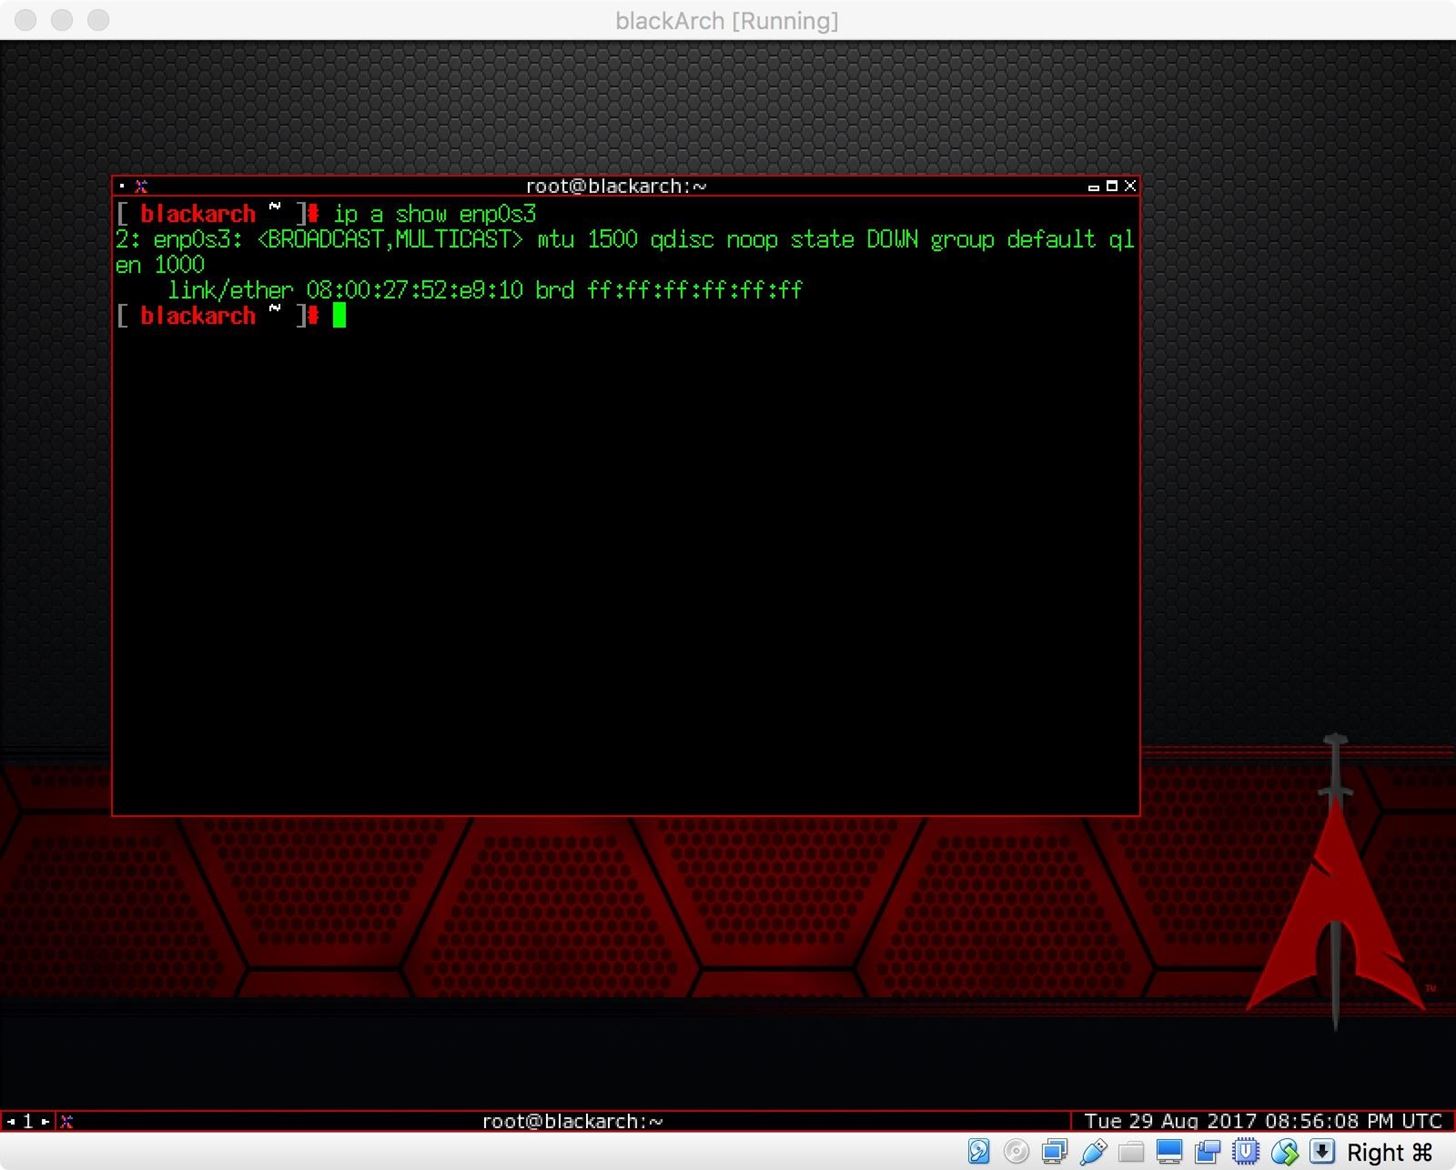
In order to bring up the network, open your Xterm and use systemctl with the command below.
systemctl start dhcpcd
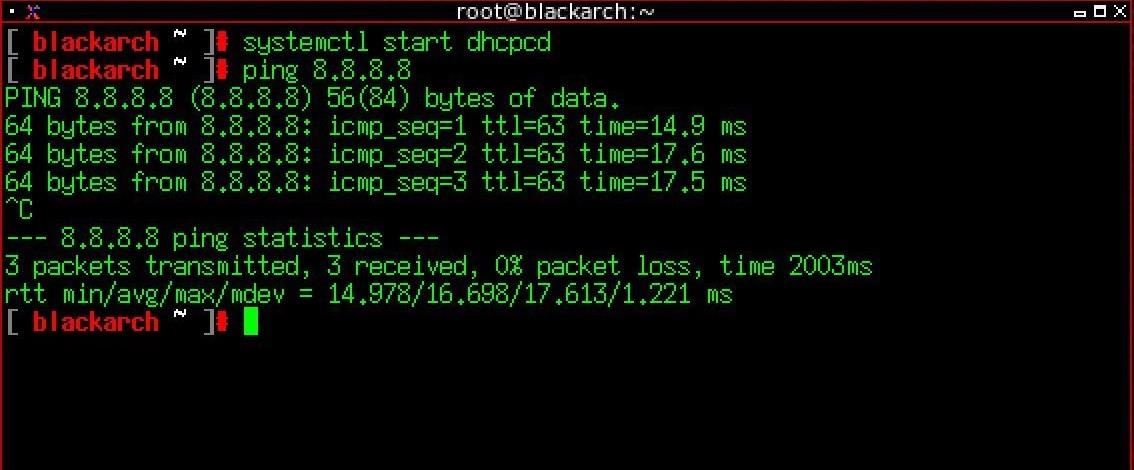
As you may have noticed, the default terminal in BlackArch is Xterm. A very lightweight terminal emulator, Xterm doesn't support tabs, but workflow can be managed with tmux. Or, just add in your favorite terminal emulator.
Step 6: Update the System
Since BlackArch is a rolling release distribution and ISOs are released quarterly, it's important to keep the system up to date. This can be done using pacman. To update the system using pacman, issue the following command into your favorite terminal emulator.
pacman -Syu
This set of arguments is a bit different from Debian's apt. The -S without additional arguments is used to sync a package to the system and is the equivalent of apt install. The addition of the y and u arguments tell pacman to refresh the package database and upgrade the system. This is the equivalent of issuing the standard Debian upgrade commands.
apt update && apt upgrade
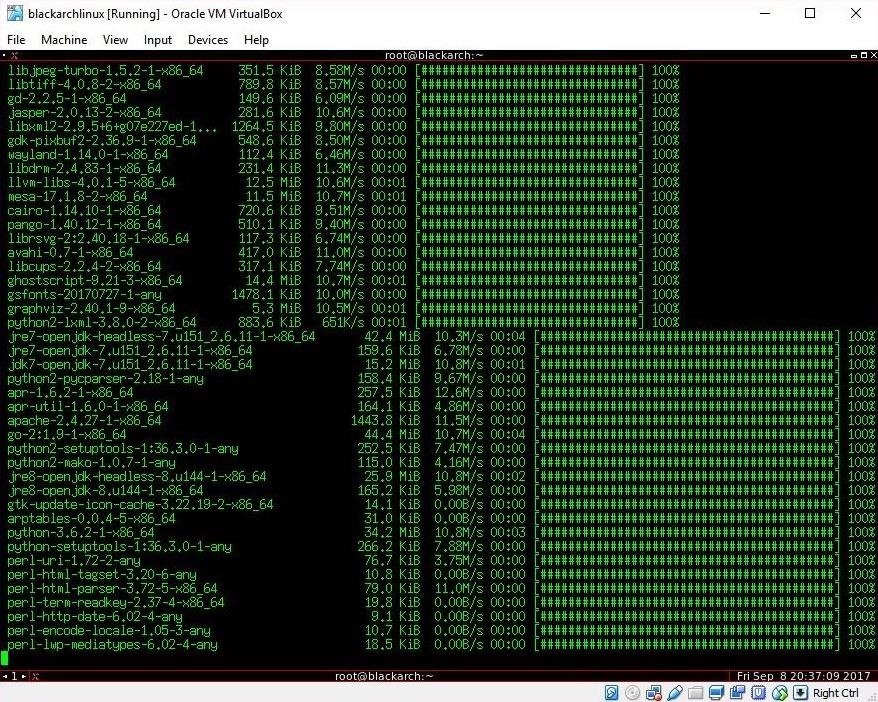
In order to sync your system with the current BlackArch tools repo, we again use pacman, but with a different set of arguments.
pacman -Syyu --needed --force blackarch
Once again, we use the sync command, where yy tells sync to force an update of the repository, even if it appears to be up to date, and --needed tells the package manager to not install targets that are already up to date. The --force argument bypasses file conflict checks and will overwrite conflicting files this can be risky, but it is the BlackArch-approved way to upgrade all the BlackArch tools.
After updating the system, you may also want to update sploitctl. Sploitctl is the BlackArch version of Kali Linux's searchsploit utility. Sploitctl archives and searches the Exploit-DB, Packet Storm, m00-exploits, and lsd-pl-exploits. For the first run with sploitctl, you will want to download all the exploit archives.
sploitctl -f 0
This will pull down the exploit code and place it in your /usr/share/exploits directory.
Step 7: Getting Help
If you encounter any issues with the software found in BlackArch, help is readily available. If the problem is a general problem with Arch Linux itself, the first place to check is the ArchWiki, which can be verbose but is incredibly comprehensive. If you are having an issue with BlackArch itself, I recommend the #blackarch IRC channel on the Freenode network. The channel is well-populated but can be somewhat slow to answer depending on your time zone.
BlackArch Is Great for Experienced Pentesters
BlackArch is a great distribution choice for penetration testing if you are comfortable with Linux. Because BlackArch isn't as polished as Kali Linux, I wouldn't recommend this distribution to beginners. As a cohesive operating system, BlackArch maybe a bit challenging at times. The toolset is enormous, which can be intimidating. Despite the tools all being categorized in the menu system, there's still a lot to dig through, and some tools may require additional setup.
Following in the minimal style of Arch, BlackArch requires a lot of work in the terminal. For example, changing the desktop background by default requires the use of the command line tool feh, and that's just the start. BlackArch really does require some Linux familiarity on the part of the user. If you decide to use BlackArch, there's plenty of help available in the form of the ArchWiki and the #blackarch IRC channel on Freenode.
Generally, I would add the BlackArch repos to an existing Arch Linux system and then install tools as needed or by category. I especially like to use Arch with BlackArch on top of it on low-resource devices where I'm trying to save disk space and need a really light system. If you aren't comfortable installing Arch, BlackArch does come with an install script which makes installation easier than a vanilla Arch install.
Thanks for reading! If you have any questions, feel free to reach out on Twitter @0xBarrow or in the comments below.
Just updated your iPhone? You'll find new emoji, enhanced security, podcast transcripts, Apple Cash virtual numbers, and other useful features. There are even new additions hidden within Safari. Find out what's new and changed on your iPhone with the iOS 17.4 update.
Screenshots by Barrow/Null Byte


6 Comments
This is live view. But tell us how to install it.
I just installed the OS, and I've encountered this error when running pacman -Syu: Error: Failed retrieving file '@@@@@@' from @@@@@.@@@: Failed Writing body (@@@ != @@@@) both installing from the .ova or the .iso file. I set 80GB disk space for the VM. What can I do?
Do you have a network connection?
Make sure the interface is up
It's unlikely to be eth0.
Thanks for the info about Blasckarch Linux!
make some tutorials of " Garuda Linux "
Share Your Thoughts