

Welcome back, my novice hackers!
Reconnaissance is one of the most important preparatory steps to hacking. As I have emphasized many times before here on Null Byte, you must know the operating system, the ports, the services, the applications, and sometimes even the language of the target to be effective. If you haven't taken the time to gather this info, then you are likely wasting your time.
In an earlier post, I had shown you the most widely-used and valuable reconnaissance tool in the hacker's toolbox, nmap. There are a number of other recon tools that are also helpful such as hping and xprobe, but nmap is the standard by which all others are judged. I STRONGLY recommend that you master nmap if you are to truly call yourself a hacker.
I've already shown you some of the basics of nmap, like performing port scans using the TCP (-sT) and SYN (-sS) scans, as well as performing OS (-O) detection. In addition, I showed you how to change the speed of the scans to evade intrusion detection systems.
This post will take you through some more advanced features so that it can be an even more useful tool for you. To begin, let's fire up Kali Linux and open nmap.
Step 1: Open Nmap in Kali
Open a terminal in Kali and type nmap.
kali > nmap
When you do so, nmap will display the help screen like that below.
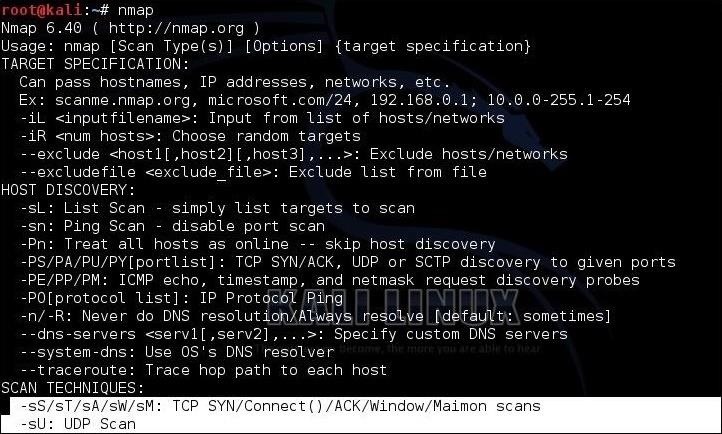
At the bottom of the first screen, you will see a section named SCAN TECHNIQUES. In my earlier post, we used the -sS and -sT scans.
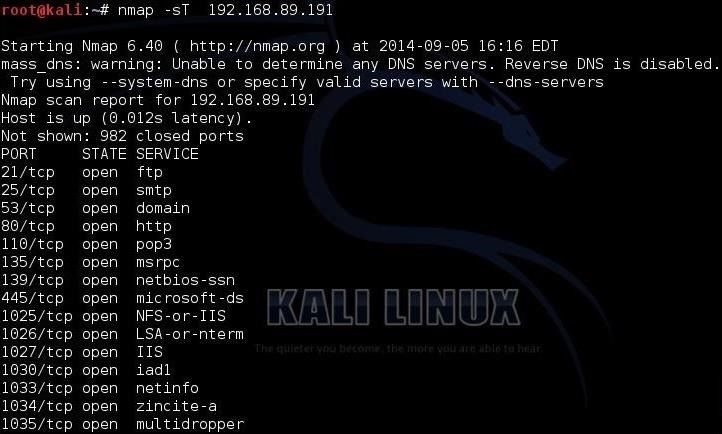
Using nmap's basic syntax:
nmap <scantype> IP address
We get results like that below showing all of the TCP ports that are open on our target machine and the default service for that port.
Step 2: Scan for Specific Port or Port Range
Sometimes we are looking for a specific port or a port range. Nmap uses the -p switch to designate a port or port range. So, if we were only looking for ports 25-150, we could use:
kali > nmap 192.168.89.191 -p25-150
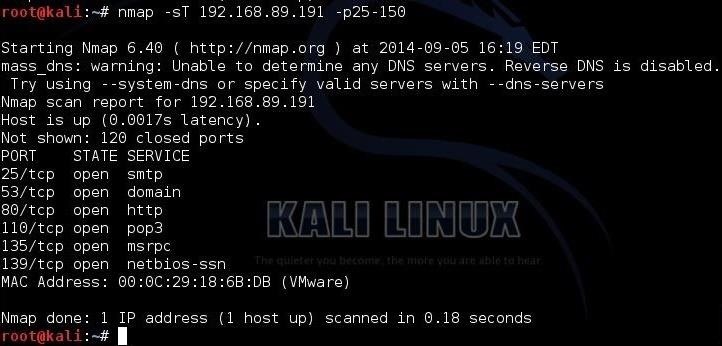
As you can see, this command scans and reveals only the ports in that port range.
Step 3: Scanning a Subnet
Often, we want to scan more than a single IP address. Nmap allows us to use CIDR notation to designate an entire subnet. So, for instance, if we wanted to scan on entire Class C subnet (256 hosts) for port 80 open, we could type:
kali > nmap 192.168.89.0/24 -p80

As you can see in the last line of this output from nmap, it scanned all 256 addresses in the subnet and found "2 hosts up." One host had port 80 open and the other did not.
Step 4: Spoofing & Decoy Scan
When we are scanning machines that are not ours, we often want to hide our IP (our identity). Obviously, every packet must contain our source address or else the response from the target system will not know where to return to.
The same applies to spoofing our IP when using nmap. We CAN spoof our IP address (-S) in nmap, but as a result, any response and any info we are trying to gather will return to the spoofed IP. Not very useful, if we are scanning for info gathering.
A better solution is to obfuscate our IP address. In other words, bury our IP address among many IP addresses so that the network/security admin can't pinpoint the source of the scan. Nmap allows us to use decoy IP addresses so that it looks like many IP addresses are scanning the target.
We can do this by using the -D switch, such as:
nmap -sS 192.168.89.191 -D 10.0.0.1,10.0.0.2,10.0.0.4
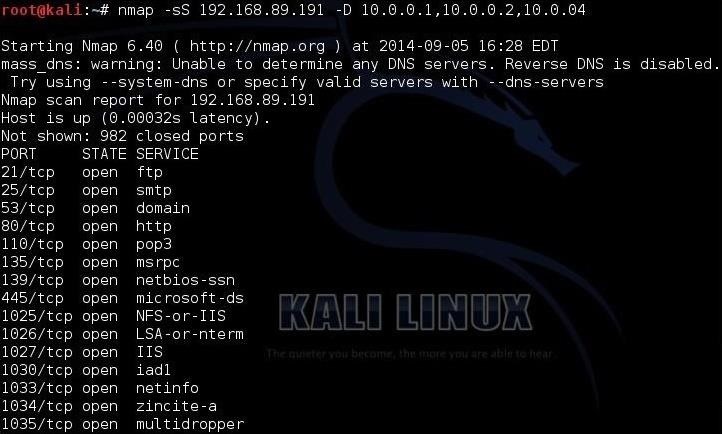
This scan will use three decoy IP addresses, but also use our own address as well. In this way, we get responses and the info on the target AND the admin of the system sees scans coming from four systems simultaneously. In this way, he can't pinpoint the true source of the scan easily.
Step 5: Evading Firewalls
Many firewalls and routers block or drop the ICMP (echo request, echo reply) ping. This is meant to obscure the presence of the hosts behind the firewall and protect against a possible DoS using the ping packet.
When you use nmap to scan a system or network, by default, it send out a ping to see if the host is up and if it gets a response, it then sends the specified packets to scan the system. If the ping is blocked or dropped, nmap gives up and says, "host is down."
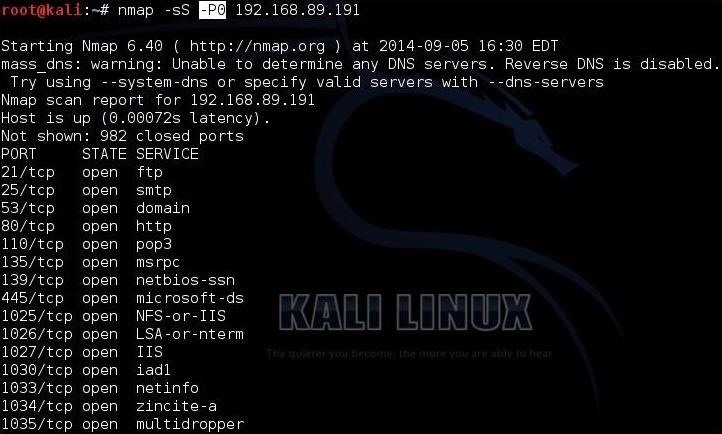
To get around firewalls and routers that block or drop the ping, we need to suppress nmap's default behavior of sending out that initial ping and get past the firewall that is blocking us. We can do this by using the -P0 switch:
kali > nmap -sS -P0 192.168.89.191
Step 6: Gathering Version Info
When nmap runs a port scan, it retrieves the port info (open/closed/filtered) and then gives us the default service that is running on that port. As one can run ANY service on any port, that may not be adequate information. If our attack requires a particular service on a particular port, gathering the default information may not be enough.
We need to know what service is actually running on that port, not the default service. For instance, knowing that port 80 is open and running http is good to know, but if our attack is specific to Apache, then if the target has Microsoft's IIS running on that port, it won't work. We often need the service on the port.
Nmap has a feature that interrogates the service running on each port scanned. It can be used with the -V switch, such as:
kali > nmap -V 192.168.89.191
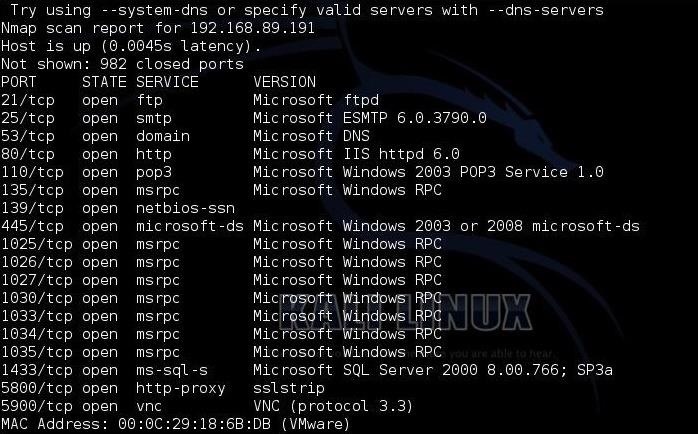
Notice in the output above that the server is running an older version of IIS on port 80. That makes a tempting target!
Step 7: UDP Scan
Up until this point, all of our scans have been for TCP ports. Some services and ports use UDP to communicate to the outside world. Our previous scan types (-sS and -sT) will not find UDP ports as they are only looking for TCP ports. Some services only run on UDP, such NTP (port 123) and SNMP (port 161). To find these ports and services, we need to do a UDP scan. We can do this with the -sU switch:
kali > nmap -sU 192.168.89.191
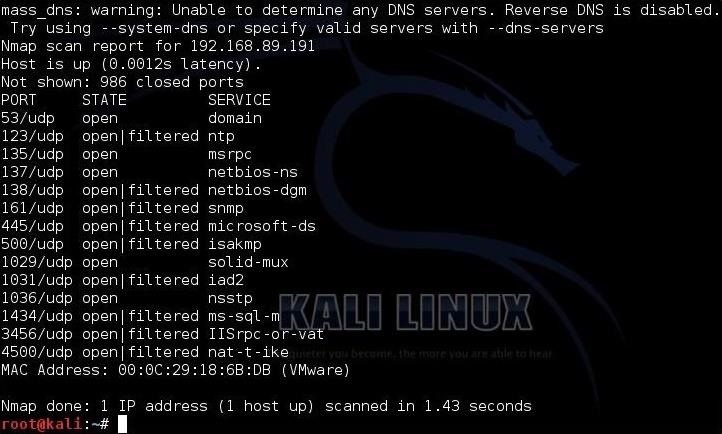
As you can see, the UDP scan reveals ports and services not found with our TCP scans.
Step 8: Reason
Note in the output from the UDP scan above that some ports are reported as open/filtered. This indicates that nmap cannot determine whether the port is open or it is filtered by a device such as a firewall.
Unlike TCP ports that respond with a RST packet when they are closed, UDP ports respond with an ICMP packet when they are closed. This can make scans far less reliable, as often the ICMP response is blocked or dropped by intermediate devices (firewalls or routers).
Nmap has a switch that will return the reason why it has placed a particular port in a particular state. For instance, we can run the same UDP scan as above with the --reason switch and nmap will return the same results, but this time will give us the reason it has determined the particular state of the port.
kali > nmap -sU --reason 192.168.89.191
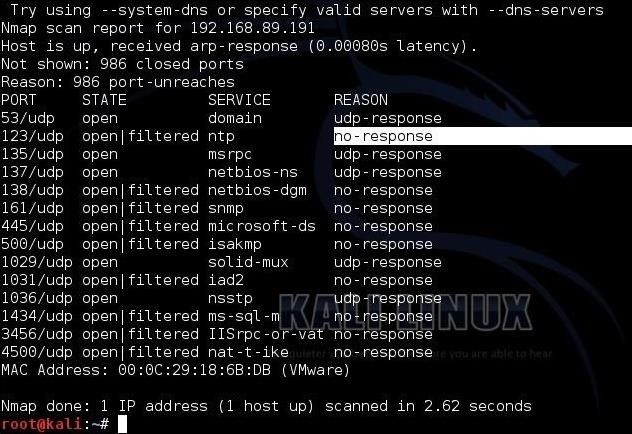
Notice in the screenshot above that I have highlighted the "reason" that nmap has found that port 123 is either open or filtered. Nmap tells us that it received "no response," so it doesn't know if that port is open or filtered.
Step 9: Using a List
Many times we want to scan a list of IP addresses and not an entire subnet. We can use any text editor and create a list of IP addresses and "feed" it to nmap. Here, I am using Leafpad, which is built into Kali (any text editor will work), to put together a list of IP addresses I want to scan.
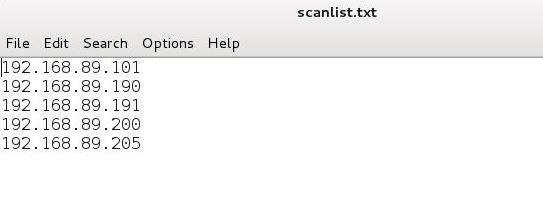
Then I can use this list of IP address in nmap rather than having to retype these IP addresses each time I scan.
kali > nmap -iL scanlist.txt
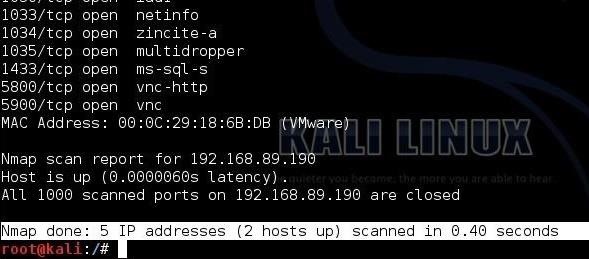
As you can see, nmap scanned all five IP addresses I listed in my text document, but only found two were up.
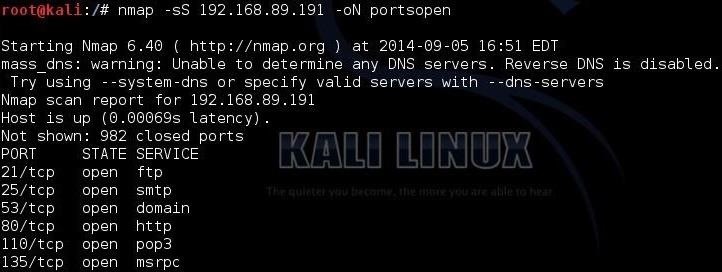
Step 10: Ouput to a File
If we are scanning multiple IP addresses, we probably want to save the output to a file for later reference. Although nmap has many ways and formats to save the output, I prefer the -oN (output normal) switch.
Simply add the -oN switch at the end of the command with the name of the file you want to save the output to. Here, I have used a file named "portscan.txt":
kali > nmap -sS 192.168.89.191 -oN portscan
When I run the command, I get my same output to the screen, but I also get that output saved to a file. I can view the contents of that file by using the cat, more, less commands. Here I have used the cat command.
kali > cat portscan.txt
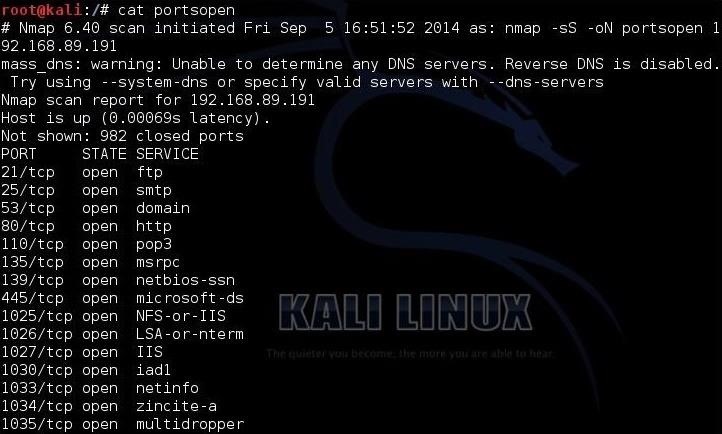
As you can see, the output that always appears on the screen with a nmap scan is now saved to a file for later reference and some permanence.
Nmap is one of those tools that EVERY hacker must master to be proficient at this trade. With this post, we have advanced your nmap skills another step, but we still have much to learn, so keep coming back, my novice hackers!
Just updated your iPhone to iOS 18? You'll find a ton of hot new features for some of your most-used Apple apps. Dive in and see for yourself:


17 Comments
I was just reading on Metasploit Unleashed about scanners, then I said "let's see if OTW has something about that". You are sort of magician.
-The edit was about a request , but turns out that there's what I was looking for on Null Byte already.
Great tuto
Master :
I have a question so far do you have any tuto to find a IP address from someone that post any file on internet ? (i.e from a blog, Facebook, Twitter etc...)
X:
Every packet on the Internet has a source IP address attached. If you can grab the packet enroute, you can read the IP. The tool p0f among others can do this.
OTW
Would you find having ports 21, 22, 80, 445, 443 open a big security issue?
I wouldn't think FTP 21 would be used as much anymore (no encryption!), been replaced by FTPS 990?
What about port 80??
Cheers,
David:
As for port 21, many ftp servers still use it with anonymous login to allow anymore to download data/software. Encryption isn't needed if the info is not confidential.
Port 80 is often open. Your port 80 is probably open right now. Scan your machine and see.
OTW
Port 445 is MS-DS File Sharing.
Thanks,
is it possible to run backtrack without downloading it first?
if i boot it from a usb or cd?
Newbie:
You can run BackTrack or Kali from a USB or DVD.
OTW
i mean can i download kali set it on a usb.
then put it into another computer and boot it.
or do i also have to download it on the other computer first?
You can boot kail live off the USB without installing it or use the USB to install Kali on as many machines as possible, it will give you options when you boot the USB. No need to download it again.
Hi
What does the -P0 command in nmap specifically do?
It suppresses the ping that nmap sends by default.
Great, thanks again
Nice Article..Using Nmap we can get the OS fingerprint of victim.
Here is video
Step 6: Gathering Version Info
Great guide, but this step was typo'd -- I figured it out myself.. "nmap -V" is actually "nmap -v" (lowercase). Capital "V" will show your own info.
Question about Dcoy. You have mentioned that the scanned server will see scanning packets coming from multiple servers. It is true. But wireshark shows RST packet only to the real attacker machine. Will that not give way the secret information about who the real culprit it is ?
Share Your Thoughts