
With a cheap computer, smaller than the Raspberry Pi, an attacker can create a remote hacking device. The device can be attached to a target router without anyone's knowledge and enable the hacker to perform a variety of network-based attacks from anywhere in the world.
As the name infers, network implants are small, physical devices (e.g., Raspberry Pi) that can be discreetly attached to computers and routers. These devices are typically implanted without anyone's knowledge and disguised to blend into the environment.
Much like Hak5's LAN Turtle, this attack requires a physical device on the target network or router. Without any port-forwarding, firewall exceptions, or interactions with the router settings, the implanted device will automatically connect to the internet. The device will act as a remote access tool (RAT), giving an attacker the ability to manipulate data on the network and all of the connected devices.
Instead of using a commercial product that normally retails for $200 (USD), I'll show how a hacker could set up a cheap single-board computer (SBC) similar to the infamous Raspberry Pi.
- Don't Miss: How to Build a Portable Pen-Testing Pi Box
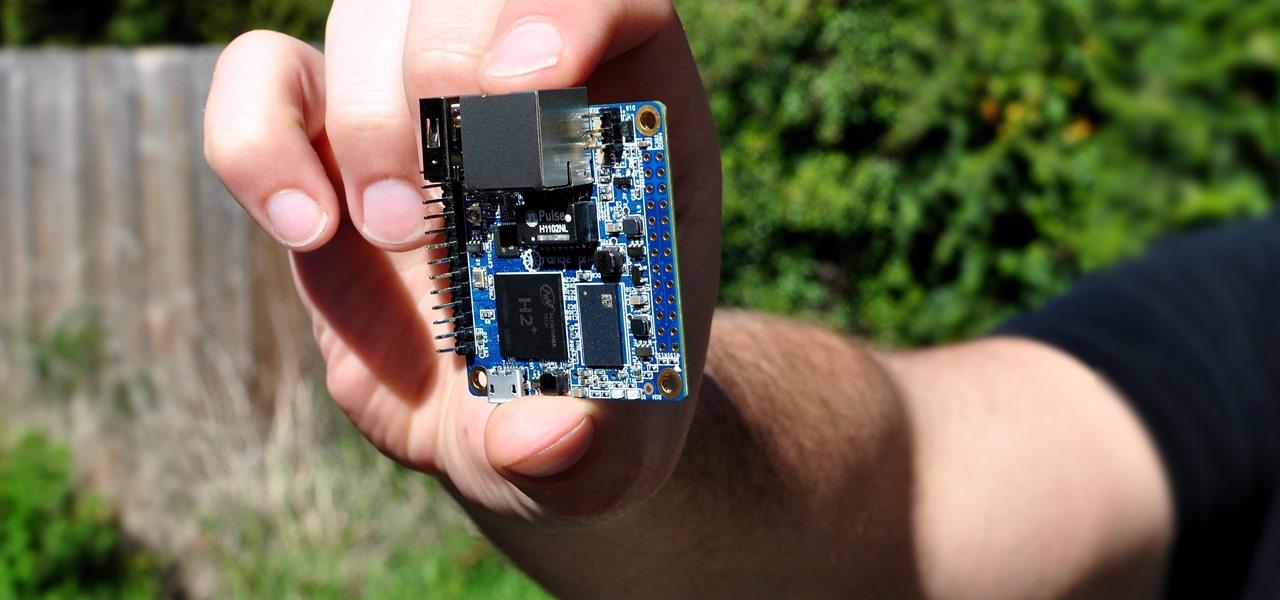
The SBC featured in this article is the Orange Pi Zero, aka OPi Zero, though, there are other possibilities. The OPi Zero is a small board with a cortex-A7 CPU and 512 MB of memory. That may not sound like a lot of RAM, but it's more than enough to perform man-in-the-middle attacks, advanced Nmap scans, and brute-force attacks while hosting a Wi-Fi hotspot and running Tor for remote access. It's a small, lightweight computer, but still impressively powerful.
The Orange Pi Zero can be purchased on Amazon for $19.99 (USD) or via outlets like AliExpress. There is also the Orange Pi Zero H2, Orange Pi Zero Plus 2, and Orange Pi Zero Plus H5. You can view Orange Pi's full store on Amazon.
Why Not Use the Raspberry Pi?
It's certainly possible to use the Raspberry Pi 3 Model B+ — a great SBC with superior CPU and RAM compared to the Orange Pi Zero. Similarly, the Raspberry Pi Zero also retails for less than $20 (USD) and is just as small as the Orange Pi Zero. But the latter was chosen for several reasons.
- Price: The Orange Pi Zero features a great CPU for a low price. The Raspberry Pi 3 B+ is slightly more expensive than the Orange Pi Zero, which makes the Raspberry Pi a bit less disposable. After planting the SBC on the target router, it may not be recoverable (depending on the scenario) or discovered and confiscated by someone on the network. If it's lost during a penetration-testing engagement, the loss isn't quite as severe.
- Ethernet: The attack relies on an SBC with an Ethernet port, which is used to interface with the target router directly. The Raspberry Pi Zero, while also small and inexpensive, doesn't feature an Ethernet port. It does have gigabit Ethernet over USB 2.0, but that means buying an Ethernet to USB adapter.
- Performance: Benchmarks performed with the Raspberry Pi 3 B+, Raspberry Pi Zero, and Orange Pi Zero are relatively conclusive. The Orange Pi Zero outperforms the Raspberry Pi Zero at every test while being comparable in price. In most cases, the Orange Pi Zero performed similarly (or better than) the Raspberry Pi 2 (shown below).

With the Orange Pi Zero, we're getting the performance of a Raspberry Pi 2 and older at the price of the Raspberry Pi Zero. Really, as far as hardware specs go, the Raspberry Pi 3 B+ is overkill for what's required. In fact, the NanoPi NEO-LTS — which is even smaller than the Orange Pi Zero — will likely perform well in this kind of attack.
Prerequisites
To perform this attack, the following components are required:
- Orange Pi Zero: It can be purchased conveniently on Amazon for $19.99 (USD). Again, the Orange Pi Zero can be substituted with a Raspberry Pi 2 or older if money and disposability are non-issues. However, keep in mind, all of the commands and instructions featured in this article are intended for the Orange Pi Zero. Be mindful of this going forward if a Raspberry Pi is used instead.
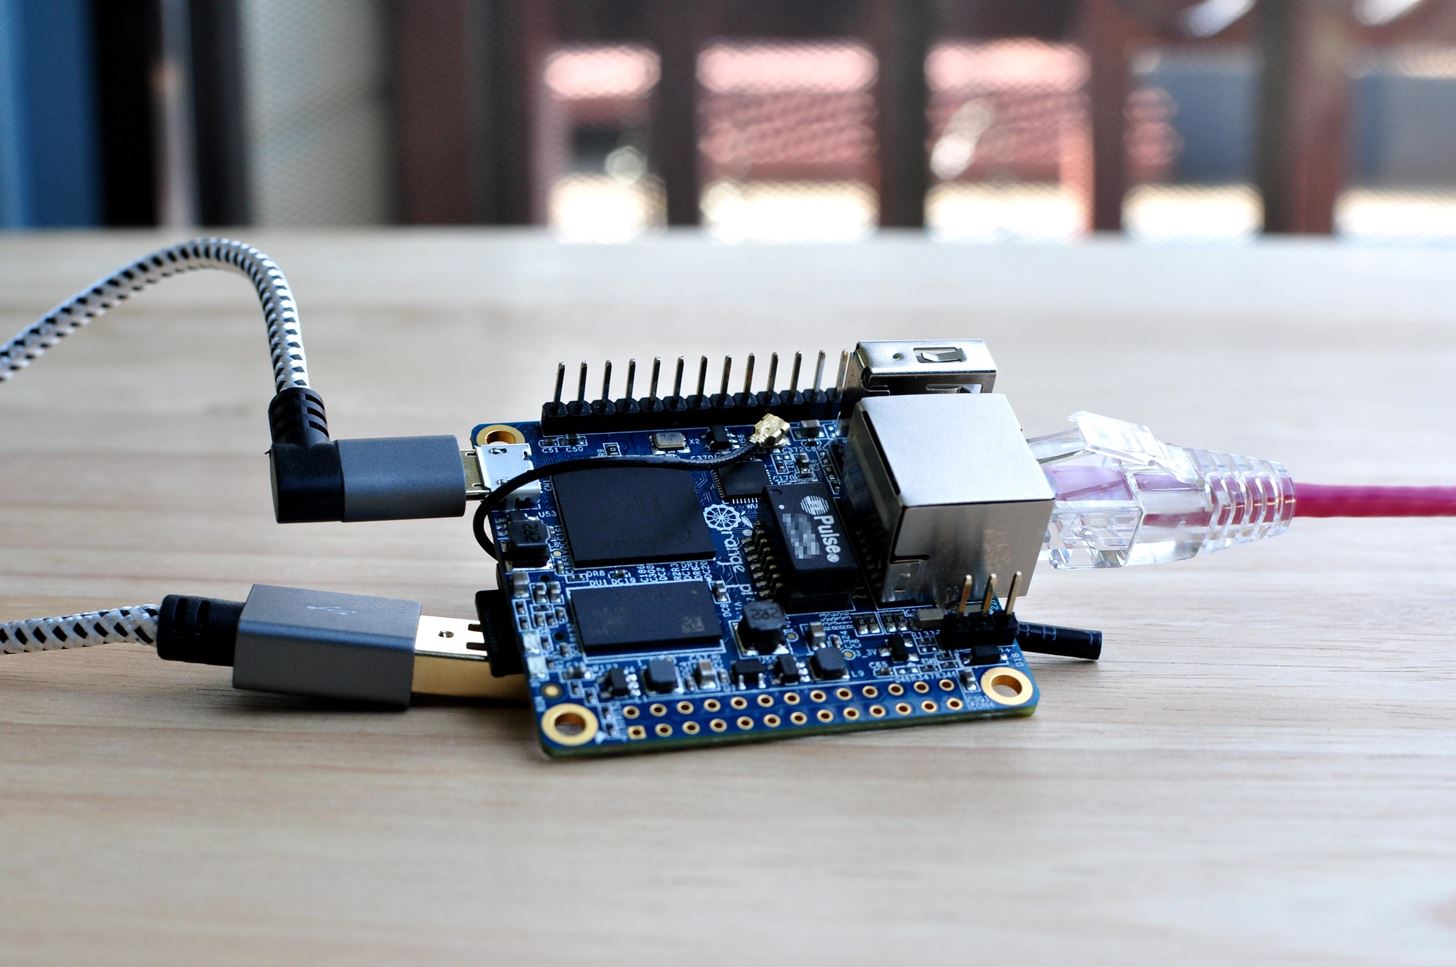
- Ethernet cable: A short, six-inch Ethernet cable is idle for this attack. The idea is to hide the Orange Pi Zero behind the router. A lengthy Ethernet cable protruding from the router will probably be too obvious. A shorter Ethernet cable can be wrapped or tucked to make it more concealable.
- USB charging cable: A short, six-inch USB to Micro-USB cable is required to power the Orange Pi Zero. Most modern routers feature one or more USB ports on the back, which can be used to power the device. Alternatively, a power bank or five-volt power supply may be used if they can be easily concealed.
- MicroSD card: The microSD card is required to host the operating system. Any microSD card over 8 GB is size will be adequate for most scenarios. The operating system allocated only 1.1 GB in my tests. After installing many hacking tools and packages, there's still over 7 GB of available space on the microSD card.
- MicroSD card reader: If your microSD card came with a microSD to SD card adapter and you have an SD slot on your computer, that's all you'll need. If not, you'll need to get an adapter or use a microSD card reader via USB. We need a way to connect the microSD to the computer so the OS can be loaded.
- Protective case/enclosure (optional): It may be desirable to enclose the Orange Pi Zero in a protective casing, which may make it more discreet and appear benign to someone less informed who discovers it behind the router. To most people, a black cube is probably not as frightening as a bare single board computer. The addition of a sticker that reads "I.T. Do not remove" might also go a long way in social engineering targets into believing the device was placed there by the network administrator(s).
Target Router Requirements
Not every router is going to be an idle candidate for network implant attacks. Older routers or highly-secure network environments may pose particular challenges.
- Available USB port: As mentioned, a router with an available USB port would be ideal for powering the Orange Pi Zero while it's in use. Power banks can be used if there are no USB ports open. In my test with a 3350 mAh portable battery, the Orange Pi Zero remained powered on for 10 hours straight while under a medium/heavy workload.
- Available Ethernet port: The attack relies on an available Ethernet port on the router. On busier networks, all of the Ethernet ports may be occupied. In that scenario, the Orange Pi R1, which features two Ethernet ports, can be used as a kind of Ethernet man-in-the-middle attack similar to Hak5's Packet Squirrel.
- DHCP enabled: DHCP is essential for the Orange Pi Zero to acquire an IP address automatically when connected to the router. Most routers have a DHCP service running and freely issue an IP address to any Ethernet-connected device. In hardened, highly-secure environments like banks and corporate companies, more advanced static or authenticationed configurations may be required. These scenarios are beyond the scope of this article, so for now, test this on routers that support DHCP.

Step 1: Download the Orange Pi Armbian Image
With all of the hardware components acquired and the target router set up, we can start building the Orange Pi Zero for this attack. Download the Armbian Orange Pi Zero image, available on their website. In Kali, this can be done using the wget command.
~$ wget 'https://dl.armbian.com/orangepizero/Debian_stretch_next.7z'

--2019-04-12 22:04:50--  https://dl.armbian.com/orangepizero/Debian_stretch_next.7z
Resolving dl.armbian.com (dl.armbian.com)... 193.40.101.96
Connecting to dl.armbian.com (dl.armbian.com)|193.40.101.96|:443... connected.
HTTP request sent, awaiting response... 302 Moved Temporarily
Location: https://dl.armbian.com/orangepizero/archive/Armbian_5.75_Orangepizero_Debian_stretch_next_4.19.20.7z [following]
--2019-04-12 22:04:55--  https://dl.armbian.com/orangepizero/archive/Armbian_5.75_Orangepizero_Debian_stretch_next_4.19.20.7z
Reusing existing connection to dl.armbian.com:443.
HTTP request sent, awaiting response... 200 OK
Length: 262124041 (250M) [application/x-7z-compressed]
Saving to: ‘Debian_stretch_next.7z’

Debian_stretch_next.7z           100%[====================================================>] 249.98M   283KB/s    in 16m 26s

2019-04-12 22:21:22 (260 KB/s) - ‘Debian_stretch_next.7z’ saved [262124041/262124041]
The 7z format is a kind of compressed file type (e.g., ZIP). The Debian image can be extracted using the 7z command. If 7z isn't installed, use the below command.
~$ apt-get install p7zip-full -V

Reading package lists... Done
Building dependency tree
Reading state information... Done
The following additional packages will be installed:
   p7zip (16.02+dfsg-6)
Suggested packages:
   p7zip-rar (16.02-3)
The following NEW packages will be installed:
   p7zip (16.02+dfsg-6)
   p7zip-full (16.02+dfsg-6)
0 upgraded, 2 newly installed, 0 to remove and 0 not upgraded.
Need to get 1,540 kB of archives.
After this operation, 5,780 kB of additional disk space will be used.
Do you want to continue? [Y/n]
Then, extract (x) the image.
~$ 7z x Debian_stretch_next.7z

7-Zip [64] 16.02 : Copyright (c) 1999-2016 Igor Pavlov : 2016-05-21
p7zip Version 16.02 (locale=en_US.UTF-8,Utf16=on,HugeFiles=on,64 bits,3 CPUs Intel(R) Core(TM) i7-8700 CPU @ 3.20GHz (906EA),ASM,AES-NI)

Scanning the drive for archives:
1 file, 262124041 bytes (250 MiB)

Extracting archive: Debian_stretch_next.7z
--
Path = Debian_stretch_next.7z
Type = 7z
Physical Size = 262124041
Headers Size = 297
Method = LZMA2:25
Solid = +
Blocks = 1

Everything is Ok

Files: 4
Size:       1124093008
Compressed: 262124041
To view the extracted image, use the ls command. Notice the "Armbian_5.75_Orangepizero_Debian_stretch_next_4.19.20.img" file. This file will be used to install Debian on the microSD card intended for the Orange Pi Zero.
~$ ls -l

-rwxrwx--- 1 root root 1124073472 Feb 10 07:59 Armbian_5.75_Orangepizero_Debian_stretch_next_4.19.20.img
-rwxrwx--- 1 root root        833 Feb 10 07:59 Armbian_5.75_Orangepizero_Debian_stretch_next_4.19.20.img.asc
-rwxrwx--- 1 root root      18579 Feb 10 07:59 armbian.txt
-rwxrwx--- 1 root root  262124041 Apr 13 05:58 Debian_stretch_next.7z
-rwxrwx--- 1 root root        124 Feb 10 07:59 sha256sum.sha
Step 2: Write the OS to the MicroSD Card
Insert the microSD card into the computer running Kali. If the microSD card you got came with a microSD to SD card adapter, use that in the SD slot in your computer. Otherwise, you may need to get one or get a microSD card reader you can connect via USB. Immediately after connecting the microSD card to the computer, open a terminal and use the dmesg command to view information about the microSD card.
~$ dmesg

[   31.283694] usb 2-1: new SuperSpeed Gen 1 USB device number 2 using xhci_hcd
[   31.340852] usb 2-1: New USB device found, idVendor=0bda, idProduct=0306, bcdDevice= 1.17
[   31.340859] usb 2-1: New USB device strings: Mfr=1, Product=2, SerialNumber=3
[   31.340864] usb 2-1: Product: USB3.0 Card Reader
[   31.340868] usb 2-1: Manufacturer: Realtek
[   31.340872] usb 2-1: SerialNumber:
[   31.426677] usb-storage 2-1:1.0: USB Mass Storage device detected
[   31.429196] scsi host3: usb-storage 2-1:1.0
[   31.429381] usbcore: registered new interface driver usb-storage
[   31.441631] usbcore: registered new interface driver uas
[   32.450075] scsi 3:0:0:0: Direct-Access     Generic- USB3.0 CRW   -SD 1.00 PQ: 0 ANSI: 6
[   32.458690] scsi 3:0:0:1: Direct-Access     Generic- USB3.0 CRW   -SD 1.00 PQ: 0 ANSI: 6
[   32.459431] sd 3:0:0:0: Attached scsi generic sg2 type 0
[   32.459991] sd 3:0:0:1: Attached scsi generic sg3 type 0
[   32.468754] sd 3:0:0:0: [sdb] 31116288 512-byte logical blocks: (15.9 GB/14.8 GiB)
[   32.471278] sd 3:0:0:0: [sdb] Write Protect is off
[   32.471279] sd 3:0:0:0: [sdb] Mode Sense: 2f 00 00 00
[   32.473801] sd 3:0:0:0: [sdb] Write cache: disabled, read cache: enabled, doesn't support DPO or FUA
[   32.477495] sd 3:0:0:1: [sdc] Attached SCSI removable disk
[   32.526834]  sdb: sdb1 sdb2
[   32.536433] sd 3:0:0:0: [sdb] Attached SCSI removable disk
Take note of the sdX drive letter assigned to the microSD card, in my case, sdb2. This assignment is required for the following dd command, which will copy the IMG file from the first step to the microSD card. Replace the "X" in sdX for your card's info.
~$ dd if=/path/to/Armbian_5.75_Orangepizero_Debian_stretch_next_4.19.20.img of=/dev/sdX bs=512k status=progress
1119354880 bytes (1.1 GB, 1.0 GiB) copied, 53 s, 21.1 MB/s
2144+0 records in
2144+0 records out
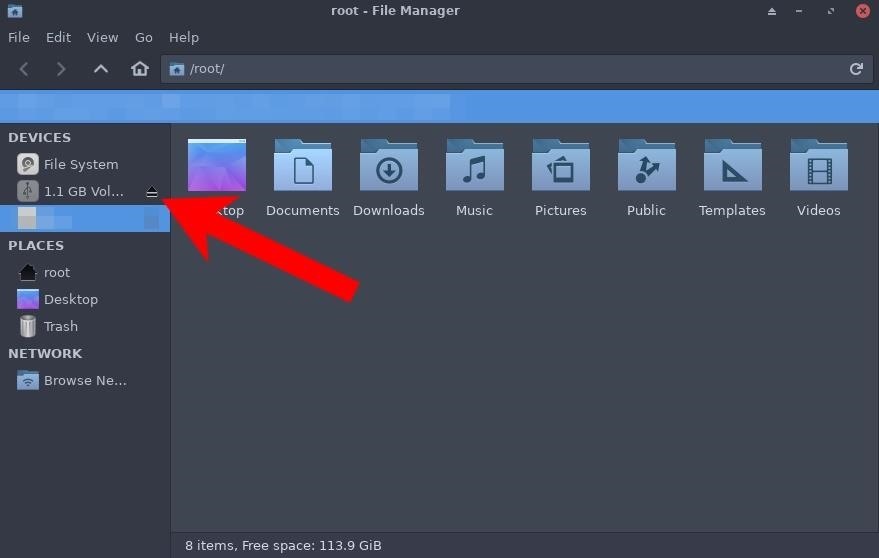
1124073472 bytes (1.1 GB, 1.0 GiB) copied, 97.1421 s, 11.6 MB/sWhen dd is done, open the file manager and properly eject the microSD card.
Step 3: Connect the Orange Pi Zero to Your Router
Remove the microSD card from the computer and insert it into the Orange Pi Zero. The Orange Pi Zero isn't ready to be deployed on the target router by default, as in it's not weaponized yet. To get started, connect it (via Ethernet) to a router that you control. Then, wait about five minutes for the Orange Pi Zero to fully boot for the first time.

Step 4: Discover the Orange Pi Zero's IP Address
The IP address of the Orange Pi Zero may not be immediately apparent as there is no desktop interface or convenient way to interact with it right now. However, from another device on the same router (e.g., Kali), Nmap can be used to locate the Orange Pi Zero's IP address quickly. Use the -T (timing template) and -sn (ping) options to scan the entire network for active hosts.
~$ nmap -T4 -sn 192.168.1.1/24

Starting Nmap 7.70 ( https://nmap.org ) at 2019-04-13 06:30 UTC
Nmap scan report for 192.168.0.165
Host is up (0.00063s latency).
MAC Address: XX:XX:XX:XX:XX:XX (Unknown)
Nmap scan report for 192.168.0.1
Host is up.
Nmap done: 256 IP addresses (2 hosts up) scanned in 4.75 seconds
As we can see, there's a device reported on 192.168.0.165. To identify this device as the Orange Pi Zero, try using the below SSH command.
Step 5: SSH into the Orange Pi Zero
The default SSH password is "1234" but users are required to reset the password and create a new account after logging in for the first time.
~$ ssh -p 22 root@192.168.0.165

The authenticity of host '192.168.0.165 (192.168.0.165)' can't be established.
ECDSA key fingerprint is SHA256:PE6127Kvx+twOLWK90mJDUQSUggH5ujh3h8liuLCR7w.
Are you sure you want to continue connecting (yes/no)? yes
Warning: Permanently added '192.168.0.165' (ECDSA) to the list of known hosts.

root@192.168.0.165's password:
You are required to change your password immediately (root enforced)
  ___                               ____  _   _____
 / _ \ _ __ __ _ _ __   __ _  ___  |  _ \(_) |__  /___ _ __ ___
| | | | '__/ _` | '_ \ / _` |/ _ \ | |_) | |   / // _ \ '__/ _ \
| |_| | | | (_| | | | | (_| |  __/ |  __/| |  / /|  __/ | | (_) |
 \___/|_|  \__,_|_| |_|\__, |\___| |_|   |_| /____\___|_|  \___/
                       |___/

Welcome to ARMBIAN 5.75 stable Debian GNU/Linux 9 (stretch) 4.19.20-sunxi
System load:   0.08 0.09 0.07   Up time:       7 min
Memory usage:  12 % of 493MB    IP:            192.168.0.165
CPU temp:      43°C
Usage of /:    6% of 15G

New to Armbian? Check the documentation first: https://docs.armbian.com
Changing password for root.
(current) UNIX password:
Enter new UNIX password:
Retype new UNIX password:
Follow the prompts in the terminal window — the process is pretty straightforward. The new account won't ever be used, but this process can't be skipped. The name, room number, and phone number values can be left blank.
Creating a new user account. Press <Ctrl-C> to abort

Please provide a username (eg. your forename): orangepi
Trying to add user orangepi
Adding user `orangepi' ...
Adding new group `orangepi' (1000) ...
Adding new user `orangepi' (1000) with group `orangepi' ...
Creating home directory `/home/orangepi' ...
Copying files from `/etc/skel' ...
Enter new UNIX password:
Retype new UNIX password:

passwd: password updated successfully
Changing the user information for orangepi
Enter the new value, or press ENTER for the default
    Full Name []:
    Room Number []:
    Work Phone []:
    Home Phone []:
    Other []:
Is the information correct? [Y/n] y

Dear orangepi, your account orangepi has been created and is sudo enabled.
Please use this account for your daily work from now on.

root@orangepizero:~#
Step 6: Update the Orange Pi Zero
With that done, use the below command to update the system. There will likely be a few out-of-date packages that need to be installed.
During this process, the SSH connection may stall or break, which happens because the openssh-server and wpasupplicant packages are being updated. Do not shut off the Orange Pi Zero during this time. The SSH connection may reconnect on its own. Be patient here.
root@orangepizero:~# apt-get update && apt-get dist-upgrade

Reading package lists... Done
Building dependency tree
Reading state information... Done
Calculating upgrade... Done
The following packages will be upgraded:
   base-files (9.9+deb9u7 => 9.9+deb9u8)
   dirmngr (2.1.18-8~deb9u3 => 2.1.18-8~deb9u4)
   gnupg (2.1.18-8~deb9u3 => 2.1.18-8~deb9u4)
   gnupg-agent (2.1.18-8~deb9u3 => 2.1.18-8~deb9u4)
   gnupg2 (2.1.18-8~deb9u3 => 2.1.18-8~deb9u4)
   gpgv (2.1.18-8~deb9u3 => 2.1.18-8~deb9u4)
   libc-bin (2.24-11+deb9u3 => 2.24-11+deb9u4)
   libc-dev-bin (2.24-11+deb9u3 => 2.24-11+deb9u4)
   libc-l10n (2.24-11+deb9u3 => 2.24-11+deb9u4)
   libc6 (2.24-11+deb9u3 => 2.24-11+deb9u4)
   libc6-dev (2.24-11+deb9u3 => 2.24-11+deb9u4)
   libnss-myhostname (232-25+deb9u8 => 232-25+deb9u11)
   libntfs-3g871 (1:2016.2.22AR.1+dfsg-1 => 1:2016.2.22AR.1+dfsg-1+deb9u1)
   libpam-systemd (232-25+deb9u8 => 232-25+deb9u11)
   libssl1.0.2 (1.0.2q-1~deb9u1 => 1.0.2r-1~deb9u1)
   libsystemd0 (232-25+deb9u8 => 232-25+deb9u11)
   libudev1 (232-25+deb9u8 => 232-25+deb9u11)
   libxapian30 (1.4.3-2+deb9u2 => 1.4.3-2+deb9u3)
   locales (2.24-11+deb9u3 => 2.24-11+deb9u4)
   multiarch-support (2.24-11+deb9u3 => 2.24-11+deb9u4)
   ntfs-3g (1:2016.2.22AR.1+dfsg-1 => 1:2016.2.22AR.1+dfsg-1+deb9u1)
   openssh-client (1:7.4p1-10+deb9u4 => 1:7.4p1-10+deb9u6)
   openssh-server (1:7.4p1-10+deb9u4 => 1:7.4p1-10+deb9u6)
   openssh-sftp-server (1:7.4p1-10+deb9u4 => 1:7.4p1-10+deb9u6)
   systemd (232-25+deb9u8 => 232-25+deb9u11)
   systemd-sysv (232-25+deb9u8 => 232-25+deb9u11)
   tzdata (2018i-0+deb9u1 => 2019a-0+deb9u1)
   udev (232-25+deb9u8 => 232-25+deb9u11)
   wget (1.18-5+deb9u2 => 1.18-5+deb9u3)
   wpasupplicant (2:2.4-1+deb9u2 => 2:2.4-1+deb9u3)
30 upgraded, 0 newly installed, 0 to remove and 0 not upgraded.
Need to get 22.1 MB of archives.
After this operation, 24.6 kB of additional disk space will be used.
Do you want to continue? [Y/n]
If it doesn't reconnect automatically after several minutes, press Ctrl + c to exit the terminal. Then, SSH back into the device and run the apt-get commands again to ensure everything was correctly installed.
Shut down the Orange Pi Zero when this process is complete. Give the device at least two minutes to properly shutdown.
root@orangepizero:~# shutdown nowFinally, power the Orange Pi Zero back on by unplugging and replugging the USB power supply, and SSH back in to it.
Step 7: Configure the Orange Pi Zero for Remote Access
Now, the Orange Pi Zero has to be remotely accessible, preferably from anywhere in the world. A few solutions came to mind when thinking about how to set this up. There are OpenVPN and Ngrok-style services that could be used to create a connection into the Orange Pi Zero. However, I think the usage of Tor as well as configuring the Orange Pi Zero as a Wi-Fi hotspot are more fun.
The first (recommended) method requires Tor. Tor and SSH can be coupled to allow remote access to the Orange Pi Zero from anywhere in the world without configuring port-forwarding on the target router.
The second method (as a backup solution) requires configuring the Orange Pi Zero to act as a Wi-Fi hotspot. An attacker within proximity of the Orange Pi Zero's Wi-Fi hotspot could connect to the network and SSH into the device.
Both methods can be configured simultaneously without conflicting with each other. I recommend setting up Tor as the primary way of connecting to the Orange Pi Zero remotely, and the Wi-Fi hotspot as a backup solution in case the router doesn't have DHCP enabled or if the Tor process for some reason breaks.
Option 1: Install Tor
On the Orange Pi Zero, add the Tor Project's repository to your APT repository list with the following echo command.
root@orangepizero:~# echo -e "deb https://deb.torproject.org/torproject.org $(lsb_release -sc) main \ndeb-src https://deb.torproject.org/torproject.org $(lsb_release -sc) main" > /etc/apt/sources.list.d/tor.listThen, download the Tor Project's package signing key and import it into the APT keyring.
root@orangepizero:~# wget -O- https://deb.torproject.org/torproject.org/A3C4F0F979CAA22CDBA8F512EE8CBC9E886DDD89.asc | sudo apt-key add -

--2019-04-13 07:32:06--  https://deb.torproject.org/torproject.org/A3C4F0F979CAA22CDBA8F512EE8CBC9E886DDD89.asc
Resolving deb.torproject.org (deb.torproject.org)... 95.216.163.36
Connecting to deb.torproject.org (deb.torproject.org)|95.216.163.36|:443... connected.
HTTP request sent, awaiting response... 200 OK
Length: 19665 (19K) [text/plain]
Saving to: ‘STDOUT’

-                                 100%[===================================>]  19.20K  52.4KB/s    in 0.4s

2019-04-13 07:32:21 (52.4 KB/s) - written to stdout [19665/19665]

OK
The "OK" output should occur when the signing key has been added to the keyring. Next, update APT using the below apt-get command.
root@orangepizero:~# apt-get update

Ign:1 http://cdn-fastly.deb.debian.org/debian stretch InRelease
Hit:2 http://security-cdn.debian.org stretch/updates InRelease
Hit:3 http://cdn-fastly.deb.debian.org/debian stretch-updates InRelease
Hit:4 http://cdn-fastly.deb.debian.org/debian stretch-backports InRelease
Hit:5 http://cdn-fastly.deb.debian.org/debian stretch Release
Get:7 https://deb.torproject.org/torproject.org stretch InRelease [4,965 B]
Get:8 https://deb.torproject.org/torproject.org stretch/main Sources [1,253 B]
Get:9 https://deb.torproject.org/torproject.org stretch/main armhf Packages [3,482 B]
Fetched 9,700 B in 40s (241 B/s)
Reading package lists... Done
Install Tor using the below command.
root@orangepizero:~# apt-get install tor deb.torproject.org-keyring torsocks

Reading package lists... Done
Building dependency tree
Reading state information... Done
The following NEW packages will be installed:
   deb.torproject.org-keyring (2018.08.06)
   libevent-2.0-5 (2.0.21-stable-3)
   libzstd1 (1.1.2-1)
   tor (0.3.5.8-1~d90.stretch+1)
   torsocks (2.2.0-1+deb9u1)
0 upgraded, 5 newly installed, 0 to remove and 0 not upgraded.
Need to get 2,082 kB of archives.
After this operation, 4,845 kB of additional disk space will be used.
Do you want to continue? [Y/n]
Tor will be started automatically. Stop it momentarily while the following commands are being executed.
root@orangepizero:~# systemctl stop torAdd the following "HiddenServiceDir" and "HiddenServicePort" lines to the Tor configuration file located at /etc/tor/torrc. This can be done with the below echo command.
root@orangepizero:~# echo -e "HiddenServiceDir /var/lib/tor/orangepi/\nHiddenServicePort 22 127.0.0.1:22" >> /etc/tor/torrcQuickly check to make sure the command was executed successfully. Use tail to read the bottom lines of the torrc file.
root@orangepizero:~# tail /etc/tor/torrc

HiddenServiceDir /var/lib/tor/orangepi/
HiddenServicePort 22 127.0.0.1:22
To generate the new onion address, restart the Tor process using the systemctl command.
root@orangepizero:~# systemctl restart torThe onion address (i.e., the hostname) can be identified using the cat command to read the hostname file.
root@orangepizero:~# cat /var/lib/tor/orangepi/hostname

kclikhrwriz4cpxli4paiyzoft7lviv2z6jxd7uyoxesrpxpsve2feqd.onion
To ensure the Tor process is started whenever the Orange Pi Zero is powered on, use the systemctl to enable it.
root@orangepizero:~# systemctl enable tor

Synchronizing state of tor.service with SysV service script with /lib/systemd/systemd-sysv-install.
Executing: /lib/systemd/systemd-sysv-install enable tor
In Kali on your computer, install tor and torsocks as well.
~$ apt-get update && apt-get install torsocks

Get:1 https://kali.download/kali kali-rolling InRelease [30.5 kB]
Get:2 https://kali.download/kali kali-rolling/main amd64 Packages [17.1 MB]
Fetched 17.1 MB in 49s (350 kB/s)
Reading package lists... Done
Reading package lists... Done
Building dependency tree
Reading state information... Done
tor is already the newest version (0.3.5.8-1).
torsocks is already the newest version (2.3.0-2).
0 upgraded, 0 newly installed, 0 to remove and 0 not upgraded.
That's all there is to it. From here on, the Orange Pi Zero will be accessible using this onion address while connected to a target router. In Kali, the following ssh command can be used to connect to the Orange Pi Zero.
~$ torsocks ssh -p 22 root@kclikhrwriz4cpxli4paiyzoft7lviv2z6jxd7uyoxesrpxpsve2feqd.onionOption 2: Configure a Wi-Fi Hotspot
In my tests, the Wi-Fi hotspot functionality was somewhat unreliable. The DHCP service on the Orange Pi Zero seemed to fail, so devices need to be statically configured and SSH connections still seem to stall or break unexpectedly.
While authenticated to the Orange Pi Zero hotspot, the connecting device will not have access to the internet. These issues are a limitation of the Orange Pi Zero's Wi-Fi hardware, no doubt. But these are not reasons to avoid using the Orange Pi Zero as a Wi-Fi hotspot. It can still act as a last resort solution to remotely connect to the Orange Pi Zero's SSH server in the event the Tor process stops working for some unknown reason. A flaky, unreliable Wi-Fi connection into the device is still better than no way of interfacing with it at all.
Alternatively, using Kali as a Wi-Fi hotspot and configuring the Orange Pi Zero to connect to it may function more reliable. This configuration is beyond the scope of the article and untested. You are encouraged to try that method yourself.
To get started setting up the Orange Pi Zero as a hotspot, install the dnsmasq required dependencies.
root@orangepizero:~# apt-get install dnsmasq dnsmasq-base

Reading package lists... Done
Building dependency tree
Reading state information... Done
The following additional packages will be installed:
  dnsmasq-base
Recommended packages:
  dns-root-data
The following NEW packages will be installed:
  dnsmasq dnsmasq-base
0 upgraded, 2 newly installed, 0 to remove and 0 not upgraded.
Need to get 409 kB of archives.
After this operation, 817 kB of additional disk space will be used.
Do you want to continue? [Y/n]
The wireless interface will most likely be a generic "wlan0," but to be sure, use the ip command to list the interfaces.
root@orangepizero:~# ip addr

4: wlan0: <NO-CARRIER,BROADCAST,MULTICAST,UP> mtu 1500 qdisc mq state DOWN group default qlen 1000
    link/ether XX:XX:XX:XX:XX:XX brd ff:ff:ff:ff:ff:ff
The wlan0 interface appears as the fourth interface on my Orange Pi Zero. Use the "wlan0" interface name in the following command.
Nmcli is a command-line tool designed to create, display, edit, delete, activate, and deactivate network connections, as well as control and display network device status. This tool will be used to create the Orange Pi Zero's Wi-Fi hotspot via command line. All of the following nmcli commands can be copied and pasted without modifying a single line.
root@orangepizero:~# nmcli con add type wifi ifname wlan0 con-name Hotspot autoconnect yes ssid OrangePi

Connection 'Hotspot' (ae7c3d23-b5f3-424c-8a43-41bf6161978f) successfully added.
This command will create the base configuration file for the Wi-Fi hotspot. Next, modify the wireless mode using the below command.
root@orangepizero:~# nmcli con modify Hotspot 802-11-wireless.mode ap 802-11-wireless.band bg ipv4.method sharedModify the security type to WPA-PSK.
root@orangepizero:~# nmcli con modify Hotspot wifi-sec.key-mgmt wpa-pskSet a secure password to protect the hotspot. My example uses a simple "orangepi" password for demonstration purposes.
root@orangepizero:~# nmcli con modify Hotspot wifi-sec.psk "orangepi"Reset the Wi-Fi hotspot by first disabling (down) it.
root@orangepizero:~# nmcli con down Hotspot

Connection 'Hotspot' successfully deactivated (D-Bus active path: /org/freedesktop/NetworkManager/ActiveConnection/7)
Then, reenabling (up) it.
root@orangepizero:~# nmcli con up Hotspot

Connection successfully activated (D-Bus active path: /org/freedesktop/NetworkManager/ActiveConnection/8)
Use the ip addr command again to verify the wlan0 interface acquired an IP address.
root@orangepizero:~# ip addr

4: wlan0: <BROADCAST,MULTICAST,UP,LOWER_UP> mtu 1500 qdisc mq state UP group default qlen 1000
    link/ether XX:XX:XX:XX:XX:XX brd ff:ff:ff:ff:ff:ff
    inet 10.42.0.1/24 brd 10.42.0.255 scope global wlan0
       valid_lft forever preferred_lft forever
    inet6 xxxx::xxxx:xxxx:xxxx:xxxx/64 scope link
       valid_lft forever preferred_lft forever
Notice the 10.42.0.1/24 address. When devices connect to the Wi-Fi hotspot, they should allocate the 10.42.0.2, 10.42.0.3, and 10.42.0.4 addresses.
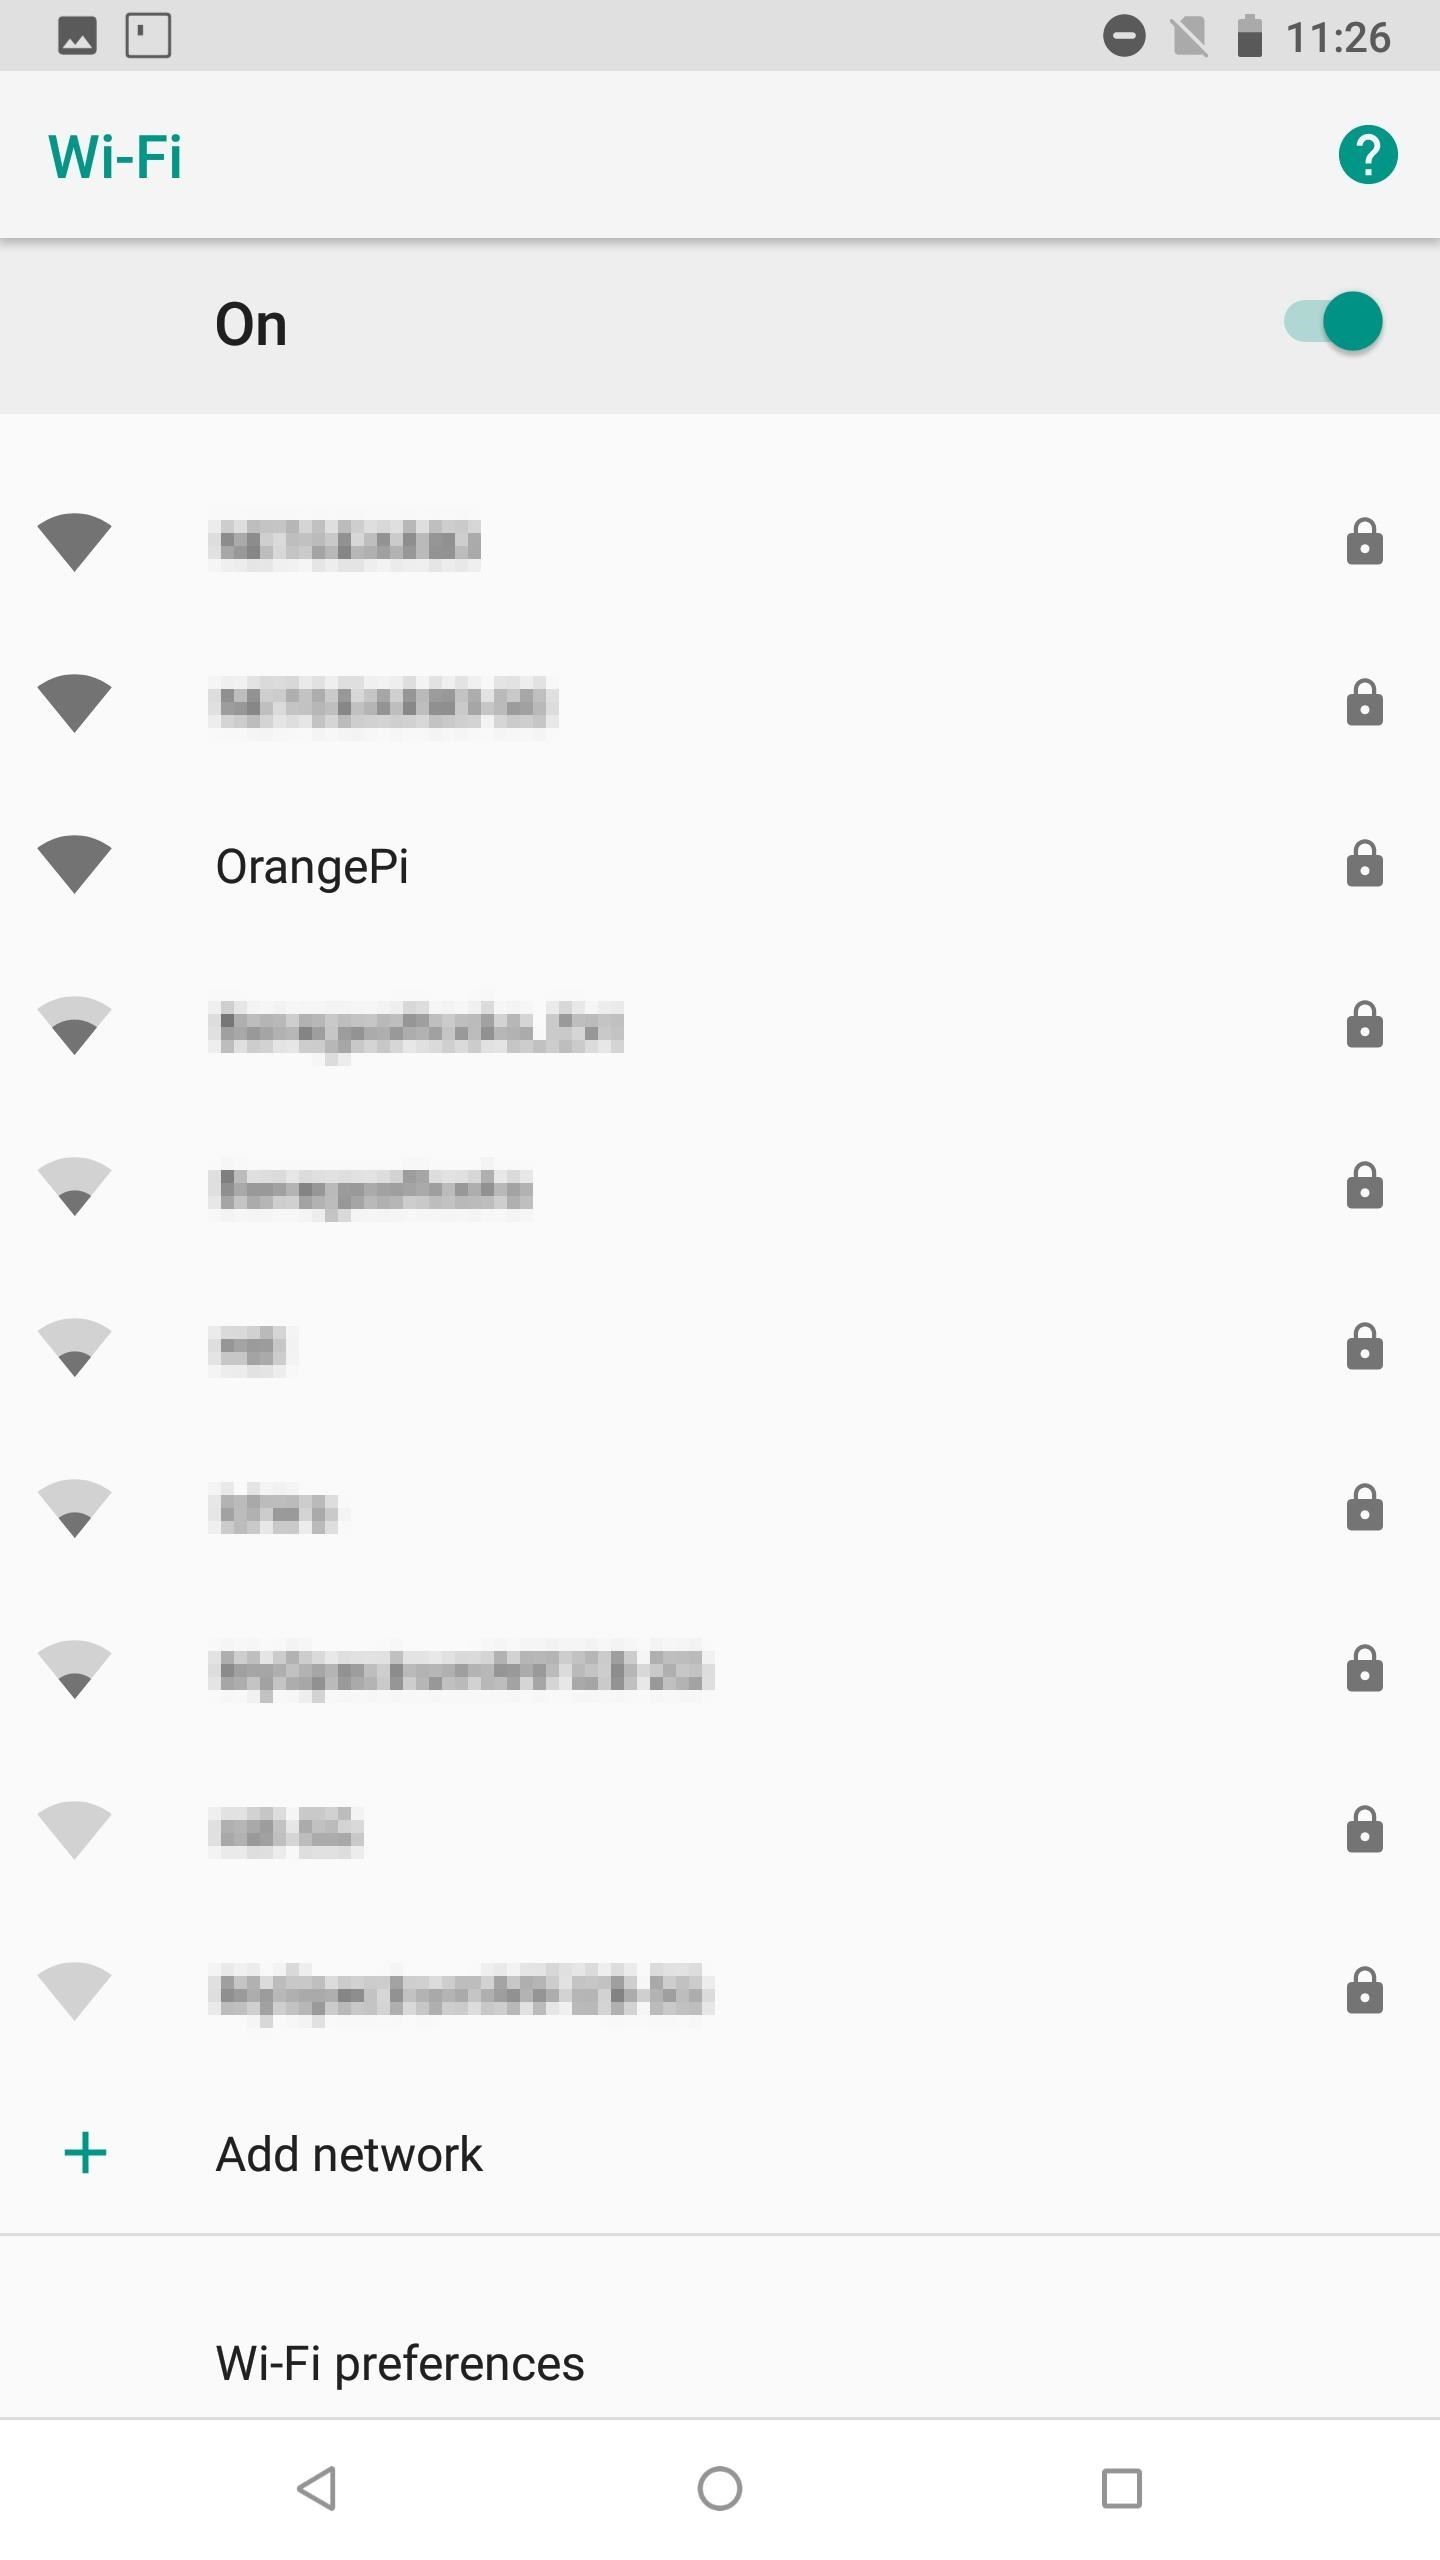
The Wi-Fi hotspot should now be visible to devices in the area (shown below). Remember, devices connecting to the Wi-Fi hotspot must be statically configured. UserLAnd and Tmux users can follow the below Android example. Kali users can scroll further down to find instructions.
Option 1: Android Devices
To start, select the "OrangePi" hotspot in the Wi-Fi settings. Enter the "orangepi" password that was previously configured.
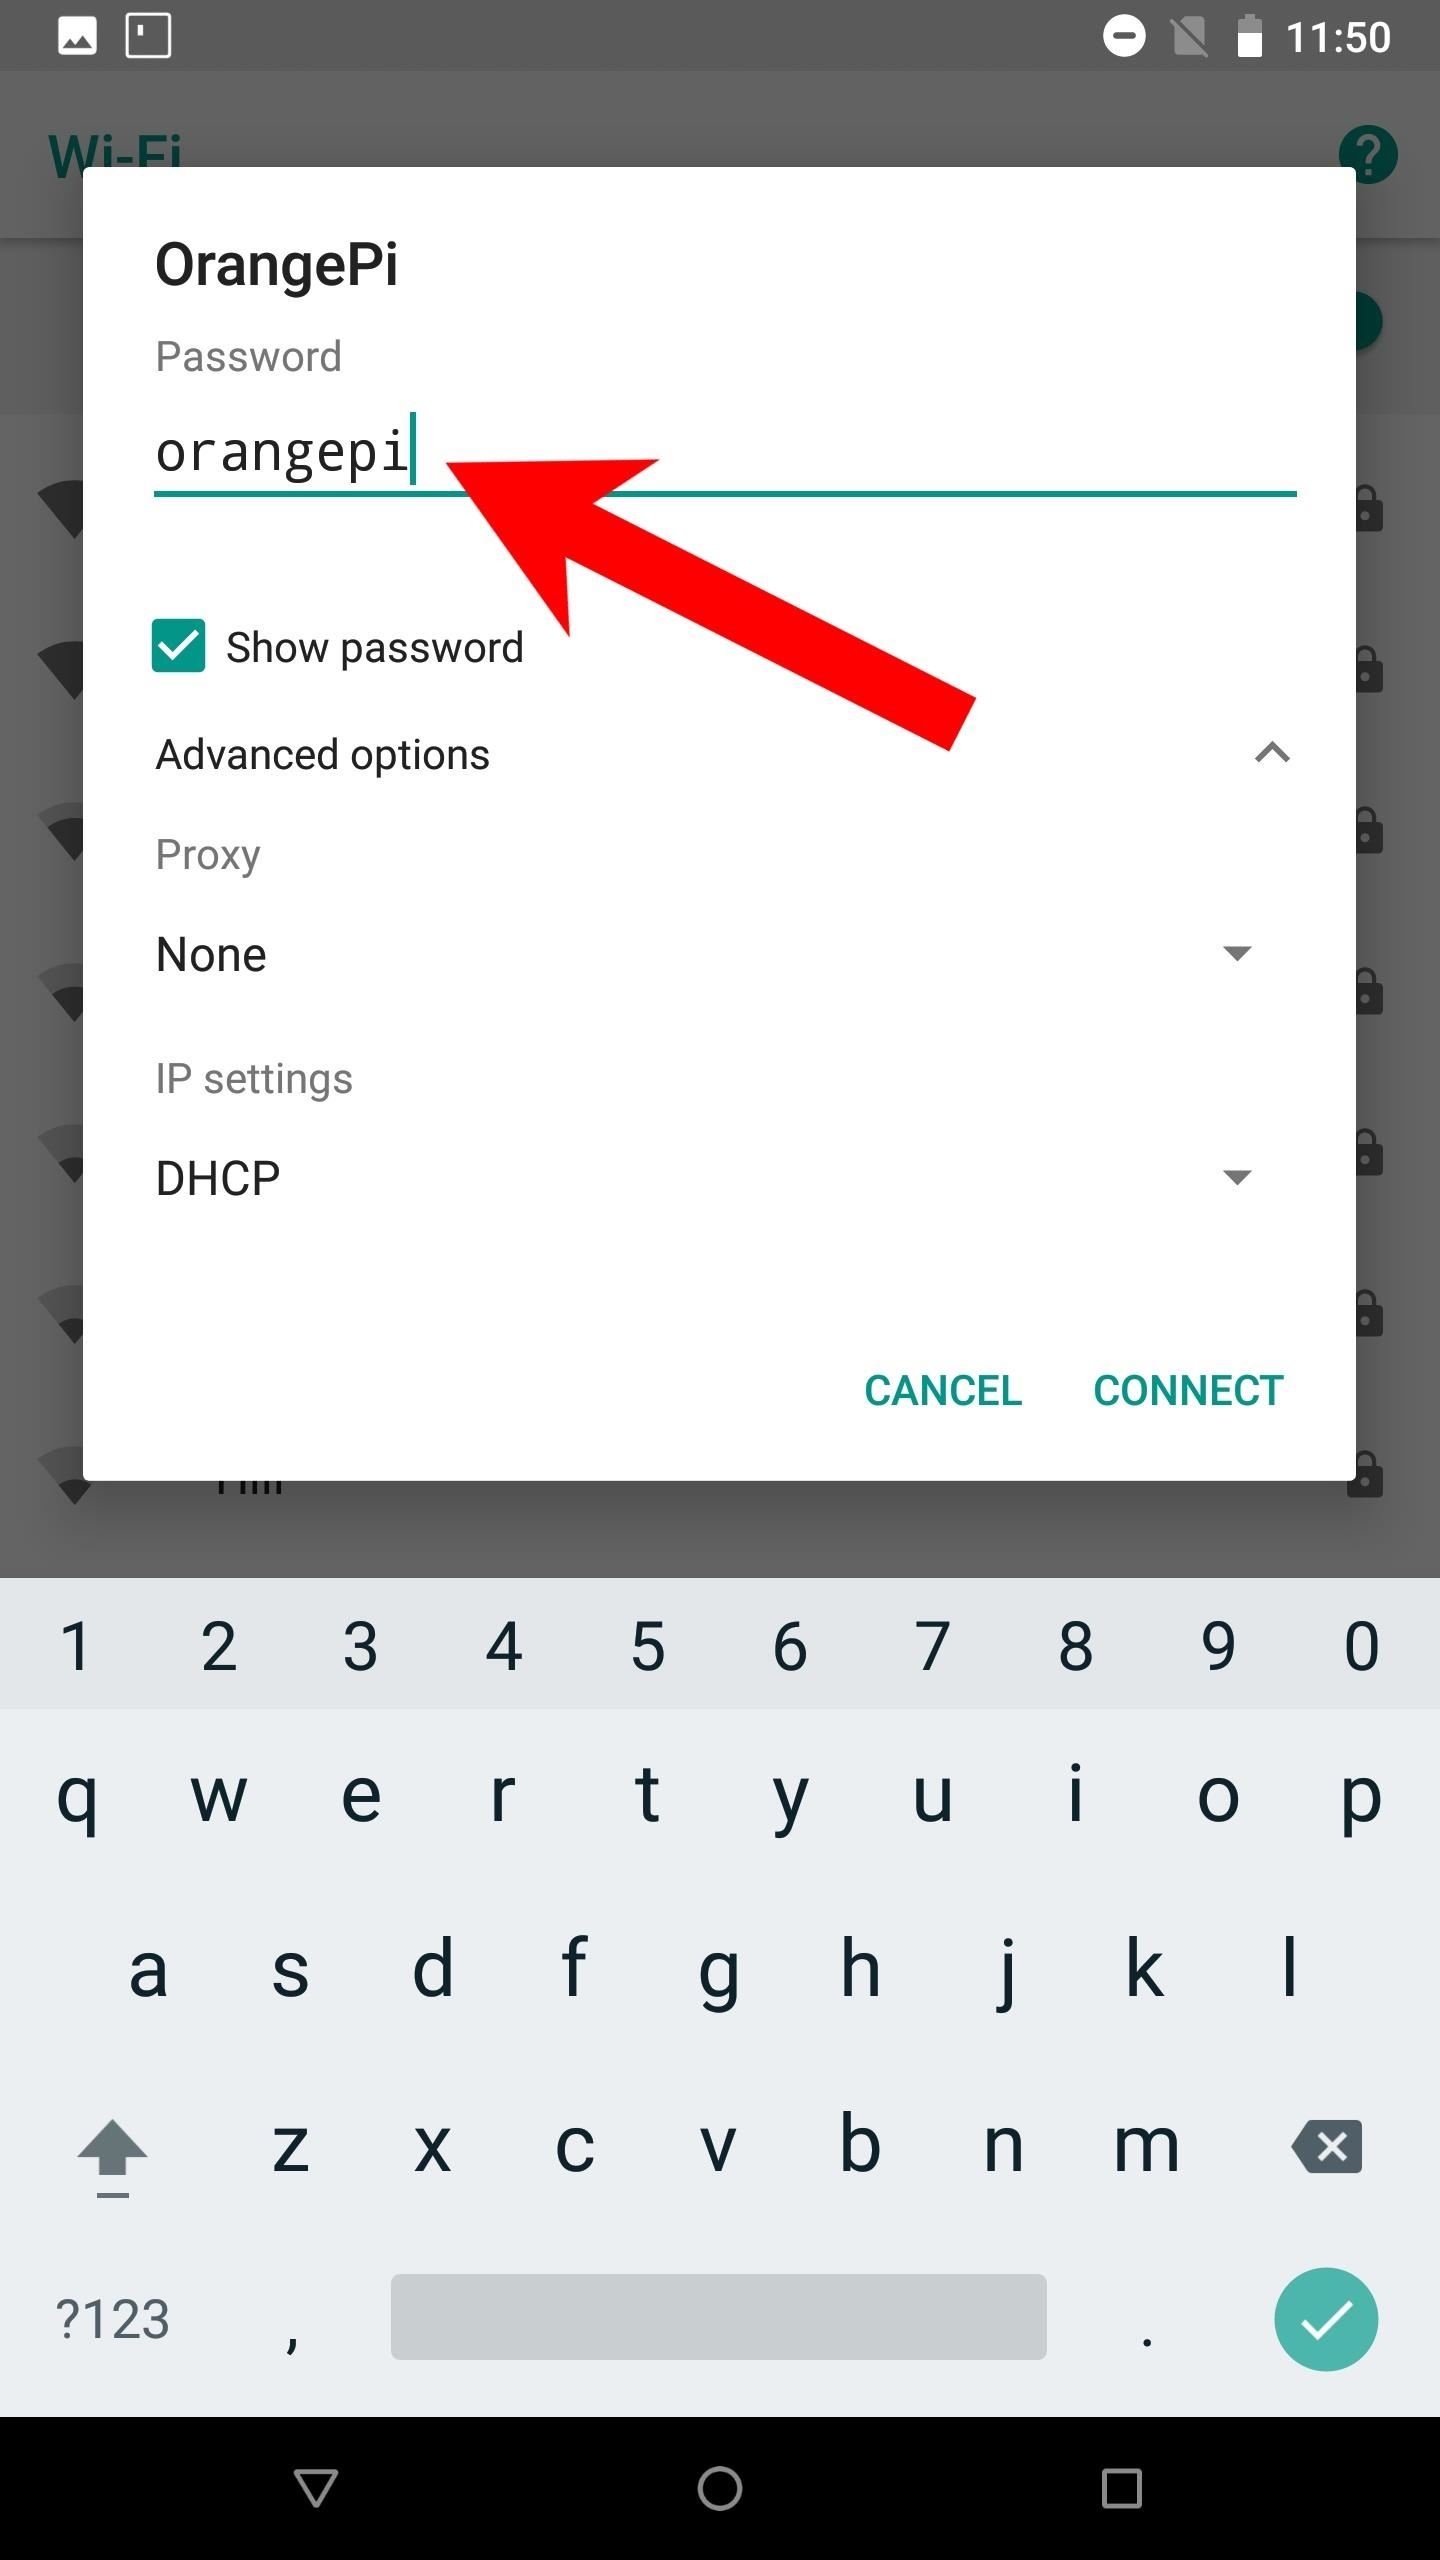
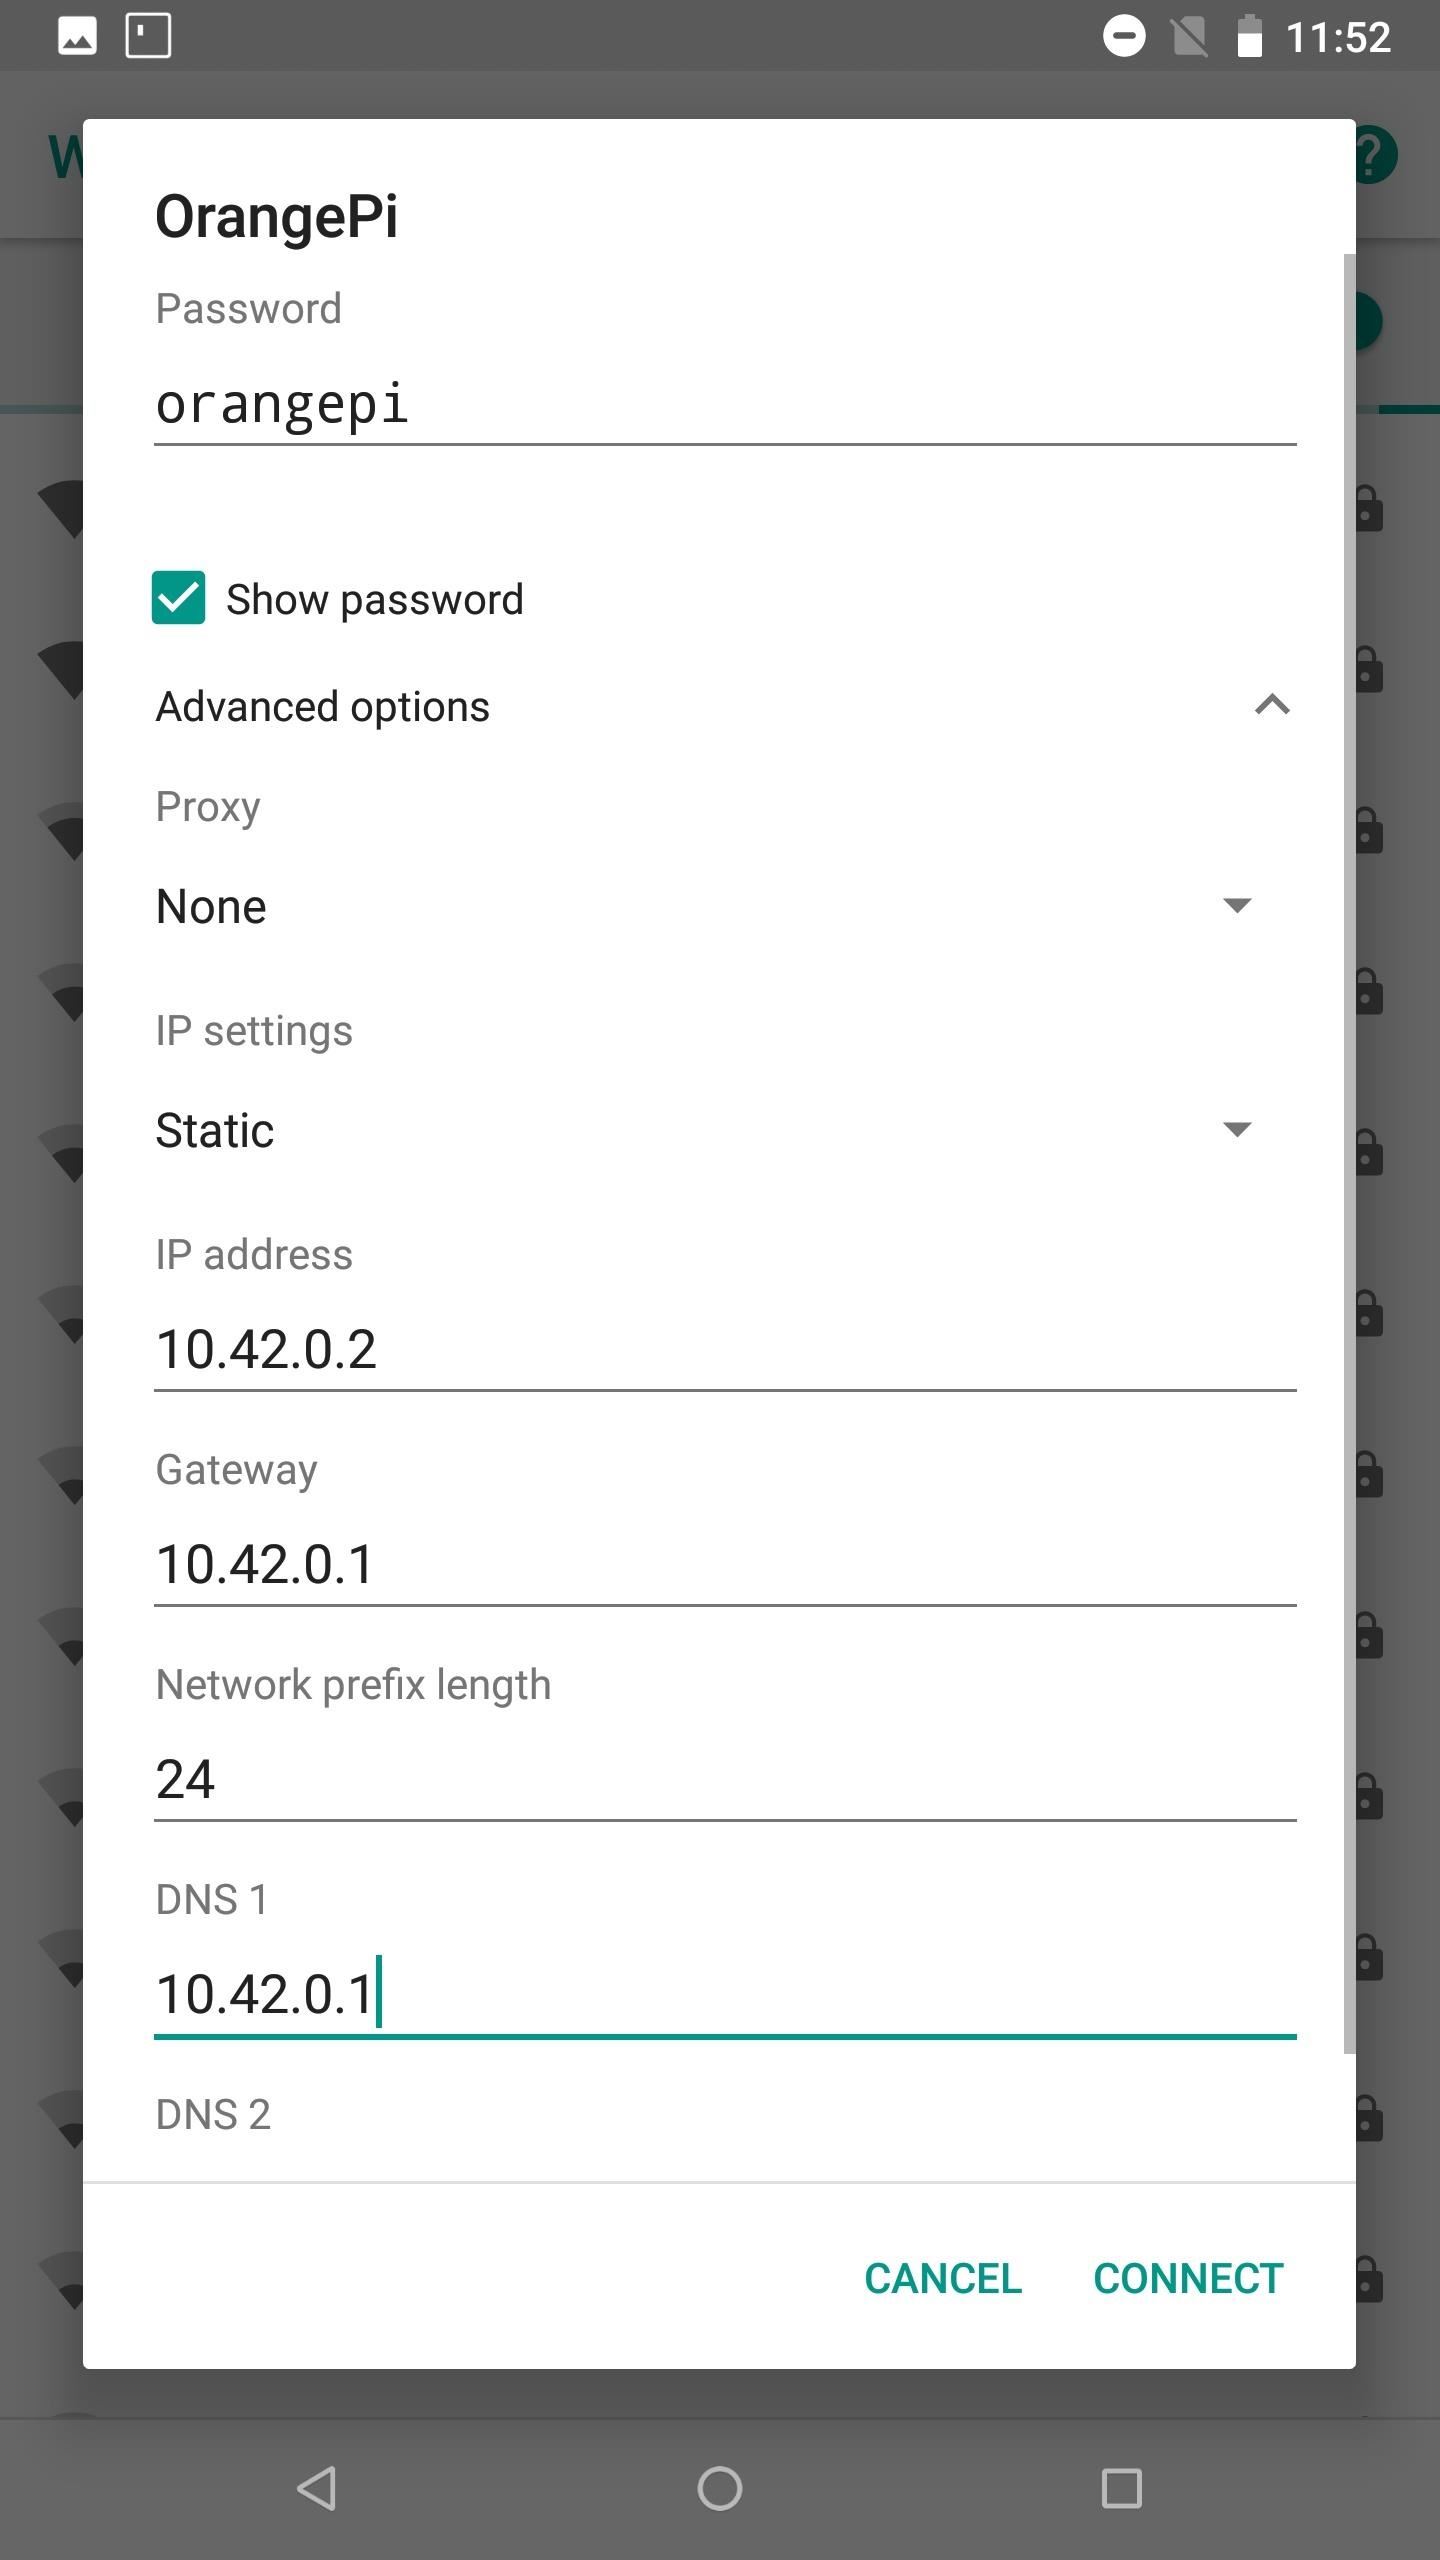
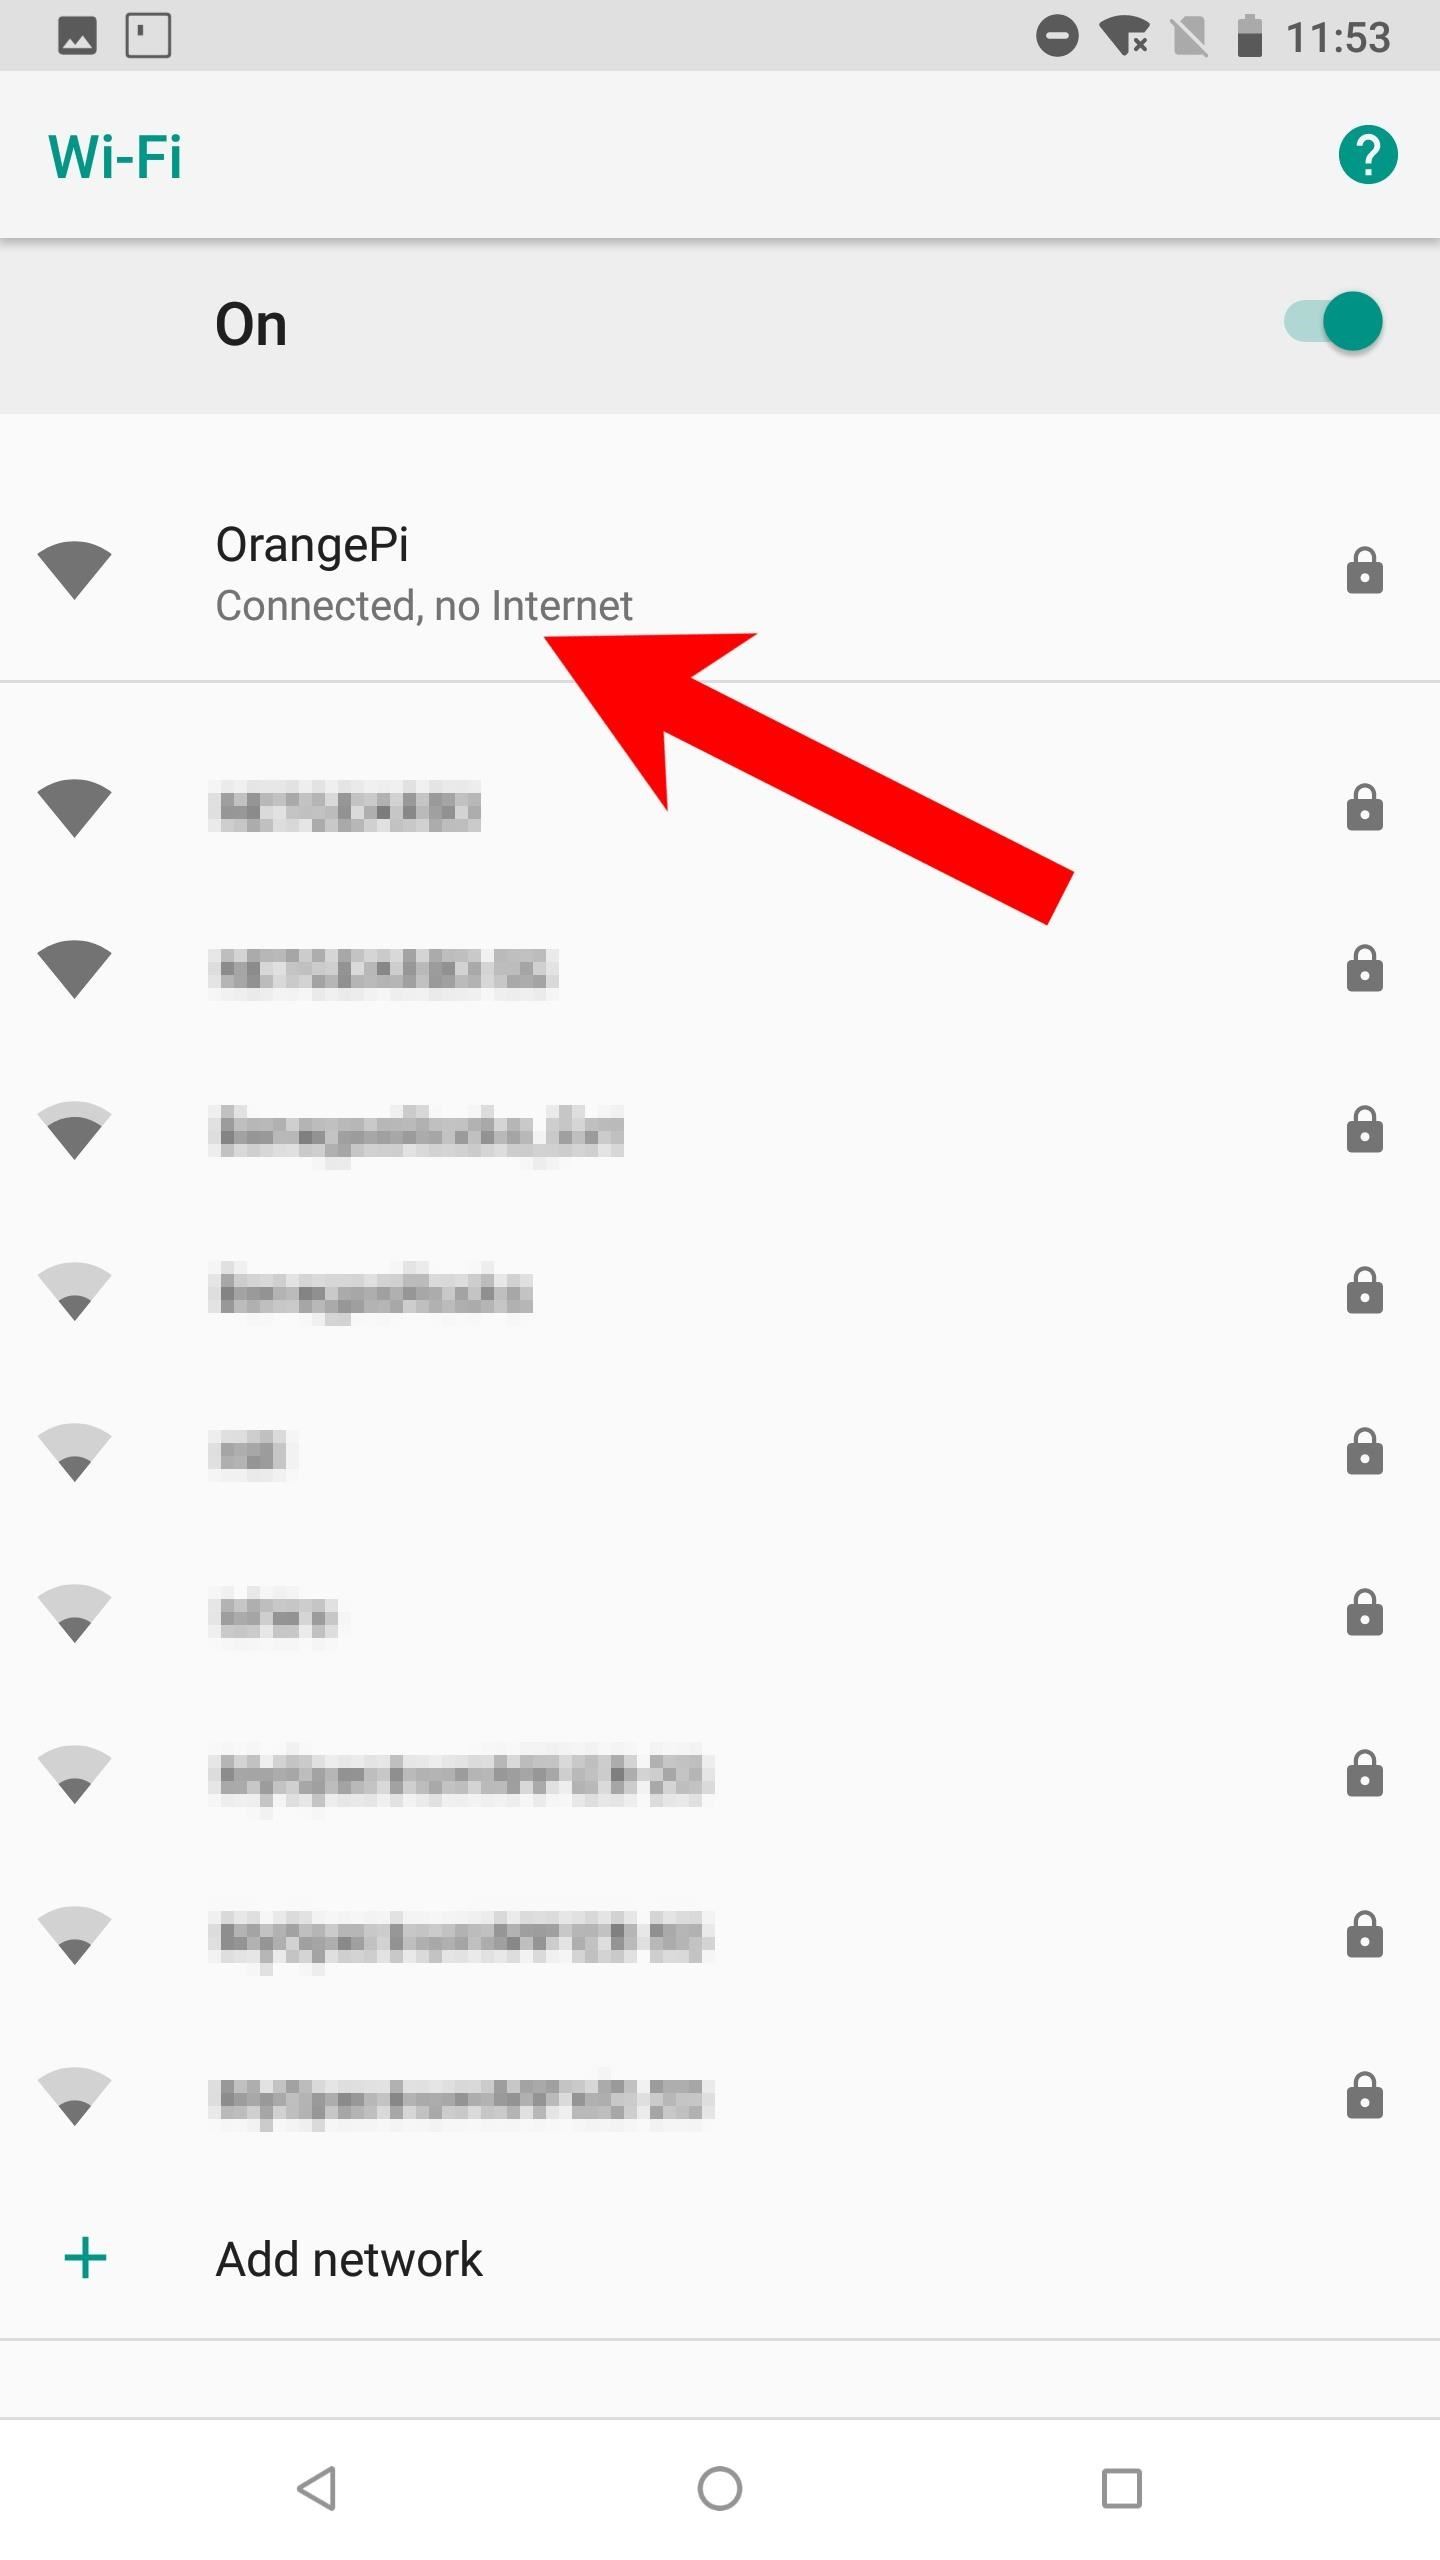
Tap the "Advanced options" dropdown. Change the IP settings to "Static." Set the IP address to "10.42.0.2," the Gateway to "10.42.0.1," the Network prefix length to "24," and the DNS 1 to "10.42.0.1" as well. The DNS 2 value can remain blank. Then, hit the "Connect" button. After a few seconds, the device should connect and report "Connect, no internet" — this is to be expected.
Open Tmux or a UserLAnd distribution and connect to the SSH server running on the Orange Pi Zero.
~$ ssh -p 22 root@10.42.0.1Again, this is an idle solution for quickly connecting the Orange Pi Zero in the event the Tor process stops working. This would allow for some remote administration that doesn't require completely retrieving the Orange Pi Zero.
Option 2: Kali Linux
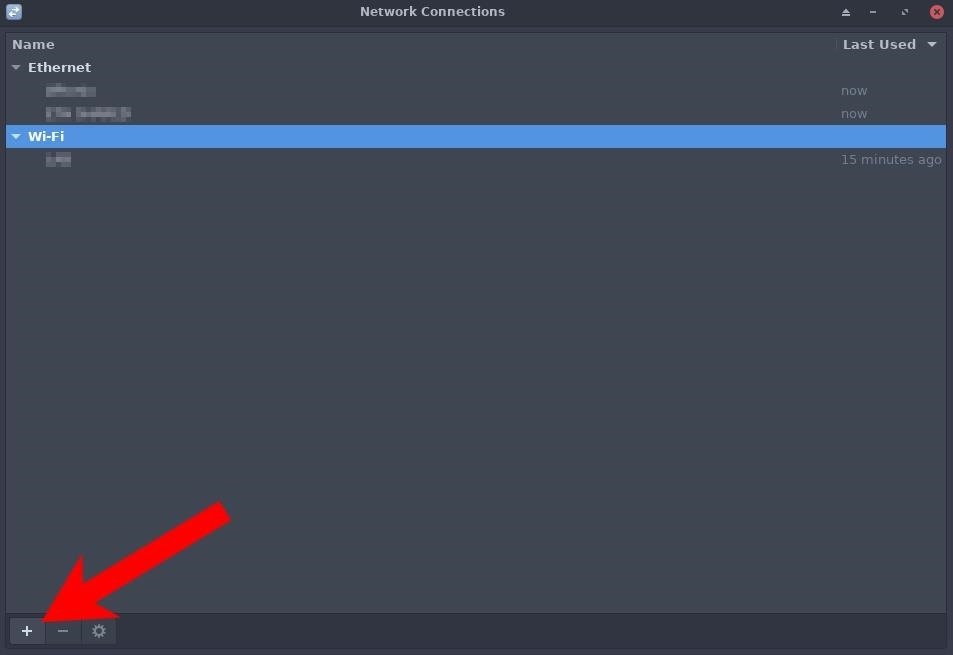
Kali can also be configured to statically connect to the "OrangePi" Wi-Fi hotspot for remote administration. Start by opening the Network Connections window. This example uses XFCE4, but GNOME users should be able to follow along. Select the "Add a new connection" button.
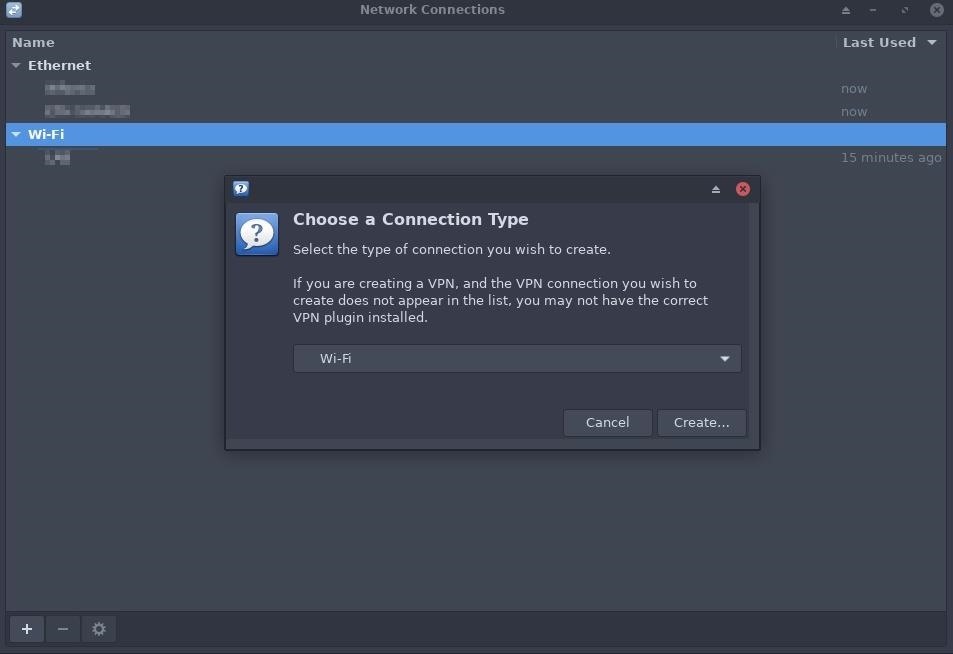
Select the "Wi-Fi" connection type, and click the "Create" button.
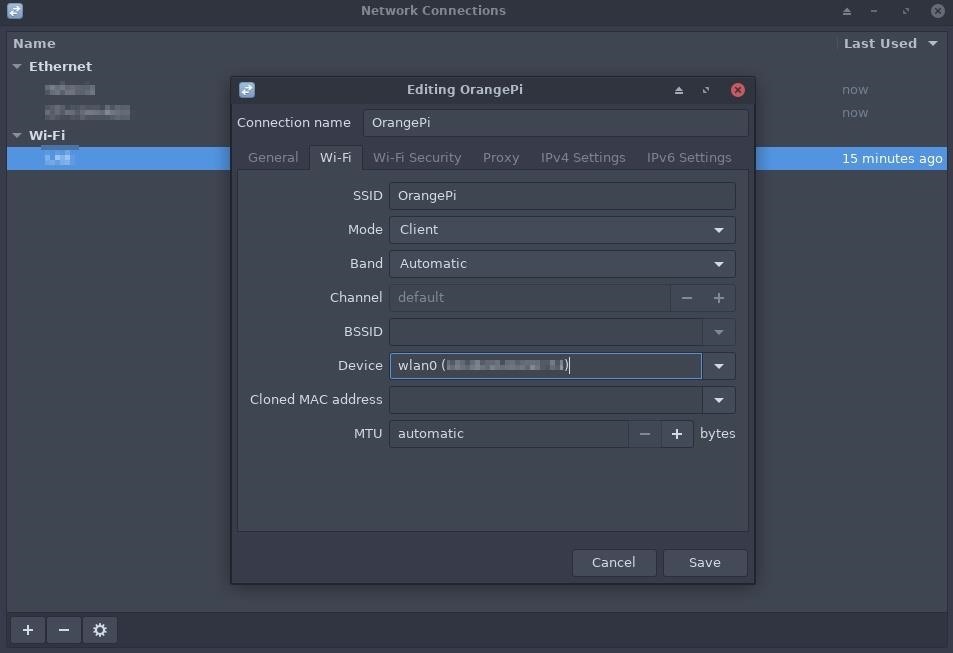
Set the SSID to match the Orange Pi Zero's Wi-Fi name (e.g., "OrangePi") and choose the "wlan0" interface that should automatically connect to the hotspot when it's in the proximity of the Kali machine.
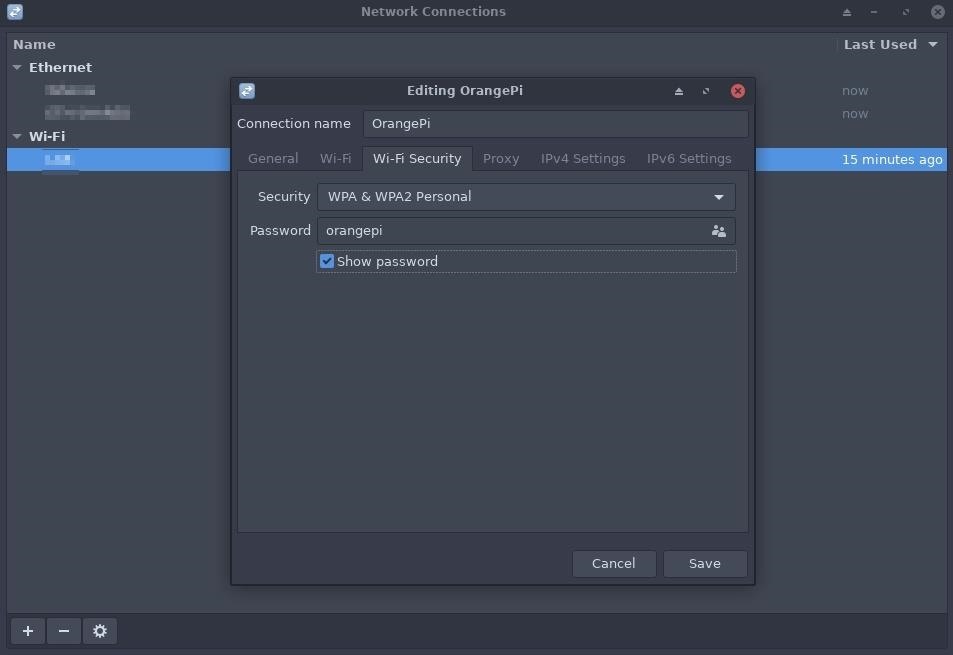
Open the Wi-Fi Security tab and change the Security type to "WPA & WPA2 Personal." Then, enter the "orangepi" password.
Open the IPv4 Settings tab and change the Method to "Manual." Then, click the "Add" button and use the following 10.42.0.X IP address, Netmask, and Gateway.
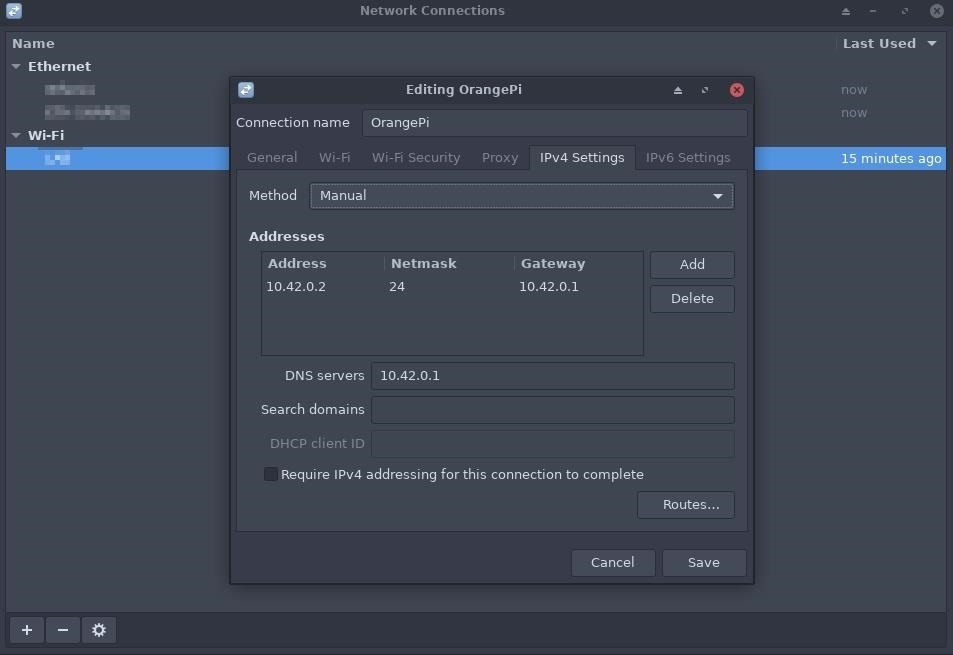
Click the "Save" button, and Kali should automatically connect to the OrangePi hotspot. This can be verified using the below ip command.
~$ ip addr

4: wlan0: <BROADCAST,MULTICAST,UP,LOWER_UP> mtu 1500 qdisc mq state UP group default qlen 1000
    link/ether XX:XX:XX:XX:XX:XX brd ff:ff:ff:ff:ff:ff promiscuity 0 minmtu 256 maxmtu 2304 numtxqueues 4 numrxqueues 1 gso_max_size 65536 gso_max_segs 65535
    inet 10.42.0.2/24 brd 10.42.0.255 scope global noprefixroute wlan0
       valid_lft forever preferred_lft forever
    inet6 xxxx::xxxx:xxxx:xxxx:xxxx/64 scope link noprefixroute
       valid_lft forever preferred_lft forever
Lastly, open a terminal and SSH into the Orange Pi Zero.
~$ ssh -p 22 root@10.42.0.1

The authenticity of host '10.42.0.1 (10.42.0.1)' can't be established.
ECDSA key fingerprint is SHA256:PE6127Kvx+twOLWK90mJDUQSUggH5ujh3h8liuLCR7w.
Are you sure you want to continue connecting (yes/no)? yes
Warning: Permanently added '10.42.0.1' (ECDSA) to the list of known hosts.
root@10.42.0.1's password:
  ___                               ____  _   _____
 / _ \ _ __ __ _ _ __   __ _  ___  |  _ \(_) |__  /___ _ __ ___
| | | | '__/ _` | '_ \ / _` |/ _ \ | |_) | |   / // _ \ '__/ _ \
| |_| | | | (_| | | | | (_| |  __/ |  __/| |  / /|  __/ | | (_) |
 \___/|_|  \__,_|_| |_|\__, |\___| |_|   |_| /____\___|_|  \___/
                       |___/

Welcome to ARMBIAN 5.75 stable Debian GNU/Linux 9 (stretch) 4.19.20-sunxi
System load:   0.20 0.05 0.02   Up time:       54 min
Memory usage:  14 % of 493MB    IP:            192.168.0.165 10.42.0.1
CPU temp:      48°C
Usage of /:    7% of 15G

Last login: Sat Apr 13 16:13:13 2019 from 127.0.0.1

root@orangepizero:~#
Step 8: Install Hacking Tools
The Orange Pi Zero is just about ready for deployment at this point. With two methods of remote access set up, hacking tools can now be installed in the operating system.
It helps to preemptively decide which kinds of attacks will be performed on the target network. Tools can always be installed while connected to the target router, but it's usually better to minimize the amount of data being used by the device. An apt-get command, for example, might put a spike in the router's bandwidth and/or make other user's connected to the router suspicious.
Some recommended, essential tools are screen, git, and nmap. Screen is a great multiplexer that can help with a broken or unstable SSH connection. Git is used to install hacking tools found on GitHub. And Nmap because, well, it's Nmap. Network reconnaissance is vital.
Some older versions of sqlmap, nikto, medusa, and mitmproxy can be found in the Debian repositories, but not quite as many tools as Kali-natives will hope to expect. Other hacking tools will have to be installed with Git and from source.
root@orangepizero:~# apt-get install screen git nmap

Reading package lists... Done
Building dependency tree
Reading state information... Done
git is already the newest version (1:2.11.0-3+deb9u4).
screen is already the newest version (4.5.0-6).
The following additional packages will be installed:
  libblas-common libblas3 libgfortran3 liblinear3 liblua5.3-0 libpcap0.8
Suggested packages:
  liblinear-tools liblinear-dev
Recommended packages:
  ndiff
The following NEW packages will be installed:
  libblas-common libblas3 libgfortran3 liblinear3 liblua5.3-0 libpcap0.8 nmap
0 upgraded, 7 newly installed, 0 to remove and 0 not upgraded.
Need to get 5,648 kB of archives.
After this operation, 24.0 MB of additional disk space will be used.
Do you want to continue? [Y/n]
That concludes the Orange Pi Zero setup for network implant attacks. In my next article, I'll talk about performing attacks while on the target network with tools like Patator, Bettercap, and Routersploit, as well as some advanced Nmap recon with NSE scripts.
Until next time, you can follow me on Twitter @tokyoneon_ and GitHub. And as always, leave a comment below or message me on Twitter if you have any questions.
Just updated your iPhone? You'll find new emoji, enhanced security, podcast transcripts, Apple Cash virtual numbers, and other useful features. There are even new additions hidden within Safari. Find out what's new and changed on your iPhone with the iOS 17.4 update.


5 Comments
What if the target network blocks tor?
The risk of that is like 0%.
You just use a VPN I guess.
Paid or free.
There also must be Tor like services just not as known. Then you can
use that.
when I flash it with dd the card disappears from the files tab and I cant eject it. When I plug it back in Linux it doesn't detect it and windows just wants to reformat it. The light on the board of orange pi zero doesn't light up when I power it.
finally found a way to flash but when I try to ssh with torsocks it says connection refused
Can't you just activate PoE somehow to power the OPi with nothing but the ethernet cable? Or am I missing something?
Share Your Thoughts