

Hello everyone! I thought I'd help a few people out by writing a written tutorial on how to install Kali Linux on your chromebook, as well as Metasploit-Framework, so let's begin! If you would like a video version instead, watch my YouTube video at the bottom of the page. Although this guide is a lot more clear.
Step 1: Power Wash Your Chromebook
Power Washing your Chromebook will wipe all of it's data, so if you have anything installed on your Chromebook's hard drive, make sure to back it up.
To Power Wash your Chromebook, locate to the bottom right hand of your Chromebook's desktop and click on your profile picture. Next, click on "settings." Once in settings, scroll down to the bottom and click "show advanced settings," and scroll to the bottom. From here, click "Powerwash." Your Chromebook will reboot. Follow on screen instructions.
Step 2: Put Your Chromebook into Developer Mode
First, make sure your Chromebook is switched off (not asleep). Hold down the power button until you're logged off, and then hold it down again until the screen fades to white. When you switch it back on, hold the Power, Refresh and Esc keys down at the same time.
You'll be presented with a warning about your Chrome operating system being damaged. Ignore this and press CTRL+d. Your Chromebook will now be wiped and Chrome OS will be installed in developer mode. This process will take a few minutes to complete, and you'll need to sign in and re-sync all your Chrome OS data when you eventually log back on again.
Every time your restart your Chromebook from now on (unless you factory reset it), it will warn you about being in developer mode. This warning will persist for 30 seconds. Don't press space as instructed, as this will wipe your device and you'll have to start again. Instead, hit CTRL+d as above to skip the warning. Avoid this by simply putting your Chromebook to sleep (by closing the lid) when you're not using it, instead of shutting it down fully.
Step 3: Download Crouton
Visit: https://github.com/dnschneid/crouton
At the top of the page, it will say "Chromium OS Universal Chroot Environment." click that link and Crouton will be downloaded automatically.
Step 4: Install Kali Linux
On Chrome, press (CTRL+ALT+T). This will bring you to a Crosh terminal. From there, type: " Shell"
After you've typed shell, paste the following command and press enter:
sudo sh -e ~/Downloads/crouton -r sana -t xfce
This download will take a while, so be patient. ETA: 30min
FYI: At some point during the installation, it will ask you to set a new UNIX user and pass. This will be your Kali login.
Step 5: Enter Kali and Install a Web Browser
Before we begin this step, I'll tell you how to toggle between Kali Linux & Chrome OS. On your keyboard press (CTRL+ALT+SHIFT+F2) + (CTRL+ALT+SHIFT+F1) to switch between the two operating systems. If Kali Fails to switch back to Chrome OS, log off and it will redirect you back to Chrome OS
Anyways... to actually enter Kali Linux you must open your Crosh terminal again (CTRL+ALT+T) and type "Shell". Next, type "sudo startxfce4" and you will boot into Kali Linux!
Once in, you will notice that your Web Browser doesn't work, so go ahead and right click it and select "remove". We will install Chromium browser instead.
To do this, open a terminal at the bottom of your Kali desktop. Once in, type
sudo apt-get install chromium
You will be asked to input your UNIX pass that you set during the installation.
Step 6: Installing Metasploit-Framework Console Part 1: Ruby
Next step is to install Metasploit. To begin open a terminal. Type:
sudo apt-get update
sudo apt-get upgrade
You can copy and paste multiple commands at once FYI. After doing this,
Now that we know that we are running an updated system we can install all the dependent packages that are needed by Metasploit Framework:
Run these commands next:
sudo apt-get install build-essential libreadline-dev libssl-dev libpq5 libpq-dev libreadline5 libsqlite3-dev libpcap-dev openjdk-7-jre git-core autoconf postgresql pgadmin3 curl zlib1g-dev libxml2-dev libxslt1-dev vncviewer libyaml-dev curl zlib1g-dev
The distribution doesn't come with Ruby, so we will have to install in manually. We will be installing Ruby using RBENV. If you have no clue what's going on, just keep following along.
Run the following commands:
cd ~
git clone git://github.com/sstephenson/rbenv.git .rbenv
echo 'export PATH="$HOME/.rbenv/bin:$PATH"' >> ~/.bashrc
echo 'eval "$(rbenv init -)"' >> ~/.bashrc
exec $SHELL
Next run these commands:
git clone git://github.com/sstephenson/ruby-build.git ~/.rbenv/plugins/ruby-build
echo 'export PATH="$HOME/.rbenv/plugins/ruby-build/bin:$PATH"' >> ~/.bashrc
And this:
git clone git://github.com/dcarley/rbenv-sudo.git ~/.rbenv/plugins/rbenv-sudo
And thisss:
exec $SHELL
And finally these:
rbenv install 2.3.1
rbenv global 2.3.1
ruby -v
Step 7: Installing Metasploit Framework Console Part 2: NMAP
One of the external tools that Metasploit uses for scanning that is not included with the sources is Nmap. Here we will cover downloading the latest source code for Nmap, compiling and installing. Before we do this we will need to install Subversion in order to use the command "svn"
Open up a terminal and type
sudo apt-get install subversion
Once installed, we can begin with the NMAP installation. To begin paste the following commands into your terminal:
mkdir ~/Development
cd ~/Development
svn co https://svn.nmap.org/nmap
cd nmap
./configure
make
sudo make install
make clean
Step 8: Installing Metasploit Framework Console Part 3: Installing Metasploit
We will download the latest version of Metasploit Framework via Git so we can use msfupdate to keep it updated:
Run these commands:
cd /opt
sudo git clone https://github.com/rapid7/metasploit-framework.git
sudo chown -R `whoami` /opt/metasploit-framework
cd metasploit-framework
Install using bundler the required gems and versions:
cd metasploit-framework
And then finally run these 2 commands:
gem install bundler
bundle install
Lets create the links to the commands so we can use them under any user and not being under the framework folder, for this we need to be in the metasploit-framework folder if not already in it. Run these final two commands:
cd metasploit-framework
sudo bash -c 'for MSF in $(ls msf*); do ln -s /opt/metasploit-framework/$MSF /usr/local/bin/$MSF;done'
Step 9: Running Msfconsole!
To run msfconsole for the first time make sure you change your directory like so:
cd ~
Now you are ready to launch metasploit! Simply type:
msfconsole
Congratulations! You have installed Kali Linux and Metasploit Framework Console on your Chromebook :D If you would like to watch my video on how to do this visit: https://www.youtube.com/watch?v=fEmWUj708y0


18 Responses
which chromebook do you use?
good info
having issues with pgaadmin3 and which vnc viewer to install, I am running on an HP G1 (intel) Chromebook any advice please have not used linux in a long tie so looking forward to some new learning and getting reacquainted
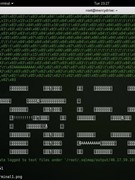
Help! I keep getting this error: http://pastebin.com/WmQUX1qg
Also, I am using Kali Rolling instead of Sana, as that returns quite a few errors.
same, there are fatal install errors for straight up kali install, this os install is quite a chore getting around errors. the console is practicaly impossible to run after all the gem install errors, worth it though!
It did not let me install it it gave me an error
Great information, thanks!
Can you switch between chrome OS and Kali Linux? I know you can with Kubuntu...
sudo sh -e ~/Downloads/crouton -r kali-rolling -t xfce
try using this instead of
sudo sh -e ~/Downloads/crouton -r sana -t xfce
then type
sudo startxfce4
Hello, thanks for the info, but now when I switch between using shift+ctrl+alt+ <- || -> I find that the graphics in chrome are completly screwed up... any ideas please
Hello again, so closing the lid and opening it again fixes this, just for anyone else that has this problem :-)
I know this is a somewhat old thread but I would appreciate any help I can get.
When I get to step 6 and attempt to run
sudo apt-get install build-essential libreadline-dev libssl-dev libpq5 libpq-dev libreadline5 libsqlite3-dev libpcap-dev openjdk-7-jre git-core autoconf postgresql pgadmin3 curl zlib1g-dev libxml2-dev libxslt1-dev vncviewer libyaml-dev curl zlib1g-dev
I get error message 'openjdk-7-jre' has no installation candidate. Also saying it is unavailable or only available from another source. How do I fix this. Thank you.
It does not work for me. It just says: ERROR: unknown command: shell.
And yes, I did enable dev mode. Please help. I am sure it works, but I must have not done something right. Thanks for you time.
ok
are you sure you are in dev mode?
I keep getting refusing to exec
Thanks for sharing. Its worth reading indeed. Actually I was looking for the same.
Share Your Thoughts